· Todd Martin · Home Improvement · 20 min read
How To Dye A Sofa Without Removable Covers
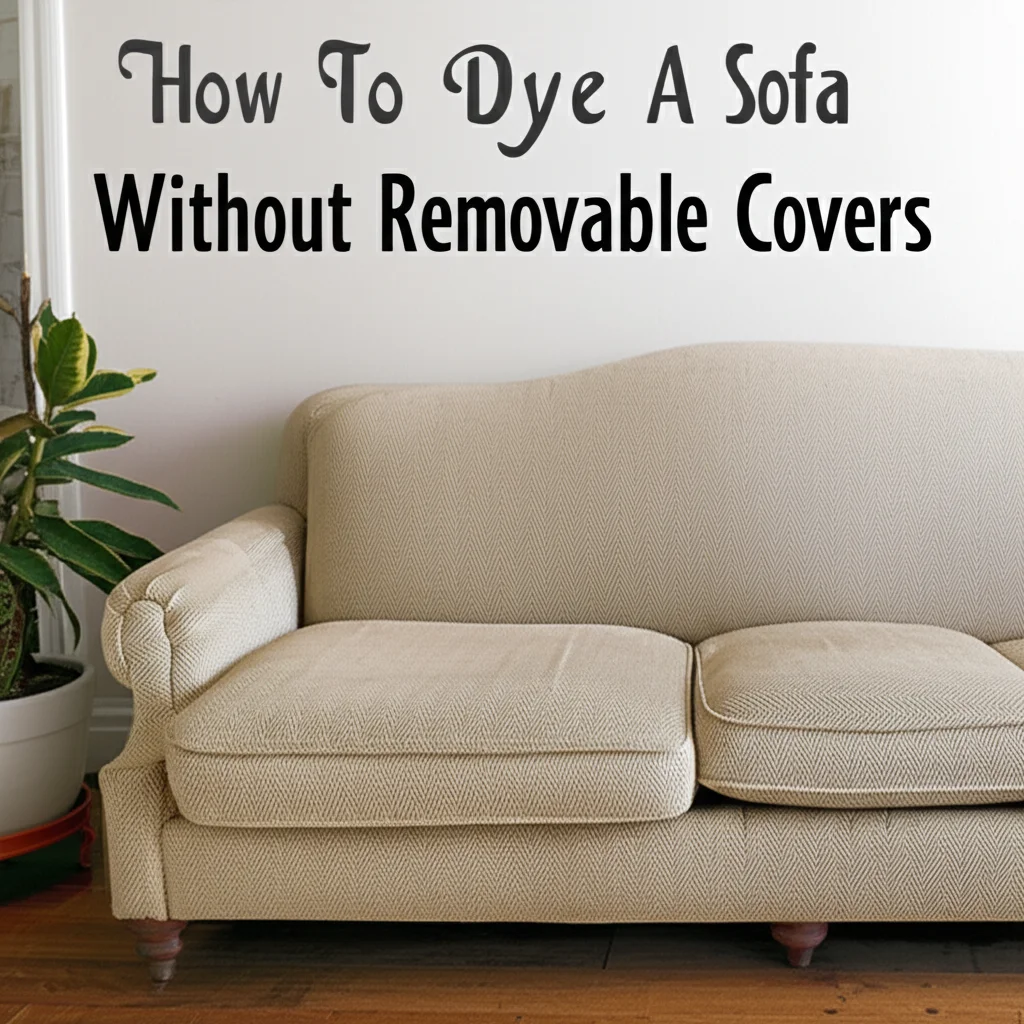
Revamp Your Sofa: How To Dye Furniture Without Removable Covers
Has your beloved sofa lost its vibrancy? Perhaps its color no longer matches your updated decor. Instead of buying new furniture, consider a creative and budget-friendly solution: dyeing it. I know, dyeing a sofa without removable covers sounds like a big task, but it is entirely possible. This process offers a fantastic way to refresh your living space and give an old piece of furniture a new life.
I am here to guide you through this rewarding DIY project. We will cover everything from understanding your sofa’s fabric to selecting the right dye, preparing your space, and applying the color evenly. You will also learn about drying, curing, and long-term care for your newly dyed furniture. Get ready to transform your sofa and revitalize your home with a fresh, personalized look.
Takeaway
- Assess Fabric: Identify your sofa’s fabric type to choose the correct dye.
- Prepare Thoroughly: Clean the sofa and protect surrounding areas from dye.
- Apply Dye Evenly: Use proper techniques to ensure uniform color application.
- Ensure Proper Drying: Allow ample time for the dye to dry and cure completely.
- Maintain Care: Follow aftercare tips to preserve your sofa’s new color.
To dye a sofa without removable covers, first clean the sofa thoroughly to ensure dye adhesion. Next, choose a fabric-specific dye, such as a liquid or spray formula, suitable for your upholstery material. Apply the dye in thin, even coats using a spray gun or sponge, allowing each layer to dry partially before reapplying. This method ensures a new, fresh color.
Understanding Your Sofa’s Fabric and Dye Options
When you plan to dye a sofa without removable covers, the first crucial step is to understand its fabric. Different materials react differently to dye. Natural fibers like cotton, linen, rayon, and even blends with a high percentage of these materials, absorb dye very well. Synthetic fabrics, such as polyester, nylon, and acrylic, are much harder to dye because their fibers are designed to resist absorption.
I always recommend checking your sofa’s care tag if you can find it. This tag usually lists the fabric composition. Knowing the fabric content will directly impact your dye choice and the potential success of your project. If you are unsure, performing a fabric burn test on an inconspicuous area can help identify the material type.
Matching Fabric to Dye Type
Once you identify your sofa’s fabric, you can select the correct dye. Not all dyes work on all fabrics. Choosing the wrong dye can lead to uneven color, poor absorption, or even damage to your sofa.
- All-Purpose Liquid Dyes: These dyes work best on natural fibers like cotton, linen, silk, and wool. You can dilute them with water and apply them with a spray bottle or brush. They offer good color saturation but require fabric to be damp.
- Fabric Spray Paints: These are excellent for both natural and synthetic blends. They are easy to apply evenly and dry quickly. Fabric spray paints offer a wide range of colors and are ideal for touch-ups or complete color changes. They are particularly useful for sofas without removable covers because they minimize moisture.
- Fabric Paints/Textile Mediums: These paints are thicker and you can apply them with a brush or sponge. They are suitable for intricate designs or specific areas. You can mix them with textile mediums to make them more flexible and less stiff once dry.
- Dye Fixatives: Some dyes, especially those for natural fibers, benefit from a dye fixative. This helps set the color and prevents fading or bleeding after application. Always check the dye product instructions for this.
I strongly suggest performing a small patch test on an inconspicuous area of your sofa. This could be the back, underside of a cushion, or a hidden seam. This test helps you see how the dye interacts with your specific fabric and gives you a preview of the final color. It also lets you check for any unwanted stiffness or texture changes before committing to the whole sofa. This step is non-negotiable for a successful outcome.
Essential Preparation Before Dyeing Your Sofa
Proper preparation is the key to a successful sofa dyeing project. Since you cannot remove the covers, you must take extra precautions to protect your home and achieve a professional finish. I always stress the importance of thorough cleaning and masking. Skipping these steps can lead to uneven color and permanent stains on your floors or walls.
Thorough Sofa Cleaning
Before you apply any dye, your sofa must be impeccably clean. Dirt, dust, oils, and stains will prevent the dye from adhering properly. This leads to blotchy results or areas that do not take the color at all. I find that a clean surface is essential for even dye absorption.
- Vacuum Thoroughly: Use your vacuum’s upholstery attachment to remove all loose dirt, dust, and crumbs. Pay attention to crevices, under cushions, and along seams.
- Spot Clean Stains: Address any visible stains. Use a mild fabric cleaner or a homemade solution. Always pre-test your cleaning solution on a hidden spot to ensure it does not damage or discolor the fabric. For general guidance on keeping your sofa clean, check out my article on how to clean your sofa. If you are specifically dealing with fabric, you might find tips on how to clean sofa fabric couch at home. For situations where you need to avoid excessive moisture, consider methods for how to clean fabric sofa without water.
- Allow to Dry Completely: If you use any wet cleaning methods, ensure the sofa is bone dry before applying dye. Dyeing a damp sofa can lead to uneven color distribution and mold growth. Give it at least 24-48 hours to air dry, or use fans to speed up the process.
Protecting Your Workspace and Furniture
Dye is permanent, so protecting your surrounding area is critical. I treat this step as a professional painter would, covering everything that should not get color. This prevents accidental spills and overspray.
- Clear the Area: Move all other furniture, rugs, and decor items out of the room or at least far away from the sofa.
- Lay Drop Cloths: Cover the entire floor area around your sofa with plastic sheeting or old drop cloths. Extend them several feet beyond the sofa’s footprint. Secure them with painter’s tape to prevent slipping.
- Protect Walls and Nearby Furniture: If your sofa is against a wall, tape plastic sheeting or newspaper to the wall to protect it. Cover any nearby furniture that cannot be moved with plastic covers.
- Mask Non-Fabric Parts: Use painter’s tape to meticulously mask off any parts of the sofa you do not want to dye. This includes wooden legs, metal accents, trim, or exposed piping that should remain its original color. Take your time with this step for crisp lines.
- Wear Protective Gear: Always wear gloves, old clothes, and possibly a mask or respirator, especially if using spray dyes. Eye protection is also a good idea.
Taking these preparatory steps ensures a smooth dyeing process and a clean, professional outcome. It minimizes stress and maximizes the chances of a beautifully refreshed sofa.
Applying Fabric Dye to Your Sofa Effectively
Once your sofa is clean and your workspace is protected, you are ready to apply the dye. This stage requires patience and a methodical approach to ensure an even, streak-free finish. I always recommend working in small sections, which gives you better control and helps prevent dye from drying too quickly. The goal is to achieve uniform saturation without oversaturating the fabric.
Mixing and Preparing the Dye
Follow the dye manufacturer’s instructions for mixing. Most liquid fabric dyes require dilution with water. Pay close attention to the ratios. If using fabric spray paint, shake the can well before and during use.
- Dilute as Instructed: Use the recommended amount of water for liquid dyes. Too much water can make the color too light; too little can make it too dark and potentially stiff.
- Stir Thoroughly: Ensure the dye is fully dissolved and mixed evenly. Lumps or undissolved particles can cause uneven coloration.
- Prepare Your Applicator: If using a spray gun, ensure it is clean and functioning correctly. For brushes or sponges, have several on hand for different areas.
Application Techniques for Even Coverage
Applying the dye to a sofa without removable covers requires precision. You want to cover every part uniformly. I prefer using a spray method for large areas, but brushes and sponges are useful for edges and details.
- Work in Sections: Mentally divide your sofa into manageable sections (e.g., one cushion, one armrest, the back panel). Complete one section before moving to the next. This ensures wet edges for seamless blending.
- Use Light, Even Coats: Apply the dye in thin, even layers. Do not try to achieve full color saturation in one go. Multiple thin coats are always better than one heavy coat. Heavy coats can lead to drips, uneven drying, and a stiff texture.
- Spray Application (Recommended): If using a fabric spray dye or a diluted liquid dye with a spray gun, hold the applicator about 6-12 inches away from the fabric. Use sweeping motions to ensure even coverage. Overlap each pass slightly to avoid stripes.
- Brush or Sponge Application: For liquid dyes applied by hand, use a soft-bristled brush or a sponge. Work the dye into the fabric using circular motions or by dabbing. Ensure the dye penetrates the fibers evenly. This method is good for deeper saturation and tight corners.
- Address Crevices and Seams: Use a smaller brush or sponge to get into all the nooks, crannies, and seams. These areas are easy to miss, and neglecting them will result in patchy color.
- Maintain Dampness (for liquid dyes): If you are using a liquid dye that requires the fabric to be damp, mist the area with water before applying the dye. This helps the dye spread and absorb better.
- Allow Drying Between Coats: Let each coat dry to the touch before applying the next. This prevents over-saturation and allows you to build color gradually. Drying times vary depending on the dye type, humidity, and fabric.
Applying the dye systematically and patiently will lead to a beautiful, professional-looking finish. Remember, take your time and do not rush the process. Your sofa’s new look depends on careful application.
Drying and Curing Your Newly Dyed Sofa
After the exciting part of applying the dye, the waiting game begins. Proper drying and curing are critical steps to ensure the dye sets permanently and your sofa feels comfortable. Rushing this stage can lead to dye transfer, uneven color, or a sticky residue. I always advise patience here; it pays off in the long run.
Understanding Drying Times
Drying time for your newly dyed sofa will vary significantly. Several factors influence how quickly the dye sets:
- Type of Dye: Fabric spray paints typically dry to the touch within a few hours. Liquid dyes, especially those applied heavily, might take 24-48 hours.
- Fabric Thickness: Thicker, denser fabrics will hold more moisture and take longer to dry than thin upholstery.
- Humidity and Temperature: High humidity slows down drying, while good ventilation and moderate temperatures speed it up.
- Number of Coats: More coats mean more moisture, so the overall drying time will increase with each layer.
I recommend checking the dye manufacturer’s specific instructions for drying times. They usually provide guidelines for optimal results.
Ensuring Proper Ventilation
Ventilation is your best friend during the drying process. It helps evaporate moisture and disperse any fumes from the dye.
- Open Windows and Doors: If possible, open windows and doors in the room where the sofa is drying. This creates a cross-breeze.
- Use Fans: Place oscillating fans strategically around the sofa to promote airflow. Direct them at the sofa, but avoid placing them so close that they disturb the wet dye.
- Dehumidifier: If you live in a humid climate, a dehumidifier in the room can significantly speed up drying by removing moisture from the air.
The Curing Process
Drying to the touch is one thing, but allowing the dye to fully “cure” is another. Curing is the process where the dye fully bonds with the fabric fibers, achieving its final color and durability. This often takes longer than simply drying to the touch.
- Avoid Contact: For at least 24-72 hours after the final coat, avoid sitting on or touching the sofa. This prevents dye transfer to clothing or skin. It also ensures the dye sets without disturbance.
- Heat Setting (if applicable): Some fabric dyes recommend heat-setting to ensure permanence. Since you cannot put a sofa in a dryer, you might use a hairdryer on a low-heat setting or a clothes steamer. Move the heat source constantly to avoid scorching the fabric. Always test on an inconspicuous area first. This step is more common for clothing dyes than sofa dyes, so check your product’s specific instructions.
- Full Curing Time: Many dyes suggest a full curing time of 3-7 days, or even up to 2 weeks, before the sofa is ready for regular use. During this time, the dye continues to set and strengthen. I understand this requires patience, but it is crucial for long-lasting results.
By allowing adequate drying and curing time, you will ensure your sofa’s new color is vibrant, long-lasting, and comfortable to use. Do not rush this vital step in the dyeing process.
Post-Dyeing Care and Maintenance Tips
Congratulations, your sofa has a new lease on life! Now that you have successfully dyed your sofa without removable covers, maintaining its vibrant new color is important. Proper aftercare will extend the life of your dye job, prevent fading, and keep your sofa looking fresh. I have learned that consistent, gentle care makes all the difference.
Setting the Dye (if applicable)
Some fabric dyes require a setting process to lock in the color. While washing is the common method for removable covers, it is not an option here.
- Follow Dye Instructions: Check your specific dye product for any post-application setting recommendations. Some fabric spray dyes are “set” simply by drying. Others might suggest a heat treatment.
- Heat Setting for Permanence: If your dye recommends heat setting, use a hairdryer on a low to medium setting, keeping it moving continuously over the fabric. This helps bond the dye to the fibers. Be careful not to hold it in one spot for too long, as this could scorch or damage the fabric.
- Allow Full Cure Time: As mentioned, the dye needs time to cure completely. This internal setting process makes the dye colorfast and durable. Resist the urge to use the sofa heavily during this period.
Routine Cleaning for Dyed Fabric
Routine cleaning is essential to keep your sofa looking its best. The method will largely depend on the dye type and how it affects the fabric’s water resistance.
- Vacuum Regularly: Continue to vacuum your sofa regularly to remove dust, crumbs, and pet hair. This prevents dirt from embedding into the dyed fibers.
- Spot Clean Spills Immediately: Accidents happen. Blot spills immediately with a clean, white cloth. Avoid rubbing, as this can spread the stain or push it deeper into the fabric.
- Use Mild Cleaners: For stains, use a mild, pH-neutral fabric cleaner designed for upholstery. Always test the cleaner on an inconspicuous area first to ensure it does not lift the dye or cause discoloration. Avoid harsh chemicals or abrasive scrubbers. For more general advice on how to clean your sofa upholstery, you can refer to relevant guides. If you are ever in a pinch and need to clean without water, remember how to clean fabric sofa without water for quick fixes.
- Avoid Excessive Water: Since your covers are not removable, minimize the amount of water used during cleaning. Too much moisture can reactivate the dye and cause bleeding or water spots.
Protecting from Fading and Wear
Even with proper care, dyed fabrics can fade over time, especially with exposure to sunlight or heavy use.
- Limit Direct Sunlight: Position your sofa away from direct sunlight. UV rays are a major cause of color fading. If relocation is not possible, use curtains or blinds to block intense sun during peak hours.
- Use Fabric Protectants: Consider applying a fabric protector spray after the dye has fully cured. These sprays create an invisible barrier that repels spills and dirt, making future cleaning easier and helping to prevent stains. Choose one suitable for upholstery.
- Rotate Cushions: If your sofa has reversible cushions, rotate and flip them regularly. This helps distribute wear and tear evenly, preventing one area from looking more faded or worn than others.
- Consider Throws and Slipcovers: For high-traffic areas or if you want to further protect the dye, decorative throws or temporary slipcovers can offer an extra layer of protection. This also gives you another opportunity to change your decor look.
By following these post-dyeing care and maintenance tips, you can enjoy your beautifully refreshed sofa for years to come. Your hard work in dyeing it will be well worth the effort!
Common Challenges and Troubleshooting for Sofa Dyeing
Dyeing a sofa without removable covers can be a rewarding project, but like any DIY endeavor, you might encounter some challenges. I have dealt with a few issues myself, and knowing how to troubleshoot them can save your project from disaster. Being prepared for potential problems helps you tackle them effectively.
Uneven Color or Streaks
This is one of the most common complaints. Uneven color can happen if the dye was not applied uniformly, if the fabric absorbed it inconsistently, or if the sofa was not clean enough.
- Solution 1: Another Light Coat: If the unevenness is minor, apply another thin, even coat of dye over the entire sofa. This often helps to blend the colors and fill in lighter spots.
- Solution 2: Focus on Lighter Areas: If some spots are significantly lighter, apply dye only to those areas using a smaller brush or sponge, blending outwards gently. Be careful not to over-saturate.
- Solution 3: Re-clean and Re-dye (Extreme Cases): If the sofa was not clean enough initially, some spots might have resisted the dye. In severe cases, you might need to try to clean the resistant spots again and then re-dye those specific areas, feathering out the edges. This is a last resort.
Stiffness or Rough Texture
Sometimes, dyeing can leave the fabric feeling stiff or rough, especially with heavier dye applications or certain dye types.
- Solution 1: Gentle Brushing: Once the dye is completely dry and cured, try gently brushing the fabric with a soft-bristled brush. This can help to loosen the fibers and restore some of their natural softness.
- Solution 2: Fabric Softener Spray: Some DIYers have had success with a very light mist of fabric softener diluted with water. Test this in an inconspicuous area first. Do not saturate the fabric.
- Solution 3: Time and Use: Often, the stiffness lessens over time with normal use. The fabric fibers will soften as they are sat on and moved.
Dye Bleeding or Transferring
This occurs if the dye is not fully set, if the sofa gets wet too soon, or if the dye is not colorfast.
- Solution 1: Allow More Curing Time: The most common reason for dye transfer is insufficient drying and curing time. Ensure the sofa is completely dry and has cured for the manufacturer’s recommended period (often several days to a week).
- Solution 2: Heat Setting: If your dye instructions mention heat setting, perform this step carefully. Heat helps bond the dye to the fibers.
- Solution 3: Fabric Sealant: For persistent issues, after the sofa is fully cured, consider applying a clear fabric sealant designed to prevent dye transfer. Test thoroughly first.
- Solution 4: Avoid Moisture: Remind family members to avoid placing wet items on the sofa or sitting on it with damp clothes. If any dye gets on your skin, you might look into how to clean hair dye off skin.
Accidental Dye on Non-Fabric Parts or Floor
Even with careful masking, accidents can happen.
- Solution 1: Immediate Wipe Down: If dye gets on non-fabric parts (wood, metal) or the floor, wipe it up immediately with a damp cloth before it dries.
- Solution 2: Alcohol or Acetone: For dried dye on hard, non-porous surfaces, a small amount of rubbing alcohol or non-acetone nail polish remover on a cloth can sometimes lift it. Test in an inconspicuous area first. Be very careful around finished surfaces, as these solvents can damage finishes.
- Solution 3: Seek Professional Advice: For stubborn stains on floors or permanent fixtures, consult a cleaning professional.
Troubleshooting these common issues will help you achieve a beautifully dyed sofa that you can enjoy for years to come. Do not let minor setbacks deter you from completing your project!
Enhancing Longevity and Appearance of Your Dyed Sofa
You have put in the effort to dye your sofa without removable covers, giving it a fantastic new look. Now, you will want to keep it looking great for as long as possible. Extending the longevity of your dyed sofa and preserving its appearance involves ongoing care and a few smart strategies. I believe that thoughtful maintenance is key to enjoying your refreshed furniture for years.
Protecting Your Investment
Just like any valuable piece of furniture, your dyed sofa benefits from protective measures. These actions guard against wear, fading, and accidental damage.
- Apply a Fabric Protectant: After the dye has fully cured, consider applying a high-quality fabric protectant spray. These products create an invisible barrier on the fabric fibers. This barrier repels spills, making them easier to blot up before they soak in and stain. It also helps resist dirt and grime, simplifying routine cleaning. Choose a protectant specifically designed for upholstery and always test it on an inconspicuous area first.
- Guard Against Sunlight: UV rays are the primary enemy of fabric color. Direct sunlight will cause fading over time, even with well-set dyes. Position your sofa away from windows that receive intense, direct sunlight. If this is not possible, use curtains, blinds, or UV-filtering window films during peak sun hours to protect your sofa.
- Manage Pet and Child Activity: Pets and young children can be tough on furniture. If your dyed sofa will see heavy use from them, consider placing pet throws or washable covers on high-traffic areas. This adds an extra layer of protection against dirt, spills, and snags, preserving the dye job underneath.
Regular Maintenance for Lasting Vibrancy
Consistent, simple maintenance keeps your sofa looking vibrant and feeling fresh. These routine tasks are not difficult but make a big difference.
- Frequent Vacuuming: Make vacuuming your sofa a regular part of your cleaning routine. Use the upholstery attachment to remove dust, pet hair, and loose debris. This prevents dirt from accumulating and embedding into the fabric, which can dull the color over time. Pay special attention to seams and crevices.
- Address Spills Immediately: Time is of the essence when a spill occurs. Blot, do not rub, any liquid spills with a clean, white cloth. For solid messes, gently scrape away excess before blotting. Quick action prevents stains from setting and potentially reacting with the dye.
- Gentle Spot Cleaning: For stubborn spots, use a very mild, pH-neutral upholstery cleaner. Test it first on a hidden area to ensure it does not lift the dye or damage the fabric. Apply the cleaner to a cloth, then blot the stain. Avoid saturating the fabric, especially since your sofa covers are not removable.
- Fluff and Rotate Cushions: If your sofa has loose cushions, fluff them regularly to maintain their shape and comfort. If cushions are reversible, flip and rotate them periodically. This distributes wear and tear evenly, helping to prevent any single area from showing more fading or compression.
By integrating these practices into your routine, you can significantly enhance the longevity and appearance of your newly dyed sofa. It is a small investment of time that yields long-term rewards, allowing you to enjoy your refreshed furniture for many years.
Frequently Asked Questions About Dyeing Sofas Without Removable Covers
Dyeing a sofa can raise many questions, especially when the covers are not removable. Here are answers to some common inquiries I hear.
Can I dye a synthetic sofa like polyester?
Dyeing synthetic sofas, like polyester, is challenging because synthetic fibers resist traditional dyes. While some specialty dyes or fabric spray paints are designed for synthetics, results can vary significantly. Always perform a patch test on a hidden
- sofa dyeing
- furniture dyeing
- DIY upholstery
- fabric dye
- home decor refresh
- non-removable covers
- couch transformation

Todd Martin
Senior Writer
With over 15 years of experience in home renovation and design, I started HEG to share what I’ve learned with homeowners who want to create spaces that are both beautiful and functional. I’ve always believed in a hands-on approach, and over the years, I’ve picked up practical solutions that actually work. Through HEG, I aim to make home improvement more approachable, sharing real tips that help you create a home you truly love.