
· Todd Martin · Home Cleaning · 20 min read
How To Deep Clean Hair Brushes
Master the Art of Deep Cleaning Hair Brushes
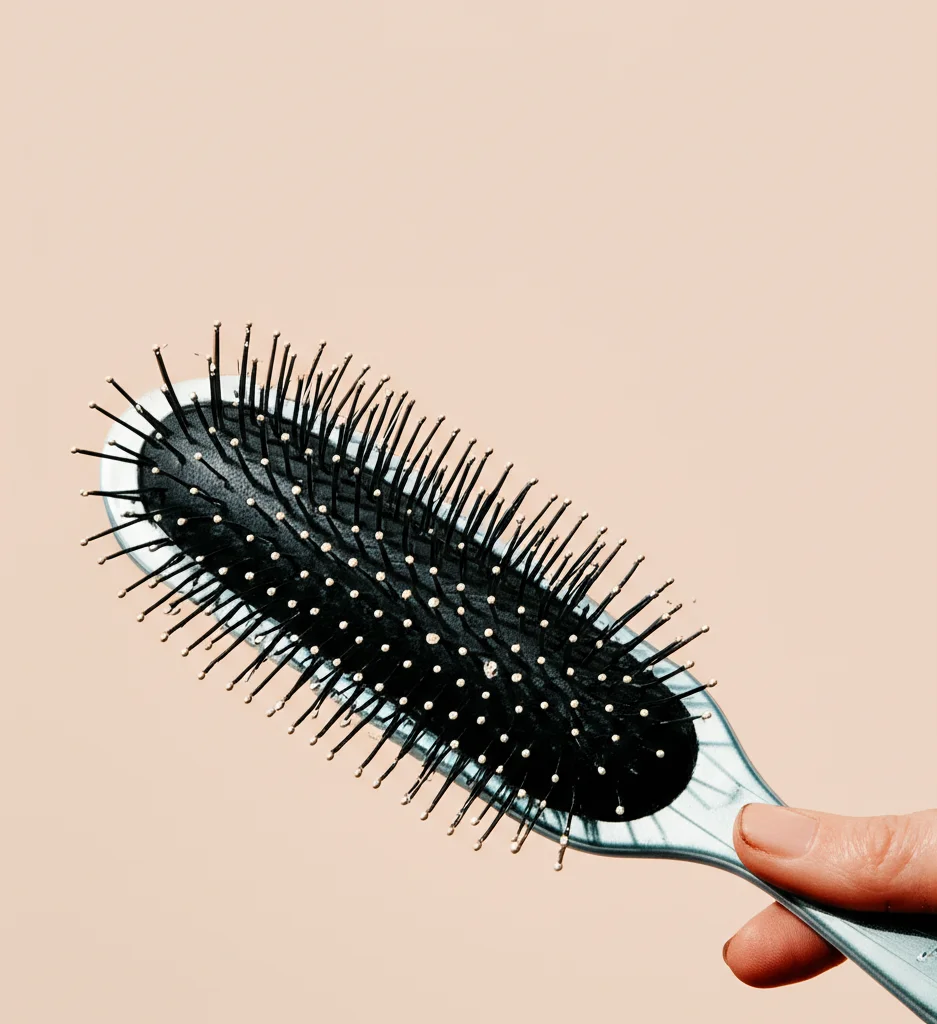
Have you ever looked closely at your hairbrush? You might be surprised by what you find. A dirty hairbrush holds more than just loose strands. It accumulates old hair, dust, dead skin cells, and product residue. This creates a breeding ground for bacteria and grime. Learning how to deep clean hair brushes is a simple step. It helps keep your scalp healthy and your hair clean.
A clean brush means healthier, shinier hair. It also extends the life of your valuable hair tools. This guide provides a full overview. We will cover why cleaning your brush is important. We will list the tools you need. We will give step-by-step instructions for different brush types. By the end, you will know exactly how to give your brushes a fresh start. You will use a clean brush every time.
Takeaway
- Regularly remove trapped hair from your brushes.
- Choose cleaning methods specific to your brush material.
- Sanitize brushes to remove bacteria and product buildup.
- Ensure brushes dry completely to prevent mildew.
- Maintain a consistent cleaning schedule for optimal hygiene.
Deep cleaning hair brushes involves removing all trapped hair, washing away product residue and oils with a suitable cleaning solution, and then sanitizing the bristles to eliminate bacteria. The process varies slightly based on brush material, but ensures a truly hygienic tool for healthier hair.
The Importance of Hair Brush Hygiene
Your hair brush touches your hair and scalp daily. It picks up a lot of things. This includes shed hair, dust, and product residue. Hair oils, dry shampoo, and styling products stick to the bristles. Over time, this creates a sticky film. This film can harbor bacteria and fungi. Brushing your hair with a dirty brush transfers these unwanted guests back to your clean hair. It also spreads dirt and oil. This can make your hair look dull or feel greasy.
A clean brush helps your hair look its best. It reduces product buildup on your strands. It also improves scalp health. When bristles are clean, they can glide through your hair more easily. This reduces tugging and breakage. It also allows your styling products to work better. Regular cleaning removes the barrier of grime. This barrier prevents the brush from doing its job well. Think of it like cleaning your makeup brushes; it is essential for good results and health. Dirty brushes can even lead to scalp issues. These issues include itchiness or irritation. Proper hygiene is a basic step in a good hair care routine.
Ignoring brush cleanliness leads to problems. Your brush becomes less effective at detangling. It can even make your freshly washed hair dirty again. This wastes your time and hair products. It is simple to prevent these issues. Just add brush cleaning to your regular schedule. This small effort makes a big difference. It helps your hair stay vibrant and healthy. This section shows why we must clean our hair brushes. It is a critical part of personal care.
Essential Tools for Deep Cleaning
Before you begin, gather all necessary supplies. Having everything ready makes the cleaning process smooth. You likely have most of these items at home already. The right tools ensure a thorough clean. They also protect your brushes from damage. Different brush types need slightly different approaches. Most basic supplies work for many brushes. Some specific items help with certain materials.
Here is a list of what you will need:
- Scissors: Small, sharp scissors are useful. They help cut through stubborn hair tangles. You can use nail scissors or crafting scissors.
- Pointed object: A rat-tail comb, skewer, or pencil works well. This helps lift hair from the base of the bristles.
- Bowl or Sink: You need a basin for soaking or washing. A clean kitchen sink or a plastic bowl is perfect.
- Mild Shampoo or Soap: Baby shampoo, clarifying shampoo, or gentle dish soap are good choices. Avoid harsh detergents.
- Baking Soda: This is an excellent natural cleaner. It helps cut through grease and deodorizes. It also aids in removing stubborn buildup. You can learn more about using baking soda for cleaning hair brushes.
- White Vinegar: White vinegar is a natural disinfectant. It helps break down product residue. It also leaves brushes smelling fresh.
- Hydrogen Peroxide (optional): For extra sanitization. Use it carefully. It helps kill germs. Learn more about cleaning hair brushes with hydrogen peroxide.
- Old Toothbrush or Small Cleaning Brush: A dedicated brush helps scrub bristles. This reaches deep into the base.
- Clean Towels: You need these for drying your brushes. Microfiber towels work well.
- Hair Dryer (optional): For speeding up the drying process, especially for paddle brushes. Use on a cool setting.
Having these items ready ensures efficiency. You can tackle any brush type with confidence. Prepare your cleaning station before you start. This saves time and makes the process easier.
Step-by-Step Hair Removal
The first step in deep cleaning any hair brush is to remove all the trapped hair. This step is critical. You cannot effectively clean the bristles if they are matted with old hair. This initial hair removal lays the foundation for a truly deep clean. It also makes the subsequent washing steps much easier.
Using a Comb or Brush Cleaner
Many people find a thin comb or a specialized brush cleaning tool very effective. A rat-tail comb, with its long, thin handle, works perfectly.
- Slide the comb: Insert the pointed end of the comb under the hair at the base of the brush bristles. Start at one end of the brush.
- Lift and pull: Gently lift the hair upwards and away from the bristles. Pull it out in sections. Work your way across the entire brush.
- Repeat as needed: For very matted brushes, you may need to repeat this several times. Move the comb in different directions to loosen all the hair.
Specialized brush cleaners have hooks or rake-like teeth. They are designed for this purpose. These tools can grab and lift hair quickly. They are very efficient for dense brushes.
Manual Removal and Scissors
For deeply embedded or very stubborn hair, manual methods are best. Sometimes hair wraps tightly around the bristles.
- Cut tangled hair: Use small, sharp scissors. Carefully cut through the hair tangled around the bristles. Be careful not to cut the bristles themselves. Make small snips across the matted hair. This breaks the hair strands into smaller, easier-to-remove pieces.
- Pull out remaining hair: Once the hair is cut, it becomes much easier to pull out. Use your fingers or the comb again. Gently pull all the loose hair away from the brush.
- Clear the base: Ensure the base of the bristles is clear. Check for any remaining hair strands. A completely cleared brush is ready for washing.
Removing all hair is important. This allows water and cleaning solutions to reach every part of the brush. It ensures a thorough clean. Without this step, you are just washing dirty hair. For tips on how to remove buildup effectively, you can check out resources on how to clean buildup on hair brush. This method is for more than just hair. It also helps loosen dust and lint.
Deep Cleaning Different Hair Brush Types
Not all hair brushes are the same. Each type of brush needs a slightly different cleaning approach. The material of the brush dictates the best cleaning method. Using the wrong method can damage your brush. It can even shorten its lifespan. Knowing your brush type is the first step to proper cleaning.
Cleaning Plastic and Synthetic Brushes
Plastic and synthetic brushes are the easiest to clean. They are generally waterproof. This makes soaking a viable option.
- Remove hair: First, remove all loose hair as described earlier. Use scissors and a comb.
- Prepare solution: Fill a sink or bowl with warm water. Add a few drops of mild shampoo or dish soap. You can also add a tablespoon of baking soda for extra cleaning power. This helps cut through grease and product buildup.
- Soak: Place the hair-free brushes into the solution. Let them soak for 10-15 minutes. This loosens dirt and grime. For general tips on how to keep your brushes clean, see how to clean a brush hair.
- Scrub: Use an old toothbrush or small cleaning brush. Scrub the bristles and the base of the brush. Pay attention to any stubborn spots.
- Rinse: Rinse the brushes thoroughly under cool running water. Make sure no soap residue remains.
- Dry: Shake off excess water. Place them bristles-down on a clean towel. Let them air dry completely. Or you can use a cool setting on a hairdryer to speed up drying. For more detailed instructions specific to these materials, refer to how to clean plastic hair brushes.
Cleaning Natural Bristle (Boar Bristle) Brushes
Natural bristles, like boar bristles, require a gentler touch. They are more delicate than synthetic ones. These brushes should not be submerged in water for long periods. Over-soaking can damage the bristles. It can also warp the wooden base.
- Remove hair: Carefully remove all hair from the bristles. Use a comb or your fingers.
- Prepare a shallow solution: Fill a shallow bowl with warm water and a tiny amount of gentle shampoo. The water level should be just enough to cover the bristles, not the brush handle or cushion.
- Dip and swish: Dip the bristles into the solution. Swish the brush gently for a few seconds. Do not submerge the entire brush.
- Scrub gently: Use your fingers or a very soft brush. Gently scrub the bristles. Focus on removing product buildup.
- Rinse carefully: Rinse the bristles under very light, cool running water. Point the bristles downwards. Avoid getting the cushion or wooden handle wet.
- Dry: Lay the brush bristles-down on a clean towel. Allow it to air dry completely. This might take several hours. Ensure it is fully dry before use.
Cleaning Wooden Brushes
Wooden brushes, including those with wooden handles or bases, need extra care. Wood can warp, crack, or mold if it absorbs too much water. Avoid prolonged soaking at all costs.
- Remove hair: Get rid of all loose hair from the bristles first.
- Wipe bristles: Dampen a cloth with warm water and a small amount of mild soap. Gently wipe the bristles. You can also use an old toothbrush for scrubbing the bristles only. Be careful not to get the wood part too wet.
- Clean handle: Wipe the wooden handle and base with a separate damp cloth. If there is grime on the wood, a very slightly damp cloth with a tiny bit of soap can help. Then immediately wipe with a dry cloth.
- Rinse (minimal): Lightly rinse the bristles under cool, running water. Angle the brush so water only touches the bristles. Do not let water pool on the wooden base.
- Dry immediately: Shake off excess water. Use a clean, dry towel to pat the brush dry immediately. Lay it bristles-down on a clean, dry towel to air dry. Make sure it dries in a well-ventilated area. Never store it until it is completely dry. For more specific advice on this type, refer to how to clean wooden hair brush.
Cleaning Paddle and Round Brushes
Paddle and round brushes often have a cushion base. This base can trap water. Water trapped inside can lead to mold or mildew.
- Remove hair: Always start by removing all hair.
- Gentle wash: Do not submerge paddle or round brushes. Instead, fill a shallow basin with warm, soapy water. Dip only the bristles into the water. Swish them around gently.
- Scrub the bristles: Use an old toothbrush to scrub the bristles and the cushion. Focus on the areas with buildup.
- Rinse carefully: Rinse the bristles under cool running water. Tilt the brush so water drains away from the cushion. Avoid water getting into the cushion’s air hole.
- Dry thoroughly: This is the most crucial step for these brushes. Gently squeeze water from the bristles. Place the brush bristles-down on a clean towel. Elevate the handle slightly if possible. This allows air to circulate under the cushion. If your brush has an air hole, point it downwards. This helps water drain out. You can also use a hairdryer on a cool setting. Direct air at the bristles and cushion. This speeds up drying. Ensure it is completely dry before storing. This prevents mold.
By following these specific steps, you will keep all your hair brushes clean. They will be hygienic and ready for use.
Sanitizing Hair Brushes for Optimal Hygiene
Cleaning removes visible dirt and product buildup. Sanitizing goes a step further. It kills bacteria, fungi, and viruses that may linger on your brush. This is especially important for brushes used frequently or shared. A sanitized brush helps keep your scalp healthy. It also prevents the spread of germs.
Using Vinegar Solution
White vinegar is a powerful natural disinfectant. It breaks down product residue. It also neutralizes odors. It is a safe and effective option for most brush types.
- Prepare solution: Mix equal parts white vinegar and warm water in a bowl. For example, half a cup of vinegar and half a cup of water.
- Soak (for plastic/synthetic): If your brush is plastic or synthetic, you can submerge it in the vinegar solution for 15-30 minutes after cleaning. Make sure all hair is already removed.
- Wipe (for natural/wooden): For natural bristle or wooden brushes, do not submerge them. Instead, dampen a clean cloth or a small cleaning brush with the vinegar solution. Gently wipe and scrub the bristles. Be very careful to avoid getting the wooden parts wet.
- Rinse: After sanitizing, rinse the brushes thoroughly under cool running water. Ensure all vinegar smell is gone.
- Dry completely: Shake off excess water. Lay brushes bristles-down on a clean towel. Let them air dry fully in a well-ventilated area. The vinegar smell will dissipate as they dry.
Vinegar is a great all-around choice. It is safe and common.
Using Rubbing Alcohol
Rubbing alcohol (isopropyl alcohol) is an effective disinfectant. It evaporates quickly. This makes it a good option for certain brush types. It is best for synthetic bristles and plastic.
- Prepare: Pour some rubbing alcohol into a shallow dish.
- Dip bristles: After cleaning your brush and removing all hair, dip just the bristles into the alcohol. Swish them around for a few seconds. Do not soak natural bristles or wooden parts.
- Wipe: For brushes that cannot be dipped, spray rubbing alcohol onto a clean cloth. Wipe down the bristles and the base of the brush. Make sure to cover all areas that come into contact with hair.
- Air dry: Rubbing alcohol evaporates quickly. This means less waiting time. Place the brush bristles-down on a clean towel. Let it air dry completely. The alcohol will evaporate, leaving the brush sanitized.
Be cautious when using rubbing alcohol. It can dry out natural bristles over time. It can also damage some painted handles. Test a small area first if unsure. For general advice on how to clean many types of brushes, you can find help at how to clean combs and brushes.
Using Hydrogen Peroxide
Hydrogen peroxide is another strong sanitizing agent. It effectively kills bacteria and viruses. It creates an oxygen bubble when it meets organic matter. This helps lift dirt.
- Dilute: Mix 3% hydrogen peroxide with an equal amount of water.
- Apply: For plastic or synthetic brushes, you can briefly dip them in the solution. For other brushes, dampen a cloth or cotton swab with the diluted hydrogen peroxide. Wipe down the bristles thoroughly. Avoid the wooden or cushioned parts.
- Rinse well: It is crucial to rinse the brush thoroughly after using hydrogen peroxide. Residual peroxide can cause damage or irritation.
- Dry fully: Air dry the brush completely bristles-down on a clean towel.
Hydrogen peroxide is potent. Use it sparingly. Always rinse well. It is an effective way to ensure your brushes are germ-free. For more specific usage details, consult resources like how to clean hair brushes with hydrogen peroxide. Choosing the right sanitizing method depends on your brush material and how often you clean. Regular sanitization ensures optimal hair and scalp health.
Drying and Storing Your Clean Hair Brushes
Proper drying is as important as the cleaning itself. If brushes do not dry completely, they can develop mildew or mold. This defeats the purpose of cleaning them. Mold thrives in damp environments. It can damage your brushes and pose health risks. Storing them correctly also keeps them clean until the next use.
Ensuring Complete Drying
Different brush types require different drying approaches. However, the goal is always the same: complete dryness.
- Shake out excess water: After rinsing, give the brush a good shake. This removes most of the standing water.
- Pat dry with a towel: Use a clean, absorbent towel. Gently pat the bristles and the entire brush. Absorb as much moisture as possible.
- Position for air drying:
- Bristles-down: For most brushes, especially paddle and round brushes, place them bristles-down on a clean towel. This allows water to drain away from the cushion or base. It prevents water from pooling inside.
- Elevate: If possible, elevate the handle slightly. You can prop it against something. This helps air circulate around the bristles and cushion.
- Well-ventilated area: Place the brushes in a well-ventilated room. Avoid humid bathrooms. A spot near an open window or fan is ideal.
- Use a cool hairdryer (optional): For quicker drying, especially for cushioned brushes, use a hairdryer on a cool setting. Direct the airflow at the bristles and cushion. Do not use hot air. Hot air can melt plastic bristles or damage natural ones. It can also crack wooden handles.
- Check for dryness: Before storing, feel the bristles and the base. Ensure they are completely dry to the touch. This can take several hours, or even overnight, depending on the brush and humidity. A damp brush is a breeding ground for mildew.
Smart Storage Solutions
Once your brushes are perfectly dry, store them in a way that keeps them clean. Proper storage prevents dust buildup. It also protects them from accidental contamination.
- Upright or bristles-up: Store brushes bristles-up in a clean container or drawer. This prevents the bristles from bending. It also keeps them from touching dirty surfaces.
- Avoid damp areas: Do not store brushes in humid environments. Avoid keeping them directly next to the shower. This can reintroduce moisture and promote mold.
- Dedicated storage: Keep your hair brushes separate from makeup brushes or other household cleaning tools. This prevents cross-contamination.
- Dust-free environment: If possible, store brushes in a closed drawer or a covered holder. This protects them from dust settling on the bristles.
By following these drying and storage tips, you ensure your brushes remain hygienic. They will be ready to give you clean, healthy hair every time. Proper care extends the life of your brushes. It protects your investment.
Maintaining Hair Brush Cleanliness: Best Practices
Deep cleaning your hair brushes is important. But it is not a one-time event. Regular maintenance keeps your brushes in top condition between deep cleans. A consistent routine prevents major buildup. It also makes deep cleaning less of a chore. Think of it as preventative care for your hair tools.
Regular Hair Removal
This is the most fundamental step. It should be done frequently.
- Daily or after each use: Take a moment to pull out any loose hair from your brush. Use your fingers or a comb.
- Prevents tangles: Removing hair daily stops it from building up. It prevents the formation of dense, matted tangles. These tangles are much harder to remove later.
- Improves brush performance: A brush free of hair glides through your hair more smoothly. It works more effectively for detangling and styling.
This simple habit takes only seconds. It significantly reduces the effort needed for deeper cleans.
Weekly Quick Cleans
Beyond daily hair removal, a quick weekly wash is beneficial. This addresses product residue and surface grime.
- Gather supplies: You need warm water and a mild soap (like baby shampoo or gentle dish soap).
- Quick wash for plastic/synthetic: After removing hair, quickly dip the bristles in warm, soapy water. Swish them around. Use your fingers or an old toothbrush to gently scrub the bristles. Rinse thoroughly under running water.
- Quick wipe for natural/wooden: For delicate brushes, dampen a cloth with soapy water. Wipe the bristles down. Avoid getting the wooden base or cushion wet. Then wipe with a clean, damp cloth to rinse.
- Dry fully: Place brushes bristles-down on a towel to air dry. Ensure they are completely dry before putting them away. This weekly routine keeps your brushes fresh. It stops oil and product buildup from hardening. This makes monthly deep cleaning much easier. A clean brush is a key part of any good hair care routine. You can find more general information about keeping your tools clean at how to clean hair brush.
Monthly Deep Cleans
Even with regular weekly cleans, a monthly deep clean is still necessary. This provides the thorough sanitization needed to eliminate bacteria and stubborn buildup.
- Follow detailed steps: Refer back to the “Deep Cleaning Different Hair Brush Types” and “Sanitizing Your Hair Brushes” sections.
- Choose appropriate method: Select the deep cleaning and sanitizing method best suited for your specific brush material. Use baking soda or vinegar solutions as needed.
- Consistency is key: Mark it on your calendar. Make deep cleaning a regular part of your household chores. Consistent deep cleaning ensures your brushes are always hygienic. This helps maintain healthy hair and a clean scalp. It also prolongs the life of your valuable hair tools.
By combining daily hair removal, weekly quick washes, and monthly deep cleans, you create a robust brush maintenance system. This ensures your hair brushes are always clean. They will be hygienic, ready to help you achieve your best hair.
Frequently Asked Questions
How often should I deep clean my hair brush?
You should deep clean your hair brush at least once a month. If you use a lot of hair products, or if you share your brush, clean it more often, perhaps every two weeks. Daily hair removal and a quick weekly rinse are also important for maintenance.
Can I put my hair brush in the dishwasher?
No, you should not put most hair brushes in the dishwasher. High heat can melt plastic bristles or handles. It can also warp or crack wooden brushes. Dishwasher detergents are too harsh for many brush materials. Always hand wash brushes according to their material.
What if my brush smells bad after cleaning?
A bad smell usually means there is still some buildup or the brush did not dry completely. Try another deep clean with white vinegar. White vinegar is excellent for deodorizing. Ensure the brush air dries thoroughly in a well-ventilated area. Do not store it until completely dry.
How do I clean a brush with a padded base without getting it wet inside?
For brushes with a padded base, avoid submerging them. Dip only the bristles into shallow, soapy water. Scrub the bristles with an old toothbrush. Rinse the bristles carefully under running water, angling the brush to prevent water from entering the cushion. Always dry it bristles-down to help water drain out.
Can I use bleach to clean my hair brush?
Do not use bleach to clean your hair brush. Bleach is too harsh. It can damage bristles and plastic, causing them to break down. It can also irritate your scalp or cause damage to your hair if residue remains. Stick to milder cleaning agents like shampoo, dish soap, vinegar, or hydrogen peroxide.
My brush still has product buildup after washing. What should I do?
If buildup remains, it often indicates old, hardened residue. Try soaking plastic brushes in a warm water and baking soda solution for 30 minutes. For other types, make a paste with baking soda and a little water, then gently scrub the bristles with an old toothbrush. Rinse thoroughly and repeat if needed.
Conclusion
Deep cleaning your hair brushes is an easy but powerful step. It significantly boosts your hair and scalp health. We have covered why this routine is essential. We have also explored all the tools you need. You now know how to remove hair, wash, and sanitize different brush types
- hair brush cleaning
- brush maintenance
- hair tool hygiene
- personal care tips
- healthy hair routine

Todd Martin
Senior Writer
With over 15 years of experience in home renovation and design, I started HEG to share what I’ve learned with homeowners who want to create spaces that are both beautiful and functional. I’ve always believed in a hands-on approach, and over the years, I’ve picked up practical solutions that actually work. Through HEG, I aim to make home improvement more approachable, sharing real tips that help you create a home you truly love.


