· Todd Martin · Home Cleaning · 19 min read
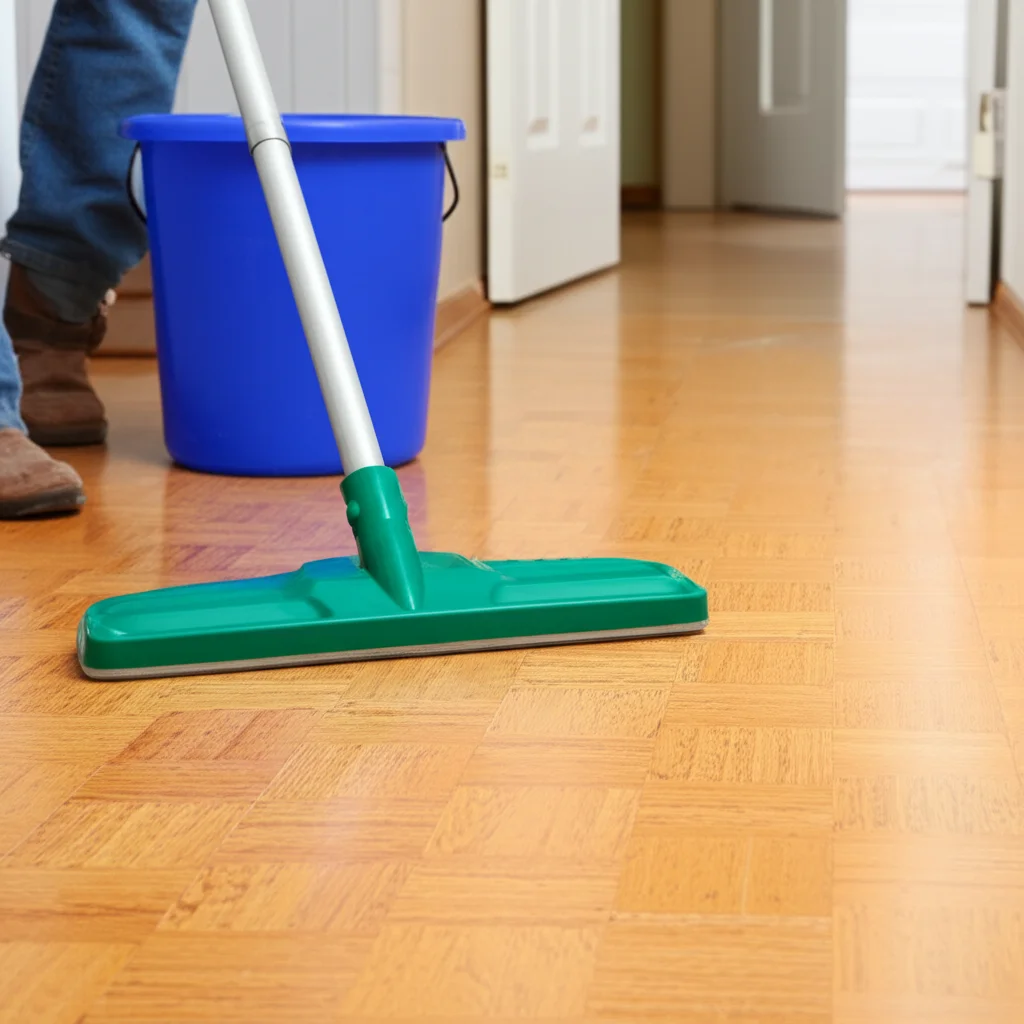
How To Deep Clean Floors

Mastering the Art of Deep Cleaning Your Floors
Do you ever look at your floors and wish they felt truly clean, not just surface-level tidy? Years of foot traffic, spills, and hidden grime can make even the most diligently swept floors look dull. A routine sweep and mop simply cannot remove all the embedded dirt. This is where a thorough deep clean floors process comes into play. It makes a big difference.
Deep cleaning your floors brings back their original shine and freshness. It also removes allergens and bacteria that regular cleaning often misses. This guide will walk you through everything you need to know. We cover identifying your floor type to using the right cleaning methods. Get ready to transform your living space with truly spotless floors.
Takeaway
- Assess Floor Type: Identify your specific flooring material to choose the correct cleaning agents and methods.
- Prepare Thoroughly: Remove all furniture and debris, then vacuum or sweep completely before deep cleaning.
- Use Proper Tools & Cleaners: Select tools and solutions specific to your floor to avoid damage and ensure effective cleaning.
- Address Specific Stains: Treat tough spots and grout lines with targeted cleaners before overall cleaning.
- Dry Properly: Ensure floors dry completely to prevent moisture damage, streaking, and mold growth.
To deep clean floors, you must first identify the floor material, then prepare the area by removing debris. Next, use appropriate cleaning solutions and tools for the specific floor type, focusing on embedded dirt and stains. Finally, rinse thoroughly and ensure the floor is completely dry to achieve a truly spotless finish.
Understanding Your Floor Type for Effective Cleaning
Before you begin any deep cleaning, you must know your floor type. Different materials require different cleaning approaches. Using the wrong product can cause damage or leave residue. I once ruined a small section of my laminate floor because I used too much water. Learn from my mistake.
Hardwood and Engineered Wood Floors
Hardwood floors are beautiful but delicate. They react poorly to excess moisture. Water can warp, swell, or stain the wood permanently. You must use specific wood floor cleaners. These cleaners are pH-neutral and dry quickly. Avoid harsh chemicals or abrasive pads. How to Clean Wood Floors can provide more details. For sealed hardwood, a damp mop with a wood-specific cleaner works well. Unsealed or waxed wood floors need even more care. They can absorb liquids easily. Always test a small, hidden area first. This check prevents unexpected damage.
Laminate and Vinyl Floors
Laminate and vinyl floors are durable and easy to maintain. They are often confused with real wood or tile. They are made of synthetic materials. Like hardwood, too much water can cause swelling or damage to the core layer. This damage cannot be repaired easily. A damp mop is usually sufficient for these surfaces. Use a cleaner designed for laminate or vinyl. Avoid oil-based soaps or abrasive scrubbers. These can leave a dull film or scratch the surface. You can find more tips on how to clean vinyl floors. For very dirty laminate floors, specialized products help lift grime without harm. Always squeeze your mop very well. This minimizes water contact.
Tile and Grout Floors
Tile floors, like ceramic, porcelain, or natural stone, are very resilient. The challenge often lies with the grout lines. Grout is porous and traps dirt, grime, and mildew. This makes floors look dirty even after washing the tiles. Regular mopping does not clean grout. You need a dedicated grout cleaner and a stiff brush. How to Deep Clean Tile Floors offers detailed steps. Natural stone tiles like marble or limestone need special pH-neutral cleaners. Acidic cleaners can etch and permanently damage them. Always check manufacturer guidelines for your specific tile type. This prevents costly mistakes.
Concrete and Stone Floors
Concrete floors, whether sealed or stained, are extremely durable. They are popular in modern homes and basements. They still need proper cleaning to maintain their appearance. Sweeping or vacuuming should be a regular step. Use a neutral pH cleaner designed for concrete. Avoid harsh acids or strong alkaline solutions. These can strip sealants or damage the surface. Stained concrete floors need gentler methods to preserve the finish. For more specialized care, refer to how to clean cement floors. Natural stone floors like granite, travertine, or slate also require specific care. They are sensitive to acidic cleaners. Always use a stone-specific cleaner. This keeps them looking great.
Carpet Floors
Deep cleaning carpets is different from hard floors. Carpets trap dust, allergens, and odors. Regular vacuuming helps, but deep cleaning removes embedded dirt. You will need a carpet cleaner or a steam cleaner. These machines inject a cleaning solution and then extract it. This lifts dirt from deep within the fibers. For specific stains, pretreat them before using the machine. Always test cleaners in a small, hidden area. This ensures colorfastness. Deep cleaning carpets improves air quality. It also extends the life of your carpeting.
Gathering Your Deep Cleaning Arsenal
Having the right tools and cleaning solutions makes your deep cleaning job much easier and more effective. You do not need a lot of fancy gadgets. A few essential items will do the trick. My cleaning closet is always stocked with these basics.
Essential Cleaning Tools
- Vacuum Cleaner with Attachments: A powerful vacuum is crucial. It removes loose dirt, dust, and pet hair. Attachments help reach corners and under furniture. For carpets, a vacuum with good suction and a brush roll is essential.
- Broom and Dustpan: Use these for initial loose debris removal. A good quality broom with stiff bristles works well on hard surfaces.
- Microfiber Mops or Sponge Mops: Microfiber mops are excellent for hard floors. They absorb dirt and water effectively. They also leave fewer streaks. Sponge mops are good for applying solutions. Always wring them out thoroughly.
- Scrub Brushes (Soft and Stiff Bristle): A soft brush is good for general scrubbing. A stiff-bristle brush is essential for grout lines and tough spots. Make sure they are safe for your floor type.
- Buckets (Two): Use one bucket for clean water and cleaning solution. Use the other for rinsing dirty water. This prevents spreading grime.
- Spray Bottles: These are useful for applying pre-treatment solutions or specialized cleaners. You can mix your own solutions.
- Clean Cloths/Towels: Microfiber cloths are great for wiping, polishing, and drying. Keep plenty on hand. Old cotton towels also work for drying.
- Squeegee (for large hard surfaces): A floor squeegee can help push dirty water into one area. This makes it easier to pick up.
Recommended Cleaning Solutions
Choosing the right cleaning solution is key. Always read the label and follow instructions.
- All-Purpose Floor Cleaner: A general-purpose cleaner that is safe for most hard surfaces. Check if it is pH-neutral.
- Specific Floor Type Cleaners:
- Wood Floor Cleaner: Designed to clean wood without leaving residue or causing damage. Many brands offer good options. For specific methods, consider how to clean wood floors with vinegar.
- Tile and Grout Cleaner: A powerful cleaner to penetrate and loosen dirt in grout lines. It often contains mild acids for tougher stains. How to clean tile grout on floors has more information.
- Vinyl/Laminate Floor Cleaner: Formulated to clean these synthetic surfaces without dulling or damaging them.
- Stone Cleaner: A neutral pH cleaner specifically for natural stone to avoid etching.
- Carpet Cleaning Solution/Shampoo: For carpet cleaning machines, use a low-foaming, high-extraction formula.
- White Vinegar: A natural, inexpensive cleaner. Diluted vinegar is great for cutting grease and deodorizing. Use caution on certain surfaces like natural stone or unsealed hardwood.
- Baking Soda: Excellent for absorbing odors and as a mild abrasive for scrubbing.
- Hydrogen Peroxide: A good option for tackling mold or mildew, especially in grout.
- Stain Removers: Specific products for stubborn spots like pet stains on carpets or oil spills on concrete. For dog urine on hardwood, a specialized product is best, as shown in how to clean dog urine from hardwood floors.
Always wear gloves to protect your hands from chemicals. Ensure proper ventilation by opening windows. This helps air circulation and speeds drying.
Pre-Deep Clean Preparations: Setting the Stage
A successful deep clean starts with thorough preparation. Skipping these steps makes the actual cleaning much harder. You will also get less effective results. Think of it like preparing a canvas before painting.
Clear the Area Completely
The first step is to remove everything from the floor. This includes furniture, rugs, plants, and small items. If you cannot move large furniture, push it to one side. Then clean the exposed area. Once that side is clean and dry, move the furniture to the cleaned area. Then clean the other side. This ensures you can access every inch of the floor. It also prevents items from getting wet or damaged. This step is critical for a truly comprehensive deep clean floors effort.
Initial Debris Removal
Once the floor is clear, it is time for initial debris removal. This means sweeping or vacuuming thoroughly. Do not just skim the surface.
- Sweeping: Use a good broom to sweep all loose dirt, dust, and crumbs into a dustpan. Pay attention to corners and edges where debris collects.
- Vacuuming: For hard floors, use a vacuum with a hard floor attachment. This prevents scratching. For carpets, vacuum slowly and deliberately. Go over high-traffic areas multiple times. Use your vacuum’s crevice tool for tight spaces. Remove any visible pet hair or large debris. This step prevents turning dirt into muddy streaks during wet cleaning. For floors that are already quite dirty, a good vacuuming is the first step in how to clean dirty floors.
Spot Treatment and Pre-Soaking
After removing loose debris, inspect your floors for stubborn stains or grime. Address these spots before applying a general cleaner. This makes the overall cleaning process more effective.
- For Grout Lines: If you have tile floors, your grout lines might be discolored. Apply a grout cleaner directly to the lines. Let it sit for the recommended time. Use a stiff brush to scrub the grout. This helps lift embedded dirt.
- For Stains on Hard Floors: For sticky spots or spills, use a suitable cleaner. Spray it directly onto the stain. Let it penetrate for a few minutes. Then gently wipe or scrub the area.
- For Carpet Stains: Treat specific carpet stains with a carpet stain remover. Blot the stain, do not rub it. Work from the outside of the stain inwards. This prevents spreading.
- For Heavily Soiled Areas: If parts of your floor are extremely dirty, a pre-soak might help. Apply your chosen floor cleaner. Let it sit for a few minutes to break down the grime. Make sure the floor material can handle this. This step prepares the surface for deep cleaning.
These preparatory steps lay the foundation for a truly clean floor. They ensure that your main cleaning efforts are focused on deep grime, not just surface-level dirt.
Deep Cleaning Techniques for Hard Surfaces
Now that your floors are prepped, it is time to deep clean. The method varies significantly by floor type. Always use the right products and techniques for your specific material.
Deep Cleaning Hardwood and Engineered Wood
Deep cleaning hardwood floors requires care. Too much water is the biggest enemy.
- Vacuum Thoroughly: Ensure all dust and debris are gone.
- Choose the Right Cleaner: Use a cleaner specifically formulated for hardwood. Avoid general-purpose cleaners that can leave residue or dull the finish. I prefer spray-on, wipe-off products for quick drying.
- Use a Damp (Not Wet) Mop: Lightly spray a section of the floor with cleaner. Use a microfiber mop pad that is just damp, not soaking wet. Mop in the direction of the wood grain.
- Work in Small Sections: Clean one small area at a time. This prevents the cleaner from sitting on the wood too long.
- Dry Immediately: Use a clean, dry microfiber cloth to immediately buff the area dry. This prevents water spots and streaks. This step is critical for how to clean hardwood floors without damage. If you have engineered wood, many techniques are similar to real hardwood, as seen in how to clean engineered wood floors with bona.
Deep Cleaning Laminate and Vinyl Floors
Laminate and vinyl are quite forgiving, but still sensitive to excess moisture.
- Initial Cleaning: Vacuum or sweep all loose dirt.
- Select Cleaner: Use a cleaner designed for laminate or vinyl. You can also use a mixture of warm water and a small amount of dish soap (a few drops per gallon).
- Damp Mop: Wring your mop out very well. It should feel barely damp. Mop the floor in sections. Overlapping strokes ensure full coverage.
- Avoid Soaking: Never pour water directly onto laminate or vinyl. This can seep into seams and cause swelling.
- Prevent Streaks: For streak-free results, dry the floor immediately with a clean, dry microfiber cloth. If you are cleaning Pergo, these tips are particularly useful, as mentioned in how to clean pergo floors without streaks. For issues like sticky floors, a slightly stronger but still gentle approach might be needed, as described in how to clean sticky floors.
Deep Cleaning Tile and Grout Floors
Tile floors can withstand more moisture, but grout needs special attention.
- Pre-Treat Grout: Apply a specialized grout cleaner to all grout lines. Allow it to sit for 5-10 minutes.
- Scrub Grout: Use a stiff-bristle brush or a grout brush to vigorously scrub the grout lines. You will see dirt lift away.
- Clean Tiles: Mix your tile cleaner with warm water in a bucket. Use a sponge mop or a microfiber mop. Mop the entire floor, working in sections.
- Rinse Thoroughly: This is crucial. Fill a second bucket with clean, clear water. Rinse your mop frequently in the clean water. Mop the floor again to remove all cleaner residue and lifted dirt. Change the rinse water often. This prevents a hazy film.
- Dry: For shiny, streak-free tiles, dry the floor with a clean microfiber cloth or a floor squeegee. This is especially important for porcelain tiles, where how to clean porcelain tile floors without streaks is a common concern. For issues with grout specifically, focus on the details found in how to clean tile grout on floors.
Deep Cleaning Concrete and Stone Floors
These durable floors still benefit from specific deep cleaning methods.
- Remove Loose Debris: Sweep or vacuum completely.
- Choose a pH-Neutral Cleaner: For natural stone (marble, granite, limestone) or sealed concrete, use a pH-neutral cleaner. Harsh chemicals can etch or strip sealants.
- Mop Application: Apply the cleaner solution using a mop or a spray bottle. Work in manageable sections.
- Gentle Scrubbing: For tougher spots, use a soft-bristle brush. Avoid abrasive scrubbers on sealed or polished surfaces.
- Rinse Well: Rinse the floor thoroughly with clean water. Ensure all cleaner residue is gone.
- Dry Completely: Allow the floor to air dry. For a faster dry, use a fan or open windows. This prevents water spots and ensures the sealant remains intact. How to clean cement floors can offer more insights.
Deep Cleaning Techniques for Carpets and Rugs
Deep cleaning carpets and rugs is essential for removing embedded dirt, allergens, and odors. Regular vacuuming helps, but a deep clean gets to the root of the grime.
Preparing Carpets for Deep Cleaning
Before you start, preparation is key.
- Vacuum Thoroughly: Use a powerful vacuum cleaner to remove as much loose dirt, dust, and pet hair as possible. Go over high-traffic areas multiple times. Use attachments to get into corners and along baseboards. This prevents turning dry dirt into muddy residue during the wet cleaning process.
- Move Furniture: If possible, remove all furniture from the carpeted area. If not, move pieces to one side and clean one half, then shift them to the clean half to finish the job. Place plastic or foil under furniture legs that cannot be moved. This prevents moisture damage or rust stains on your carpet.
- Pre-Treat Stains: Inspect the carpet for any visible stains. Apply a specialized carpet stain remover to these spots. Follow the product instructions, usually by spraying and letting it sit for a few minutes. Gently blot the stain with a clean white cloth. Do not rub, as this can spread the stain or damage carpet fibers.
Using a Carpet Cleaner or Steam Cleaner
For a true deep clean, you will need a carpet cleaning machine. You can rent these from hardware stores or supermarkets. You can also purchase one if you plan to deep clean often.
- Fill the Machine: Fill the clean water tank with hot water. Add the recommended amount of carpet cleaning solution. Use a low-foaming formula. High-foaming solutions can leave residue and be difficult to rinse.
- Test a Small Area: Always test the cleaning solution in an inconspicuous spot first. This checks for colorfastness and ensures no damage to the carpet.
- Start at the Farthest Point: Begin deep cleaning at the corner farthest from your exit. Work your way towards the door. This prevents stepping on already cleaned areas.
- Apply Solution: Push the machine forward slowly, engaging the spray trigger to apply the cleaning solution. Overlap each pass slightly to ensure full coverage.
- Extract Water: Release the spray trigger. Pull the machine backward slowly over the same path. This extracts the dirty water from the carpet fibers. Repeat this extraction pass one or two more times. The goal is to remove as much moisture as possible. The more water you extract, the faster the carpet dries and the less residue remains.
- Rinse (Optional but Recommended): For an even deeper clean and to prevent residue build-up, refill the machine with plain hot water. Go over the carpet again, spraying only clear water and then extracting. This helps rinse out any remaining cleaning solution.
- Ventilation is Key: After cleaning, ensure proper ventilation. Open windows and turn on fans. This helps speed up the drying process. Carpets can take several hours to dry completely. Avoid walking on the carpet until it is dry to prevent re-soiling.
Deep cleaning carpets regularly helps extend their lifespan. It also creates a healthier indoor environment by removing trapped allergens and odors.
Drying and Finishing Touches
After deep cleaning your floors, the drying process is just as important as the cleaning itself. Improper drying can lead to new problems like moisture damage, streaks, or even mold growth.
Ensuring Proper Drying
- Ventilation is Key: Open windows and doors in the area. This creates airflow. Turn on ceiling fans or stand-alone fans to circulate air. Good ventilation significantly speeds up drying time.
- Avoid Foot Traffic: Try to avoid walking on newly cleaned floors until they are completely dry. Walking on damp floors can leave footprints, re-deposit dirt, or even cause slipping hazards.
- Buff for Shine (Hard Surfaces): For hardwood, laminate, or tile, a final buff with a clean, dry microfiber cloth can enhance shine and remove any lingering streaks. This step is especially helpful for achieving that pristine, spotless look.
Protecting Your Deep Cleaned Floors
Once your floors are spotless and dry, consider steps to maintain their cleanliness and extend their life.
- Apply Sealants (Where Applicable):
- Grout Sealant: For tile floors, applying a grout sealant after the deep clean helps protect grout lines. It makes them less porous and more resistant to stains and moisture. Reapply every 1-2 years, depending on traffic.
- Hardwood Polishes/Protectors: Some hardwood cleaners also offer a polishing or protective layer. These can add shine and a thin layer of protection. Ensure they are compatible with your specific wood finish.
- Concrete Sealants: If you have unsealed concrete, consider a sealant to protect against stains and wear. This also makes future cleaning easier.
- Use Floor Protectors: Place felt pads under furniture legs. These prevent scratches and dents on hard surfaces. Heavy furniture can leave permanent marks.
- Entry Mats: Place good quality doormats at all entry points. These trap dirt and moisture before it tracks onto your clean floors. This is a simple but effective way to reduce maintenance.
- No Shoes Policy: Consider asking family and guests to remove shoes indoors. This drastically reduces the amount of dirt, dust, and outdoor contaminants brought onto your floors. This is one of the easiest ways to keep floors cleaner for longer.
These finishing touches and protective measures ensure your hard work lasts. They help your floors stay clean and beautiful between deep cleaning sessions.
Maintaining Floor Cleanliness Between Deep Cleans
Deep cleaning is a big job. You do not want to do it too often. Regular maintenance helps keep your floors looking good. This reduces the need for frequent deep cleaning. I have found a simple routine makes a huge difference.
Daily and Weekly Cleaning Habits
- Sweep or Vacuum Daily (High-Traffic Areas): For areas like entryways, kitchens, and hallways, a quick sweep or vacuum every day or two helps. This removes loose dirt, crumbs, and pet hair before they get ground in. This prevents dirt buildup that would require deep cleaning sooner.
- Spot Clean Spills Immediately: Accidents happen. Wipe up spills as soon as they occur. Use a clean cloth and the appropriate cleaner for the spill. Quick action prevents stains from setting. This is crucial for keeping floors spotless.
- Damp Mop Weekly (Hard Surfaces): For hardwood, laminate, vinyl, and tile, a weekly damp mop session is usually enough. Use a cleaner suitable for your floor type. Remember to wring the mop out very well. This prevents excess moisture on the floor. For wood floors, this regular care helps keep them bright.
- Vacuum Carpets Weekly: Vacuum carpets at least once a week. High-traffic carpeted areas may need more frequent vacuuming. Regular vacuuming removes dust, allergens, and light dirt. This keeps carpet fibers from getting matted.
Dealing with Specific Challenges
Sometimes, regular cleaning is not enough. You might encounter specific issues that need more attention.
- Pet Accidents: For pet owners, accidents are inevitable. Clean pet urine or feces immediately. Use an enzymatic cleaner specifically designed for pet stains and odors. These cleaners break down the organic matter. This removes both the stain and the lingering smell. For hardwood floors, specialized products are key. How to clean dog urine from hardwood floors offers detailed guidance.
- Sticky Residue: Sticky floors can result from spills or improper cleaning products. Use warm water and a small amount of dish soap. A microfiber cloth often works well. For persistent stickiness, a very dilute vinegar solution might help (test first). How to clean sticky floors provides more solutions.
- Scuff Marks: Rubber shoe marks or furniture scuffs can appear on hard floors. Use a pencil eraser or a soft cloth with a small amount of rubbing alcohol to gently buff them out. Test in an inconspicuous area first.
- Construction Dust: If you have had home renovations, fine construction dust can be a challenge. Vacuum first with a HEPA filter. Then damp mop multiple times, rinsing your mop very frequently. Specialty cleaners might be needed for very fine dust.
By adopting these maintenance habits, you can significantly extend the time between deep cleaning sessions. Your floors will consistently look cleaner and fresher. This protects your investment and keeps your home looking its best.
- deep clean floors
- floor cleaning guide
- home cleaning
- floor care tips
- spotless floors
- cleaning techniques
- floor maintenance

Todd Martin
Senior Writer
With over 15 years of experience in home renovation and design, I started HEG to share what I’ve learned with homeowners who want to create spaces that are both beautiful and functional. I’ve always believed in a hands-on approach, and over the years, I’ve picked up practical solutions that actually work. Through HEG, I aim to make home improvement more approachable, sharing real tips that help you create a home you truly love.