· Todd Martin · Cooking · 11 min read
How To Cook An Omelet In An Omelet Pan

Mastering the Omelet: How To Cook An Omelet In An Omelet Pan
Have you ever dreamed of making a fluffy, perfectly cooked omelet at home? Many people believe creating a restaurant-quality omelet is a complex task. I understand this feeling; it seems challenging at first. However, the secret often lies in using the right tool for the job. Mastering how to cook an omelet in an omelet pan transforms the process from intimidating to enjoyable.
An omelet pan is designed specifically for this delicate task. Its unique shape and non-stick surface make a real difference. This article guides you through the entire process. We will cover choosing your pan, preparing ingredients, mastering heat, and folding techniques. You will soon create delicious omelets with confidence. Let’s make your breakfast dreams a reality.
Takeaway:
- Choose the Right Pan: A good non-stick omelet pan is crucial for effortless cooking.
- Proper Egg Preparation: Whisk eggs thoroughly with a touch of liquid for airiness.
- Master Heat Control: Cook on low to medium heat for a slow, even set.
- Use Enough Fat: Butter ensures flavor and prevents sticking.
- Fold with Confidence: Practice the classic three-fold technique for a polished look.
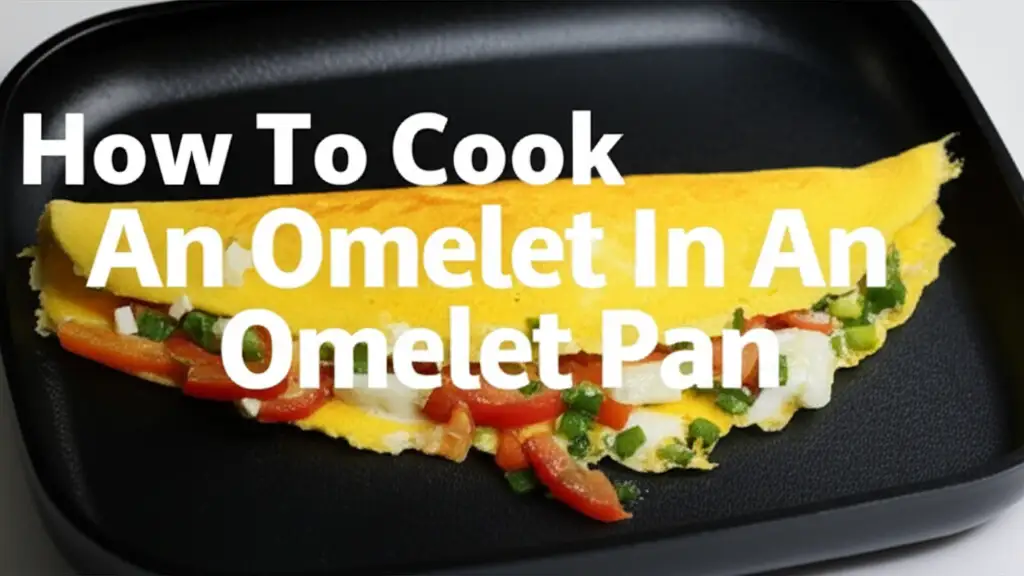
To cook an omelet in an omelet pan, preheat the buttered pan over medium-low heat. Pour whisked eggs into the hot pan, tilting to coat the bottom evenly. Push cooked edges to the center while tilting the pan. Once the top is mostly set but still moist, add fillings and fold the omelet.
The Essential Omelet Pan: Your Key to Success
The right pan makes all the difference when you cook an omelet in an omelet pan. An omelet pan is not just any frying pan. It has specific features that help create perfect omelets. These features include sloped sides and a high-quality non-stick coating. Sloped sides make it easy to slide the omelet out without tearing. The non-stick surface ensures the delicate egg does not stick to the pan. This prevents breakage and makes clean-up simple.
Most omelet pans are made from aluminum or clad stainless steel with a non-stick interior. Aluminum pans heat up quickly and evenly. Clad stainless steel pans offer better heat retention. Regardless of material, a durable non-stick coating is essential. I personally prefer a pan with a comfortable, heat-resistant handle. This allows for easy tilting and manipulation during cooking. Investing in a good omelet pan is worth it. It ensures consistent, perfect results every time you cook an omelet. A well-maintained pan also lasts longer.
Preparing Your Ingredients for an Impeccable Omelet
Successful omelet cooking starts before the pan even touches the stove. Proper ingredient preparation is crucial for a great outcome. For a single omelet, I use two to three large eggs. Fresh eggs always yield the best flavor and texture. Crack your eggs into a medium-sized bowl. Avoid any shell fragments. This step is basic but important.
Next, add a small amount of liquid to the eggs. One tablespoon of milk, cream, or water works well. This liquid helps create a lighter, fluffier omelet. I prefer a splash of water; it makes the omelet tender. Whisk the eggs thoroughly until they are uniformly yellow and slightly frothy. You should see small bubbles on the surface. This incorporates air, which contributes to the omelet’s light texture. Do not over-whisk, as this can break down the egg structure. Season the egg mixture with salt and freshly ground black pepper. Keep your desired fillings ready and close at hand. Chopped cheese, herbs, or pre-cooked vegetables are excellent choices. Having everything prepared ensures a smooth cooking process.
Mastering Heat Control for the Perfect Omelet Texture
Heat control is perhaps the most critical factor in cooking an exceptional omelet. Many people make the mistake of using too high heat. This results in a rubbery or browned omelet. The goal is to cook the omelet slowly and evenly. This creates a tender, moist interior and a delicate, un-browned exterior. I always start with medium-low heat. This allows for gentle cooking.
Place your omelet pan on the burner. Add a knob of butter, about one tablespoon, to the pan. Let the butter melt slowly. It should foam gently but not brown. If the butter browns, your pan is too hot. Remove it from the heat and let it cool slightly. Swirl the melted butter to coat the entire bottom and lower sides of the pan. The butter provides flavor and also helps prevent sticking. When the butter is foamy and smells nutty, the pan is ready. Pour the whisked egg mixture into the center of the pan. The eggs should sizzle gently, not aggressively. Maintaining this consistent, moderate heat is key. It ensures the omelet sets slowly from the bottom up, leaving the top moist and pliable.
The Art of Pouring and Swirling Your Eggs
Once your omelet pan is properly heated and buttered, the pouring and swirling technique comes next. This step ensures an even set and a consistent texture throughout your omelet. Carefully pour the whisked egg mixture into the center of the preheated pan. Do not dump it in too quickly. The eggs should spread out naturally.
As soon as the eggs are in the pan, gently tilt the pan. This allows any unset egg mixture to flow into thin areas. Use a heat-resistant spatula or a fork to gently push the cooked edges of the omelet towards the center. As you push, tilt the pan so that the uncooked egg flows underneath. Repeat this process around the entire circumference of the omelet. This creates soft curds and ensures even cooking. Continue doing this for about 30 seconds to one minute. The goal is to set the bottom of the omelet while leaving the top still moist and slightly runny. This moistness is crucial for a classic, foldable omelet. Avoid stirring vigorously, as this creates scrambled eggs, not an omelet. The surface should still look wet, but the bottom should be firm enough to slide.
Folding Your Omelet: Techniques for a Classic Finish
Folding the omelet is the final, most satisfying step. This is where your omelet transforms from a flat disc into its classic, elegant shape. Once the eggs are mostly set but still moist on top, it is time to add your fillings. Sprinkle your chosen cheese, herbs, or pre-cooked vegetables over one half of the omelet. Place them closer to the handle side. Do not overfill the omelet, as this can make folding difficult.
With a spatula, gently loosen the edge of the omelet opposite the handle. Ensure it moves freely in the pan. Now, use the spatula to fold one-third of the omelet over the fillings. Then, carefully tilt the pan. Slide the omelet onto a plate, allowing the remaining two-thirds to fold over the first fold. This creates a beautiful, neat three-fold presentation. Alternatively, you can simply fold the omelet in half directly in the pan before plating. I often use the fold-and-slide method. It gives a very professional finish. Practice makes perfect with this technique. The goal is a light, tender omelet that holds its shape.
Filling and Serving Your Perfectly Cooked Omelet
Adding the right fillings enhances your omelet’s flavor and appeal. The key is to add them at the right moment. As discussed, sprinkle your chosen fillings onto one half of the omelet when the eggs are mostly set but still slightly moist. This allows the heat from the omelet to warm the fillings. It also helps any cheese melt beautifully inside. Common fillings include shredded cheddar, Swiss, or goat cheese. Fresh herbs like chives, parsley, or dill add brightness. Cooked mushrooms, spinach, bell peppers, or ham are also popular. Ensure any vegetable fillings are pre-cooked and drained of excess moisture. This prevents them from making your omelet watery.
Once your omelet is folded and ready, immediately slide it onto a warm plate. Serving it right away is important. Omelets are best enjoyed fresh from the pan. You can garnish your omelet with extra fresh herbs, a sprinkle of paprika, or a dollop of sour cream. A perfectly cooked omelet in an omelet pan should be tender, moist, and flavorful. It offers a truly satisfying breakfast or brunch. Enjoy your culinary creation.
Cleaning and Maintaining Your Omelet Pan
Proper cleaning and maintenance extend the life of your omelet pan. This ensures it performs beautifully for years. After cooking, let your omelet pan cool down completely. Never plunge a hot non-stick pan into cold water. This can warp the pan and damage the non-stick coating. Once cool, wash the pan with warm, soapy water. Use a soft sponge or cloth. Avoid abrasive scrubbers or harsh detergents. These can scratch the non-stick surface. I always hand wash my omelet pan. It is generally the best approach for preserving the coating.
For stubborn residue, soak the pan for a few minutes before washing. If you ever encounter a burnt spot, gentle soaking often helps. For tips on cleaning particularly tough spots, you might find this guide helpful: How To Clean A Pan That Is Burnt. After washing, dry the pan thoroughly with a soft towel. Store it carefully to prevent scratches. If stacking pans, place a paper towel or cloth between them. Regular, gentle care protects the non-stick surface. This ensures your omelet pan remains your go-to for perfect omelets. Maintaining your pan is as important as learning How To Clean Bottom Of Pan for overall kitchen hygiene. For specific non-stick care, especially if you have a “green pan” type, you might check How To Clean Green Pan.
Frequently Asked Questions About Cooking Omelets
What kind of omelet pan is best for beginners?
For beginners, a non-stick aluminum omelet pan with gently sloped sides is ideal. Aluminum heats quickly and evenly. The non-stick coating makes it easy to slide the omelet out without sticking. Choose a pan size appropriate for one or two eggs, typically 6 to 8 inches. A comfortable, ergonomic handle also helps with control.
How many eggs should I use for a single omelet?
For a single serving omelet, two to three large eggs are typically sufficient. Using two eggs results in a thinner omelet. Three eggs create a thicker, fluffier omelet. Adjust the number based on your hunger and the size of your omelet pan. I usually use two eggs for a quick breakfast.
Can I make an omelet without an omelet pan?
Yes, you can make an omelet in a regular non-stick frying pan. However, a pan with straight sides makes folding more challenging. The sloped sides of an omelet pan help in easy sliding and folding. Ensure your regular frying pan is truly non-stick for best results. Use plenty of butter to prevent sticking.
What are common mistakes to avoid when cooking an omelet?
Common mistakes include using too high heat, over-whisking eggs, and overfilling the omelet. High heat makes the omelet rubbery. Over-whisking can break down the egg structure. Too many fillings make folding difficult. Also, avoid constantly stirring the eggs; let them set gently.
Should I add water or milk to my eggs for an omelet?
Adding a small amount of liquid, like one tablespoon of water, milk, or cream, to your whisked eggs is beneficial. Water creates a lighter, more tender omelet. Milk or cream adds richness. I often use water, finding it gives the perfect delicate texture. Experiment to see what you prefer.
How do I prevent my omelet from sticking to the pan?
To prevent sticking, always use a good quality non-stick omelet pan. Ensure the pan is properly seasoned if it requires it. Use a sufficient amount of fat, like butter, in the hot pan before adding eggs. Melt the butter until it is foamy, coating the entire pan surface. Avoid scratching the non-stick coating.
Your Journey to Omelet Perfection
Learning how to cook an omelet in an omelet pan is a rewarding skill. It transforms a simple dish into a culinary delight. We have covered every essential step today. From selecting the perfect non-stick pan to preparing your eggs and mastering heat control, each element contributes to success. Remember the importance of gentle heat and precise folding. These techniques ensure your omelet is always light, fluffy, and tender.
My own experience shows that practice truly makes perfect. Do not be discouraged if your first omelet is not exactly as pictured. With each attempt, your technique will improve. Soon, you will effortlessly create beautiful, delicious omelets. Embrace the process and enjoy the journey. An omelet pan is more than just kitchenware; it is a tool for culinary artistry. Take pride in your new skill. What delicious fillings will you try first? Your perfect omelet awaits!


