· Todd Martin · Kitchen Appliances · 20 min read
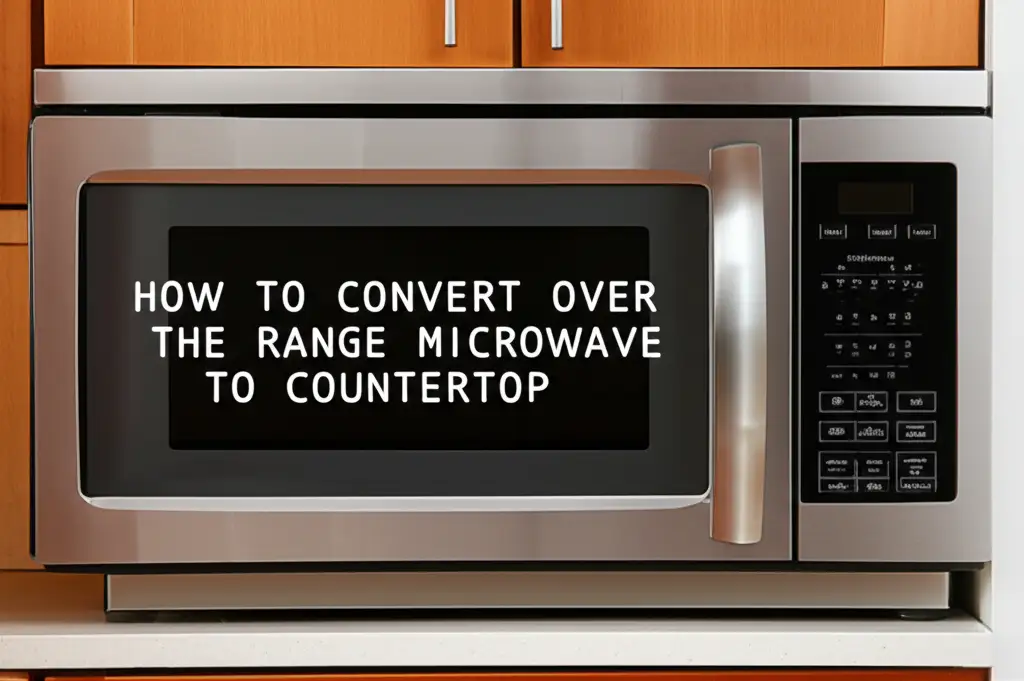
How To Convert Over The Range Microwave To Countertop
Transform Your Kitchen: Convert Over The Range Microwave To Countertop
Have you ever considered moving your over-the-range microwave? Many people find themselves in a situation where their kitchen layout changes, or they simply want to free up space above their stove. Perhaps you plan to install a dedicated range hood. Maybe you just bought a new home with an existing over-the-range (OTR) unit, but you prefer a different setup. I understand this desire for flexibility in kitchen design.
Converting your over-the-range microwave to a countertop model is a common desire for many homeowners. This article will guide you through the process. We will cover the steps involved, safety checks, and important considerations. By the end, you will understand if this project is right for you. We aim to help you make informed decisions about your kitchen appliances.
Takeaway:
- Over-the-range microwaves can often function as countertop units.
- Check the specific model for features like fan operation and feet.
- Prioritize safety by disconnecting power and inspecting the unit.
- Ensure proper ventilation is addressed if removing an OTR microwave.
- Consider dimensions and electrical needs for the new countertop spot.
An over-the-range microwave can often function as a countertop unit. You need to ensure the unit has stable feet and proper air vents. The microwave must be able to stand freely on a flat surface. Some models require minor adjustments to their ventilation or support components for safe use on a counter.
Understanding Your Over-The-Range Microwave’s Design
Before you convert over the range microwave to countertop, you need to understand its design. Over-the-range (OTR) microwaves are different from standard countertop models. They typically come with mounting brackets and a vent system. This system pulls smoke and odors from your stove. Countertop microwaves simply plug in and sit on a flat surface.
Most OTR microwaves have internal fans. These fans can be set up to recirculate air or vent it outside. This feature is important. When you move the microwave, its venting capabilities might change. You also need to look at the bottom of your OTR microwave. Countertop models have small feet for stability and airflow. OTR microwaves often have flat bottoms, designed to sit flush against a cabinet or wall. They may lack proper feet for countertop use. If your microwave does not have feet, it will not sit properly on a counter. Airflow underneath the unit is important for cooling. Without proper feet, the microwave could overheat. You might need to add rubber feet or small risers to allow for air circulation.
Another key difference is the power cord. OTR microwaves are often hardwired or have a shorter cord designed to plug into an outlet above the stove. Countertop placement requires a longer cord or an accessible outlet. You must ensure the electrical setup is safe and convenient for your new spot. Knowing these design elements helps you plan your conversion. This also helps you decide if the conversion is practical for your appliance. Remember, checking your specific microwave’s manual is always a good first step. It provides details on its intended use and features.
Is Converting Your OTR Microwave Feasible?
Many people ask, “Can an over-the-range microwave be installed elsewhere?” The answer is often yes, but with important considerations. Not all over-the-range microwaves are suitable for countertop conversion. The main challenge is typically the bottom structure and ventilation. OTR microwaves are designed to be mounted, not to sit freely. They might not have the stable feet that countertop models do. Without feet, the microwave could block its own air vents, leading to overheating. This is a safety risk.
Another factor is the exhaust fan. OTR microwaves have powerful fans for venting cooking fumes. If your model vents outwards, you will lose that benefit on a countertop. If it recirculates, it might still function, but airflow could be restricted by its new placement. Consider the overall size too. OTR microwaves are often larger than typical countertop models. They can take up significant counter space. Think about where you want to put it. Will it fit without crowding your kitchen? Will it look good?
Before you start, check your microwave’s model number and find its manual online. Some manufacturers explicitly state if a model can be used as a countertop unit. Others may not recommend it. For more insights on general OTR microwave placement, you can read about whether an over-the-range microwave has to be over the range. This can help you decide if an OTR microwave can truly be placed anywhere. It also clarifies if your unit is suitable for a countertop setup.
Essential Tools and Safety Precautions
Before you begin to convert over the range microwave to countertop, gather your tools. Safety must be your top priority. You will need a few basic items for this project.
Here is a list of tools you might need:
- Screwdriver set (Phillips and flathead)
- Adjustable wrench or socket set
- Utility knife or box cutter
- Pliers
- Work gloves
- Safety glasses
- Measuring tape
- Level
- Marker or pencil
Safety Precautions are Critical:
- Disconnect Power: This is the most important step. Before touching any wires or mounting hardware, turn off the circuit breaker that supplies power to the microwave. Do not just unplug it if it is hardwired. Confirm the power is off using a voltage tester if you are unsure.
- Get Help: Microwaves are heavy. Do not try to lift or remove the unit alone. Ask a friend or family member for help. This prevents injury to yourself and damage to the appliance.
- Clear the Area: Make sure your work area is clear of clutter. This prevents trips and falls.
- Wear Protective Gear: Always wear work gloves to protect your hands from sharp edges. Safety glasses will protect your eyes from debris.
- Inspect Wiring: Look for any frayed or damaged wires during the removal process. If you see any, consult a professional electrician. Do not try to convert the microwave if wiring appears damaged.
- Proper Lifting Technique: When moving the microwave, lift with your legs, not your back. Bend at your knees, keep your back straight, and lift slowly.
- Ventilation Awareness: If your OTR microwave was vented to the outside, you will now have an open vent hole. Plan to cover this opening after microwave removal. This prevents pests and drafts.
- Appliance Stability: Once on the countertop, ensure the microwave sits on a stable, level surface. It must not wobble or tip.
Following these safety steps protects you and ensures a smooth conversion process. Always prioritize your well-being over speed.
Step-by-Step Guide to Removing Your OTR Microwave
Removing an over-the-range microwave requires careful steps. This is how to get your unit ready for a new life on the countertop.
- Turn Off Power: First, go to your electrical panel. Locate the circuit breaker for your kitchen microwave and flip it to the “off” position. This stops power to the unit. Double-check that the microwave is off before touching it. Safety comes first.
- Remove Filters and Grille: Open the microwave door. You will usually find grease filters on the underside of the microwave. Remove these filters. They often slide out or unclip. Next, remove the top grille, if present. This grille typically covers the light and fan. It might be held by screws or clips. Removing the grille can give you access to internal components or mounting screws.
- Disconnect the Venting (if applicable): Some OTR microwaves vent outside through the wall or ceiling. If yours does, you will see a vent duct connected to the top or back of the microwave. Carefully disconnect this duct. It might be held by screws or tape. Be gentle not to damage the ductwork. If your microwave only recirculates, there will be no external duct to disconnect.
- Unplug the Power Cord: If your microwave has a plug, unplug it from the outlet inside the cabinet above the microwave. This outlet is usually hidden behind the microwave. If your microwave is hardwired, you will need to disconnect the wiring. This involves removing the junction box cover and unscrewing the wire nuts. If you are not comfortable with electrical work, hire a licensed electrician for this part.
- Locate and Remove Mounting Screws: OTR microwaves are secured by bolts from the cabinet above and screws from the wall bracket. You will usually find two or three large bolts coming down through the bottom of the upper cabinet into the top of the microwave. Use your adjustable wrench or socket set to loosen and remove these bolts.
- Remove Wall Mounting Bracket Screws: With the top bolts removed, the microwave will still be supported by a mounting bracket on the wall. Carefully lift the front of the microwave slightly. Have a helper support the weight of the microwave from underneath. The microwave usually hooks onto this bracket at the back.
- Lift and Remove the Microwave: With a helper, slowly lift the microwave off the wall bracket. Pull it away from the wall. The microwave will be heavy. Be sure to lift together. Once clear of the bracket, lower the microwave carefully to the floor or a sturdy surface.
- Clean Up and Prepare the Space: After the microwave is removed, clean the area. You will likely find grease and dust. Decide what to do with the open wall space. You might want to install a range hood or simply repair the wall and paint. If you’re replacing it with a new appliance, consider reading about how to replace an over-the-range microwave with a vent hood. This can help you utilize the now-empty space effectively.
Preparing Your OTR Microwave for Countertop Use
Once you have removed your over-the-range microwave, you need to prepare it for countertop use. This step ensures it is safe and functions correctly in its new spot. The main focus is stability and proper ventilation.
1. Inspect the Bottom of the Microwave: Look at the underside of your microwave. OTR models often have a flat bottom. This design allows them to sit flush against cabinets or walls. Countertop microwaves have small feet. These feet lift the unit slightly. This gap allows air to circulate underneath the microwave. Proper airflow is crucial for cooling the internal components. Without it, the microwave could overheat during operation.
2. Add Feet for Stability and Airflow (if needed): If your OTR microwave lacks feet, you must add them. You can buy universal rubber feet or use small, sturdy risers.
- Rubber Feet: Look for self-adhesive rubber or silicone feet at a hardware store. Attach four feet, one at each corner of the microwave’s base. Ensure they are evenly spaced.
- Small Risers: Alternatively, you can use small wooden blocks or furniture risers. Make sure they are non-slip and provide a stable base. The goal is to lift the microwave a quarter-inch to a half-inch off the counter. This small gap is enough for air circulation.
3. Check Ventilation Openings: Most OTR microwaves have vents on the top, back, or sides. Ensure these openings are not blocked when the microwave sits on the counter. Do not push the microwave flush against a back wall or side cabinet if it covers a vent. Leave a few inches of space around the unit, especially at the back and sides. This allows the internal fan to pull in cool air and expel hot air efficiently.
4. Consider the Exhaust Fan Direction: Your OTR microwave had an exhaust fan. This fan usually directs air either through a top vent (for outside venting) or out the front (for recirculation). When you use it on a countertop, the fan still operates. If it was set to vent outside, it will now simply blow air upwards. If it was set to recirculate, it will continue to do so, expelling filtered air through the top or front vents. Make sure these air outlets are not obstructed.
5. Electrical Cord Management: OTR microwaves often have shorter power cords. This is because they plug into an outlet directly above them. On a countertop, you will need an accessible outlet nearby. If the cord is too short, do not use an extension cord. Extension cords can be dangerous for high-wattage appliances like microwaves. Instead, have a new outlet installed closer to your desired countertop location. Or, find a different spot for the microwave where the existing cord can reach safely.
By preparing your microwave carefully, you ensure its longevity and safe operation as a countertop unit. For more information on general microwave placement, you might find it helpful to understand if you can use an over-the-range microwave as a countertop unit without specific modifications. This helps clarify if your model is truly adaptable.
Choosing the Perfect Countertop Spot
Finding the right place for your newly converted microwave is essential. Countertop space is valuable in any kitchen. You need to pick a spot that is both functional and safe.
1. Consider Counter Space Availability: Over-the-range microwaves are typically larger than standard countertop models. They take up more room. Measure the dimensions of your microwave (width, depth, height). Then, measure the available space on your kitchen counter. Ensure there is enough room for the microwave without making your kitchen feel crowded. You also need space around the microwave for air circulation. Manufacturers usually recommend several inches of clearance on all sides and the top. This prevents overheating.
2. Electrical Outlet Access: Your microwave needs a dedicated electrical outlet. Microwaves draw a lot of power. They often require their own circuit. Make sure the outlet you plan to use is easily accessible. Do not use extension cords with microwaves. They can overheat and cause fires. If there is no suitable outlet, you may need an electrician to install one. For details on power requirements, you can learn if an over-the-range microwave needs its own circuit. This information applies generally to microwaves due to their power consumption, even when moved.
3. Proximity to Food Prep Areas: Think about how you use your kitchen. Placing the microwave near your main food prep area or refrigerator can be convenient. This allows for easy access when heating food or drinks. However, avoid placing it directly next to the stove or sink if possible. Splashes from cooking or water can damage the unit. Heat from the stove can also affect the microwave’s performance.
4. Ventilation and Heat Dissipation: As mentioned, microwaves generate heat. They need space to dissipate this heat.
- Back and Sides: Leave at least 2-4 inches of space behind and on the sides of the microwave. This allows warm air to escape and cool air to enter.
- Top: Do not place anything on top of the microwave. The top surface often has vents. Blocking these vents can cause the microwave to overheat. It can also damage your microwave or create a fire hazard.
5. Stability of the Surface: The countertop surface must be sturdy and level. A microwave is heavy. An unstable surface could cause the microwave to wobble or even fall. Ensure your chosen counter can support the weight of the microwave. If the surface is uneven, use shims under the microwave’s feet to level it.
By carefully selecting the placement, you ensure your microwave operates safely and efficiently. You also keep your kitchen organized and functional.
Benefits and Drawbacks of Converting
Deciding to convert an over-the-range microwave to a countertop unit has both advantages and disadvantages. It is important to weigh these before you begin the process.
Benefits:
- Increased Kitchen Flexibility: Moving the microwave frees up the space above your stove. This allows you to install a dedicated range hood. A range hood often provides better ventilation than an OTR microwave. This can improve air quality in your kitchen.
- Improved Ergonomics: For some, an OTR microwave is too high. It can be difficult to reach, especially for shorter individuals or children. Placing the microwave on the countertop makes it more accessible. This improves user comfort and safety during use.
- Cost Savings: Converting an existing appliance is much cheaper than buying a new one. A good quality countertop microwave can still be expensive. Reusing your current microwave saves you money.
- Temporary Solution: This conversion can be a temporary fix. Maybe you are renovating your kitchen soon. This allows you to use your existing appliance until you decide on a new kitchen layout or appliance package. You can learn more about alternative placements like installing an over-the-range microwave in a cabinet for future plans.
- Aesthetics: You might prefer the look of a traditional range hood over an OTR microwave. This change can update your kitchen’s visual appeal.
Drawbacks:
- Takes Up Counter Space: This is the most obvious disadvantage. OTR microwaves are generally larger than typical countertop models. They will occupy valuable counter real estate. This can be a significant issue in smaller kitchens.
- Aesthetic Mismatch: OTR microwaves are designed to integrate with cabinetry. Their appearance might not blend well on a countertop. They might look bulky or out of place. Some models have visible mounting holes or unfinished sides.
- Ventilation Compromise: When moved to a countertop, the microwave’s powerful exhaust fan loses its direct connection to the stove area. It will no longer effectively remove cooking fumes from your range. You will need another solution for stove ventilation.
- Stability Issues: As discussed, OTR microwaves often lack proper feet. This means they might not sit stably on a flat surface. You must add feet to ensure proper airflow and prevent wobbling. This adds an extra step to the conversion.
- Electrical Cord Length: OTR microwaves often have short power cords. They are designed to plug into an outlet directly above the unit. On a countertop, this short cord might not reach an available outlet safely. Using an extension cord is not recommended for microwaves.
- Resale Value: While not a direct drawback of the conversion itself, removing an integrated appliance might affect your home’s resale value. Some buyers prefer a complete, built-in kitchen setup.
By understanding these points, you can make an informed decision. Consider your kitchen layout, budget, and priorities before committing to the conversion.
Maintaining Your Converted Countertop Microwave
Once you convert over the range microwave to countertop, proper maintenance is key. This ensures its longevity and safe operation. Just because it is no longer above your stove does not mean you can neglect it.
1. Regular Cleaning: Microwaves get dirty quickly, especially with food splatters. Clean the interior regularly. Use a damp cloth and mild soap or a specialized microwave cleaner. Wipe down the exterior surfaces too. This prevents grease and grime buildup. For general cleaning tips, even for different surfaces, it is good to know how to clean a laminate countertop to ensure your new microwave spot stays pristine.
2. Ensure Proper Airflow: Remember those feet you added? Make sure they are still there and providing adequate space underneath. Periodically check that the microwave’s vents (on the top, back, or sides) are not blocked. Do not push the microwave flush against a wall or other appliances. Leave the recommended clearance around the unit. This allows for proper cooling and prevents overheating.
3. Inspect the Power Cord: Regularly check the power cord for any signs of damage. Look for fraying, cuts, or pinched spots. If you find any damage, replace the cord immediately or have a professional assess it. Never use a damaged power cord. Also, ensure the cord is not kinked or tucked into a tight space that could cause it to overheat.
4. Check for Stability: Occasionally, give the microwave a gentle nudge to ensure it is still stable on the countertop. If it wobbles, check the feet. Adjust them or add shims if needed. A stable microwave prevents accidental tipping.
5. Listen for Unusual Noises: Pay attention to any new or strange noises coming from the microwave during operation. Buzzing, grinding, or loud humming could indicate a problem with the fan or other internal components. If you hear unusual noises, stop using the microwave and consult a service technician.
6. Avoid Overloading: Do not put items too heavy for the turntable. This can strain the motor. Also, do not place oversized dishes that touch the interior walls. This can interfere with proper heating and air circulation.
7. Clean Filters (if applicable): Even on a countertop, some OTR models have removable grease filters. While they won’t catch stove grease, they can still accumulate dust. Check your manual to see if your model has these and how to clean them.
By following these simple maintenance tips, your converted microwave can serve you well for many years. It remains a valuable and functional appliance in your kitchen.
FAQ Section
Can any over-the-range microwave be used on a countertop?
Not every over-the-range microwave is ideal for countertop use. The main issues are usually the lack of stable feet and potential ventilation obstructions. Always check your specific model’s manual. Some units might require adding separate feet to ensure proper airflow underneath.
Do I need to remove the internal fan if I use it on a countertop?
No, you do not need to remove the internal fan. The fan helps cool the microwave’s internal components. It will continue to operate regardless of placement. Ensure the microwave’s vents are not blocked to allow the fan to work effectively.
Will the exhaust fan still work for my stove if I move the microwave to the counter?
No, the exhaust fan will no longer work for your stove. When the microwave moves to the countertop, its direct connection to the stove area is lost. The fan will continue to move air, but it will not capture cooking fumes from your range. You will need a separate range hood for stove ventilation.
What are the power requirements for a converted microwave?
Microwaves, whether over-the-range or countertop, draw significant power. They generally require a dedicated 15-amp or 20-amp circuit. Ensure the outlet you use for your converted microwave is rated for its power consumption. Avoid using extension cords, as they can be a fire hazard.
Is it safe to convert an OTR microwave for countertop use?
It is safe if done correctly. The main safety points are ensuring stable placement with adequate airflow (adding feet if needed) and proper electrical connection. Always disconnect power during removal. Do not use a damaged unit or a damaged power cord.
Will my converted microwave look good on the countertop?
The appearance depends on the specific model. OTR microwaves are designed for a built-in look. They might appear bulky or out of place on a countertop. Some models may have exposed mounting holes or unfinished sides. Consider the aesthetic impact on your kitchen.
Conclusion
Converting your over-the-range microwave to a countertop unit can be a smart move. I hope this guide has given you a clear path forward. It frees up space above your stove. This allows you to install a dedicated range hood. It also makes the microwave more accessible for daily use.
Remember, the process involves careful planning and safety. You must understand your microwave’s design. This includes its feet and ventilation. You need the right tools. You must follow safety precautions during removal. Preparing the microwave for its new spot, like adding feet, is important. Choosing the right countertop location ensures both functionality and safety. Consider space, electrical access, and ventilation. Weigh the benefits against the drawbacks. Converting saves money but uses counter space.
Think about your kitchen’s needs and your budget. This project can give your kitchen a fresh look and better flow. If you decide to move forward, approach the task thoughtfully. Your kitchen will thank you for it. Start your kitchen transformation today.
- over-the-range microwave
- countertop microwave
- microwave conversion
- kitchen appliance tips
- home improvement

Todd Martin
Senior Writer
With over 15 years of experience in home renovation and design, I started HEG to share what I’ve learned with homeowners who want to create spaces that are both beautiful and functional. I’ve always believed in a hands-on approach, and over the years, I’ve picked up practical solutions that actually work. Through HEG, I aim to make home improvement more approachable, sharing real tips that help you create a home you truly love.