· Todd Martin · Home Maintenance · 19 min read
How To Clean Wire Shelves
Tackle Grime: How To Clean Wire Shelves Effectively
Wire shelves are incredibly common. We see them everywhere from our kitchens and pantries to garages and laundry rooms. They offer convenient storage, letting air circulate around items. However, their open design also makes them perfect traps for dust, spills, and sticky residue.
Knowing how to clean wire shelves properly helps maintain a tidy home. Dirty shelves can harbor germs and make your space look unkempt. This guide will walk you through various cleaning methods. We cover everything from routine cleaning to tackling tough rust and persistent sticky spots. Let’s make your wire shelves sparkle again.
Takeaway
To effectively clean wire shelves, follow these key steps:
- Identify the material: Understand what your shelves are made of to choose safe cleaning agents.
- Prepare and clear: Remove all items and wipe loose debris.
- Choose the right cleaner: Use dish soap for light grime, or stronger degreasers/vinegar for tougher messes.
- Scrub and soak: Use brushes or cloths to clean, soaking if necessary for stubborn dirt.
- Rinse and dry: Always rinse thoroughly and dry completely to prevent water spots and rust.
To clean wire shelves, first clear all items and wipe away loose debris. Next, use a solution of warm water and dish soap, scrubbing with a brush or sponge to remove grime. For tough stains or grease, consider a stronger cleaner like vinegar or a degreaser. Finish by rinsing the shelves completely and drying them thoroughly to prevent rust and water spots.
Understanding Your Wire Shelves: Materials and Common Grime
Before you start cleaning, it is helpful to know what type of wire shelves you have. Different materials need different cleaning approaches. Knowing this helps you choose the safest and most effective cleaning products. It also prevents any damage to the shelf surface.
Wire shelves come in various forms, each with unique characteristics. We typically find them in kitchens, pantries, garages, and even closets. Each location can contribute to specific types of grime. A good understanding ensures your cleaning efforts are successful.
Common Wire Shelf Materials
Wire shelves are often made from several common materials. Each material offers different levels of durability and needs specific care. For example, stainless steel is rust-resistant, while chrome can be prone to rusting if not dried properly.
Here are the most common types you might encounter:
- Chrome-plated steel: This is a very popular choice. It has a shiny, metallic finish. Chrome is usually durable but can rust if the plating chips or if it stays wet.
- Stainless steel: These shelves are highly resistant to rust and corrosion. Stainless steel is often used in kitchens and damp environments. It holds up well to strong cleaners.
- Epoxy-coated wire: These shelves have a powder-coated finish over steel. The coating provides color and rust resistance. It is often found in pantries or closets.
- Plastic-coated wire: Similar to epoxy, these shelves have a plastic layer. They are common in refrigerators or laundry rooms. The plastic protects against moisture.
- Galvanized steel: This steel has a zinc coating for rust protection. It is common in garages and outdoor storage areas. It is very strong and durable.
Each material has its pros and cons. Chrome is shiny, but stainless steel resists rust better. Epoxy and plastic coatings add color and protection. Knowing your shelf’s material is the first step to successful cleaning.
Typical Messes on Wire Shelves
Wire shelves collect many types of dirt. The kind of grime often depends on where the shelves are located. A kitchen pantry shelf will likely have food spills. A garage shelf might collect oil and dust.
Here are the common types of messes you will find:
- Dust and dirt: This is the most common type of mess. Dust settles everywhere, including on your shelves. It mixes with everyday dirt, forming a light film.
- Food spills and crumbs: Kitchen and pantry shelves often have dried food. Sugar, flour, and liquid spills can leave sticky residues. These can attract pests if not cleaned promptly.
- Grease and oil: Garage shelves might have oil stains from tools. Kitchen shelves near cooking areas can accumulate a greasy film. This type of grime is usually tough to remove.
- Soap scum and mildew: In bathrooms or laundry rooms, wire shelves can gather soap scum. Constant moisture can also lead to mildew or mold growth. This needs specialized cleaning.
- Rust and corrosion: If shelves are exposed to moisture, they can develop rust. This is especially true for chrome-plated or untreated steel shelves. Rust can be difficult to remove once it sets in.
Understanding the type of mess helps you pick the right cleaning method. A simple wipe works for dust. Stubborn grease or rust needs more aggressive treatment. Assess the grime on your shelves before you begin.
Gathering Your Tools: Essential Cleaning Supplies
Having the right tools makes cleaning wire shelves much easier. You do not need many specialized items. Most supplies are things you probably already have at home. Gather everything before you start. This saves time and ensures you are ready for any type of grime.
The tools you choose will depend on how dirty your shelves are. Basic tools work for light dust. More serious stains require stronger solutions and scrubbing implements. Always prioritize safety when gathering your cleaning arsenal.
Basic Cleaning Arsenal
For everyday cleaning, you only need a few simple items. These supplies are gentle enough for most wire shelf materials. They are also effective for removing dust, crumbs, and fresh spills. Always start with the least abrasive methods first.
Here are the essential items for routine cleaning:
- Microfiber cloths: These cloths are soft and absorbent. They are excellent for wiping down surfaces. Microfiber also picks up dust effectively. You can use them wet or dry.
- Sponges: A soft sponge works well for scrubbing. Look for one with a gentle abrasive side for tougher spots. Avoid overly rough sponges that could scratch some coatings.
- Dish soap: A mild dish soap is a versatile cleaner. It cuts through light grease and grime. Mix a few drops with warm water to create a cleaning solution.
- Warm water: Water is essential for mixing cleaners and rinsing. Use warm water to help dissolve grease and dirt. Keep a bucket or spray bottle handy.
- Bucket or large basin: You will need this for mixing your cleaning solution. It is also useful for rinsing smaller shelves. A sink can also work for larger items.
- Old toothbrush or small brush: The small bristles can reach into tight spots. Wire shelves have many nooks and crannies. A toothbrush helps clean these hard-to-reach areas.
These basic supplies will get your wire shelves clean from everyday dirt. They are safe for most common materials. Always test a small, hidden area first if you are unsure about a new cleaner on a particular shelf material.
Specialized Solutions for Stubborn Grime
Sometimes, basic cleaning is not enough. Stubborn grime, heavy grease, or rust needs more powerful solutions. These specialized cleaners tackle tough challenges. They help restore your wire shelves to their original condition.
Always use these stronger cleaners with caution. Wear gloves and ensure good ventilation. Read product labels for specific instructions.
Here are some specialized solutions for tougher cleaning jobs:
- White vinegar: This is a fantastic natural cleaner. Vinegar cuts through grease and dissolves mineral deposits. Mix it with water for general cleaning. Use it undiluted for stubborn spots. It also helps remove mild rust and mildew. You can learn more about using vinegar to clean various surfaces, including for cleaning shower with vinegar or cleaning mold with vinegar.
- Baking soda: Baking soda is a gentle abrasive and odor absorber. Make a paste with water to scrub sticky residues. It is also useful for light rust stains. Sprinkle it on a damp sponge for extra scrubbing power.
- Degreaser spray: For heavy grease buildup, a commercial degreaser is effective. These products are formulated to break down oil and fat. They are especially useful for kitchen or garage wire shelves. For specific advice on tough grease, check out how to clean greasy wire racks.
- Steel wool (fine grade) or brass brush: Use these with extreme caution. They can remove rust or very tough grime. Only use them on stainless steel or galvanized shelves. Avoid them on chrome, plastic-coated, or epoxy shelves. These materials can scratch easily.
- Rust remover gel/spray: For extensive rust, a dedicated rust remover product works best. These products contain acids that dissolve rust. Follow the manufacturer’s instructions carefully. Ensure proper ventilation.
- Enzyme cleaner: For organic stains or smells (like in a fridge), an enzyme cleaner can break down proteins and fats. It eliminates odors at their source. This is a good option for deep cleaning.
- Rubbing alcohol: Alcohol can remove sticky residues, ink, or marker stains. It evaporates quickly. Use it on a cloth to target specific spots.
Choose your specialized solution based on the specific problem. Always test it on an inconspicuous area first. This prevents damage to your wire shelves.
Step-by-Step Guide: Basic Cleaning for Everyday Grime
Routine cleaning keeps your wire shelves looking good. It also prevents dirt from building up into major problems. This basic method is for light dust, crumbs, and fresh, non-greasy spills. I recommend doing this regularly.
This simple process is quick and effective. It extends the life of your shelves. You will find that keeping them tidy makes your whole space feel cleaner.
Preparation is Key
Before you start cleaning, prepare the area. This makes the cleaning process more efficient. It also protects your items from water or cleaning solutions. I always start by taking everything off the shelves.
Follow these steps for proper preparation:
- Remove all items: Take everything off your wire shelves. This gives you full access to the surface. It also prevents your stored items from getting wet or dirty.
- Shake off loose debris: Take the removed shelves outside if possible. Gently tap or shake them to remove loose crumbs and dust. This reduces the amount of dirt you need to wash away.
- Wipe down surrounding areas: Before you put anything back, wipe the area around the shelves. Dust from the shelves might have fallen onto nearby surfaces. A quick wipe ensures a truly clean space.
Proper preparation saves time in the long run. It also gives you a clear workspace.
Gentle Scrubbing Techniques
Once prepared, it is time to clean. A gentle approach is usually best for most wire shelves. This prevents damage to coatings or finishes. I find a simple soapy water solution works wonders for everyday dirt.
Here is how to scrub your wire shelves effectively:
- Prepare your cleaning solution: Mix a few drops of mild dish soap into a bucket of warm water. The water should be warm, not hot. This helps activate the soap.
- Dip and scrub: Dip a microfiber cloth or soft sponge into the soapy water. Wring out excess water so it is damp, not dripping. Gently scrub the entire surface of the wire shelf.
- Focus on crevices: Wire shelves have many small gaps. Use an old toothbrush or a small utility brush. This helps you reach into these tight spaces. Pay attention to corners and where wires intersect.
- Re-dip as needed: As your cloth or sponge gets dirty, rinse it in the soapy water. Re-dip and continue scrubbing. Change the water if it becomes too dirty.
This method effectively removes most common dirt. It is safe for all wire shelf materials. Remember to be thorough, especially in the tricky spots.
Rinsing and Drying Properly
Rinsing and drying are critical steps. They remove soap residue and prevent water spots. Proper drying is especially important for metal shelves to avoid rust. I never skip this part.
Follow these steps for effective rinsing and drying:
- Rinse thoroughly: You can rinse smaller shelves under a faucet. For larger shelves, use a clean, damp cloth. Wipe down all surfaces to remove soap residue. Make sure no soap film remains.
- Inspect for cleanliness: Look closely at the shelves. Check for any remaining dirt or soap. If you see any, repeat the scrubbing and rinsing steps.
- Dry immediately and completely: This is vital, especially for chrome-plated or untreated metal shelves. Use a clean, dry microfiber cloth to wipe down every part of the shelf. Ensure there is no standing water.
- Air dry if possible: If space allows, let the shelves air dry for a short period. Place them in a well-ventilated area. This helps evaporate any lingering moisture.
- Avoid air drying only: Do not rely solely on air drying. Water can sit in crevices and lead to rust or mineral deposits. Always wipe them dry first.
Completing these steps ensures your wire shelves are clean and protected. They will look great and be ready for use again.
Deep Cleaning Wire Shelves: Tackling Stubborn Residue and Grease
Sometimes, everyday cleaning is not enough. Wire shelves can accumulate tough grime over time. This includes sticky residues, heavy grease, and baked-on spills. These require a more intense approach. I often encounter these types of challenges in kitchens or garages.
Deep cleaning brings your shelves back to pristine condition. It ensures they are hygienic and truly clean. This section focuses on powerful methods for persistent dirt.
Degreasing Solutions
Grease is one of the toughest types of grime. It sticks to surfaces and attracts dust. Kitchen wire shelves, especially oven racks or those near the stove, often get very greasy. I have found specialized solutions work best for this. For general grease stains, you can also consult tips on how to clean grease stains.
Here are effective degreasing methods:
- Hot water and dish soap soak: For moderately greasy shelves, a long soak helps. Fill a tub or utility sink with very hot water. Add a generous amount of dish soap. Submerge the wire shelves and let them soak for at least an hour, or even overnight. The hot water and soap work to loosen the grease.
- Commercial degreaser spray: For heavy grease, a strong commercial degreaser is very effective. Spray the degreaser liberally onto the greasy areas. Let it sit for the time recommended on the product label. This allows the chemicals to break down the grease.
- Baking soda paste: Make a paste with baking soda and a little water. Apply this paste directly onto greasy spots. Let it sit for 15-20 minutes. Baking soda is a mild abrasive that helps lift grease.
- White vinegar solution: Vinegar is acidic and can cut through grease. Mix equal parts white vinegar and hot water in a spray bottle. Spray the solution onto the greasy shelves. Let it sit for about 10-15 minutes before scrubbing.
- Scrub with a stiff brush: After soaking or applying a degreaser, use a stiff nylon brush. Scrub the greasy areas with firm pressure. The bristles help dislodge the loosened grease. For extremely stubborn cases, consider how to clean greasy wire racks for more specific guidance.
Always rinse degreased shelves thoroughly. Any residue left behind can attract more dirt.
Tackling Sticky Spills
Sticky spills, like dried syrup or soda, are common on pantry or refrigerator shelves. They can be very stubborn once dry. These spills often need specific treatment to dissolve the sugar or other sticky components.
Here are ways to remove sticky residues:
- Hot, soapy water soak: As with grease, soaking is very effective. Fill a basin with hot, soapy water. Submerge the sticky wire shelves. Let them soak for 30 minutes to an hour. The hot water helps dissolve the sticky substances.
- Rubbing alcohol: For non-food sticky residues (like glue or tape residue), rubbing alcohol works well. Apply a small amount to a clean cloth. Rub the sticky spot directly. Alcohol evaporates quickly and dissolves many adhesives.
- Oil-based removers: For very gummy residues, a small amount of cooking oil or a commercial sticky residue remover can work. Apply a dab to the sticky spot. Let it sit for a few minutes to break down the stickiness. Then wipe it away with a clean cloth.
- Scraping carefully: For very thick, dried spills, you might need a plastic scraper. Be careful not to scratch coated shelves. Gently scrape away the bulk of the residue after softening it with heat or a cleaner.
- Vinegar and baking soda combination: For sticky food spills, sprinkle baking soda directly onto the spill. Then spray it with white vinegar. This creates a fizzing reaction that helps lift the grime. Let it bubble for a few minutes before scrubbing.
Always rinse and dry the shelves well after removing sticky residues. This prevents a new layer of grime from forming.
Soaking for Best Results
Soaking is often the most effective method for deep cleaning wire shelves. It allows cleaning solutions to penetrate and loosen stubborn dirt. I use this method whenever shelves are heavily soiled. It saves a lot of scrubbing effort.
Here is how to properly soak your wire shelves:
- Choose a suitable container: You need a container large enough to fully submerge the shelves. A bathtub, large utility sink, or a sturdy plastic storage bin works well.
- Use hot water: Fill the container with the hottest water your tap can provide. Hot water helps dissolve grease and loosen dried-on food.
- Add cleaning agent:
- For general deep cleaning: Add a generous amount of dish soap.
- For greasy shelves: Add dish soap and a cup or two of white vinegar.
- For very stubborn grime: Add a cup of baking soda along with the dish soap.
- For oven racks or extremely tough baked-on messes, you can use a stronger oven cleaner (check compatibility with shelf material first).
- Submerge the shelves: Carefully place the wire shelves into the solution. Ensure they are fully immersed. You might need to weigh them down with something heavy if they float.
- Soak duration: Let the shelves soak for at least 30 minutes to several hours. For extremely dirty or greasy shelves, an overnight soak can be highly effective. The longer they soak, the less scrubbing you will need to do.
- Scrub and rinse: After soaking, remove the shelves. Use a stiff brush or sponge to easily scrub away the loosened grime. Rinse thoroughly with clean water.
- Dry completely: Dry the shelves immediately with a clean cloth. This prevents water spots and rust.
Soaking is a passive yet powerful cleaning technique. It often simplifies the entire deep cleaning process.
Removing Rust and Mold from Wire Shelves
Rust and mold are common problems, especially on wire shelves in damp environments. These issues require specific treatments. Rust compromises the integrity of metal shelves. Mold poses a health risk. I tackle these problems as soon as I spot them.
Addressing rust and mold promptly prevents them from spreading. It also extends the life of your wire shelves. Always wear gloves and ensure good ventilation when dealing with these issues.
Rust Removal Methods
Rust forms when iron in steel reacts with oxygen and water. It appears as reddish-brown flakes or spots. While stainless steel is very resistant, even it can show rust if exposed to harsh conditions or improper cleaning. For more general advice on cleaning stainless steel, you can refer to how to clean stainless steel.
Here are effective methods for removing rust from wire shelves:
- Vinegar soak: White vinegar is a mild acid that dissolves rust. Submerge small rusty shelves in undiluted white vinegar for several hours or overnight. For larger shelves, soak towels in vinegar and drape them over the rusty areas.
- Baking soda paste: Mix baking soda with a little water to form a thick paste. Apply the paste generously to the rusty spots. Let it sit for at least an hour. The baking soda is a gentle abrasive that helps lift the rust.
- Lemon juice and salt: The acid in lemon juice combined with the abrasive nature of salt can tackle rust. Sprinkle salt on the rusty area. Squeeze lemon juice over the salt. Let it sit for a few hours before scrubbing with a brush.
- Steel wool (fine grade) or brass brush: For stubborn rust on robust materials like stainless steel or galvanized steel, a fine-grade steel wool pad or a brass brush can mechanically remove rust. Rub gently in the direction of the grain. Never use these on chrome, painted, or plastic-coated shelves, as they will scratch the finish.
- Commercial rust remover: For heavy rust, a dedicated rust remover product is often the most effective. These products contain stronger acids. Always follow the manufacturer’s instructions carefully. Wear protective gloves and eye protection. Ensure the area is well-ventilated.
- After rust removal: Once the rust is gone, clean the shelf thoroughly with soap and water. Dry it immediately and completely. Consider applying a rust-inhibiting paint or clear coat to prevent future rust on non-food-contact shelves.
Act quickly when you see rust. Early intervention makes removal much easier.
Eradicating Mold and Mildew
Mold and mildew thrive in damp, dark environments. Wire shelves in bathrooms, basements, or even damp pantries can become moldy. Mold often appears as black, green, or white fuzzy spots. It can cause odors and affect air quality.
Here is how to effectively remove mold and mildew:
- Ventilate the area: Open windows and doors before you start. Proper ventilation is important to disperse mold spores and cleaning fumes.
- Protective gear: Wear gloves, a mask, and eye protection. This protects you from mold spores and cleaning solutions.
- Vinegar solution: White vinegar is a powerful natural mold killer. Fill a spray bottle with undiluted white vinegar. Spray the moldy areas thoroughly. Let the vinegar sit for at least an hour to penetrate and kill the mold. For more information on how to clean mold with vinegar, you can read specific guides.
- Hydrogen peroxide: A 3% hydrogen peroxide solution also kills mold. Spray it directly onto the moldy spots. Let it sit for 10-15 minutes before scrubbing. Hydrogen peroxide is also good for bleaching light stains.
- Baking soda and dish soap: For milder mold, make a paste of baking soda, dish soap, and a little water. Apply it to the mold. Scrub with a brush. This physically removes the mold and absorbs odors.
- Scrubbing: After applying your chosen solution, use a stiff brush or an old toothbrush. Scrub the moldy areas vigorously. Make sure to get into all the crevices of the wire shelf.
- Rinse thoroughly: Rinse the shelves with clean water to remove all mold and cleaning residue.
- Dry completely: Dry the shelves immediately and completely. Mold needs moisture to grow. Ensuring the shelves are dry helps prevent its return.
- Preventative measures: After cleaning, address the source of moisture. Improve ventilation in the area. Consider using a dehumidifier if humidity is high.
Removing mold is crucial for a healthy home. Regular checks in damp areas can prevent large outbreaks.
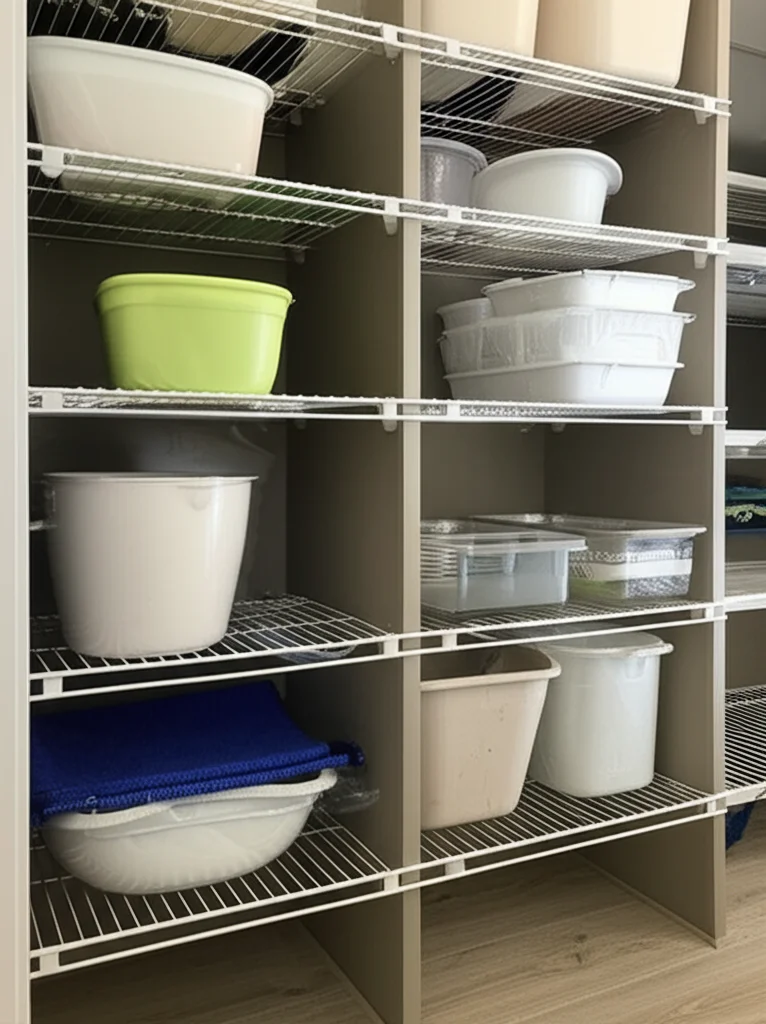
Cleaning Wire Shelves in Specific Locations (Fridge, Pantry, Garage)
Wire shelves are not just one-size-fits-all. Their location dictates the types of messes they gather. It also influences the best cleaning strategy. A shelf in your refrigerator will have different cleaning needs than one in a dusty garage. I always tailor my approach to
- Wire Shelf Cleaning
- Deep Cleaning
- Rust Removal
- Kitchen Organization
- Home Care
- Greasy Shelves

Todd Martin
Senior Writer
With over 15 years of experience in home renovation and design, I started HEG to share what I’ve learned with homeowners who want to create spaces that are both beautiful and functional. I’ve always believed in a hands-on approach, and over the years, I’ve picked up practical solutions that actually work. Through HEG, I aim to make home improvement more approachable, sharing real tips that help you create a home you truly love.