· Todd Martin · Home Cleaning · 22 min read
How To Clean Vases
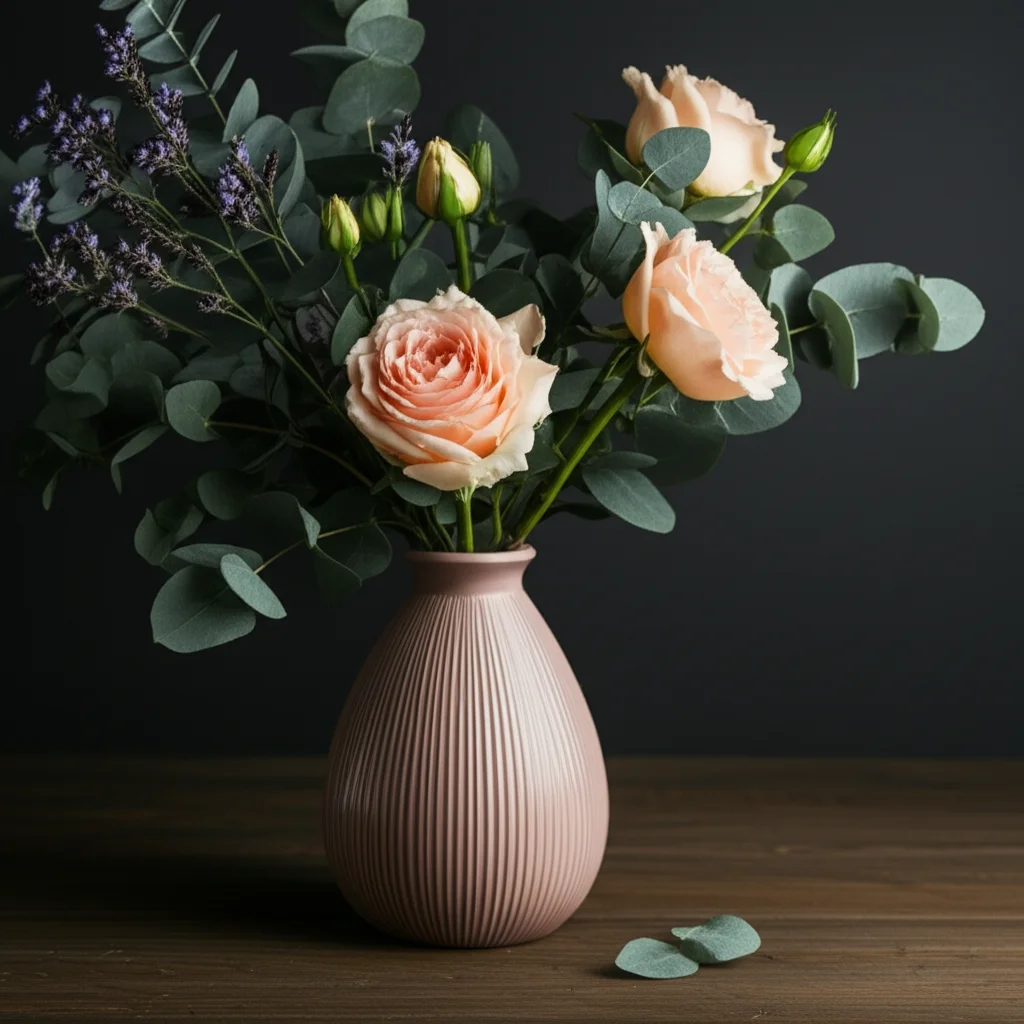
How To Clean Vases for Lasting Beauty and Fresh Blooms
There is a simple truth about vases: they look stunning with fresh flowers. However, a dirty vase can quickly ruin that beauty. You might notice cloudy film, unsightly rings, or even green slime. These issues come from hard water deposits, floral debris, and bacterial growth. Learning how to clean vases properly is key to maintaining their sparkle. It also helps your fresh cut flowers last longer.
This guide explores various techniques for cleaning vases of different materials and shapes. We will discuss essential tools and supplies. We will also cover specific methods for tackling common problems like mineral buildup and algae. By the end, you will know exactly how to restore your vases to their original glory. You will be able to enjoy beautiful, clean displays for years.
Takeaway
Keeping your vases clean is simple when you know the right steps.
- Always rinse vases immediately after use to prevent buildup.
- Use warm water, dish soap, and a brush for general cleaning.
- Combat hard water stains and cloudy film with vinegar or baking soda.
- Address stubborn algae or mold with stronger solutions like bleach, used carefully.
- Dry vases thoroughly to prevent water spots and odor.
Clear Answer to the Main Query
To effectively clean vases, start by rinsing out loose debris with warm water. For general cleaning, use dish soap and a bottle brush. For hard water stains or cloudy film, fill the vase with equal parts white vinegar and warm water, letting it soak. Add rice or crushed ice with salt for scrubbing narrow necks. Rinse well and dry.
Understanding Vase Cleaning: Why It Matters
Vases are more than just containers for flowers; they are decorative pieces. They add elegance to your home. Over time, however, they can accumulate a variety of unsightly residues. These residues impact both the look of your vase and the health of your flowers. Dirty vases shorten the lifespan of your cut flowers significantly.
The primary culprits behind dirty vases are hard water, bacteria, and algae. Hard water leaves mineral deposits, causing a cloudy film. This film is often white or off-white. Bacteria thrive on decaying plant matter and old water. This leads to foul odors and slimy residues. Algae, appearing as green or brown slime, grows in stagnant water exposed to light. These substances not only make your vase look unappealing but also create an unhealthy environment for your flowers. Clean water and clean surfaces are vital for blooms to absorb nutrients effectively. A dirty vase can also clog the stems of your flowers, stopping water uptake. I always make sure my vases are spotless before arranging new flowers. This simple step makes a big difference in how long my flowers last.
Essential Tools and Cleaning Supplies for Vases
Having the right tools and supplies makes vase cleaning much easier. You do not need a lot of specialized equipment. Most items are likely already in your home. Collecting them before you start saves time and effort. I always keep these items handy for my regular cleaning routine.
Here are the basic tools and supplies you will need:
- Warm Water: Always use warm water. It helps dissolve residues and allows cleaning agents to work better.
- Dish Soap: A gentle liquid dish soap is excellent for everyday grime. It cuts through oils and organic matter.
- Bottle Brush or Vase Brush: These brushes have long handles and soft bristles. They are perfect for reaching the bottom and sides of tall or narrow vases. Different brush sizes can be useful for various vase openings.
- White Vinegar: This is a versatile cleaning agent. Vinegar is excellent for dissolving hard water stains and mineral deposits. It is also a natural disinfectant. You can learn more about how vinegar cleans glass in our guide on how to clean glass with vinegar.
- Baking Soda: Baking soda is a mild abrasive and deodorizer. It helps scrub away film without scratching delicate surfaces.
- Uncooked Rice or Crushed Ice: These act as small scrubbing agents. They reach areas a brush cannot, especially in vases with narrow openings.
- Salt (Coarse or Epsom): Salt, when combined with rice or ice, adds extra scrubbing power.
- Bleach (Optional): For severe mold or mildew, a very diluted bleach solution can be effective. Use it with caution. For more tips on dealing with mold, check out how to clean mold with vinegar for a natural approach.
- Microfiber Cloths or Lint-Free Towels: These are best for drying and polishing your vases. They prevent water spots and streaks.
Gathering these items before you begin ensures a smooth and effective cleaning process. This preparation is a small step. It makes a big difference in achieving sparkling results.
Cleaning Glass Vases: Common Stains and Solutions
Glass vases are popular because they show off flower stems beautifully. However, they are also prone to showing every smudge and stain. The most common issues are cloudy film from hard water and green or brown algae. These stains can make a clear glass vase look dirty and unappealing. Luckily, glass is durable enough to handle various cleaning methods. I have found specific techniques work best for different types of stains on glass. You can find even more specialized information on how to clean glass vases for a deeper dive.
Tackling Hard Water Stains and Cloudy Film
Hard water stains are the most frequent problem for glass vases. They appear as a white, cloudy, or chalky film on the inside. This film is made of mineral deposits, like calcium and magnesium.
Vinegar Soak Method: This is my go-to solution.
- Pour equal parts white vinegar and warm water into the vase. Make sure the solution covers all the stained areas.
- Let the vase soak for at least a few hours, or even overnight for stubborn stains. The acid in the vinegar dissolves the mineral deposits.
- After soaking, scrub the inside with a bottle brush. If the neck is narrow, add a handful of uncooked rice or crushed ice with a tablespoon of coarse salt. Swirl this mixture vigorously. The rice/ice acts as an abrasive, scrubbing the internal surfaces.
- Rinse the vase thoroughly with clean water.
- Dry it completely with a lint-free cloth to prevent new water spots.
Baking Soda Paste: For particularly thick mineral buildup, a baking soda paste can help.
- Mix baking soda with a little water to form a thick paste.
- Apply the paste to the stained areas inside the vase. Use your brush to spread it.
- Let it sit for about 15-30 minutes.
- Scrub with your bottle brush. The abrasive nature of baking soda helps lift the film.
- Rinse well.
Removing Green Algae and Slimy Residue
Algae and slime often appear in vases that hold water for extended periods, especially in sunny spots. These look unpleasant and can carry bacteria.
Dish Soap and Hot Water: For light algae, simple soap and hot water can work.
- Add a few drops of dish soap and very hot water to the vase.
- Use a bottle brush to scrub vigorously.
- Rinse thoroughly.
Vinegar and Salt Scrub: For more persistent algae, combine the power of vinegar with an abrasive.
- Pour about a quarter cup of white vinegar into the vase.
- Add a handful of coarse salt.
- Swirl the mixture around, letting the salt scrub the algae away. For narrow vases, add rice for extra abrasion.
- Rinse the vase completely.
Bleach Solution (Use with Caution): If algae or mold is very heavy, a diluted bleach solution can be used. I recommend this only as a last resort due to bleach’s potency.
- Mix one teaspoon of bleach with one gallon of water.
- Pour the solution into the vase.
- Let it sit for about 15-30 minutes. Do not leave it longer.
- Pour out the bleach solution.
- Rinse the vase multiple times with clean water. Make sure no bleach residue remains.
- Wash again with dish soap and warm water to remove any bleach smell. Ensure proper ventilation when using bleach.
Regular cleaning prevents these stains from becoming severe. It makes maintenance much easier.
Cleaning Ceramic and Porcelain Vases: Gentle Care
Ceramic and porcelain vases offer unique textures and colors. They are less transparent than glass, so internal stains might not be as obvious. However, they can still accumulate hard water deposits, algae, and odors. These materials are generally durable, but their glazed surfaces can be scratched. You must use gentle cleaning methods to avoid damaging the finish. I always approach cleaning these vases with extra care.
General Cleaning and Odor Removal
For everyday cleaning and to remove light buildup or unpleasant odors, a simple wash is often sufficient.
- Rinse Thoroughly: Start by rinsing the vase with warm water to remove any loose debris.
- Soak with Dish Soap: Fill the vase with warm water and a few drops of mild dish soap. Let it sit for 15-30 minutes. This helps loosen grime.
- Gentle Scrubbing: Use a soft-bristled bottle brush or a non-abrasive sponge to gently scrub the inside of the vase. Avoid using anything metallic or overly stiff. These can scratch the glaze.
- Rinse and Dry: Rinse the vase thoroughly with clean water. Ensure all soap residue is gone. Dry it with a soft cloth to prevent water spots.
Addressing Stubborn Stains on Glazed Surfaces
Even though ceramic and porcelain hide stains better, hard water and mineral deposits can still cling to their internal surfaces. If a simple soap wash does not work, it is time for a stronger, yet still gentle, approach.
Vinegar Soak for Mineral Deposits: White vinegar is effective on mineral stains without harming the glaze.
- Fill the vase with a solution of equal parts white vinegar and warm water.
- Let the vase soak for several hours, or even overnight for stubborn stains. The vinegar will break down the mineral bonds.
- After soaking, use a soft brush or sponge to gently scrub the affected areas. The deposits should now be much easier to remove.
- Rinse the vase completely with clean water.
Baking Soda Paste for Light Stains: For light discolored areas or slight roughness from minerals, baking soda offers a gentle abrasive action.
- Mix baking soda with a small amount of water to create a paste.
- Apply the paste to the stained spots inside the vase with a soft cloth or sponge.
- Gently rub the paste in small circular motions.
- Rinse the vase well to remove all baking soda residue.
Special Considerations for Unfinished or Textured Ceramics
Some ceramic vases have unglazed sections or highly textured surfaces. These areas are more porous. They can absorb stains more deeply. Cleaning such vases requires even more caution.
- Avoid Harsh Chemicals: Bleach or strong acidic cleaners can discolor or damage unglazed ceramics. Stick to very mild solutions.
- Spot Clean: For small stains on porous areas, try a diluted solution of dish soap and water. Apply it with a soft brush. Gently scrub the spot. Rinse immediately and dry thoroughly.
- Test in an Inconspicuous Area: Always test any new cleaning solution on a small, hidden part of the vase first. This ensures it does not cause damage or discoloration.
By treating your ceramic and porcelain vases with care, you can keep them looking beautiful and functional for many years.
Tackling Stubborn Stains in Vases: Limescale and Mineral Deposits
Stubborn stains like limescale and mineral deposits are common enemies of a sparkling vase. These chalky white or reddish-brown residues cling tightly to surfaces. They often appear around the waterline. They are particularly difficult to remove with just soap and water. These stains are caused by minerals present in hard water. When water evaporates, it leaves these minerals behind. Over time, these layers build up, creating an unsightly film. My experience has taught me that patience and the right acidic cleaner are key to conquering these persistent marks.
The Power of Vinegar and Lemon Juice
Both white vinegar and lemon juice are natural acids. They work wonders on mineral deposits. They react with the alkaline mineral buildup, effectively dissolving it.
Vinegar Soak: This is the most effective method for overall film.
- Fill the vase with undiluted white vinegar, or a 50/50 mix of vinegar and very warm water. Ensure the solution covers all the stained areas.
- Let it soak. For light buildup, a few hours may be enough. For heavy limescale, leave it overnight, or even for 24 hours. The longer the soak, the more time the acid has to break down the minerals.
- After soaking, pour out the vinegar. Use a bottle brush or a scrub sponge to gently scrub the remaining film. You should find it much easier to remove.
- Rinse the vase thoroughly with clean water.
Lemon Juice Method: Lemon juice is a good alternative if you prefer a citrus scent. It is less potent than white vinegar but still acidic.
- Squeeze fresh lemon juice directly onto the stained areas. For a full vase, fill it with lemon juice.
- Let it sit for several hours.
- Scrub with a brush and rinse. This method also leaves a fresh smell.
Using Baking Soda and Salt for Extra Scrubbing Power
While vinegar dissolves minerals, sometimes a little mechanical action is needed. Baking soda and salt provide a gentle abrasive. They can help dislodge stubborn bits of film after the acid has softened them.
Baking Soda Scrub:
- After a vinegar soak, sprinkle baking soda directly onto the remaining wet stains inside the vase.
- Use a damp bottle brush or a non-abrasive sponge to scrub. The baking soda acts as a mild abrasive, lifting the softened deposits.
- Rinse well.
Salt and Ice/Rice Method (for narrow necks): This method combines abrasion with the benefits of a cleaning solution.
- Pour a handful of coarse salt (like Epsom salt or rock salt) into the vase.
- Add a handful of uncooked rice or a few ice cubes.
- Add about half a cup of white vinegar or lemon juice.
- Cover the opening and shake the vase vigorously. The salt/rice/ice tumbles inside, scrubbing the surfaces. The acid continues to dissolve deposits.
- Continue shaking for several minutes, or until the stains appear to loosen.
- Pour out the mixture and rinse the vase thoroughly. You can repeat this process if necessary. This method is particularly useful for those hard-to-reach areas.
Remember to always rinse your vase thoroughly after using any of these methods. This removes all cleaning residues. A clean vase not only looks better but also keeps your flowers fresher longer.
Cleaning Oddly Shaped Vases and Narrow Necks
Some vases have beautiful, intricate designs, but their unique shapes can make cleaning a real challenge. Narrow necks, unusual curves, or deep bottoms can be impossible to reach with a standard brush. This often leads to frustratingly persistent stains. I have faced this challenge many times. I have found creative solutions that get into every nook and cranny. You need to think outside the box when conventional tools do not fit.
Innovative Scrubbing Techniques
When your hand or brush cannot reach, you need something that can move freely inside the vase. This is where a combination of abrasives and cleaning solutions works wonders.
Rice and Soap/Vinegar: This is my absolute favorite method for narrow-necked vases.
- Pour about a quarter cup of uncooked rice (any type will do) into the vase. The rice acts as a tiny, gentle scrubber.
- Add a few drops of dish soap or about half a cup of white vinegar. The soap helps cut grease; vinegar tackles hard water.
- Fill the vase about a third of the way with warm water.
- Cover the opening tightly with your hand. Shake the vase vigorously. Swirl the mixture around. The rice tumbles against the interior surfaces, scrubbing away grime and deposits.
- Continue shaking for several minutes. Observe the inside of the vase.
- Pour out the dirty water and rice. Rinse the vase thoroughly with clean water. Repeat if necessary.
Crushed Ice and Salt: Similar to rice, crushed ice combined with salt provides excellent scrubbing power.
- Add a handful of crushed ice (or a few whole ice cubes if the opening allows) into the vase.
- Pour in a tablespoon or two of coarse salt (Epsom salt or rock salt works well).
- Add a splash of water, dish soap, or vinegar.
- Cover the opening and shake vigorously. The ice and salt scour the inside of the vase, cleaning hard-to-reach areas.
- Once the ice melts and the vase is clean, rinse well.
Flexible Tools and Specialized Cleaners
Sometimes, a tool is still necessary to guide the cleaning process.
- Flexible Bottle Brushes: Invest in a set of flexible bottle brushes. Some have bendable wire handles. Others have very thin designs. They can navigate curves and reach deep into unusual shapes. Look for brushes specifically designed for carafes or decanters; they are often perfect for vases.
- Magnetic Cleaners: For delicate glass or very specific spots, a magnetic cleaner can be a lifesaver. This tool consists of two parts: a scrubber pad and a magnetic handle. You place the pad inside the vase and use the outside magnet to guide it. This allows you to scrub precise areas without putting your hand inside. These are great for vases that cannot be shaken.
- Effervescent Tablets: For minimal effort, you can use denture cleaning tablets or specialized vase cleaning tablets.
- Fill the vase with warm water.
- Drop in one or two tablets. They will fizz, releasing cleaning agents that break down stains and odors.
- Let them work for several hours or overnight.
- Rinse the vase thoroughly. This is a passive cleaning method and works best for lighter stains.
With these creative approaches, no vase is too challenging to clean. I have seen remarkable transformations in vases that seemed impossible to clean before trying these methods.
Preventive Measures: Keeping Your Vases Clean Longer
Cleaning a dirty vase is one thing, but preventing them from getting dirty in the first place is even better. Implementing a few simple habits can significantly reduce the need for deep cleaning. This saves you time and effort in the long run. Good preventive care also ensures your vases are always ready for your next floral arrangement. I have found that a little foresight makes a huge difference in vase maintenance.
Immediate Rinse After Use
The single most effective preventive measure is to rinse your vase immediately after you remove the flowers and dispose of the old water. Do not let old water sit and dry in the vase. This is where most stains begin.
- Empty and Rinse: As soon as you remove flowers, empty all the old water.
- Warm Water Rinse: Fill the vase with warm tap water. Swirl it around vigorously.
- Light Scrub (Optional): If you see any light residue, a quick scrub with a soft sponge and a drop of dish soap will prevent it from drying on.
- Invert to Dry: Turn the vase upside down on a drying rack. This lets excess water drain. It promotes air circulation. This helps prevent moisture from getting trapped, which can lead to odors or mold.
This quick rinse prevents hard water rings, bacterial film, and algae from drying and sticking to the surface. Dried on stains are much harder to remove.
Use Clean Water and Change It Regularly
The quality of water you use and how often you change it directly affects how quickly your vase gets dirty.
- Fresh Water: Always fill your vase with fresh, clean water when arranging flowers.
- Regular Water Changes: Change the water in your vase every one to two days. Old water quickly becomes a breeding ground for bacteria and algae. These not only cloud your vase but also cause flowers to wilt faster. Each time you change the water, give the vase a quick rinse. This clears away any immediate buildup.
Add a Flower Food Packet
Flower food packets contain nutrients for your flowers. They also often include a mild anti-bacterial agent. This helps to inhibit the growth of bacteria in the water. This keeps the water cleaner for longer.
- Follow Instructions: Always use flower food according to the package directions.
- Reduce Bacterial Growth: The anti-bacterial component minimizes the slimy film that often forms on flower stems and inside the vase. This means less residue to clean later.
Dry Thoroughly Before Storage
Storing a vase that is still damp can lead to musty odors, mold, or mildew. It can also cause water spots to form as remaining water evaporates.
- Air Dry Completely: After cleaning or rinsing, allow the vase to air dry completely. Invert it on a drying rack. You can also use a clean, lint-free cloth to wipe the inside and outside dry.
- Prevent Water Spots: For glass vases, drying with a microfiber cloth immediately after rinsing is crucial to prevent water spots.
- Store Properly: Once completely dry, store vases in a clean, dust-free area.
By adopting these simple habits, you will find yourself spending much less time on deep vase cleaning. Your vases will remain sparkling and ready to showcase your next beautiful floral display.
Drying and Storing Vases Properly
After putting in the effort to clean your vases, the final steps of drying and storing are just as crucial. Improper drying can lead to new water spots, especially on clear glass. Storing them incorrectly can invite dust, odors, or even damage. My goal is always to ensure my vases are perfectly clean and ready for immediate use.
The Art of Drying Vases
Drying a vase correctly prevents water spots and ensures it remains hygienic. This is particularly important for glass vases, where every droplet shows.
Air Drying Upside Down: The simplest method is air drying.
- Place the freshly rinsed vase upside down on a clean drying rack.
- Ensure good air circulation around the vase. This allows water to drain and evaporate efficiently.
- For narrow-necked vases, a wire drying rack or even a few wooden skewers placed over a basin can help prop it up. This ensures air flows into the vase’s interior.
- Allow ample time for the vase to dry completely. This can take several hours, especially for thicker or larger vases.
Manual Drying for Spotless Shine: For a truly streak-free finish, especially on glass, manual drying is best.
- Use a clean, lint-free microfiber cloth or a dedicated glass polishing cloth.
- Reach inside the vase with the cloth where possible. Wipe down all surfaces.
- For areas you cannot reach, roll a piece of paper towel or the microfiber cloth around the end of a long stick or chopstick. Gently wipe the interior.
- Alternatively, some people use a hairdryer on a cool setting. Direct the airflow into the vase to speed up drying without leaving residue. Be careful not to overheat delicate glass.
- Check for any remaining moisture. Any trapped dampness can lead to musty odors or even mold growth over time.
Smart Storage Solutions
Once your vases are bone dry, proper storage keeps them clean and protected until their next use.
Protect from Dust: Store vases in a cabinet or on a shelf where they are less likely to accumulate dust. For infrequently used vases, consider covering them with a breathable cloth bag. This keeps dust out while allowing air circulation.
Prevent Chipping and Breakage:
- Separate Storage: Avoid stacking vases directly on top of each other. This can cause chips or scratches.
- Padding: Place a soft cloth or felt pad between vases if you must store them close together. You can also wrap individual delicate vases in tissue paper or bubble wrap. This adds a layer of protection.
- Stable Placement: Store vases on flat, stable surfaces. Avoid edges where they might easily tip over.
- Handle with Care: Always pick up vases by the base or body. Never by the rim or neck, especially if they are heavy or have narrow openings.
Odor Prevention: Ensure vases are completely dry before storing them in an enclosed space. A small sachet of baking soda placed near the vase (not inside, unless it is completely empty and dry) can help absorb any lingering moisture or odors in the storage area.
By following these drying and storage practices, you ensure your vases stay in pristine condition. They will be ready to display your next beautiful bouquet without any fuss or extra cleaning.
FAQ Section
Q1: Can I put my vase in the dishwasher?
A1: It depends on the vase material and shape. Glass vases generally can go in the dishwasher, but handwashing is safer for delicate or hand-painted pieces. High heat can damage some finishes or cause thermal shock in thin glass. Dishwashers might not clean narrow necks effectively. Always check the manufacturer’s recommendations first.
Q2: How do I remove cloudy film from an old vase?
A2: For persistent cloudy film, especially in old vases, soak the vase overnight in a solution of equal parts white vinegar and warm water. For extra scrubbing power, add a handful of uncooked rice or coarse salt with the vinegar solution. Swirl or shake vigorously, then scrub with a bottle brush. Rinse thoroughly afterwards.
Q3: What is the best way to clean a vase with a very narrow opening?
A3: Use small, abrasive agents with a cleaning solution. Pour about a quarter cup of uncooked rice or crushed ice into the vase, along with a few drops of dish soap and warm water, or white vinegar. Cover the opening and shake vigorously. The rice or ice will scrub the inside surfaces where a brush cannot reach.
Q4: How can I prevent mold or algae growth in my vase?
A4: To prevent mold and algae, change the water every one to two days. Rinse the vase thoroughly each time you change the water. Using flower food, which often contains anti-bacterial agents, also helps. Always dry your vase completely before storing it, as moisture promotes growth.
Q5: Is it safe to use bleach on my vases?
A5: You can use a very diluted bleach solution (e.g., 1 teaspoon bleach per gallon of water) for severe mold or algae. However, use bleach as a last resort and with caution. Rinse the vase thoroughly multiple times afterwards to remove all bleach residue. Avoid bleach on delicate, painted, or metal-accented vases.
Q6: How do I clean a vase that has a rough, unglazed interior?
A6: For unglazed or rough interiors, avoid harsh chemicals that could be absorbed. Stick to warm water and mild dish soap. Use a soft brush or sponge to gently scrub. For stains, a baking soda paste can be gently rubbed. Rinse very thoroughly, as porous materials can retain soap.
Conclusion
Keeping your vases sparkling clean is a simple yet impactful way to enhance your home and extend the life of your fresh flowers. We have explored various methods for how to clean vases effectively, from general maintenance to tackling stubborn hard water stains and unsightly algae. You now know the power of common household items like vinegar, baking soda, and rice. You also understand how to choose the right tools for challenging shapes.
By regularly rinsing your vases and changing water frequently, you can prevent most major issues. When deep cleaning is needed, selecting the appropriate technique for your vase’s material will ensure its beauty and longevity. Remember to dry your vases completely and store them carefully. This prevents future problems. A clean vase provides a healthy environment for your blooms. It also serves as a beautiful backdrop for any floral arrangement. Embrace these cleaning practices. Enjoy perfectly clear, beautiful vases every time. Your flowers (and your home) will thank you.

Todd Martin
Senior Writer
With over 15 years of experience in home renovation and design, I started HEG to share what I’ve learned with homeowners who want to create spaces that are both beautiful and functional. I’ve always believed in a hands-on approach, and over the years, I’ve picked up practical solutions that actually work. Through HEG, I aim to make home improvement more approachable, sharing real tips that help you create a home you truly love.