· Todd Martin · Bathroom Cleaning · 20 min read
How To Clean Under Toilet Base
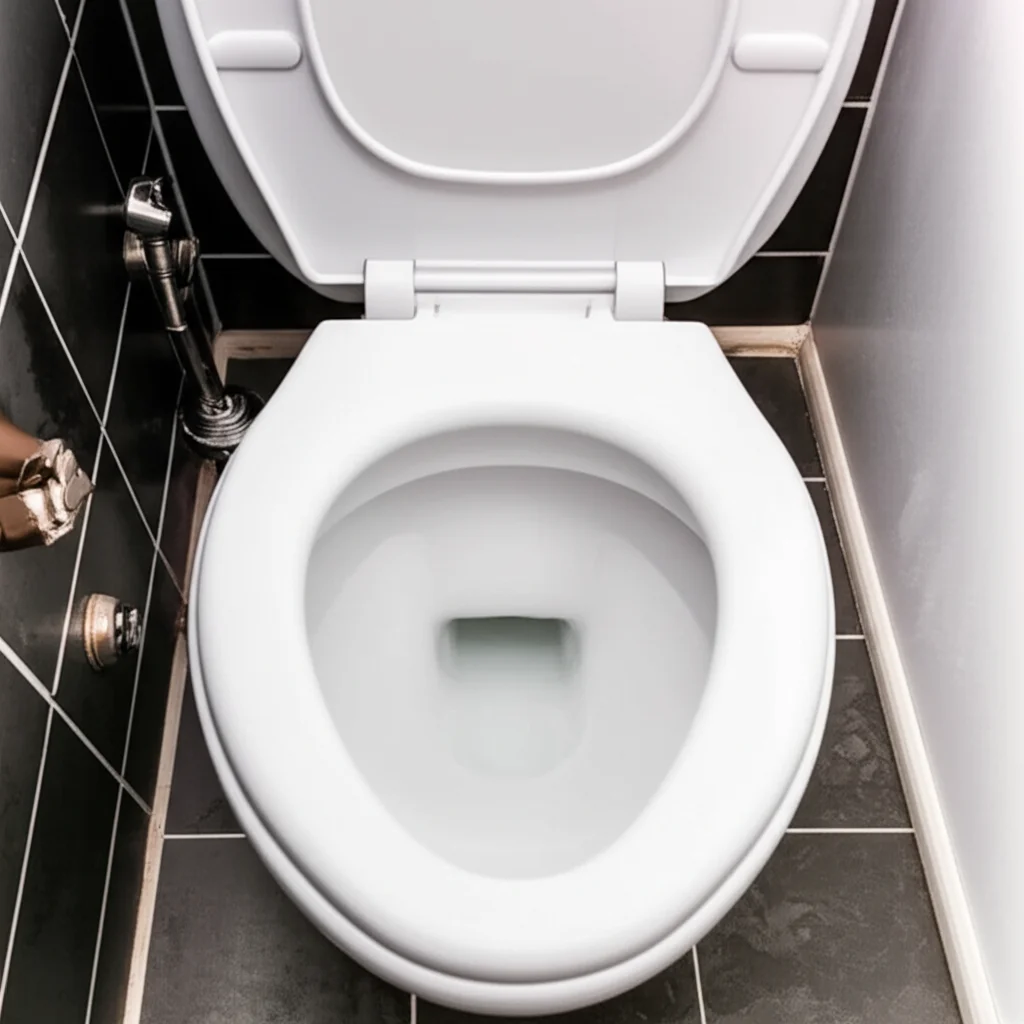
Master the Art: How To Clean Under Toilet Base Effectively
The area under your toilet base often goes unnoticed. Yet, it can become a hotspot for dirt, dust, grime, and even mold. Ignoring this space compromises your bathroom’s cleanliness and can lead to unpleasant odors. Learning how to clean under toilet base is a vital part of maintaining a truly hygienic home.
This article provides a comprehensive guide to cleaning this challenging spot. We will cover the tools you need, safety precautions, and step-by-step instructions. You will learn specific methods for tackling stubborn stains and preventing future buildup. My goal is to help you achieve a sparkling clean bathroom from top to bottom, including those hidden areas.
Takeaway:
- Regularly clean under your toilet base to stop grime and mold.
- Gather the right tools like brushes, cloths, and cleaning agents.
- Use a systematic approach to ensure thorough cleaning.
- Address specific issues like mold or hard water stains with targeted solutions.
- Maintain the area to keep it clean long-term.
To clean under a toilet base, you need the right tools and a systematic approach. First, clear the area and gather your cleaning supplies. Then, scrub away visible grime with appropriate cleaners and brushes. Finally, rinse and dry the surface thoroughly to prevent new buildup and odors.
Uncovering the Need: Why Clean Under Your Toilet Base?
Many people focus on cleaning the toilet bowl and exterior surfaces. However, the space directly under the toilet base often gets ignored. This area, where the toilet meets the floor, can collect all sorts of unsanitary materials. Dirt, dust, hair, urine splashes, and even moisture gather there, creating a breeding ground for bacteria and mold. Understanding why clean under toilet base is important helps you prioritize this task.
This hidden grime contributes significantly to unpleasant bathroom odors. Even if your visible bathroom surfaces look clean, a lingering smell often comes from these neglected spots. Airborne particles settle under the toilet, mixing with moisture from flushing or showering. This creates a sticky, dirty residue. Over time, this residue can harden, making it even tougher to remove.
Beyond odor, mold and mildew thrive in dark, damp environments. The area around the toilet base provides ideal conditions for their growth. Mold can impact indoor air quality and may cause health issues for sensitive individuals. Regularly cleaning this area helps you control mold growth and maintain a healthier home. It also prevents discoloration and damage to your flooring. A truly clean bathroom extends to every corner, including the parts you do not see easily.
Moreover, neglecting this area can lead to permanent staining on your bathroom floor. Urine, water, and cleaning product residues can react with tile grout or vinyl. This reaction can cause stubborn discoloration that becomes difficult to remove later. Regular cleaning prevents these stains from setting in. A clean toilet base contributes to the overall aesthetic appeal of your bathroom. It reflects a higher standard of home hygiene.
Gathering Your Arsenal: Essential Tools and Cleaning Solutions
Before you begin the task of how to clean under toilet base, you need the right supplies. Having everything ready saves you time and makes the process more efficient. The right tools help you reach tight spots and effectively break down grime. I always make sure to have these items on hand for a thorough clean.
Here is a list of essential items:
- Rubber gloves: Protect your hands from harsh chemicals and germs.
- Safety goggles: Shield your eyes from splashes, especially when using strong cleaners.
- Old towels or rags: Use these for wiping, scrubbing, and soaking up spills. Microfiber cloths work well for streak-free drying.
- Stiff-bristled scrub brush: A small, angled brush or a detail brush can reach into crevices. An old toothbrush also works for very tight spots.
- Spray bottle: Useful for diluting cleaners or for applying solutions to specific areas.
- All-purpose cleaner: Choose a cleaner safe for your floor type. Many people prefer an effective bathroom cleaner like vinegar.
- Disinfectant: A bleach-based cleaner or a hydrogen peroxide solution helps kill bacteria and mold. If you find mold, learning how to clean mold with vinegar offers a natural approach.
- Baking soda: A gentle abrasive that helps lift stains and neutralize odors.
- White vinegar: An excellent natural disinfectant and deodorizer. It helps dissolve mineral deposits and soap scum.
- Scraper or putty knife (optional): For hardened grime that needs a bit of leverage. Protect your floor if using this.
- Cotton swabs or dental picks (optional): For extremely tiny gaps.
When selecting cleaners, consider the type of flooring you have. Some cleaners might damage delicate surfaces like natural stone. Always test a cleaner in an inconspicuous area first. Avoid mixing bleach with ammonia or vinegar, as this creates dangerous fumes. Your safety is paramount throughout this cleaning process.
Preparing the Area: Safety and Accessibility
Proper preparation is crucial before you start cleaning under the toilet base. This step ensures your safety and makes the cleaning process much easier. Rushing this part can lead to slips, falls, or exposure to harsh chemicals. I always take a few minutes to set up the area properly.
Follow these important steps:
- Ventilate the Bathroom: Open windows and turn on the exhaust fan. Good airflow helps disperse fumes from cleaning products. This is especially important when using strong disinfectants like bleach. Fresh air also helps the area dry faster after cleaning.
- Clear the Immediate Area: Remove any bath mats, rugs, wastebaskets, or decorative items from around the toilet. This gives you unobstructed access to the base. You do not want to accidentally splash cleaning solutions on your nice bath mat.
- Protect Yourself: Put on your rubber gloves and safety goggles. These are your first line of defense against splashes, dirt, and chemicals. I never start cleaning a bathroom without wearing proper protective gear.
- Protect the Floor (if needed): If you are concerned about strong cleaners damaging your flooring, lay down old towels or plastic sheeting around the toilet base. This creates a barrier and catches any drips or spills. This is particularly helpful on wood floors or delicate tiles.
- Assess the Situation: Take a moment to look closely at the area under the toilet base. Identify visible grime, stains, or mold spots. Note any areas that seem particularly stubborn. This assessment helps you choose the right cleaning method and focus your efforts. For example, if you see black grime or mold, you know you will need a stronger disinfectant.
- Gather all tools: Make sure your bucket, brushes, cloths, and cleaning solutions are within easy reach. This prevents you from having to stop midway through the cleaning process to fetch something. Organization saves time and effort.
By taking these preparatory steps, you create a safe and efficient cleaning environment. You protect yourself and your bathroom. This thorough preparation makes the actual cleaning much more straightforward.
The Deep Cleaning Process: Step-by-Step for Grime
Now comes the core task of how to clean under toilet base. This detailed step-by-step guide will help you tackle even the most stubborn grime. Take your time with each step for the best results. I find that a methodical approach really pays off here.
Initial Grime Removal
First, address the loose dirt and surface grime. This makes it easier to work on deeper stains.
- Vacuum or Sweep: Use a vacuum cleaner with a narrow attachment or a small broom to remove dust, hair, and loose debris. Get as close to the toilet base as possible. This step stops you from just pushing around wet dirt later.
- Pre-Soak (if heavily soiled): For very dirty areas, spray a generous amount of an all-purpose cleaner or a solution of warm water and a few drops of dish soap under and around the base. Let it sit for 5-10 minutes. This helps loosen dried-on grime.
Applying Your Cleaner
Choose a cleaning solution based on your assessment of the grime.
For General Dirt and Light Grime:
- Mix equal parts white vinegar and water in a spray bottle. Add a few drops of essential oil like tea tree or lemon for a fresh scent.
- Spray the solution liberally under and around the toilet base. Ensure it saturates the dirty areas.
- Alternatively, use your chosen all-purpose bathroom cleaner according to its instructions.
- For areas with tough mineral deposits, consider a dedicated cleaner for mineral deposits. These can build up around the base too.
For Mold or Mildew:
- If you see mold, a solution of one part bleach to ten parts water is effective for non-porous surfaces. Apply carefully and ensure good ventilation.
- For a natural approach, use undiluted white vinegar. Spray it directly onto the moldy areas and let it sit for at least 15-30 minutes before scrubbing. Vinegar helps kill mold spores.
- Hydrogen peroxide (3%) can also be sprayed directly onto mold. Let it sit for 10 minutes before scrubbing.
- You might find specific methods for cleaning mold from grout useful if your toilet sits on a tiled floor.
Scrubbing the Grime Away
This is where your elbow grease comes in.
- Use Your Brushes: Take your stiff-bristled brush or old toothbrush. Vigorously scrub all visible grime under and around the toilet base. Pay close attention to the grout lines if your floor is tiled.
- Reach Into Crevices: Use the old toothbrush or cotton swabs to clean the narrow gaps where the toilet meets the floor. These spots hide a lot of dirt. Angle your brush to get into the tightest spaces.
- Apply More Solution if Needed: If grime is particularly stubborn, reapply your cleaning solution and let it sit for a few more minutes before scrubbing again. You might need to repeat this step several times for heavily soiled areas.
Rinsing and Drying
Proper rinsing stops residue buildup and keeps the area looking clean.
- Wipe with Damp Rags: Dip a clean rag into plain water and wring it out. Wipe down all the areas you just scrubbed, removing all cleaning solution and loosened grime. Rinse the rag often in clean water.
- Final Rinse: Repeat the wiping process with fresh, clean water until no soap residue remains. You want the surface to feel clean, not sticky.
- Thorough Drying: Use a dry, clean towel or microfiber cloth to dry the entire area. Air drying can leave water spots or encourage mold growth. Ensure the space is completely dry. A dry area helps prevent future grime buildup.
By following these steps, you can achieve a truly clean and hygienic space under your toilet base. It requires effort, but the results are worth it.
Tackling Stubborn Stains and Mold Under the Base
Sometimes, general cleaning is not enough for the hidden horrors under your toilet base. Stubborn stains, persistent mold, and mineral deposits require special attention. Knowing how to specifically address these issues is key to a truly clean bathroom. I have found certain methods work best for these challenges.
Eliminating Stubborn Stains
Dried urine, hard water mineral buildup, or unknown black stains can cling tightly to the floor or the toilet’s porcelain base.
- Baking Soda Paste: For tough stains and odors, create a thick paste with baking soda and a small amount of water. Apply this paste directly onto the stain. Let it sit for 15-30 minutes, or even longer for very old stains. The abrasive nature of baking soda, combined with its deodorizing properties, helps lift the grime. Then, scrub vigorously with a stiff brush and rinse well.
- Vinegar and Baking Soda Combo: After applying baking soda paste, spray white vinegar over it. This creates a fizzing reaction that helps break down organic matter and mineral deposits. Let the fizzing subside, then scrub and rinse. This combination is powerful for many kinds of toilet base stains.
- Peroxide for Discoloration: For stubborn yellow or brown stains, apply hydrogen peroxide (3%) directly to the stained area. Let it sit for at least 30 minutes, then scrub. Hydrogen peroxide works as a bleaching agent and disinfectant.
- Magic Eraser: A melamine foam eraser can be surprisingly effective on scuff marks and some surface stains on non-porous surfaces. Use it with water and gentle pressure. Test on an inconspicuous area first, especially on flooring.
Conquering Mold and Mildew
Mold and mildew thrive in the damp, dark environment under a toilet. Addressing them quickly stops their spread and improves air quality.
- Undiluted White Vinegar: For a non-toxic mold killer, spray undiluted white vinegar directly onto the moldy areas. Let it sit for at least an hour. Vinegar is highly effective at killing most household molds. After the hour, scrub the mold away with a stiff brush and wipe the area clean. Make sure to dry it thoroughly.
- Bleach Solution (for severe mold): If mold is extensive and persistent, a bleach solution can be used. Mix 1 cup of bleach with 1 gallon of water. Apply this solution carefully to the moldy areas. Let it sit for about 10 minutes to kill the spores. Always ensure excellent ventilation when using bleach. Scrub the area thoroughly and rinse completely with clean water. Remember, never mix bleach with vinegar or ammonia.
- Hydrogen Peroxide: Spray 3% hydrogen peroxide directly onto mold. Let it sit for 10 minutes, then scrub. It is a safe and effective alternative to bleach for killing mold.
- Consider Grout Sealant: If mold consistently grows in the grout around your toilet base, consider cleaning the grout thoroughly and then applying a grout sealant. This helps protect the grout from moisture penetration, which prevents mold.
When dealing with mold, wear gloves and a mask to avoid inhaling spores. Proper ventilation is always critical. These targeted methods will help you restore your toilet base area to a pristine, hygienic state.
Advanced Techniques and Hard-to-Reach Spots
Cleaning under a toilet base can be tricky because of tight spaces. Sometimes, standard brushes just cannot get everywhere. This is where advanced techniques and specialized tools become helpful. I have learned a few tricks over the years for these really challenging spots.
Reaching Beyond the Obvious
The most difficult parts are often those tiny gaps where the toilet meets the floor or where the wax ring might have leaked.
- Flexible Brushes: Look for cleaning brushes with flexible handles or very thin heads. These can snake into narrow spaces where traditional brushes cannot go. Bottle brushes or pipe cleaners can also be surprisingly useful for very tight crevices.
- Dental Picks or Cotton Swabs: For truly microscopic gaps, such as around the bolts holding the toilet down, a dental pick or a tightly wound cotton swab can help. Dip them in cleaner and carefully work them into the tiny spaces to dislodge grime.
- Steam Cleaner: A handheld steam cleaner is excellent for sanitizing and loosening stubborn, dried-on grime. The high heat and moisture break down dirt without harsh chemicals. Aim the nozzle directly at the dirty areas. Be cautious not to over-saturate wooden floors. Steam cleaners are also great for cleaning bathroom grout around the base.
- Specialized Long-Handled Scrapers: For solidified gunk or dried spills, a slim, long-handled scraper designed for tight spaces might be useful. Exercise extreme caution to avoid scratching your flooring or the toilet itself. A thin plastic scraper is safer than metal.
Addressing Leaks and Seals
Sometimes, the grime under the toilet base is due to a failing wax ring or a slow leak. This requires more than just cleaning.
- Identify the Source of Moisture: If you notice consistent wetness or excessive mold, the problem might be a leak. Look for water stains on the floor or a persistent musty smell that returns quickly after cleaning. A common cause is a worn-out wax seal between the toilet and the flange.
- Temporary Sealant (Caulk): If the grime is a result of splashes getting under the base but there is no actual leak from the plumbing, you can caulk the base to the floor. Use a mildew-resistant silicone caulk around the perimeter of the toilet base after a thorough cleaning. This creates a barrier against spills and prevents dirt and mold from accumulating underneath. Ensure you leave a small gap at the back, just in case a leak develops internally; this gap allows any future leaks to be noticed rather than trapped and causing unseen damage.
- Professional Help: If you suspect a serious leak from the toilet’s internal components or the wax ring, it is best to call a plumber. Continued leaks can cause significant damage to your subfloor and promote extensive mold growth. Cleaning will only be a temporary fix if the source of the problem is not resolved.
Thinking outside the box for tools and understanding the root cause of persistent dirt will help you master cleaning under your toilet base. This deep level of cleaning ensures lasting results and a truly hygienic bathroom.
Maintaining a Pristine Base: Prevention and Regular Care
Cleaning under your toilet base is a substantial task. You do not want to do it every week. The best approach is to prevent significant buildup from happening in the first place. Regular maintenance and smart habits save you time and effort in the long run. I always aim for prevention over intensive cleaning.
Here are key strategies for maintaining a clean toilet base:
- Wipe Down Regularly: Make a habit of wiping down the exterior of your toilet, including the very bottom edge, every time you clean the bathroom. Use a disinfecting wipe or an all-purpose cleaner with a cloth. This quick wipe stops splashes and dust from hardening into grime.
- Address Spills Immediately: Accidents happen. If water or urine spills around the toilet, wipe it up immediately. Do not let liquids sit and seep under the base. The quicker you act, the less likely stains and odors are to develop.
- Ensure Proper Ventilation: Good airflow in your bathroom helps reduce humidity. Humidity is a primary cause of mold and mildew growth. Always use your exhaust fan during and after showers or baths. Open a window if possible. This helps dry out the area around the toilet base, making it less hospitable for mold.
- Consider a Toilet Base Sealant (Caulk): As mentioned earlier, once you have thoroughly cleaned under the base, consider applying a bead of mildew-resistant silicone caulk around the perimeter where the toilet meets the floor. This creates a barrier that prevents water, dust, and grime from entering the space. Remember to leave a small opening at the back to allow for detection of any internal plumbing leaks.
- Regular Deep Cleaning (Less Often): While you wipe regularly, schedule a deeper clean for under the toilet base every 3-6 months. This allows you to inspect the area thoroughly and tackle any minor buildup before it becomes a major problem. This proactive approach saves you from exhaustive scrubbing sessions.
- Use Absorbent Mats: Place a washable bath mat around the toilet. This can catch drips and splashes before they reach the floor under the base. Remember to wash the mat frequently to maintain hygiene. Cleaning bathroom rugs is another important aspect of overall bathroom hygiene.
- Check for Leaks: Periodically check around the base for any signs of constant moisture. A small, slow leak from the toilet’s internal components or the wax ring can go unnoticed but cause significant damage and mold growth. Catching a leak early saves you from bigger problems.
By incorporating these maintenance tips into your cleaning routine, you can significantly reduce the frequency and intensity of deep cleaning under your toilet base. A clean base contributes to a truly clean and fresh bathroom environment every day.
Dealing with Specific Floor Types Under Your Toilet
The type of flooring under your toilet base significantly impacts how you approach cleaning it. Different materials react differently to various cleaners and methods. Understanding these differences helps prevent damage and ensures effective cleaning. I always consider the floor material before picking my cleaning solution.
Tile and Grout Floors
Tile and grout are common bathroom floor materials. Grout, being porous, can be particularly challenging.
- Cleaning: For tiles, most all-purpose bathroom cleaners, vinegar solutions, or bleach solutions are safe. Focus on the grout lines. A stiff-bristled brush or an old toothbrush is essential for scrubbing grime and mold from grout.
- Specific Challenges: Grout can absorb urine and moisture, leading to stains and mold. For cleaning mold from grout, a paste of baking soda and hydrogen peroxide works well, or a bleach-based grout cleaner for stubborn mold.
- Protection: After cleaning, consider reapplying a grout sealant. This creates a protective barrier, making the grout less porous and easier to clean in the future.
Vinyl and Linoleum Floors
These synthetic materials are generally durable and water-resistant but can be susceptible to harsh chemicals.
- Cleaning: Mild all-purpose cleaners, dish soap and water solutions, or diluted vinegar are usually safe. Avoid abrasive scrubbers that could scratch the surface. Use soft brushes or cloths.
- Specific Challenges: Over time, vinyl can lift or discolor if exposed to constant moisture or strong, undiluted cleaners. Urine can cause yellowing.
- Protection: Ensure quick cleanup of spills. Avoid pooling water under the base. Use a gentle approach and thorough drying.
Hardwood Floors
Hardwood in bathrooms is less common but requires the most care due to its sensitivity to moisture.
- Cleaning: Use cleaners specifically designed for sealed hardwood floors. A damp cloth with a mild wood cleaner is often sufficient. Avoid excessive water.
- Specific Challenges: Water damage, warping, and mold are major concerns. Urine can permanently stain and damage wood.
- Protection: Immediately wipe up any spills. Ensure the area under the toilet base is completely dry after cleaning. Consider using a small, absorbent mat. Sealing the gap with caulk is highly recommended on hardwood floors to prevent any moisture from seeping underneath.
Concrete Floors
Polished or sealed concrete floors are tough but can still show stains.
- Cleaning: Generally, concrete is robust. All-purpose cleaners, diluted bleach, or even a pressure washer (for unsealed outdoor concrete, but not inside a bathroom) can be used. For interior sealed concrete, use pH-neutral cleaners to protect the sealant.
- Specific Challenges: Unsealed concrete is porous and can absorb stains and odors deeply. Sealed concrete resists stains better but the sealant can wear off. For cleaning grease from concrete or other tough stains, a strong degreaser or specialized concrete cleaner might be needed.
- Protection: Ensure the concrete is properly sealed. Reapply sealant as needed to maintain its stain resistance.
Always test any cleaning product on a small, hidden area of your specific flooring type before applying it widely. This simple step can prevent costly damage and ensure your toilet base area remains clean and protected.
When to Call a Professional: Beyond DIY Cleaning
While regular DIY cleaning keeps your bathroom fresh, there are times when the problem under your toilet base extends beyond simple grime. Knowing when to call a professional can save you from bigger, more expensive issues down the line. I always advise people not to hesitate if they face these challenges.
Persistent Odors and Unexplained Moisture
If you have thoroughly cleaned under your toilet base, but a musty odor or dampness persists, it indicates a deeper problem.
- Lingering Odors: A continuous sewer smell, even after cleaning, often points to a faulty wax ring or a loose toilet. The wax ring creates a seal between the toilet and the drain pipe. If it fails, sewer gases can escape.
- Unexplained Wetness: If you keep finding water or moisture under the toilet, even when no one has splashed, it is a clear sign of a leak. This leak could be from the water supply line, the fill valve, or the wax ring. A slow, undetected leak can cause significant damage to your subfloor and joists.
Visible Structural Damage or Extensive Mold
These issues go beyond surface cleaning and require specialized intervention.
- Floor Damage: If you notice discoloration, swelling, soft spots, or warping of your bathroom floor around the toilet, it indicates prolonged water damage. This means the subfloor or floorboards beneath are compromised. Cleaning will not fix this; it needs repair or replacement.
- Extensive Mold Growth: While DIY methods work for small mold patches, widespread mold growth under and around the toilet, especially if it extends into walls or flooring, suggests a significant moisture source and requires professional mold remediation. Professionals have the right equipment and expertise to safely remove mold and address its root cause. Cleaning mold with bleach can help with surface mold, but a professional is needed for deep infestations.
- toilet cleaning
- bathroom hygiene
- deep cleaning
- grime removal
- mold prevention
- floor cleaning
- bathroom maintenance

Todd Martin
Senior Writer
With over 15 years of experience in home renovation and design, I started HEG to share what I’ve learned with homeowners who want to create spaces that are both beautiful and functional. I’ve always believed in a hands-on approach, and over the years, I’ve picked up practical solutions that actually work. Through HEG, I aim to make home improvement more approachable, sharing real tips that help you create a home you truly love.