
· Todd Martin · Food Preparation · 16 min read
How To Clean Turnip Greens
Master the Art of How To Clean Turnip Greens
Turnip greens offer a wonderful addition to any meal. Their slightly bitter, earthy flavor complements many dishes, especially in Southern cooking. Before you enjoy their taste, you must know how to clean turnip greens properly. This process is simple but important.
Cleaning turnip greens removes dirt, sand, and other unwanted elements. It ensures your greens are safe and delicious to eat. This guide provides all the steps you need for perfectly clean turnip greens. We will cover everything from selecting fresh greens to advanced cleaning methods. You will soon prepare these nutritious vegetables with confidence.
Takeaway:
- Inspect turnip greens for freshness and trim any damaged parts.
- Use multiple cold-water rinses to remove grit and dirt.
- Consider a vinegar or saltwater soak for a deeper clean.
- Thoroughly dry greens before cooking or storing to maintain freshness.
To effectively clean turnip greens, rinse them under cool, running water. Then, soak them in large bowls of fresh water, changing the water several times until no dirt remains at the bottom. Finally, dry them completely with a salad spinner or paper towels before use.
Why Proper Cleaning Matters for Turnip Greens
Properly cleaning turnip greens is a critical step before cooking. These leafy greens grow close to the ground, which means they can collect significant amounts of dirt, sand, and even small insects. Eating unwashed greens can be unpleasant due to the gritty texture. It also poses potential health risks from soil contaminants or pesticides.
Thorough cleaning ensures a pleasant eating experience. It helps the greens taste their best, free from any earthy residue. My experience shows that a well-cleaned batch of greens truly transforms the final dish. It makes all the difference in flavor and texture.
Identifying Quality Turnip Greens
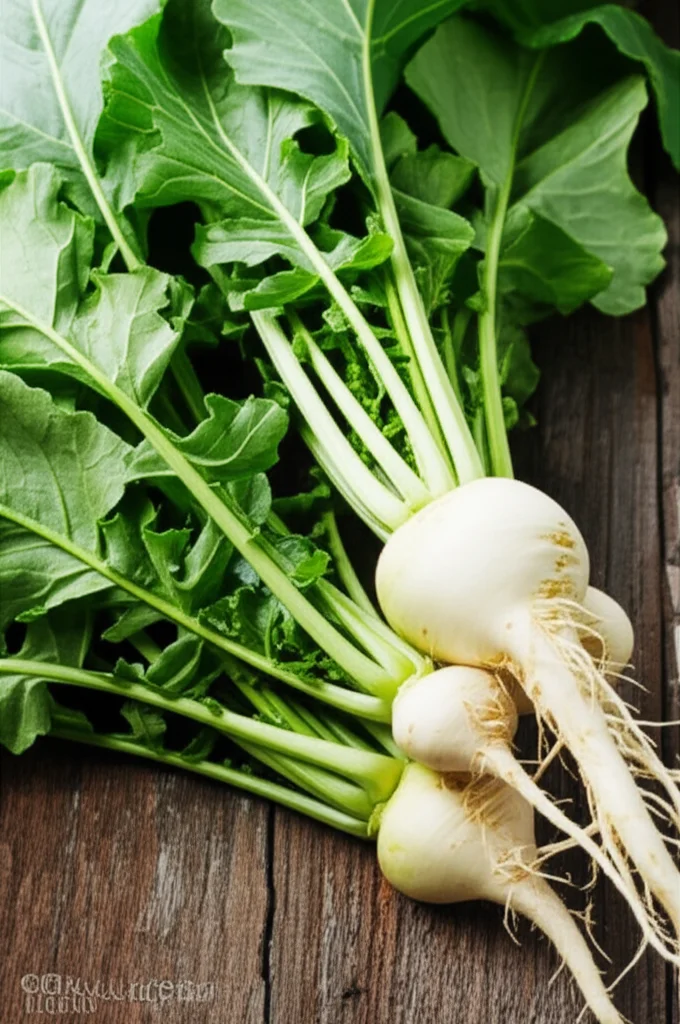
Selecting fresh, healthy turnip greens begins the cleaning process well. Look for vibrant green leaves that appear crisp and firm. Avoid any bunches with yellowing, wilted, or slimy leaves. These signs indicate old or damaged produce.
The best turnip greens will have a healthy sheen. Their stems should be firm, not brittle. Choosing good greens makes the cleaning task easier and ensures better flavor. Fresh greens also hold up better during the washing process.
Essential Tools and Supplies for Cleaning Turnip Greens
Gathering the right tools makes cleaning turnip greens much easier. You do not need many items, but having them ready helps the process go smoothly. I always make sure these are on hand before I start. This preparation saves time and effort.
You will need a few basic kitchen items. These tools are common and likely already in your home. Having them organized simplifies the entire cleaning task.
- Large bowls or a clean sink: You will need ample space to submerge and rinse the greens. I often use my sink, filled with cold water. It holds a large volume of greens.
- Colander: A sturdy colander helps drain water quickly after rinsing. This prevents the greens from sitting in dirty water too long. I use a large metal one for efficiency.
- Sharp knife or kitchen shears: These are for trimming tough stems or damaged leaves. Precision makes the job faster. I prefer a sharp chef’s knife.
- Paper towels or a clean kitchen towel: These absorb excess moisture after washing. Drying the greens is important for both cooking and storage.
- Salad spinner (optional but recommended): A salad spinner removes water very efficiently. It saves time and ensures greens are truly dry. I find it invaluable for perfectly crisp greens.
These simple tools are all you need. They will help you achieve perfectly clean turnip greens every time. Proper tools make the task less daunting.
Step-by-Step Guide to Cleaning Turnip Greens
Cleaning turnip greens effectively involves a systematic approach. Following these steps ensures all dirt and grit are removed. This process is simple to master, even for beginners. I have refined these steps over many years of cooking with fresh greens.
This method guarantees your greens are pristine and ready for cooking. It removes the most common contaminants. Focus on each step to achieve the best results.
Step 1: Initial Inspection and Trimming
Begin by inspecting your bunch of turnip greens. Look closely for any discolored, wilted, or damaged leaves. Also, check for tough or woody stems. Use your sharp knife or kitchen shears to trim these undesirable parts away.
Cut off the very end of the main stem, as it often holds a lot of dirt. Discard any yellowed leaves or those with large holes. This initial trim makes the subsequent washing much more effective. It also improves the texture of your cooked greens.
Step 2: First Cold Water Rinse
Fill a large sink or a very large bowl with cold water. Place the trimmed turnip greens into the water. Swish them around gently with your hands. This action helps to loosen embedded dirt and sand. You will likely see a surprising amount of grit settle at the bottom of the basin.
Let the greens sit in the water for a few minutes. This allows heavy particles to sink. Do not overcrowd the greens; work in batches if necessary. This first rinse removes the bulk of the surface dirt.
Step 3: Multiple Soaks and Rinses
Drain the dirty water from the sink or bowl. You will see the sediment at the bottom. Refill the sink or bowl with fresh, cold water. Submerge the greens again and swish them around. Repeat this process at least two to three more times.
Continue to change the water until no visible dirt or sand remains at the bottom of the sink. This is the most crucial step for removing grit. I sometimes repeat it five or six times, depending on how sandy the greens are. The water should appear clear when you finish. This thorough process is essential for preparing any leafy greens before cooking. You can learn more about general practices for how to clean greens before cooking in our detailed guide.
Step 4: Final Rinse in a Colander
After the multiple soaks, transfer the greens to a colander. Rinse them one last time under cool, running tap water. You can lift and turn the greens to ensure water reaches all surfaces. This final rinse washes away any lingering fine particles.
Let the greens drain in the colander for a few minutes. Shake the colander gently to remove excess water. This prepares them for the drying stage. It is a quick but important step.
Advanced Cleaning Techniques: Using Vinegar and Other Solutions
Sometimes, a simple water rinse is not enough, especially if you are concerned about pesticides or stubborn residues. Advanced cleaning techniques offer a deeper cleanse for your turnip greens. I often use these methods for peace of mind. They provide an extra layer of sanitation.
These techniques are easy to implement. They use common household ingredients. Applying these methods can help ensure your greens are as clean as possible.
Vinegar Soak for Extra Cleanliness
A vinegar solution is excellent for removing pesticides and bacteria. Fill your large bowl or sink with cold water. Add about one cup of white vinegar for every gallon of water. Submerge your turnip greens in this solution. Let them soak for about 10-15 minutes.
The acidity of the vinegar helps to break down residues. After soaking, remove the greens and rinse them thoroughly under cold, running water. Ensure all vinegar smell is gone. This method is effective for many types of produce. For more information on using vinegar to clean produce, check out our guide on how to clean greens with vinegar.
Saltwater Solution
Another option for a deeper clean is a saltwater solution. Dissolve one tablespoon of salt in each gallon of cold water. Add your turnip greens to this solution. Let them soak for 10 minutes. The salt can help dislodge small insects or debris.
After the soak, rinse the greens thoroughly under cold, running water. Ensure all salt residue is removed. This method is a traditional approach for many leafy vegetables. It offers a natural way to enhance cleanliness.
Baking Soda Rinse
Some people prefer a baking soda rinse. Add one tablespoon of baking soda to a gallon of cold water. Soak your greens for 5-10 minutes. Baking soda can help neutralize some pesticide residues. It is a mild, non-toxic cleaner.
Always follow a baking soda soak with a thorough rinse under running water. This removes any baking soda film. This method is gentle on the greens. It provides another option for comprehensive cleaning.
Drying and Storing Your Clean Turnip Greens
Properly drying turnip greens after washing is just as important as the washing itself. Excess moisture can lead to soggy cooked greens or rapid spoilage if stored. I always take the time to dry my greens thoroughly. This step makes a huge difference in the final product.
Effective drying methods prepare your greens perfectly for cooking or storage. It also helps them absorb seasonings better. This section covers the best ways to get your greens perfectly dry.
Using a Salad Spinner
A salad spinner is the most efficient tool for drying turnip greens. After rinsing, place the greens in the spinner basket. Spin them vigorously for 30-60 seconds. The centrifugal force removes most of the water quickly. You may need to do this in batches if you have a large amount.
Spinning the greens leaves them crisp and almost completely dry. This method saves time and effort. It is an investment I highly recommend for anyone who cooks with leafy greens regularly. Your greens will be perfectly primed for cooking.
Drying with Paper Towels or Clean Cloths
If you do not have a salad spinner, paper towels or clean kitchen towels work well. Lay a layer of clean paper towels on your counter. Spread a single layer of greens over the towels. Gently pat the greens dry with more paper towels. You can also roll the greens loosely in a clean, dry kitchen towel.
Repeat this process, using fresh towels if needed, until the greens are dry. This method takes more time than a spinner. However, it is effective at removing surface moisture. Ensure the greens are not dripping before proceeding.
Storing Clean Turnip Greens
Once your turnip greens are clean and dry, you can store them in the refrigerator. Wrap the dry greens in paper towels. Place them inside a large, sealable plastic bag or an airtight container. The paper towels absorb any remaining moisture. This helps prevent spoilage.
Store the greens in the crisper drawer of your refrigerator. They should remain fresh for up to 3-5 days. Cleaning and drying them properly before storage extends their shelf life significantly. This allows you to have ready-to-cook greens whenever you need them.
Common Mistakes to Avoid When Cleaning Turnip Greens
Even with simple tasks like cleaning greens, common pitfalls can lead to less-than-ideal results. Avoiding these mistakes ensures your turnip greens are perfectly clean and enjoyable. I have seen many people make these errors. Learning from them can save you time and frustration.
Understanding what not to do is as important as knowing what to do. These tips will help you achieve the best outcome. They ensure your efforts are not wasted.
Not Rinsing Enough
The most common mistake is not rinsing the greens enough. Turnip greens often carry a lot of soil. A single rinse is rarely sufficient. You must rinse and soak them multiple times until the water is completely clear.
If you skip this step, you will likely encounter gritty greens in your cooked dish. This can ruin the texture and enjoyment. Always prioritize thorough rinsing. Patience in this step pays off.
Overcrowding the Sink or Bowl
Trying to clean too many greens at once in a small space is another error. Overcrowding prevents proper water circulation. It also makes it difficult for dirt to settle away from the leaves. The greens will not get truly clean.
Work in smaller batches if your sink or bowl is not large enough. This allows the greens ample room to move and release dirt. Give each batch enough space to be fully submerged and agitated.
Using Hot Water
Always use cold water when cleaning turnip greens. Hot water can cause the greens to wilt prematurely. It can also begin to cook them slightly. This affects their texture and freshness.
Cold water helps keep the greens crisp. It also helps some dirt particles settle faster. Stick to cold water for all washing stages. This maintains the greens’ quality.
Not Drying Thoroughly
Failing to dry your greens properly before cooking or storage is a significant mistake. Wet greens will steam rather than sauté or braise effectively. They can also become slimy and spoil quickly in storage. This shortens their freshness.
Take the extra time to dry the greens using a salad spinner or paper towels. This step is crucial for both culinary results and food safety. Well-dried greens cook better and last longer.
Not Trimming Damaged Parts
Ignoring bruised, yellowed, or tough parts of the greens is another oversight. These parts can introduce off-flavors or unpleasant textures to your dish. They may also harbor more dirt or pests.
Always take the time to inspect and trim. Removing these unwanted sections improves the overall quality and taste of your cooked turnip greens. It ensures a better eating experience. This trimming process is similar to how you would prepare other leafy greens like collards, ensuring a clean and pleasant meal. You can learn more about specific cleaning techniques for other vegetables by exploring guides like how to clean collard greens.
Beyond Cleaning: Preparing Turnip Greens for Cooking
Once your turnip greens are sparkling clean and dry, they are ready for the next step: preparation for cooking. While cleaning is crucial, understanding how to prepare them makes cooking more enjoyable and efficient. I always plan my cutting based on the dish I am making. This ensures consistency and proper cooking.
Proper preparation after cleaning sets the stage for a delicious meal. It involves simple cutting techniques. These steps are quick and easy to follow.
Chopping Your Clean Greens
How you chop your turnip greens depends on your recipe and personal preference. Some people prefer large pieces, while others like them finely chopped. A common method is to stack several leaves on top of each other. Roll them tightly into a cigar shape. Then, slice across the roll to create thin ribbons. This method is called a chiffonade.
For a more rustic approach, you can simply tear the leaves by hand into bite-sized pieces. Remember to include the tender parts of the stems, as they also hold good flavor and nutrients. Chopping makes the greens easier to eat and cook evenly.
Common Cooking Methods for Turnip Greens
Turnip greens are versatile and can be cooked in various ways. Southern-style greens are often slow-cooked with smoked ham hocks or bacon for hours. This method creates tender greens with a rich, savory broth, known as “pot liquor.” This cooking style breaks down the slight bitterness.
You can also quickly sauté turnip greens with garlic and olive oil for a lighter side dish. They can be added to soups, stews, or stir-fries. Turnip greens also pair well with vinegar or a squeeze of lemon juice at the end of cooking. Their robust flavor holds up well to different cooking techniques.
Pairing and Flavor
Turnip greens have a distinct, slightly peppery and bitter taste. They pair well with savory, salty, or smoky flavors. Ingredients like bacon, ham hocks, smoked turkey, or a dash of hot sauce enhance their profile. A touch of sweetness, like a pinch of sugar or a splash of apple cider, can also balance their bitterness.
Experiment with different seasonings to find your favorite combination. Turnip greens are not just a side dish; they can be the star of a healthy meal. Their rich nutrient content makes them a great choice for any diet.
Frequently Asked Questions About Cleaning Turnip Greens
How long should I soak turnip greens?
Soak turnip greens in cold water for about 5-10 minutes per batch. This allows dirt and sand to settle. Repeat this process multiple times, changing the water each time, until the water remains clear. A single soak is usually not enough for thoroughly clean greens.
Can I use soap or detergent to clean turnip greens?
No, you should never use soap or detergent to clean turnip greens or any produce. These products are not safe for consumption and can leave harmful residues on your food. Stick to plain cold water, or consider a food-safe solution like white vinegar or salt water for a deeper clean.
What if my turnip greens are extra sandy?
If your turnip greens are exceptionally sandy, extend the soaking time and increase the number of rinses. Allow them to sit in the water longer to let more grit settle. You may need to repeat the rinse and soak process five or more times until the water is completely free of sediment.
How do I know if my turnip greens are truly clean?
Your turnip greens are truly clean when the water you are soaking or rinsing them in remains perfectly clear, with no visible dirt or sand at the bottom of the sink or bowl. Additionally, run your fingers over the leaves; they should feel smooth, not gritty.
Can I clean turnip greens ahead of time?
Yes, you can clean turnip greens ahead of time. After washing and thoroughly drying them, wrap the greens in paper towels and place them in a sealed plastic bag or airtight container. Store them in the refrigerator’s crisper drawer. They should stay fresh for 3-5 days.
Do I need to remove the stems from turnip greens before cooking?
You do not necessarily need to remove all stems from turnip greens. The tender, thinner parts of the stems are edible and add flavor and texture to your dish. Only remove the very tough, fibrous ends of the main stem, as these can be unpleasant to chew.
Conclusion
Cleaning turnip greens is a fundamental step to enjoying these nutritious and flavorful vegetables. We have explored every aspect, from selecting the freshest greens to implementing advanced cleaning techniques. My hope is that you now feel confident in your ability to thoroughly clean turnip greens, ensuring every dish is free from grit and full of pure taste.
Remember, patience and attention to detail are key. Multiple rinses and proper drying truly make all the difference. By following these guidelines, you will consistently prepare turnip greens that are both safe and incredibly delicious. Start cooking with confidence today, knowing your greens are impeccably clean. Enjoy the rich, comforting flavors of perfectly prepared turnip greens in your next meal!
- turnip greens
- cleaning greens
- vegetable preparation
- southern cooking
- healthy eating
- kitchen tips

Todd Martin
Senior Writer
With over 15 years of experience in home renovation and design, I started HEG to share what I’ve learned with homeowners who want to create spaces that are both beautiful and functional. I’ve always believed in a hands-on approach, and over the years, I’ve picked up practical solutions that actually work. Through HEG, I aim to make home improvement more approachable, sharing real tips that help you create a home you truly love.
