· Davia Murnell · Home Maintenance · 22 min read
How To Clean The Toilet Tank
Transform Your Toilet: How to Clean the Toilet Tank Effectively
Have you ever peeked inside your toilet tank? You might find an unwelcome surprise lurking in there. Many of us focus on the bowl, but the tank is where the water for flushing originates. Over time, mineral deposits, mold, mildew, and even bacteria can build up. This accumulation affects your toilet’s efficiency and overall bathroom hygiene.
A dirty toilet tank can lead to a less powerful flush or even unpleasant odors. Keeping it clean is a simple yet vital part of home maintenance. This guide will show you how to clean the toilet tank thoroughly. We will cover the necessary tools, different cleaning methods, and how to maintain a clean tank. Let’s make sure your toilet is fresh from top to bottom.
Takeaway
- Regularly cleaning the toilet tank prevents mineral buildup and mold growth.
- Gather necessary supplies like gloves, brushes, and your chosen cleaner before starting.
- Turn off the water supply and empty the tank before cleaning.
- Use natural cleaners like vinegar or stronger solutions like bleach for effective cleaning.
- Rinse the tank thoroughly after cleaning to remove all residues.
To effectively clean the toilet tank, turn off the water supply and flush to empty it. Then, scrub away grime with a brush and a suitable cleaner like white vinegar or bleach. Rinse the tank multiple times to ensure all deposits and cleaning solutions are gone, restoring its cleanliness.
Why a Clean Toilet Tank Matters
Many homeowners overlook the toilet tank, yet it plays a central role in your bathroom’s cleanliness. The water stored inside the tank directly impacts the water that fills your toilet bowl. If the tank is dirty, you are essentially flushing with dirty water. This can lead to persistent stains and odors in the bowl, even after you clean it.
A dirty tank can also affect the plumbing components. Mineral deposits, like calcium and limescale, build up on the fill valve and flapper. This buildup can make these parts less effective. Over time, it can cause leaks or prevent your toilet from flushing correctly. Regular cleaning extends the life of your toilet’s internal mechanisms. It also ensures efficient water usage.
Ignoring tank cleanliness can also harbor mold and mildew. These organisms thrive in dark, damp environments. They can contribute to unpleasant musty smells in your bathroom. Keeping the tank pristine contributes to overall bathroom hygiene. It creates a healthier living space. Think of it as the heart of your toilet; keeping it healthy ensures the whole system works well.
Essential Tools and Materials for Tank Cleaning
Before you begin the task of cleaning your toilet tank, gather all your supplies. Having everything ready saves time and makes the process smoother. You will need a few basic items. These items help you tackle dirt, grime, and mineral deposits effectively. Safety should always come first, so personal protective equipment is important.
First, get a pair of rubber gloves to protect your hands from cleaning solutions and germs. Next, you will need a stiff-bristled scrub brush. A toilet brush is too large for inside the tank. A utility brush or a long-handled bottle brush works best. An old toothbrush is useful for small crevices and difficult-to-reach areas. You will also need sponges or rags for wiping surfaces.
For cleaning solutions, white vinegar is a popular natural option. It effectively breaks down mineral deposits and mild mold. For tougher stains or serious mold issues, you might need a stronger cleaner. Bleach is an option, but use it with caution and never mix it with other cleaners. Alternatively, some homeowners prefer cleaning toilet tank with baking soda for a gentler approach. Have a bucket ready for draining water. This helps prevent spills. With these tools, you are ready to tackle the project.
Step-by-Step Guide to Cleaning Your Toilet Tank
Cleaning your toilet tank might seem intimidating, but it is a straightforward process. Following these steps ensures a thorough clean and protects your plumbing. Take your time to complete each part of the process carefully. This will lead to a truly spotless tank.
Step 1: Prepare the Tank
Your first step is to stop the water flow to the toilet. Look for the shut-off valve, typically located on the wall behind or near the base of the toilet. Turn the valve clockwise until it is completely off. Once the water supply is off, flush the toilet. This will empty most of the water from the tank into the bowl. Hold the flush handle down until all water drains out. Some residual water will remain at the bottom; this is normal.
Step 2: Initial Scrub and Remove Loose Debris
With the tank mostly empty, you can now see the inside surfaces clearly. Put on your rubber gloves. Use a stiff scrub brush to remove any loose debris or slime. You might see slimy residue on the tank walls or components. Scrub gently but firmly to dislodge these accumulations. If there are large pieces of sediment or rust, carefully scoop them out. You can use a small plastic cup or your gloved hand. This initial scrub makes the deeper cleaning more effective.
Step 3: Apply Your Chosen Cleaning Solution
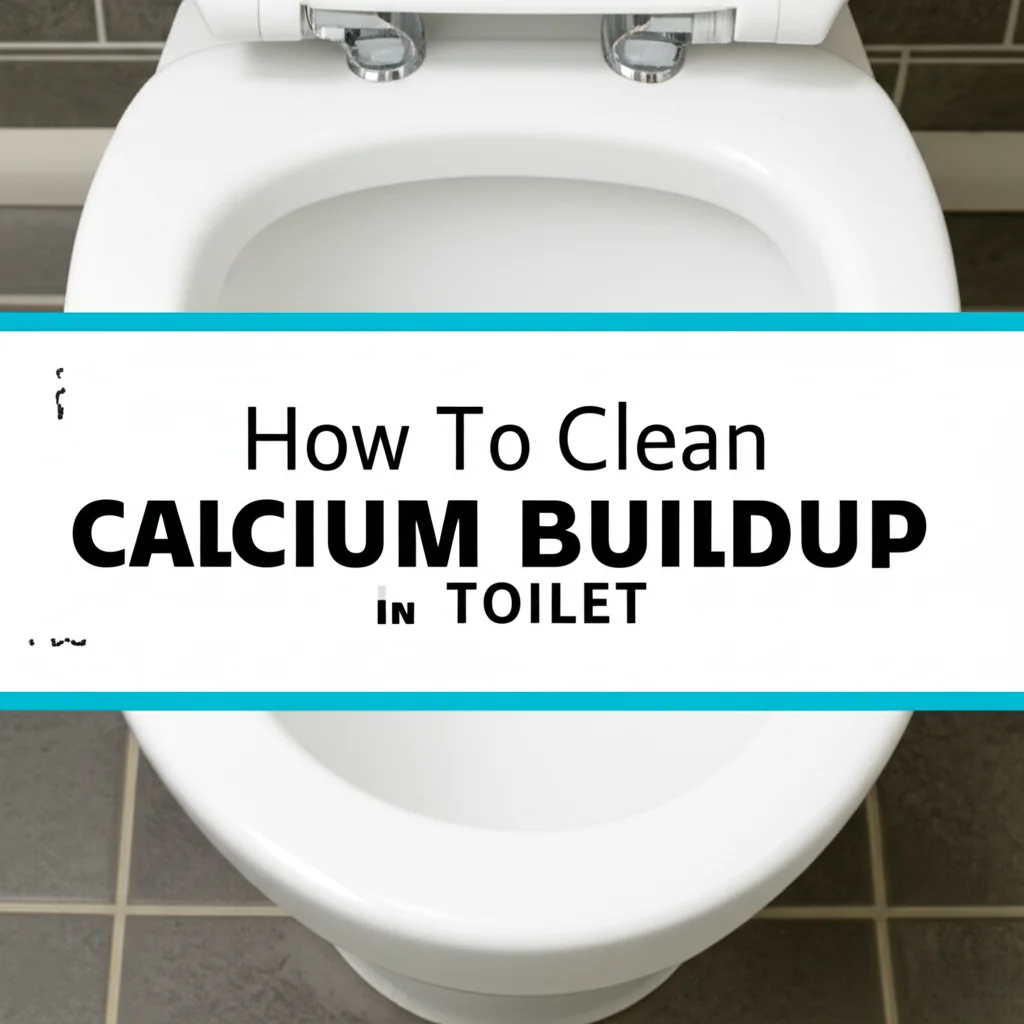
Now it is time to apply your cleaner. For a natural approach, pour several cups of white vinegar directly into the tank. Ensure the vinegar covers the water line and reaches areas with buildup. Let the vinegar sit for at least 30 minutes, or up to several hours for heavy deposits. For stubborn calcium buildup in toilet or mold, you can use a diluted bleach solution (1 part bleach to 10 parts water). Never mix bleach with vinegar or other cleaners. Alternatively, use a commercial toilet tank cleaner designed for this purpose. Allow the solution to penetrate and break down the grime.
Step 4: Deep Scrub and Address Stains
After the cleaning solution has soaked, it is time for the deep scrub. Use your scrub brush to vigorously clean the tank walls, the bottom, and around the components. Pay special attention to the water line where mineral rings often form. Use an old toothbrush for tight spots around the fill valve and the flapper. Scrub away any remaining mold, mildew, or stains. For persistent rust stains, you may need a rust-specific cleaner or more concentrated vinegar application. Make sure to clean all visible surfaces inside the tank. This includes the internal mechanics. For guidance on deep cleaning, you can refer to tips on how to deep clean toilet.
Step 5: Rinse and Refill the Tank
Once you have scrubbed the tank thoroughly, it is crucial to rinse it properly. Turn the water supply back on slowly by rotating the shut-off valve counter-clockwise. Let the tank fill completely. Then, flush the toilet several times. This flushes the dirty water and cleaning solution out of the tank and bowl. You may need to repeat this step a few times until the water runs clear. Make sure no cleaning product residue remains. This ensures your toilet water is clean and fresh.
Natural Cleaning Methods for Your Toilet Tank
Many people prefer using natural cleaning agents for their homes. These options are less harsh than chemical cleaners and safer for your plumbing. They are also better for the environment. White vinegar and baking soda are two powerful natural cleaners. They can effectively clean your toilet tank without strong fumes.
White Vinegar Method
White vinegar is an excellent descaler and mildew remover. Its acidic nature helps dissolve mineral deposits and hard water stains. It also tackles mild mold and unpleasant odors. This makes it a great choice for regular tank maintenance.
- Turn Off Water and Drain: Begin by turning off the water supply to the toilet. Flush the toilet until the tank is empty.
- Pour Vinegar: Pour 3-4 cups of undiluted white vinegar into the empty tank. Ensure the vinegar reaches the water line and covers any visible mineral deposits.
- Let it Soak: Allow the vinegar to soak for at least 30 minutes. For heavy buildup or stains, let it sit for several hours or even overnight. The longer it soaks, the more effectively it breaks down grime.
- Scrub the Tank: After soaking, use a stiff-bristled brush to scrub the inside of the tank. Focus on areas with mold, mildew, or mineral stains. An old toothbrush can help clean crevices around the flapper and fill valve.
- Rinse Thoroughly: Turn the water supply back on and let the tank refill. Flush the toilet several times to rinse away the vinegar and loosened debris. Repeat until the water runs clear and no vinegar smell remains. This ensures you have a truly clean toilet tank.
Baking Soda Method
Baking soda is a mild abrasive and odor absorber. It works well for light cleaning and freshening the tank. You can use it alone or in combination with vinegar for a more powerful clean. This method is gentle on plumbing parts.
- Empty the Tank: Turn off the water supply and flush the toilet to empty the tank.
- Sprinkle Baking Soda: Sprinkle about 1/2 to 1 cup of baking soda directly onto the bottom and sides of the empty tank. You can also mix it with a small amount of water to create a paste for scrubbing stubborn spots.
- Light Scrub: Use a damp brush to gently scrub the baking soda onto the tank surfaces. The baking soda will help lift light stains and absorb odors.
- Rinse: Turn the water supply back on and let the tank refill. Flush the toilet several times to rinse out the baking soda and any dislodged grime.
For a more robust natural clean, combine these methods. First, use the vinegar soak to break down deposits. Then, after draining, sprinkle baking soda and scrub. This combination creates a fizzing action that helps lift stubborn grime. Always rinse well after using any cleaning solution.
Tackling Tough Stains: Mold, Mildew, and Rust
Sometimes, a simple scrub with vinegar is not enough. Toilet tanks can develop stubborn issues like black mold, green mildew, or unsightly rust stains. These problems require a more targeted approach. Addressing them promptly prevents further damage and ensures a truly clean system.
Removing Mold and Mildew
Mold and mildew thrive in the damp, dark environment of a toilet tank. They often appear as black, green, or pinkish slime. While vinegar handles mild cases, severe mold may need a stronger solution.
- Bleach Solution: For tough mold, use a diluted bleach solution. Mix 1 part household bleach with 10 parts water in a separate bucket. Wear rubber gloves and eye protection. Pour the solution into the empty toilet tank. Let it sit for 15-30 minutes. The bleach will kill the mold spores. After soaking, scrub the tank thoroughly with a stiff brush. Ensure you reach all affected areas. Finally, turn the water back on and flush multiple times until the water runs completely clear. Never mix bleach with other cleaners, especially ammonia or vinegar, as this creates dangerous fumes.
- Hydrogen Peroxide: A less harsh alternative to bleach is hydrogen peroxide. Pour 1-2 cups of 3% hydrogen peroxide into the empty tank. Let it sit for 30 minutes to an hour. Hydrogen peroxide is effective at killing mold and bacteria. Scrub and rinse thoroughly afterward. This is a safer option for septic systems.
Eliminating Rust Stains
Rust stains in a toilet tank typically come from iron in your water supply or corroding internal metal parts. These stains appear as reddish-brown marks. They can be very difficult to remove with standard cleaners.
- Oxalic Acid Cleaners: Products containing oxalic acid are highly effective against rust. Look for commercial rust removers specifically designed for toilets or plumbing. Follow the product instructions carefully. These usually involve applying the cleaner to the empty tank, letting it sit, and then scrubbing. Always wear gloves and ensure good ventilation when using these products.
- Lemon Juice and Salt: For a natural approach to minor rust stains, try a paste of lemon juice and salt. Apply the paste directly to the rust spots. Let it sit for several hours, then scrub with a brush. The acidity of the lemon juice helps dissolve the rust, and the salt acts as a mild abrasive. This method is safe for all tank materials.
- Addressing the Source: If rust is a recurring problem, consider getting your water tested for high iron content. You might need a whole-house water filter to prevent future rust buildup. If the rust comes from corroding toilet parts, replace them. Learning how to clean toilet fill valve can help you identify if the issue is with the valve itself. This proactive step prevents ongoing rust issues.
When dealing with tough stains, patience is key. Allow the cleaners enough time to work before scrubbing. Always rinse the tank thoroughly multiple times after using strong cleaning agents. This protects your toilet’s components and ensures no harsh chemicals remain.
Regular Maintenance for a Pristine Toilet Tank
Cleaning your toilet tank once is a great start, but consistent maintenance keeps it pristine. Regular care prevents heavy buildup of mineral deposits, mold, and rust. This saves you time and effort in the long run. It also ensures your toilet operates at peak efficiency. Establishing a routine is simpler than you might think.
Aim to clean your toilet tank thoroughly every 3 to 6 months. The frequency depends on your water quality and how often the toilet is used. If you have hard water, you might need to clean it more often, perhaps every 2-3 months. Hard water contains high levels of minerals like calcium and magnesium. These minerals precipitate out and form limescale, which appears as white, crusty deposits. Preventing this buildup is crucial for the longevity of your toilet’s components.
Between deep cleans, consider using preventative measures. You can add a cup of white vinegar to the tank once a month. Let it sit for 30 minutes, then flush a few times. This helps to inhibit mold growth and keeps minor mineral buildup at bay. Avoid drop-in tablet cleaners that promise continuous cleaning. Many of these tablets contain harsh chemicals, like bleach or strong oxidizers. These can erode rubber components inside your tank, like the flapper and seals. This can lead to leaks and costly repairs.
Inspect your toilet tank periodically. Lift the lid once a month and take a quick look inside. Check for any signs of discoloration, slime, or unusual odors. Early detection allows you to address problems before they become severe. If you notice persistent issues, such as a strong sulfur smell, it might indicate a different problem with your water supply. This could suggest a need to clean water tank for your home’s main supply.
Keeping the external parts of your toilet clean is also important. This includes the bowl, seat, and base. While you’re cleaning the tank, give the rest of the toilet a quick wipe down. For comprehensive care, learn how to clean your toilet regularly. A clean tank contributes to a clean bowl, making your entire bathroom feel fresher.
Common Problems and Troubleshooting Tank Issues
A toilet tank often hides problems that affect the entire toilet system. Understanding common issues can help you diagnose and fix them. Regular cleaning can prevent many of these problems. However, some may require specific attention.
Unpleasant Odors
If you notice a strange smell coming from your toilet, the tank is a likely culprit. Odors can stem from several sources within the tank.
- Bacterial or Mold Growth: The most common cause is the growth of bacteria, mold, or mildew. They thrive in damp, dark environments. These organisms release gases that cause musty or sewer-like smells. A thorough cleaning of the tank, as described previously, usually resolves this. Using bleach or hydrogen peroxide is effective for killing these growths.
- Sewer Gas: In rare cases, a persistent sulfur-like smell may indicate sewer gas. This is often due to a dry P-trap in a nearby drain. It is usually not from the toilet tank itself. However, a constantly refilling tank or a running toilet can mask this. Ensure all drains in your bathroom have water in their P-traps.
- Water Quality: If your water source has high levels of sulfur or other minerals, it can produce an odor. This might mean the smell is coming from your municipal water or well. This is less common but worth considering if other cleaning methods fail.
Discolored Water
Water in the toilet bowl should be clear. If you see brown, yellow, or even black water, the tank is likely contributing to the discoloration.
- Rust Particles: Brown or reddish water usually indicates rust. This can come from old pipes or corroding metal parts inside the tank itself. A rusty fill valve or bolts can leach rust into the water. Cleaning helps, but replacing corroded parts might be necessary.
- Mineral Deposits: Yellowish or cloudy water often points to mineral deposits. Limescale, calcium, and magnesium can build up and dissolve into the water. Regular descaling with vinegar helps prevent this.
- Mold/Algae: Green or blackish water suggests mold or algae growth. These organisms are living in the tank and discolor the water as they reproduce. Bleach or hydrogen peroxide are effective treatments.
Running Toilet or Weak Flush
While not directly a “dirty tank” issue, buildup can contribute to these problems.
- Flapper Seal Issues: Mineral buildup on the flapper or the flapper seat can prevent a tight seal. This allows water to continuously leak from the tank into the bowl, causing the toilet to run. Cleaning the flapper and its seat often resolves this. If the flapper is old or worn, replace it.
- Fill Valve Problems: The fill valve controls the water filling the tank. Mineral deposits can clog or impede its function. This leads to slow filling or improper shut-off. Cleaning toilet fill valve can help remove blockages. If cleaning doesn’t work, the valve may need replacement.
- Siphon Jet Hole Blockage: While primarily a bowl issue, mineral deposits can affect the small holes under the rim of the toilet bowl. This can lead to a weak flush. Cleaning the tank and ensuring clean water flows through can help prevent these blockages.
Regular inspections and prompt action can keep your toilet system running smoothly. Addressing these issues not only improves hygiene but also saves water and prevents larger plumbing problems.
Safety Precautions and Eco-Friendly Tips
Cleaning your toilet tank involves chemicals and stagnant water. Taking proper safety precautions protects both you and your home. Opting for eco-friendly methods also benefits the environment. Always prioritize safety first.
Safety First
- Ventilation: When using strong cleaning agents like bleach, ensure the bathroom is well-ventilated. Open windows and turn on the exhaust fan. This prevents the inhalation of fumes.
- Protective Gear: Always wear rubber gloves to protect your hands from chemicals and bacteria. If using bleach or other harsh cleaners, consider wearing eye protection to prevent splashes.
- Avoid Mixing Chemicals: Never mix different cleaning products, especially bleach with ammonia, vinegar, or other acids. This can create highly toxic gases. Stick to one cleaner at a time.
- Handle with Care: Be careful when working around the toilet’s internal components. They can be delicate. Avoid forceful scrubbing that could damage the flapper or fill valve.
- Proper Disposal: Dispose of any used cleaning solutions or dirty water properly. Do not pour large quantities of strong chemicals down the drain if you have a septic system.
Eco-Friendly Cleaning Tips
- Choose Natural Cleaners: As discussed, white vinegar and baking soda are excellent natural alternatives. They are non-toxic, biodegradable, and effective for most tank cleaning needs. They are also gentle on septic systems.
- Avoid Chemical Drop-ins: Steer clear of continuous cleaning tablets that sit in the tank. These often contain harsh chemicals that degrade rubber parts over time. This leads to leaks and can be harmful to aquatic life if they enter waterways.
- Minimize Water Waste: When rinsing the tank, turn the water supply off between flushes if possible. This prevents unnecessary water usage while the tank fills and drains.
- Reusable Tools: Use reusable scrub brushes, sponges, and rags instead of disposable wipes. This reduces waste and is more sustainable.
- Consider Water Quality: If you have extremely hard water or high iron content, a whole-house water filter can reduce mineral buildup in your toilet tank. This lessens the need for frequent deep cleaning with strong chemicals. It also protects all your plumbing fixtures.
By following these safety guidelines and incorporating eco-friendly practices, you can clean your toilet tank effectively and responsibly. A clean tank contributes to a healthier home and a healthier planet.
When to Call a Professional
Most toilet tank cleaning and minor maintenance can be handled by a DIY enthusiast. However, there are times when it is best to call a professional plumber. Recognizing these situations can save you time, money, and potential headaches.
- Persistent Leaks: If your toilet tank continues to leak after you have cleaned it and checked the flapper or fill valve, it might indicate a more complex issue. Leaks can waste a significant amount of water. A plumber can diagnose the exact source of the leak, whether it is a crack in the porcelain or a faulty flush valve assembly.
- Damaged Components: During cleaning, you might discover a cracked tank, severely corroded bolts, or a broken fill valve that cannot be easily replaced. These situations require professional repair or replacement. Attempting to fix major component damage without proper tools or experience can worsen the problem.
- Unusual Noises: If your toilet tank makes strange gurgling, whistling, or banging noises that do not go away after cleaning, a plumber should investigate. These noises often signal issues with water pressure, fill valve problems, or air in the lines.
- Systemic Water Quality Issues: If your toilet tank constantly fills with rust-colored or foul-smelling water, even after regular cleaning, the problem might be with your home’s main water supply. A plumber or water treatment specialist can test your water. They can recommend solutions like a whole-house filter or water softener.
- Blocked Drains Not Solved by Standard Methods: While tank cleaning primarily affects the water quality within the tank and bowl, sometimes issues like weak flushing stem from deeper blockages. If you have tried common methods for how to clean blocked toilet and issues persist, a plumber has specialized equipment to clear stubborn clogs.
- No Water Flow: If the tank does not fill at all, or only partially fills, and you have confirmed the shut-off valve is open, there might be a significant blockage or failure in the fill valve or water line. A professional can quickly identify and fix this.
Calling a plumber for these complex issues ensures the problem is resolved correctly and safely. They have the expertise and tools to handle plumbing challenges that go beyond routine cleaning and maintenance.
Frequently Asked Questions
How often should I clean my toilet tank?
You should aim to clean your toilet tank thoroughly every 3 to 6 months. If you have hard water, or if you notice mold, mineral buildup, or unpleasant odors, you may need to clean it more frequently, perhaps every 2-3 months. Regular inspections help determine the exact cleaning schedule needed.
What are the best cleaners for a toilet tank?
For most toilet tank cleaning, white vinegar is highly effective. It is natural, safe for plumbing, and excellent at dissolving mineral deposits and mild mold. For tougher stains or significant mold, a diluted bleach solution (1 part bleach to 10 parts water) can be used, but always with caution and never mixed with other cleaners. Baking soda also works well for light cleaning and odor removal.
Can I use toilet bowl cleaner in the tank?
No, you should not use toilet bowl cleaner in the tank. Toilet bowl cleaners are formulated for porcelain and typically contain strong acids that can damage the rubber and plastic components inside your toilet tank, such as the flapper and seals. This can lead to leaks and costly repairs over time. Stick to cleaners designed for tanks or general household use.
Why does my toilet tank have black stuff in it?
Black stuff in your toilet tank is usually black mold or mildew. These organisms thrive in the damp, dark environment of the tank, feeding on minerals in the water. A thorough cleaning with white vinegar or a diluted bleach solution will kill and remove them. Regular cleaning helps prevent their recurrence.
Will cleaning the tank help a running toilet?
Yes, cleaning the toilet tank can often help a running toilet. Mineral buildup and grime can accumulate on the flapper or its seat, preventing a tight seal and causing water to leak into the bowl. Cleaning these components can restore the seal. If the problem persists after cleaning, the flapper or fill valve may need to be replaced.
Is it safe to put bleach in my toilet tank?
Yes, it is generally safe to use bleach in your toilet tank, but only occasionally and in a diluted form. Use a solution of 1 part bleach to 10 parts water. Avoid using it too frequently, as concentrated bleach can degrade rubber parts over a long period. Never mix bleach with other cleaning chemicals like vinegar or ammonia, as this creates dangerous fumes.
Conclusion
A clean toilet tank is more than just about aesthetics; it is vital for your toilet’s performance and overall bathroom hygiene. Overlooking this hidden component can lead to mineral buildup, mold growth, unpleasant odors, and even plumbing issues. By following the steps outlined in this guide, you can confidently tackle the task of cleaning your toilet tank effectively.
Regular maintenance is key to preventing severe grime and extending the life of your toilet’s internal parts. Whether you opt for natural solutions like vinegar and baking soda or need stronger methods for tough stains, a clean tank ensures a clean, efficient flush every time. Make tank cleaning a regular part of your home maintenance routine. Your toilet, and your bathroom, will thank you for it. Start your toilet tank cleaning journey today for a fresher, more functional bathroom.
- toilet cleaning
- tank maintenance
- bathroom hygiene
- DIY cleaning
- hard water stains

Davia Murnell
Room Cleaning Expert
Before joining HEG, I spent over a decade running my own window cleaning business, where I perfected streak-free techniques and learned the ins and outs of specialty glass care. Now, I bring that expertise to a broader mission—helping homeowners maintain sparkling windows and beautiful outdoor spaces. From skylights and sliding doors to patio glass and outdoor furniture, I believe every surface deserves attention and care. I share practical tips and proven methods that make even the toughest cleaning jobs feel manageable. Whether you're battling pollen on the porch or smudges on high windows, I’m here to help you see your home in a whole new light—literally.