· Todd Martin · Lash Care · 14 min read
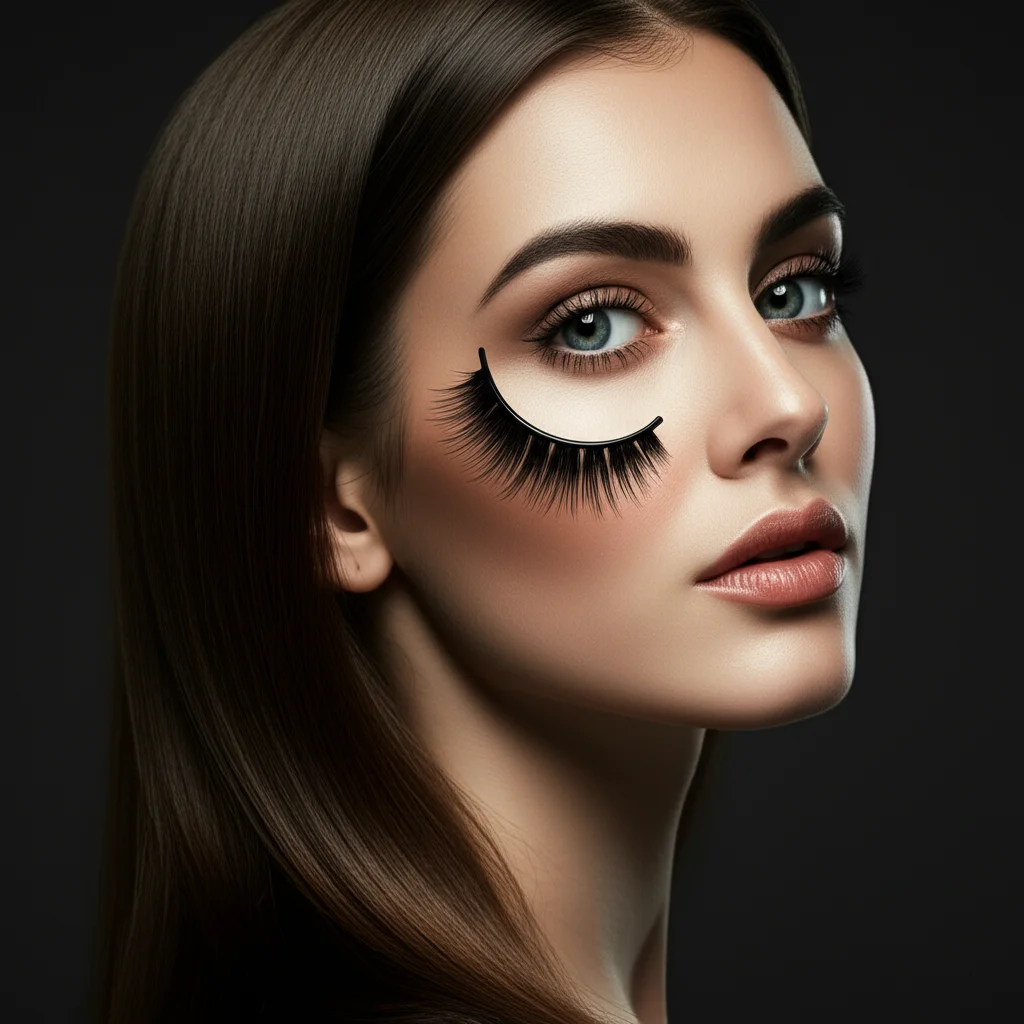
How To Clean Strip Lashes
Clean Strip Lashes: Your Guide to Extending Lash Life
Do you love the flutter of beautiful lashes but dread throwing them away after just one wear? I know that feeling! It feels wasteful. Learning how to clean strip lashes properly is a game-changer. This simple skill not only saves you money in the long run but also keeps your eyes healthy. Clean lashes look better and last longer. This guide gives you all the steps and tips to keep your favorite strip lashes in top condition. We will cover why cleaning matters, what tools you need, and a clear step-by-step process.
Takeaway:
- Remove old glue gently with tweezers.
- Cleanse lashes with an oil-free makeup remover.
- Rinse and air dry completely.
- Brush and store in their original case.
To clean strip lashes, gently peel off old glue with tweezers. Then, use an oil-free makeup remover on a cotton swab to wipe away mascara and residue. Rinse the lashes with cool water, pat them dry, and let them air dry completely before storing. This simple process keeps your lashes hygienic and ready for reuse.
Why Cleaning Strip Lashes Matters for Longevity and Hygiene
Keeping your strip lashes clean is very important. It offers several great benefits. First, it makes your lashes last much longer. Instead of using them once, you can reuse them many times. This saves you money because you do not need to buy new pairs as often. I have saved a lot by just taking a few minutes to clean them.
Second, cleaning strip lashes is essential for eye health. Throughout the day, lashes collect makeup, natural oils, and even bacteria from your eyelids and the environment. If you reuse dirty lashes, you can transfer these germs directly to your eyes. This might lead to eye infections, irritation, or even styes. Nobody wants red, itchy eyes! Regular cleaning removes this buildup. It keeps your lashes hygienic. It makes sure each wear is safe for your eyes.
Finally, clean lashes look much better. Old glue residue makes lashes stiff and unnatural. Mascara clumps make them look messy. Clean lashes stay soft, fluffy, and just like new. They blend better with your natural lashes. This gives you a fresh, flawless look every time you wear them. Taking care of them truly pays off. For more general advice on keeping all types of false eyelashes pristine, you can refer to our detailed guide on how to clean false lashes.
Essential Tools You Need for Lash Cleaning
Gathering the right tools makes the cleaning process easy and effective. You do not need many fancy items. Most of these things you might already have at home. Having them ready before you start saves time. I always lay out my tools on a clean surface.
First, you need a mild, oil-free makeup remover or micellar water. Oil-based removers can break down the lash glue band. They can also loosen the lash fibers. Micellar water is gentle and effective at dissolving makeup and dirt. This keeps your lashes in good shape.
Next, have a few cotton swabs or Q-tips ready. These are perfect for precise cleaning. They let you reach small areas without damaging the delicate lash fibers. You will also need a pair of small tweezers. These are essential for carefully peeling off old lash glue from the band. Precision is key here to avoid tearing the lash.
A clean, lint-free towel or paper towel is important for drying. You will gently blot the lashes. Finally, a lash spoolie or clean mascara wand helps reshape and fluff the lashes after cleaning. This makes them look like new again. With these simple tools, you are ready to give your strip lashes the best care.
Step-by-Step Guide: How to Clean Strip Lashes Effectively
Cleaning your strip lashes is simple once you know the steps. I follow this routine every time I take off my lashes. It keeps them looking beautiful. This process is gentle and thorough.
Gentle Removal of Old Lash Glue
The first step is to remove old lash glue. This is often the trickiest part. Hold the lash by its band. Use your clean tweezers to carefully peel off any dried glue residue from the lash band. Start from one end and work your way across. Be very gentle. Pulling too hard can damage the lash band or pull out individual lash hairs. I find it easiest to roll the glue off with my fingers or the tweezers. Sometimes, the glue comes off in one piece. Other times, you need to pick at smaller bits. This step is crucial for comfort during your next wear. A clean band will adhere better and feel lighter on your eyelid. For more detailed instructions specific to dealing with persistent adhesive, check out our article on how to clean glue off lashes.
Cleansing Away Makeup and Residue
After removing the glue, it is time to clean the actual lashes. Dip a cotton swab into your oil-free makeup remover or micellar water. Gently wipe along the lash fibers. Start from the base of the lashes and move towards the tips. Use a light hand. You want to dissolve any mascara, eyeliner, or eyeshadow residue. Do not rub harshly. This can distort the lash shape. Turn the cotton swab as you work to use a clean section. Repeat this step until all visible makeup is gone. The goal is to make them look clean and fresh.
Rinsing and Drying Your Lashes
Once cleaned with remover, rinse your lashes. Hold them under a very gentle stream of cool water. Just a quick rinse is enough to wash away any remaining cleanser or dissolved makeup. Do not soak them. Soaking can weaken the lash band. After rinsing, place the lashes on a clean, lint-free towel. Gently blot them dry. Do not rub them. Then, let them air dry completely. Lay them flat on the towel or their original tray. This might take a few hours. Make sure they are fully dry before the next step. This prevents mold or mildew growth.
Reshaping and Storing for Next Use
After your lashes are completely dry, use a clean lash spoolie. Gently brush through the lashes. This helps reshape them and fluff out any fibers that stuck together. It brings back their original volume and curl. Then, store your clean, dry lashes in their original packaging or a dedicated lash case. This protects them from dust and keeps their shape intact. Storing them properly means they are ready for your next application. It makes sure they stay beautiful for many more wears.
Common Mistakes to Avoid When Cleaning False Lashes
Cleaning false lashes can seem simple, but some common mistakes can ruin your favorite pair. I have made a few of these myself. Knowing what to avoid helps your lashes last longer.
First, using harsh chemicals is a big no-no. Alcohol, strong facial cleansers, or oil-based removers can dissolve the lash band. They can also damage the delicate fibers. Always stick to mild, oil-free options like micellar water. These products are gentle. They clean effectively without causing damage.
Second, pulling too hard when removing glue or makeup is a common error. This can rip the lash band. It can also pull out individual lashes. Be very gentle. Use tweezers with a light hand for glue. Use cotton swabs with a soft touch for cleaning fibers.
Third, soaking lashes for too long in water or cleanser can be damaging. The lash band might lose its shape. The glue holding the fibers can weaken. A quick rinse or gentle wipe is all they need. Prolonged exposure to liquid is not necessary.
Fourth, not drying lashes properly can lead to problems. If you store wet lashes, mold or bacteria can grow. This is unhygienic and can cause eye infections. Always ensure your lashes are completely air-dried before putting them away. Patience is important here.
Finally, not cleaning lashes at all is the biggest mistake. Dirty lashes accumulate bacteria and makeup. They can cause eye irritation or infections. They also look clumpy and lose their shape quickly. Regular cleaning extends their life and keeps your eyes healthy. Avoid these errors to keep your false lashes beautiful and safe to use.
Distinguishing Strip Lash Care from Other Lash Systems
While cleaning strip lashes has a standard method, it is good to know that other false lash systems need different care. My own beauty routine includes various lash types, and I have learned their unique needs. Understanding these differences helps you clean each type correctly.
Classic strip lashes, the focus of this article, use a flexible band and lash adhesive. Their cleaning involves removing glue and makeup from this band and fibers. This method is generally safe for synthetic, mink, or human hair strip lashes. The key is gentleness and oil-free cleansers.
However, other popular lash types require distinct cleaning protocols. For instance, systems like Falscara are designed for under-lash application using specific bond and seal products. Their cleaning often involves a specialized remover and a different approach to preserve the clusters. If you use this type, knowing how to clean Falscara lashes is crucial. They are not like traditional strip lashes.
Magnetic lashes, such as those from Glamnetic, do not use traditional glue. They attach via magnetic eyeliner. Their cleaning mainly focuses on cleaning the tiny magnets and the lash fibers, avoiding harsh liquids that could rust the magnets or remove their coating. For these, you would need specific steps on how to clean Glamnetic lashes.
Similarly, professional-grade systems like Lashify use tiny individual “Gossamers” and a unique bond. These require very specific cleaning methods and tools provided by the brand. Incorrect cleaning can ruin the Gossamers or impact their reusability. If you are a fan of these, learning how to clean Lashify lashes is important. Their care is very different from standard strip lashes. Even brands like Lilac St. lashes, which are individual or cluster extensions, have their own recommended cleaning processes, often involving gentle soaking or wiping due to their delicate nature. You can explore how to clean Lilac St. lashes for their specific needs.
In essence, while the principles of hygiene and gentleness apply to all false lashes, the exact products and methods vary. Always check the manufacturer’s instructions for any specialized lash product. This ensures longevity and safe reuse.
When to Replace Your Strip Lashes
Even with the best cleaning routine, strip lashes do not last forever. Knowing when to replace them is important. It ensures continued hygiene and the best look. I always inspect my lashes closely after cleaning.
One major sign is loss of shape or curl. Over time, even carefully handled lashes can lose their natural curve. They might become flat or straighten out. If they no longer hold their shape even after brushing, it is time for a new pair. They will not look as flattering.
Another sign is damage to the lash band. The band can become frayed, torn, or too stiff. A damaged band makes application difficult. It also makes the lashes less comfortable to wear. If the band is compromised, the lashes will not sit well on your eyelid.
Missing or sparse fibers also indicate replacement. If you notice a significant number of lash hairs have fallen out, the overall fullness and look of the lash will be affected. They might look gappy or uneven. Even a few missing fibers can change the look dramatically.
Finally, consider hygiene limits. Even with regular cleaning, lashes can accumulate microscopic debris or bacteria over many wears. Most experts suggest replacing strip lashes after 10-15 wears. This depends on how well you clean them and how much product they endure. If you have had an eye infection, immediately discard any lashes you wore during that time. It is safer to replace them than risk re-infection. Your eyes are delicate. A fresh pair is always better than risking irritation.
Advanced Tips for Maximizing Lash Life
Beyond the basic cleaning steps, there are a few advanced tips to make your strip lashes last even longer. These small habits add up. They help preserve the quality and appearance of your lashes. I have found these tips really make a difference.
First, consider pre-cleaning your natural lashes and eyelids. Before applying strip lashes, ensure your eyelids are clean and free of excessive oils. Use an oil-free cleanser. This prevents natural oils and makeup from transferring to the lash band. This means less residue to clean off the strip lashes later. It makes their job easier.
Second, use a minimal amount of lash adhesive. Too much glue creates a thick, sticky mess. This is harder to remove without damaging the lashes. Apply a thin, even layer of glue to the lash band. Wait for it to get tacky. This is enough for a secure hold. It also makes cleanup simpler.
Third, remove mascara before applying lashes, or apply it only to your natural lashes. Applying mascara directly onto false lashes can make them clumpy. It can also make them much harder to clean. If you need to blend your natural lashes with the falsies, apply mascara to your natural lashes first. Let it dry. Then apply the strip lashes. Or, only apply mascara to the very base of your false lashes if necessary.
Fourth, invest in a dedicated lash cleaning solution if you wear lashes very often. While micellar water works well, some brands offer specific lash cleansers. These are formulated to be extra gentle and effective on false lash fibers. They often come with specialized brushes or pads. This can be a worthwhile investment for serious lash users.
Lastly, always store your lashes properly after cleaning and drying. Use the original tray or a hard lash case. This protects them from dust, dirt, and being crushed. Keeping their curve intact is key. Proper storage prevents them from losing their shape. It keeps them ready for your next perfect application.
FAQ Section
How often should I clean my strip lashes?
You should clean your strip lashes after every use. This removes all makeup, glue, and oil buildup. Regular cleaning keeps them hygienic. It also extends their lifespan significantly. This practice prevents eye irritation or infections from accumulating bacteria.
Can I use alcohol to clean strip lashes?
No, you should not use alcohol to clean strip lashes. Alcohol is too harsh. It can break down the lash adhesive. It can also dry out or damage the synthetic or natural fibers. Stick to mild, oil-free makeup removers or micellar water for safe cleaning.
What if I can’t get all the glue off my strip lashes?
If some glue remains, try gently rolling it off with your fingers or tweezers after letting the lashes sit with a little micellar water. Do not pull hard. If tiny bits persist, it is usually fine as long as the majority is removed. Do not risk damaging the lash.
How do I store clean strip lashes?
Store clean, dry strip lashes in their original plastic tray or a dedicated lash case. This helps them keep their shape and curve. It also protects them from dust and getting crushed. Proper storage ensures they are ready for your next wear.
Can I clean mink strip lashes the same way as synthetic?
Yes, you can generally clean mink strip lashes the same way as synthetic ones. Use mild, oil-free removers and be gentle. However, avoid excessive soaking or rubbing mink lashes. Too much water can sometimes reduce their natural fluffiness.
Is it okay to sleep in strip lashes?
No, it is not okay to sleep in strip lashes. Sleeping in them can damage the lashes. It can also cause eye irritation or infections. The lashes can bend, break, or pull out your natural lashes. Always remove and clean your strip lashes before bed.
Conclusion
Cleaning your strip lashes is a simple yet powerful habit. It transforms them from single-use items into cherished, reusable accessories. By following these clear steps, you can confidently remove glue, cleanse away makeup, and properly dry your lashes. This process not only saves you money by extending lash life but also safeguards your eye health. Maintaining clean lashes prevents infections and keeps your eyes looking their best.
Remember, a little care goes a long way. With the right tools and a gentle touch, your favorite strip lashes will stay soft, fluffy, and beautiful wear after wear. Embrace this easy routine. Enjoy the long-lasting beauty and hygiene that comes with properly cleaned lashes. Your eyes will thank you for it! Start cleaning your strip lashes today and see the difference.
- strip lashes
- lash cleaning
- false eyelashes
- lash care
- reusable lashes
- beauty tips
- makeup hygiene

Todd Martin
Senior Writer
With over 15 years of experience in home renovation and design, I started HEG to share what I’ve learned with homeowners who want to create spaces that are both beautiful and functional. I’ve always believed in a hands-on approach, and over the years, I’ve picked up practical solutions that actually work. Through HEG, I aim to make home improvement more approachable, sharing real tips that help you create a home you truly love.