· Todd Martin · Home Maintenance · 20 min read
How To Clean Stone Walls

Keep Stone Walls Clean: A Complete Guide
Stone walls add beauty and character to any space. Whether inside your home or outside in your yard, they create a unique look. Over time, however, these surfaces can collect dirt, grime, and even mold. Knowing how to clean stone walls properly helps maintain their appeal and durability. I find that regular cleaning prevents tough buildup and keeps my stone looking fresh. This article will show you the best ways to clean stone walls, covering everything from basic care to stain removal.
Takeaway
- Assess Wall Type: Identify the stone type (natural, engineered) and its porosity before cleaning.
- Start Gently: Begin with dry brushing and plain water before moving to stronger solutions.
- Test Cleaners: Always test any cleaning solution on an inconspicuous area first.
- Address Stains Specifically: Use targeted methods for mold, efflorescence, dirt, or soot.
- Consider Pressure Washing Carefully: Use low pressure and proper technique for exterior walls.
- Protect After Cleaning: Apply a suitable sealer to prevent future staining and damage.
How do you effectively clean stone walls?
You effectively clean stone walls by first brushing off loose debris. Then, use a gentle rinse with water. For stubborn dirt and stains, apply a mild stone cleaner or a solution of water and vinegar, scrubbing gently with a soft brush. Always rinse thoroughly to remove all cleaning agents.
Understanding Your Stone Wall
Before you start cleaning stone walls, you need to understand them. Stone walls can be natural or engineered. Natural stone includes materials like granite, limestone, sandstone, and slate. Each stone type has different properties. Engineered stone walls are often made from concrete or composite materials designed to look like natural stone.
The porosity of your stone is very important. Porous stones, like limestone or sandstone, absorb liquids more easily. This means they can stain deeply and require gentler cleaning methods. Denser stones, like granite, are less absorbent. They can often handle stronger cleaning solutions. I always check if my stone is sealed, too. A good seal can protect the stone from stains. It also makes cleaning much easier in the long run.
Different finishes also affect cleaning. Some stone walls are rough and textured, while others are smooth and polished. Rough surfaces can trap more dirt. They might need more scrubbing. Smooth surfaces are easier to wipe clean but can show streaks more readily. Knowing your stone helps you pick the right cleaning approach.
Essential Tools and Supplies for Cleaning Stone Walls
Having the right tools makes cleaning stone walls simple and effective. You do not need fancy equipment for most cleaning jobs. Basic household items work well. I always gather everything before I start to make the job go smoothly.
Here is a list of what you will likely need:
- Soft-bristled brush or broom: Use this for dry brushing off loose dirt and debris. A regular household broom works for large areas.
- Stiff-bristled non-metallic brush: This helps with tougher scrubbing. Make sure it is not metal, as metal can scratch stone or leave marks.
- Buckets: You will need at least two – one for clean water and one for your cleaning solution.
- Garden hose with spray nozzle: This is essential for rinsing exterior walls. It provides good pressure for dislodging dirt.
- Sponge or microfiber cloths: Good for wiping down interior walls or applying cleaners.
- Mild dish soap: A small amount mixed with water is often enough for general cleaning.
- Specialized stone cleaner: If mild soap does not work, a cleaner designed for your specific stone type is a good choice. These are formulated to be safe.
- White vinegar: A natural option for some stains, especially mold and mildew. Be careful with porous or unsealed stone. You can learn more about how to clean walls with vinegar for general wall cleaning tasks.
- Bleach (diluted): Use for tough mold or mildew stains on non-porous stone. Always dilute it and use it with caution.
- Safety glasses and gloves: Protect your eyes and hands from cleaning solutions and debris.
- Drop cloths or plastic sheeting: Protect surrounding areas, especially indoors, from water and cleaning solutions.
For very tough jobs, you might consider a pressure washer. However, use it with extreme care and low settings on stone. We will cover this in more detail later. Make sure all your tools are clean before you begin. This prevents spreading more dirt.
General Cleaning Methods for Light Dirt and Grime
For everyday dirt and light grime, cleaning stone walls does not require harsh chemicals. A gentle approach often works best. This method helps maintain the stone’s integrity and appearance. I start with the least aggressive method first.
Here are the steps for general stone wall cleaning:
- Dry Brush the Surface: Use a soft-bristled brush or broom to remove loose dirt, dust, and cobwebs. Brush downwards to let gravity help. This step prevents turning dry dirt into muddy streaks when you add water. It is a quick and easy start.
- Rinse with Water: For exterior walls, use a garden hose with a spray nozzle. Start at the top and work your way down. For interior walls, use a spray bottle filled with plain water or a damp sponge. Make sure to wet the entire surface thoroughly. This helps loosen stuck-on dirt.
- Prepare a Mild Cleaning Solution: Mix a few drops of mild dish soap into a bucket of warm water. You want a very dilute solution, not sudsy. For natural stone, pH-neutral stone cleaners are also excellent. Avoid anything acidic unless specifically for efflorescence and on appropriate stone.
- Apply and Scrub Gently: Dip a soft-bristled brush or a sponge into your cleaning solution. Apply it to the wall section by section. Gently scrub in small circular motions. Do not scrub too hard, especially on softer stones. Your goal is to lift the dirt, not to abrade the stone.
- Rinse Thoroughly: This step is crucial. Rinse the wall completely with clean water. Make sure no soap residue remains. Soap residue can attract more dirt over time or leave a film. For exterior walls, continue using the hose. For interior, wipe down with fresh, damp cloths, rinsing your cloth often.
- Allow to Air Dry: Let the wall dry naturally. Good ventilation helps. Avoid using heat or harsh drying methods, as these can affect the stone.
For general dirt removal, this method is usually enough. It keeps the stone looking good without damage. Remember, consistency in cleaning helps prevent heavy buildup. You can also apply these general cleaning principles when you need to clean stone floors, as many of the same materials and methods apply to various stone surfaces.
Tackling Common Stone Wall Stains
Some stains on stone walls need more specific treatment. General cleaning might not remove them completely. Common issues include mold, efflorescence, and other persistent marks. I approach these stains with targeted solutions.
Removing Mold and Mildew
Mold and mildew thrive in damp, shaded areas. They appear as black, green, or white fuzzy patches. Removing them promptly is important for health and appearance.
- Vinegar Solution: Mix equal parts white vinegar and water in a spray bottle. Spray the affected area thoroughly. Let it sit for 15-30 minutes. Scrub with a stiff, non-metallic brush. Rinse well with clean water. Vinegar is effective and generally safe for many stone types. You can find more tips on how to clean mold off walls using various methods. For tough spots on natural stone, specifically check out how to clean mold off natural stone.
- Bleach Solution (Caution): For very stubborn mold on non-porous stone (like granite) or outdoor concrete-based stone, a diluted bleach solution can be used. Mix 1 part bleach with 3 parts water. Apply, let sit for a few minutes (do not let it dry), then scrub and rinse extremely well. Test first. Never mix bleach with vinegar or other cleaners.
Cleaning Efflorescence
Efflorescence is a white, powdery deposit. It occurs when water dissolves salts within the stone or mortar and then evaporates, leaving the salts behind on the surface. It is common on new masonry or in areas with high moisture.
- Dry Brush First: Always try to dry brush the efflorescence away first. Sometimes, it is loose and comes off easily.
- Water Rinse: After dry brushing, rinse the area with clean water.
- Mild Acidic Cleaner (Last Resort): For persistent efflorescence, a specialized efflorescence cleaner or a very dilute solution of phosphoric or muriatic acid might be needed. This is for experienced users only and requires extreme caution. Always follow product instructions, wear full protective gear, and test in an inconspicuous spot. Acid can damage many types of natural stone, especially limestone or marble. Consider consulting a professional if you are unsure.
Dealing with Algae and Moss
Algae and moss are similar to mold, but they are plants. They often create slippery green or dark patches. They love damp, shady conditions.
- Scrub and Rinse: Often, a good scrub with a stiff brush and a powerful rinse with a hose can remove most algae and moss.
- Biocides or Algae Removers: Commercial products designed to kill algae and moss are effective. Apply them according to instructions. They often contain algaecides that break down the growth.
- Vinegar or Bleach (as above): Diluted vinegar or bleach solutions can also work on algae, following the same precautions as for mold removal.
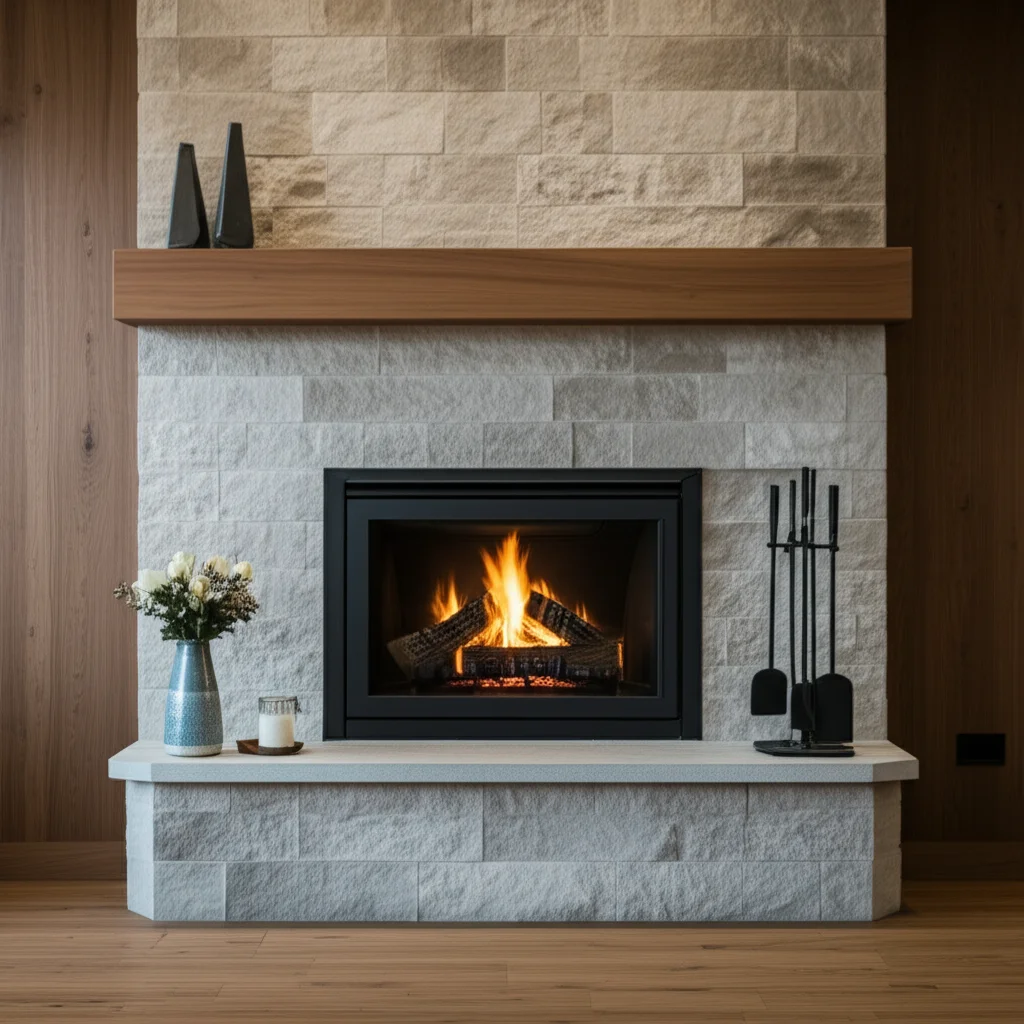
Removing Dirt, Grime, and Soot
Everyday dirt and grime are typically handled by general cleaning methods. However, deeply embedded dirt or soot from fireplaces might need extra effort. If you are dealing with soot, specifically from a fireplace, you might also find it helpful to look at how to clean a stone fireplace or general advice on how to clean soot off walls.
- Detergent and Hot Water: A slightly stronger solution of dish detergent and hot water can help break down greasy dirt. Apply, let sit, then scrub.
- Poultice for Deep Stains: For very deep stains, a poultice can draw out the stain. A poultice is a paste made from an absorbent material (like fuller’s earth or talc) mixed with a cleaning agent (like hydrogen peroxide for organic stains or mild detergent). Apply the paste to the stain, cover with plastic, and let it dry completely. As it dries, it pulls the stain out.
- Specific Stain Removers: For stains like rust, oil, or food spills, look for commercial stone stain removers. Ensure they are compatible with your stone type. Always test them in a hidden spot first. For general wall stains, you can also explore how to clean stains off walls.
Always remember to rinse thoroughly after treating any stain. This prevents residue build-up and protects the stone.
Cleaning Interior vs. Exterior Stone Walls
Cleaning interior stone walls differs from cleaning exterior ones. Each type has its own challenges and requirements. I adjust my approach based on the wall’s location.
Cleaning Interior Stone Walls
Interior stone walls, like those in living rooms, kitchens, or basements, face different kinds of dirt. They usually accumulate dust, grease, and occasional spills. Mold can be an issue in damp areas like basements.
- Dusting and Light Cleaning: Start with dry dusting using a soft brush or vacuum cleaner attachment. This prevents dust from turning into mud. For general cleaning, I use a damp microfiber cloth with plain water. For slight grime, a mild, pH-neutral stone cleaner diluted in water works well. I simply spray and wipe.
- Grease and Kitchen Splatters: In kitchen areas, stone backsplashes or walls can get greasy. A solution of warm water and a few drops of dish soap can cut through grease. Gently scrub with a soft sponge. Rinse by wiping with clean, damp cloths. Ensure no soapy residue remains. You can find more tips on how to clean a stone backsplash if you have one.
- Mold in Basements: Basement stone walls can suffer from dampness and mold. Ventilation is key here. For mold, a solution of white vinegar and water (50/50) is often effective and safer than bleach indoors. Spray, let sit, then scrub and rinse. Ensure the area dries completely. If mold is a persistent issue, investigate the source of moisture. General tips on how to clean basement walls or how to clean mold off basement walls can be very helpful.
- Protecting Surfaces: When cleaning indoors, protect floors and furniture with drop cloths. Make sure the area is well-ventilated to help with drying and to disperse any cleaning fumes.
Cleaning Exterior Stone Walls
Exterior stone walls are exposed to weather, pollution, and biological growth like algae and moss. They often require more robust cleaning methods.
- Initial Prep: Remove any plants or debris growing on or near the wall. Dry brush off loose dirt, cobwebs, and any large pieces of debris.
- Hose Rinse: A good rinse with a garden hose is the first step. This dislodges much of the surface dirt. Start from the top and work down, using the force of the water to help.
- Mild Detergent or Outdoor Cleaner: For general dirt and grime, a solution of mild biodegradable outdoor cleaner designed for masonry, or simple dish soap, applied with a brush, is often sufficient. Let it sit for a few minutes to break down the dirt.
- Algae, Moss, and Mold: These are common on exterior walls. A solution of bleach (1 part bleach to 3-4 parts water) can be effective. Apply it with a sprayer, let it sit for 10-15 minutes, then scrub with a stiff brush. Rinse thoroughly. Alternatively, commercial outdoor cleaners with algaecides work well. Always ensure proper ventilation and protect surrounding plants. For comprehensive advice, see how to clean exterior stone on a house.
- Pressure Washing (Use with Caution): This can be highly effective but also very damaging if not done correctly. I will explain proper pressure washing techniques in the next section.
- Drying: Allow exterior walls to air dry completely. Sunlight and airflow help.
The main difference is the ability to use more water and potentially stronger solutions outdoors due to better ventilation and drainage. Always consider the stone type and test any cleaner first.
Using a Pressure Washer on Stone Walls
Pressure washing can be a powerful tool for cleaning exterior stone walls, but it must be used with extreme care. Improper use can damage the stone, erode mortar joints, or even force water into wall cavities, leading to bigger problems. I always proceed with caution when using a pressure washer.
Here’s how to use a pressure washer safely and effectively on stone walls:
Assess the Stone and Mortar:
- Stone Type: Softer stones like limestone, sandstone, or older, weathered natural stone are more susceptible to damage. Denser stones like granite can usually handle more pressure.
- Mortar Condition: If the mortar between stones is old, cracked, or crumbling, a pressure washer can easily blast it away. This causes significant structural issues. In such cases, avoid pressure washing or opt for extremely low pressure.
- Sealed Stone: If your stone is sealed, be aware that high pressure can strip away the sealant.
Choose the Right Equipment and Settings:
- PSI (Pounds Per Square Inch): Use a low PSI setting. For most stone walls, 1200-1500 PSI is usually the maximum. For softer or older stone, even lower (500-1000 PSI) might be necessary. Some experts recommend starting as low as 500 PSI and increasing slowly.
- Nozzle Type: Always use a wide-angle nozzle (25-40 degrees). A fan tip disperses the water gently. Never use a zero-degree (pencil jet) nozzle, as it can cause severe damage. A rotary (turbo) nozzle is also too aggressive for most stone walls.
- Water Temperature: Cold water is usually sufficient. Hot water can sometimes enhance cleaning, but it is not always necessary and adds to the risk of damage.
Preparation:
- Clear the Area: Move any furniture, plants, or obstacles away from the wall.
- Cover Sensitive Areas: Protect windows, light fixtures, and delicate plants with plastic sheeting.
- Pre-Rinse: Lightly mist the wall with a garden hose before pressure washing. This helps to loosen surface dirt.
Pressure Washing Technique:
- Test a Small Area: This is the most critical step. Choose an inconspicuous area of the wall (e.g., behind a bush, in a hidden corner). Start with the lowest pressure setting and the widest nozzle. Observe how the stone and mortar react. If there is no damage, gradually increase pressure or decrease distance until you find the minimum effective pressure.
- Maintain Distance: Hold the pressure washer wand at least 12-18 inches away from the wall. Moving closer increases pressure rapidly.
- Consistent Motion: Use smooth, overlapping strokes. Work in small sections from top to bottom. Do not linger in one spot, as this can etch or pit the stone.
- Angle the Spray: Angle the spray downwards slightly. This helps direct loosened dirt away from the wall and reduces the chance of forcing water into mortar joints.
- Avoid Mortar Joints: Try to avoid directly hitting mortar joints. Focus on the stone surfaces themselves.
- Rinse Thoroughly: Once a section is clean, rinse it completely to remove any loosened dirt or cleaning solution.
Use of Detergents with Pressure Washers:
- Some pressure washers have detergent tanks. If using a detergent, ensure it is safe for stone. Apply the detergent on a low-pressure setting, let it dwell (sit) for the recommended time, then rinse with clean water at the appropriate pressure.
Using a pressure washer correctly can make cleaning stone walls much faster. However, if you are unsure, or if your stone is particularly delicate or historic, hiring a professional stone cleaner is always the safest option. For any natural stone surface, you might find more broad advice by reading about how to clean natural stone tile and grout, as the principles of gentle care apply.
Post-Cleaning Care and Protection
Cleaning your stone walls is a great start, but protecting them afterward ensures long-lasting beauty and reduces future cleaning efforts. Post-cleaning care often involves sealing the stone. This creates a barrier against moisture and stains. I always consider sealing, especially for outdoor or high-traffic interior stone.
Why Seal Stone Walls?
- Stain Resistance: Sealants make the stone less porous. This prevents liquids like oil, dirt, and even water from penetrating deep into the stone. Spills bead up on the surface, making them easier to wipe away.
- Moisture Protection: For exterior walls, sealing helps prevent water absorption. This is crucial in freeze-thaw cycles, where absorbed water can freeze, expand, and crack the stone.
- Inhibits Growth: A sealed surface is less hospitable to mold, mildew, algae, and moss. These growths need moisture to thrive, which a sealant helps to repel.
- Easier Maintenance: Because stains and dirt do not penetrate as easily, routine cleaning becomes much simpler. You spend less time scrubbing.
- Preserves Appearance: Sealing can enhance the stone’s natural color and prevent weathering. Some sealers offer a “wet look” enhancement.
Choosing the Right Sealer
There are two main types of sealers for stone:
- Impregnating/Penetrating Sealers: These soak into the stone and form a protective barrier within the pores. They do not create a film on the surface. The stone retains its natural look and breathability. These are generally preferred for natural stone walls. They last longer and are more resistant to wear.
- Topical/Coating Sealers: These form a protective film on the surface of the stone. They can provide a glossy or “wet look” finish. While offering strong protection, they can sometimes yellow, scratch, or peel over time. They also might make the stone less breathable, which can trap moisture. These are more common for concrete pavers or some engineered stone.
Always choose a sealer specifically formulated for your type of stone (e.g., limestone sealer, granite sealer, general masonry sealer). Read product labels carefully.
Applying the Sealer
Applying a sealer is a straightforward process:
- Ensure Wall is Bone Dry: The stone must be completely dry before sealing. Any trapped moisture can cause the sealer to fail or create a milky appearance. Wait at least 24-72 hours after cleaning, or longer if the stone was very wet or weather is damp.
- Prepare the Area: Mask off adjacent surfaces (windows, trim, plants) to protect them from overspray.
- Ventilation: If applying indoors, ensure good ventilation.
- Apply Evenly: Use a low-pressure sprayer, roller, or brush to apply the sealer. Apply it in thin, even coats. Avoid puddling. Follow the manufacturer’s instructions regarding coverage rate and number of coats. Many sealers require two coats.
- Wipe Off Excess: For penetrating sealers, it is crucial to wipe off any excess sealer from the surface before it dries. If it dries on the surface, it can leave a hazy film that is difficult to remove.
- Curing Time: Allow the sealer to cure fully. This can take anywhere from 24 hours to several days, depending on the product and environmental conditions. Avoid exposing the wall to moisture or heavy traffic during this time.
Ongoing Maintenance
Even with a sealer, regular light maintenance is important:
- Regular Dusting/Brushing: Keep dust and loose dirt from building up.
- Prompt Spill Cleanup: Clean up spills immediately, especially acidic or oily ones.
- Re-sealing: Sealers do not last forever. Most need to be reapplied every 3-5 years, but this varies by product and exposure. You can test if your stone needs re-sealing by dripping a few drops of water on it. If the water beads up, the sealer is still working. If it soaks in, it is time to reapply.
By properly cleaning and protecting your stone walls, you ensure they remain a beautiful and lasting feature of your home.
FAQs About Cleaning Stone Walls
Q1: Can I use bleach on natural stone walls?
A1: You can use bleach on some dense, non-porous natural stones like granite for tough mold or mildew stains. However, avoid it on porous stones like limestone, marble, or sandstone. Bleach can cause discoloration or damage. Always dilute bleach heavily and test it on a small, hidden area first. Rinse the wall thoroughly after use.
Q2: How often should I clean my outdoor stone walls?
A2: The frequency depends on your climate and environment. In areas with high humidity, shade, or pollution, you might need to clean them annually. In drier, cleaner environments, every 2-3 years might be sufficient. Regular visual checks will tell you when cleaning is needed.
Q3: What is the best way to remove efflorescence from stone walls?
A3: First, try dry brushing to remove loose efflorescence. Then, rinse with water. For stubborn efflorescence, a specialized efflorescence remover designed for masonry is best. Diluted vinegar can also help but test it first. Always follow product instructions carefully, as some cleaners contain acids that can harm certain stones.
Q4: Is it safe to use a pressure washer on all types of stone walls?
A4: No, it is not safe for all types. Softer stones like sandstone or limestone, or walls with old, weak mortar, can be damaged by high pressure. Always use the lowest possible PSI (under 1500 PSI, often much lower) and a wide-angle nozzle (25-40 degrees). Test on an inconspicuous area first.
Q5: How can I prevent mold and mildew from returning to my stone walls?
A5: To prevent mold and mildew, reduce moisture and improve airflow around the wall. Trim back plants, ensure good drainage, and consider applying a breathable stone sealer. A clean, sealed, and well-ventilated wall is less likely to harbor mold. Regular light cleaning also helps prevent buildup.
Conclusion
Cleaning stone walls helps preserve their unique beauty and extend their lifespan. You start by understanding your stone type. Then, choose the right tools and cleaning methods. From simple dry brushing to tackling stubborn mold or efflorescence, each step requires care. For exterior walls, I consider weather and growth. For interior walls, I focus on dust and grease. While a pressure washer can be useful for outdoor stone, caution is always necessary to prevent damage.
Finally, post-cleaning care, especially sealing, is very important. This protects your stone walls from future stains and moisture. It makes future cleaning much easier. By following these steps, you can keep your stone walls looking pristine for many years. A well-maintained stone wall enhances the charm of your home.
- stone wall cleaning
- natural stone care
- masonry cleaning
- outdoor stone walls
- indoor stone walls
- mold removal stone
- efflorescence cleaning

Todd Martin
Senior Writer
With over 15 years of experience in home renovation and design, I started HEG to share what I’ve learned with homeowners who want to create spaces that are both beautiful and functional. I’ve always believed in a hands-on approach, and over the years, I’ve picked up practical solutions that actually work. Through HEG, I aim to make home improvement more approachable, sharing real tips that help you create a home you truly love.