· Todd Martin · Home Cleaning · 19 min read
How To Clean Shower Floor

Achieve a Spotless Shower Floor: Your Complete Cleaning Guide
Stepping into a clean shower starts with a clean shower floor. Over time, shower floors collect soap scum, hard water stains, mildew, and grime. This buildup makes your shower look dirty and can become a slipping hazard. Knowing the right cleaning methods for your specific shower floor material makes all the difference.
Keeping your shower floor clean does more than improve its look. It helps prevent mold and mildew growth, which can harm your health. Regular cleaning also protects the floor material from damage, extending its lifespan. I will guide you through the best methods and products to achieve a truly spotless shower floor. We will cover different materials, common problems, and effective solutions.
Takeaway
- Identify your shower floor material to choose safe cleaning methods.
- Gather basic tools: brushes, sponges, and a spray bottle.
- Use gentle solutions for daily cleaning; choose stronger ones for deep cleaning.
- Always test new cleaners in a small, hidden spot first.
- Prevent future buildup with regular wiping and good ventilation.
To effectively clean your shower floor, identify its material, then apply the right cleaning solution and tools. Common options include vinegar or baking soda for everyday grime, and specialized cleaners for tougher stains like mold or hard water buildup. Regular cleaning prevents future accumulation and keeps your shower fresh.
Understanding Your Shower Floor Material
Before you start cleaning, you need to know your shower floor material. Different materials react differently to cleaning agents. Using the wrong cleaner can damage your floor, causing discoloration or erosion. Identifying your specific surface helps you choose the safest and most effective cleaning approach.
Types of Shower Floor Materials
Many homes feature one of several common shower floor types. Each type has unique properties that affect its cleaning needs. I will explain the most popular materials you might find in your bathroom.
Tile and Grout
Ceramic and porcelain tiles are common for shower floors. These tiles are durable but their grout lines are porous. Grout often collects dirt, soap scum, and mildew easily. You need to clean both the tiles and the grout carefully. Cleaning grout in your shower requires specific attention.
Fiberglass and Acrylic
Fiberglass and acrylic floors are lightweight and affordable. They often feel warm to the touch. These surfaces are prone to scratching and can stain if strong abrasive cleaners are used. Always choose non-abrasive cleaners for these types of shower floors. Learn more about cleaning a fiberglass shower floor properly.
Natural Stone
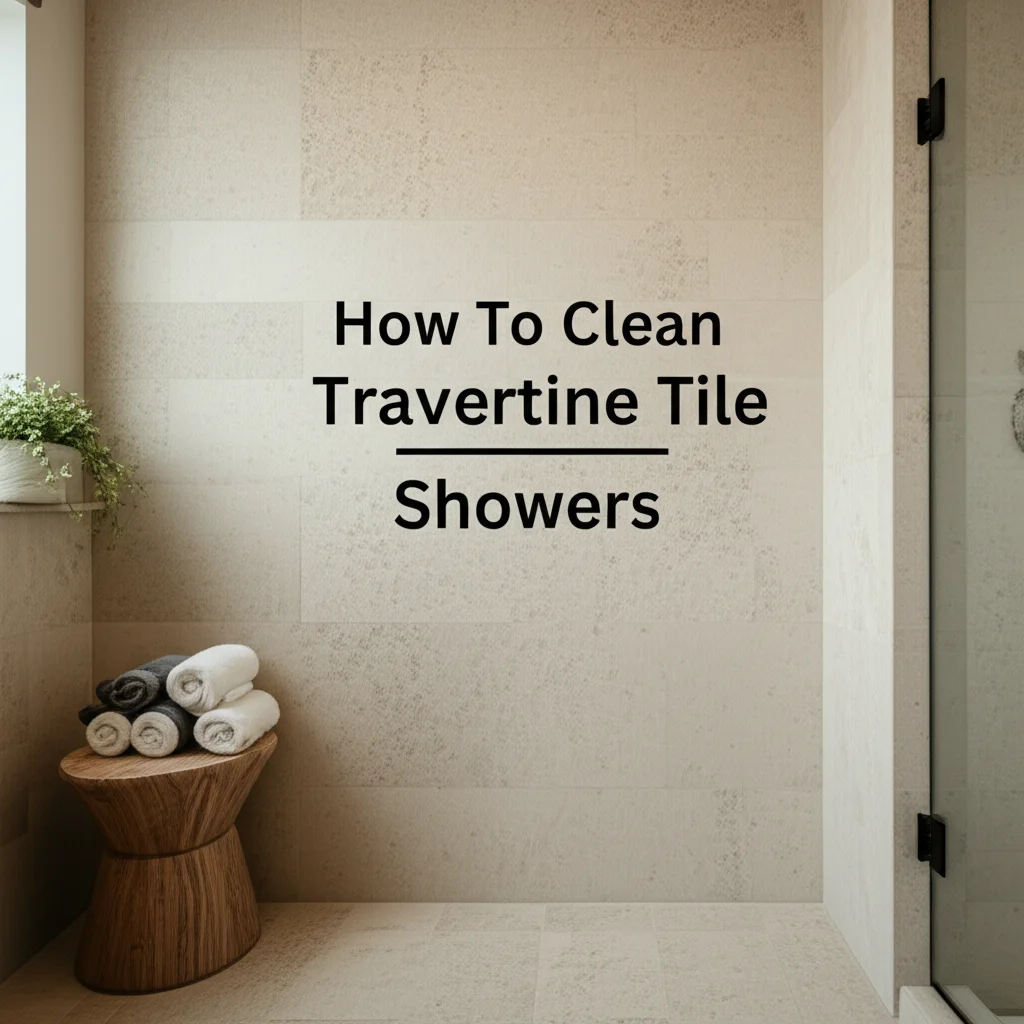
Marble, granite, travertine, and slate are natural stone options. They look beautiful but are very porous and sensitive to acidic cleaners. Acids can etch or dull the stone surface permanently. Always use pH-neutral cleaners for natural stone. For example, cleaning a marble shower floor requires gentle care. Pebble shower floors are also natural stone, requiring similar considerations. Detailed guides exist for cleaning pebble shower floors.
Other Materials
Some showers might have concrete, plastic, or even specialized composite materials. Each requires specific care. Plastic shower floors generally respond well to gentle, all-purpose cleaners. If unsure, always consult the manufacturer’s cleaning guide or test a small, hidden area.
Essential Tools and Cleaning Supplies
Having the right tools and supplies makes cleaning your shower floor much easier. Using the correct items also protects your shower surfaces from damage. Before you begin, gather everything you need. This preparation saves time and ensures a more effective clean.
Basic Cleaning Tools
Simple tools can make a big difference. You likely have most of these items already. They are effective for scrubbing and applying cleaners.
- Stiff-bristled brush: Great for grout lines and textured surfaces.
- Soft-bristled brush or scrub pad: Ideal for delicate surfaces like fiberglass or natural stone.
- Microfiber cloths or sponges: For wiping down surfaces and applying cleaners.
- Spray bottle: Convenient for mixing and applying homemade solutions.
- Bucket: For mixing cleaning solutions or rinsing tools.
- Rubber gloves: Protect your hands from harsh chemicals and grime.
- Ventilation fan or open window: Important for air circulation while cleaning.
Common Cleaning Solutions
You can use a variety of cleaning solutions, from homemade concoctions to commercial products. The best choice depends on your shower floor material and the type of grime you are tackling. Always read product labels and test any new cleaner on an inconspicuous area first.
White Vinegar
Distilled white vinegar is a versatile, natural cleaner. Its acidic nature helps break down soap scum, hard water stains, and mildew. You can use vinegar to clean your shower effectively. Mix it with water for general cleaning or use it straight for tougher spots. Avoid vinegar on natural stone floors, as it can cause etching.
Baking Soda
Baking soda is a mild abrasive and odor absorber. It works well as a paste for scrubbing tough stains. Mix it with water or vinegar to create a powerful cleaning paste. Baking soda is safe for most surfaces, including fiberglass and some tiles. Pair it with vinegar for a fizzing action that lifts grime.
Hydrogen Peroxide
Hydrogen peroxide is an excellent disinfectant and stain remover. It works well on mold and mildew. Apply it directly to affected areas and let it sit before scrubbing. Hydrogen peroxide is generally safe for most shower materials, but always test it first.
Commercial Shower Cleaners
Many commercial cleaners target specific shower problems like soap scum, mold, or hard water. Always choose a cleaner formulated for your shower floor material. Some cleaners are acidic, while others are alkaline or neutral. Read labels carefully to avoid damaging your floor. Look for “pH-neutral” options for natural stone.
Bleach (Use with Caution)
Bleach is a powerful disinfectant and whitener. It is very effective on stubborn mold and mildew, especially on grout. However, bleach is highly corrosive and can damage certain materials, like fiberglass or colored grout. Never mix bleach with ammonia or vinegar, as this creates dangerous fumes. Use it sparingly and in a well-ventilated area.
Step-by-Step General Cleaning Process
A clean shower floor contributes to a fresh bathroom. You can achieve a spotless surface by following a simple, general cleaning process. This guide covers the basic steps suitable for most shower floor materials. Always remember to ventilate the area and wear gloves for protection.
Prepare the Area
First, clear the shower floor of any items. Remove bottles, soap dishes, and shower mats. This step ensures you have full access to the entire surface. Rinse the shower floor with warm water to loosen any loose dirt or hair. This initial rinse also helps to prevent scratching during scrubbing.
Apply Your Chosen Cleaner
Now, apply your cleaning solution to the shower floor. If using a spray, coat the entire surface evenly. For pastes, spread a generous layer over stained areas and grout lines. Let the cleaner sit for 5-15 minutes. This dwell time allows the solution to penetrate and break down grime. The exact time depends on the cleaner and the level of dirt.
- For light grime: A daily shower spray or a diluted vinegar solution (1:1 vinegar to water) works well.
- For moderate buildup: A stronger solution, like a baking soda paste, is effective.
- For heavy stains: Commercial cleaners or a hydrogen peroxide solution might be necessary.
Scrub the Surface
After the cleaner has sat, it is time to scrub. Use the appropriate brush for your shower floor material. A stiff-bristled brush works best for tiled surfaces and grout. Use a soft-bristled brush or non-abrasive scrub pad for fiberglass, acrylic, or natural stone. Apply firm but not excessive pressure. Pay extra attention to grout lines and textured areas where dirt tends to accumulate. Scrub in small, circular motions for best results.
Rinse Thoroughly
Once you have scrubbed the entire floor, rinse it thoroughly with warm water. Ensure all cleaning solution and loosened grime wash down the drain. You can use a detachable showerhead for a precise rinse. If your showerhead is fixed, use a bucket to pour water over the floor. Ensure no cleaner residue remains, as it can attract more dirt or leave streaks.
Dry and Maintain
Finally, dry the shower floor. Use a clean microfiber cloth, squeegee, or a mop to remove excess water. Drying helps prevent water spots and reduces the chance of mold and mildew growth. After cleaning, consider wiping down the floor after each shower. This simple habit significantly reduces future buildup. Proper ventilation also helps the shower dry faster.
Tackling Common Shower Floor Problems
Shower floors face many challenges beyond simple dirt. Soap scum, hard water stains, mold, and mildew are persistent issues. Each problem needs a specific approach to be truly removed. Understanding how to tackle these common issues will keep your shower floor looking its best.
Removing Stubborn Soap Scum and Hard Water Stains
Soap scum forms from the reaction of soap with hard water minerals. It leaves a dull, sticky film on your shower floor. Hard water stains appear as white, chalky deposits, especially in areas with poor drainage. These stains can be tough to remove with basic cleaners alone.
- Vinegar solution: Mix equal parts white vinegar and water in a spray bottle. Spray the affected areas and let it sit for 15-30 minutes. The acid in the vinegar breaks down the mineral deposits and soap scum.
- Baking soda paste: For tougher stains, make a paste with baking soda and a little water. Apply it to the stained areas and let it sit for 20-30 minutes. Scrub with a non-abrasive brush.
- Commercial descalers: Many products are designed specifically for soap scum and hard water. Choose one safe for your shower floor material. Follow product instructions carefully.
Eliminating Mold and Mildew
Mold and mildew thrive in the damp, warm environment of a shower. They appear as black, green, or pinkish growths, often in grout lines or textured areas. These fungi are not only unsightly but can also pose health risks. Prompt action is crucial to eliminate them. Effective methods for cleaning mold in your shower are essential.
- Hydrogen peroxide: Spray 3% hydrogen peroxide directly onto the mold. Let it sit for 10-15 minutes, then scrub with a stiff brush. Rinse thoroughly.
- Bleach solution (for tiles/grout): Mix 1 part bleach with 10 parts water. Apply to moldy areas with a brush. Let it sit for a few minutes, then scrub and rinse well. Use only in well-ventilated areas and never mix with other cleaners.
- Tea tree oil: For a natural option, mix 2 teaspoons of tea tree oil with 2 cups of water in a spray bottle. Spray on mold and let it sit; no rinsing is needed. This acts as a natural fungicide.
Deep Cleaning Grout Stains
Grout is porous and absorbs dirt, soap, and moisture, leading to discoloration. Dark, stained grout makes the entire shower floor look dirty. Deep cleaning grout requires a bit more effort but yields dramatic results. Learn specific techniques for cleaning grout in your shower.
- Baking soda and vinegar paste: Create a paste with baking soda and water. Apply it along the grout lines. Spray vinegar on top; it will fizz. Let it sit for 10-15 minutes, then scrub with a small stiff brush (like a toothbrush).
- Grout cleaner: Commercial grout cleaners are formulated to penetrate and lift stains. Follow the product instructions carefully. Some require specific application methods or ventilation.
- Steam cleaner: A steam cleaner uses hot steam to loosen dirt and kill mildew in grout. This method is chemical-free and effective.
- Grout sealer: After cleaning, consider applying a grout sealer. This protects the grout from future stains and moisture absorption.
Dealing with Orange Stains and Rust
Orange stains in a shower can indicate iron bacteria, rust from metal objects, or hard water mineral deposits. These stains often appear around drains or where metal items have sat. Identifying the cause helps you choose the right cleaning method. If you see orange stains in your shower, act quickly.
- Lemon juice and salt: For mild rust stains, sprinkle salt on the stain, then squeeze lemon juice over it. Let it sit for a few hours, then scrub with a brush.
- Bar Keeper’s Friend: This oxalic acid-based cleaner is excellent for rust and mineral stains. Mix with water to form a paste, apply to the stain, let it sit briefly, then scrub and rinse. Always test on an inconspicuous area first, especially on delicate surfaces.
- Commercial rust remover: For heavy rust, a specialized rust remover product may be needed. Ensure it is safe for your shower floor material before use.
Specific Material Cleaning Guides
While general cleaning steps help, different shower floor materials need specific care. Using the wrong cleaner can cause permanent damage. This section provides detailed instructions for cleaning common shower floor materials, ensuring you keep your specific floor beautiful and well-maintained.
Cleaning Tile Shower Floors (Ceramic & Porcelain)
Ceramic and porcelain tiles are durable and common. Their main cleaning challenge lies in the grout lines, which are porous and prone to collecting dirt and mildew. The tile surface itself is generally easy to clean. For a full guide on cleaning ceramic tile showers, check our detailed article.
- Daily Maintenance: After each shower, rinse the floor and squeegee excess water. This prevents soap scum and hard water buildup.
- Weekly Cleaning:
- Preparation: Remove all items from the shower floor. Rinse with warm water.
- Application: Mix 1/2 cup white vinegar with 1 gallon of warm water in a bucket. For tough spots, spray straight white vinegar. You can also use a mild pH-neutral floor cleaner.
- Scrubbing: Dip a stiff-bristled brush into the solution and scrub the tiles and grout. Pay close attention to the grout lines.
- Rinsing: Rinse thoroughly with clean warm water, ensuring no residue remains.
- Drying: Dry with a clean microfiber cloth or squeegee to prevent water spots.
- Deep Cleaning Grout: For deeply stained grout, create a paste of baking soda and water. Apply it generously to grout lines. Spray with white vinegar to activate the fizzing action. Let it sit for 10-15 minutes. Scrub with a grout brush or an old toothbrush. Rinse thoroughly. Consider sealing your grout after deep cleaning to prevent future stains.
Cleaning Fiberglass and Acrylic Shower Floors
Fiberglass and acrylic surfaces are non-porous and lightweight. They are prone to scratching from abrasive cleaners and can dull over time with harsh chemicals. These materials require gentle cleaning methods to maintain their shine. If you need to clean your fiberglass shower floor, be gentle.
- Daily Maintenance: Wipe down the shower floor with a soft cloth or sponge after each use. This removes moisture and prevents buildup.
- Weekly Cleaning:
- Preparation: Clear the shower floor. Rinse with warm water.
- Application: Use a non-abrasive cleaner. A mixture of dish soap and warm water works well. You can also use diluted white vinegar (1:1 with water). Commercial non-abrasive shower cleaners formulated for fiberglass/acrylic are also effective.
- Scrubbing: Apply the cleaner with a soft sponge or soft-bristled brush. Gently scrub the entire surface. Avoid using abrasive pads or brushes, as they can scratch the surface.
- Rinsing: Rinse the floor completely with warm water. Ensure all soap or cleaner residue is gone.
- Drying: Dry the surface with a soft, clean cloth to prevent water spots and maintain shine.
- Tackling Stains: For stubborn stains, create a paste with baking soda and water. Apply it to the stain, let it sit for 15-30 minutes, then gently wipe away with a soft cloth. Rinse thoroughly. Avoid hydrogen peroxide and bleach on colored fiberglass or acrylic, as they can cause discoloration.
Cleaning Natural Stone Shower Floors (Marble, Travertine, Slate, Pebble)
Natural stone floors are elegant but require delicate care. They are porous and highly sensitive to acidic cleaners, which can etch, dull, or stain the stone. Always use pH-neutral cleaners specifically designed for natural stone. Whether it’s a marble shower floor or a unique pebble shower floor, the principle is the same: be gentle.
- Daily Maintenance: Use a squeegee or soft cloth to wipe down the stone after every shower. This removes water and prevents mineral deposits.
- Weekly Cleaning:
- Preparation: Remove all items and rinse the floor.
- Application: Use a pH-neutral stone cleaner. Follow the product’s instructions. Do NOT use vinegar, lemon juice, or abrasive cleaners.
- Scrubbing: Apply the cleaner with a soft cloth or a soft-bristled brush. Gently scrub the entire surface, including grout lines. Avoid harsh scrubbing that could scratch the stone.
- Rinsing: Rinse the stone thoroughly with clean, warm water. Ensure no cleaner residue remains.
- Drying: Immediately dry the stone with a soft, clean towel. Do not let water air dry on natural stone, as it can cause water spots.
- Sealing: Natural stone should be professionally sealed regularly (every 6-12 months, depending on use). Sealing protects the stone from stains and moisture absorption, making cleaning easier. If your stone is not sealed, it will absorb stains more readily.
- Spot Treatment: For specific stains, consult a stone cleaning professional or use a poultice method. A poultice is a paste that draws stains out of porous stone. Different types of stains require specific poultice ingredients.
DIY Cleaning Solutions for Your Shower Floor
You do not always need harsh chemicals to get your shower floor clean. Many effective cleaning solutions can be made with common household ingredients. These DIY options are often safer, more environmentally friendly, and cost-effective. I will show you how to create powerful homemade cleaners.
Vinegar-Based Solutions
White distilled vinegar is a cleaning powerhouse. Its acetic acid effectively breaks down soap scum, hard water stains, and light mold. You can use vinegar to clean your shower in several ways.
- All-Purpose Vinegar Spray:
- Ingredients: 1 part white vinegar, 1 part water.
- Instructions: Mix in a spray bottle. Spray generously on the shower floor. Let it sit for 10-15 minutes, then scrub and rinse. This solution is great for daily or weekly cleaning on tile, fiberglass, and acrylic. Do not use on natural stone.
- Vinegar and Dish Soap Cleaner:
- Ingredients: 1 cup warm white vinegar, 1/2 cup dish soap.
- Instructions: Gently mix the ingredients in a spray bottle or bucket. The dish soap helps cut through grease and grime, while the vinegar tackles hard water and soap scum. Spray on the floor, let it sit for 20-30 minutes, then scrub with a soft brush and rinse well. This works wonders on fiberglass and acrylic.
Baking Soda Paste
Baking soda is a mild abrasive that excels at scrubbing away grime without scratching delicate surfaces. It also helps to absorb odors. When combined with water or vinegar, it forms a powerful cleaning paste.
- Basic Baking Soda Paste:
- Ingredients: 1/2 cup baking soda, 2-3 tablespoons water (add gradually until a thick paste forms).
- Instructions: Apply the paste directly to stained areas or grout lines. Let it sit for 15-30 minutes. Scrub with a brush or sponge, then rinse thoroughly. This is safe for almost all shower floor materials, including natural stone.
- Baking Soda and Hydrogen Peroxide Paste (for mold/stains):
- Ingredients: 1/2 cup baking soda, 2-3 tablespoons 3% hydrogen peroxide.
- Instructions: Mix to form a paste. Apply to moldy or stained areas. Let it sit for 30 minutes to an hour. Scrub vigorously, then rinse. This combination is particularly effective on mold and stubborn stains on tile and grout.
Borax and Lemon Juice Mix
Borax is a natural mineral that acts as a powerful cleaner, deodorizer, and disinfectant. When mixed with lemon juice, which contains citric acid, it creates an effective stain remover.
- Ingredients: 1 cup borax, 1/4 cup lemon juice.
- Instructions: Mix to form a paste. Apply to tough stains on your shower floor. Let it sit for 30 minutes to an hour. Scrub with a stiff brush and rinse thoroughly. This solution is strong; test it on an inconspicuous area first, especially on colored surfaces. Avoid on natural stone.
Maintaining a Clean Shower Floor
Keeping your shower floor clean is not just about deep cleaning. Regular maintenance plays a huge role in preventing buildup and making deep cleans less frequent. Simple habits can extend the time between major cleaning sessions and keep your shower looking fresh day after day. This section details practical tips for ongoing care.
Daily Habits for Prevention
The best way to clean your shower floor less often is to prevent it from getting dirty in the first place. A few simple steps after each shower can make a significant difference.
- Rinse After Every Shower: As soon as you finish showering, rinse down the entire shower floor with clean water. This washes away loose hair, soap residue, and any body oils before they can dry and stick.
- Squeegee or Wipe Down: Use a squeegee or a clean microfiber cloth to wipe down the shower floor immediately after rinsing. Removing standing water prevents water spots and significantly reduces mold and mildew growth.
- Wipe Down Walls and Door: Extend this habit to your shower walls and door. This collective effort keeps the entire shower cleaner. This step applies even to the bottom of your shower where water collects.
- Ventilate Properly: Always turn on your bathroom’s exhaust fan during and after showering. If you do not have a fan, open a window or leave the bathroom door ajar. Good air circulation helps the shower dry faster, discouraging mold and mildew.
Regular Weekly Cleaning
Even with daily habits, a weekly light cleaning session is beneficial. This prevents minor buildup from becoming major problems.
- Quick Scrub with Mild Cleaner: Once a week, quickly scrub your shower floor with a mild, all-purpose bathroom cleaner or a diluted white vinegar solution. Use a soft brush or sponge.
- Focus on Grout: Pay extra attention to grout lines during your weekly clean. A quick scrub with a toothbrush can prevent deep grout stains from forming.
- Rinse and Dry: Always rinse thoroughly and dry the shower floor completely after your weekly clean.
Addressing Specific Issues Promptly
Do not let small problems become big ones. If you notice a spot of mold, a new stain, or excessive soap scum, address it immediately.
- Spot Treatment: Use a targeted cleaner for specific issues right away. For example, spray hydrogen peroxide on a new mold spot, or apply a baking soda paste to a stubborn stain. Acting fast prevents the problem from spreading or becoming harder to remove.
- Check for Leaks: Periodically check your shower for leaks around the base or the drain. Constant moisture from a leak can lead to persistent mold growth and water damage.
Re-Sealing Grout and Stone
For tiled and natural stone shower floors, sealing is a crucial part of maintenance. Sealers create a protective barrier that repels water and stains.
- Grout Sealing: Grout should be re-sealed every 6-12 months, or as recommended by the sealer product. This prevents moisture and dirt from penetrating the porous grout
- shower cleaning
- bathroom maintenance
- deep cleaning shower

Todd Martin
Senior Writer
With over 15 years of experience in home renovation and design, I started HEG to share what I’ve learned with homeowners who want to create spaces that are both beautiful and functional. I’ve always believed in a hands-on approach, and over the years, I’ve picked up practical solutions that actually work. Through HEG, I aim to make home improvement more approachable, sharing real tips that help you create a home you truly love.