· Todd Martin · Home Maintenance · 18 min read
How To Clean Shark Vacuum
Keep Your Shark Vacuum Sucking: A Guide to Thorough Cleaning
Has your trusty Shark vacuum started losing its powerful suction? Are you finding more dust left behind than picked up? Like any hard-working appliance, your Shark vacuum needs regular cleaning to perform its best. It might seem like a chore, but keeping your vacuum clean ensures it picks up dirt effectively, filters the air properly, and lasts for many years.
I know the frustration of a vacuum that just isn’t pulling its weight. A clogged filter or a tangled brush roll can turn vacuuming into a frustrating experience. But don’t worry, cleaning your Shark vacuum is a straightforward process. This comprehensive guide will walk you through each step. We will cover everything from emptying the dust cup to deep cleaning the brush roll and filters. You will soon have your Shark vacuum working like new again, ready to tackle any mess your home throws its way. Let’s get started on bringing that suction power back!
Takeaway
- Regularly empty and wash your Shark vacuum’s dust cup.
- Clean or replace foam, felt, and HEPA filters as needed.
- Remove tangled hair and debris from the brush roll.
- Check and clear any clogs in the hose and attachments.
- Follow a consistent cleaning schedule for optimal performance.
To clean a Shark vacuum, you must regularly empty the dust cup and clean or replace the filters. You also need to clear debris from the brush roll and check for clogs in the hose. This routine maintenance helps restore suction power and extends the life of your appliance.
Why Cleaning Your Shark Vacuum Matters
Your Shark vacuum works hard, sucking up dirt, dust, and debris from your floors. Over time, all that grime builds up inside the machine. This buildup affects its performance significantly. A dirty vacuum cannot clean effectively. It also wears out faster.
Regular cleaning prevents many common vacuum problems. Dirt and dust can clog filters, reducing suction power. Hair and strings can tangle around the brush roll, stopping it from spinning. Ignoring these issues means your vacuum works harder, leading to motor strain and early failure. It also means your floors are not truly clean. A clean vacuum is a happy vacuum, and a happy vacuum cleans your home better.
Benefits of Regular Vacuum Maintenance
- Restored Suction Power: Clogged filters and brush rolls directly impact your vacuum’s ability to pick up dirt. Cleaning these components brings back the strong suction you expect. My own vacuum felt brand new after a good clean. It was amazing to see the difference.
- Improved Air Quality: Shark vacuums often have advanced filtration systems, including HEPA filters. These filters trap tiny dust particles and allergens. If the filters are dirty, they cannot trap these particles efficiently. This means dust and allergens can re-enter your home’s air.
- Extended Appliance Lifespan: A vacuum that runs efficiently puts less strain on its motor and other parts. Regular cleaning prevents overheating and wear and tear. This helps your Shark vacuum last longer, saving you money on repairs or replacements. It is a simple step that yields big returns.
- Better Cleaning Performance: When the brush roll spins freely and the suction is strong, your vacuum cleans carpets and hard floors more effectively. You will notice a visible difference in how clean your home becomes. This makes vacuuming less of a chore.
Tools You Will Need
Before you start cleaning your Shark vacuum, gather a few simple tools. These items will make the process easier and more efficient. I always keep these on hand for vacuum maintenance.
- Scissors or a seam ripper
- A coin or flathead screwdriver (for some models)
- Microfiber cloths or soft towels
- Mild dish soap (optional, for washable parts)
- A small brush or old toothbrush
- A trash can or bag
- Gloves (optional, for messy tasks)
- A utility knife or box cutter (for stubborn tangles)
Having these tools ready will ensure you can complete each cleaning step without interruptions. It makes the whole process smoother.
Emptying and Cleaning the Dust Cup/Canister
The dust cup, or dirt canister, is where all the debris your Shark vacuum picks up collects. This part fills up quickly. Keeping it empty and clean is the first and most frequent step in proper vacuum maintenance. I empty mine after every few uses, or when it looks about two-thirds full.
A full dust cup restricts airflow. This directly impacts your vacuum’s suction power. If you notice your Shark vacuum is not picking up as well, checking the dust cup is always the first thing to do. It is surprising how often this simple step solves the problem. An empty dust cup allows your vacuum to breathe and perform at its peak.
Step-by-Step Dust Cup Cleaning
- Remove the Dust Cup: First, make sure your Shark vacuum is unplugged. Safety comes first. Locate the release button or lever for the dust cup. It is usually on the front or side of the vacuum body. Press it and carefully pull the dust cup away from the main unit. This step is usually very simple.
- Empty Contents into Trash: Hold the dust cup over a trash can. Locate the bottom release latch. Press it to open the flap, letting all the dirt and debris fall out. Give it a few shakes to ensure it is completely empty. Sometimes, a quick tap helps stubborn dust release.
- Wipe or Wash the Dust Cup:
- Quick Clean: For a routine clean, use a dry microfiber cloth to wipe the inside of the dust cup. Get rid of any lingering dust or debris stuck to the sides. This prevents odors and keeps it looking clean.
- Deep Clean (If Washable): Check your Shark vacuum’s manual to see if your specific dust cup is washable. Many are not, especially if they contain electrical components. If it is, you can wash it with lukewarm water and a small amount of mild dish soap. Use a soft brush to scrub away caked-on dirt. Rinse it thoroughly until no soap residue remains.
- Allow to Air Dry Completely: This step is critical. If you washed the dust cup, it must be 100% dry before you put it back on the vacuum. Moisture can damage the vacuum’s motor or cause mold growth. I usually let mine air dry for at least 24 hours, often longer. Place it in a well-ventilated area, away from direct sunlight or heat.
- Reattach the Dust Cup: Once completely dry, slide the dust cup back onto the vacuum unit. Make sure it clicks securely into place. You should hear an audible click. This confirms it is properly installed and ready for use.
By following these steps, you ensure your Shark vacuum’s primary collection point is clean and efficient. This alone can make a huge difference in your vacuum’s performance.
Maintaining Your Shark Vacuum Filters
Filters are the lungs of your Shark vacuum. They capture fine dust, allergens, and other particles, preventing them from being blown back into the air. Shark vacuums often use several types of filters: foam, felt, and HEPA. Each type needs specific care to stay effective. I find cleaning my filters is one of the most important things I do for my vacuum.
When filters get clogged, airflow is restricted. This causes the motor to work harder and suction to drop significantly. Dirty filters also cannot effectively trap airborne particles. This means your vacuum is not improving your air quality as it should. Regular filter maintenance is essential for both your vacuum’s health and your home’s air.
Types of Shark Vacuum Filters and Their Care
Foam and Felt Filters (Pre-Motor Filters):
- Location: These are typically found under the dust cup or in the filter housing, directly before the motor. They are usually a set: one foam filter and one felt filter.
- Cleaning Frequency: I recommend washing these filters at least once a month, or more often if you vacuum frequently or have pets. Your vacuum’s manual will give specific guidance.
- How to Clean:
- Remove: With the vacuum unplugged, locate and remove the foam and felt filters. They often stack on top of each other.
- Tap Clean: First, tap them over a trash can to remove loose dust and debris. You might be surprised how much comes out.
- Rinse: Rinse them under lukewarm water. Squeeze out excess water. Continue rinsing and squeezing until the water runs clear. Do not use soap unless your manual specifically allows it.
- Air Dry: This is critical. The filters must be completely air-dried for at least 24 hours, or until totally dry. Do not put them back wet. Do not use a dryer or heater. Placing them in front of a fan can help speed up drying.
- Reinstall: Once bone-dry, place them back into your vacuum. Ensure they are correctly oriented.
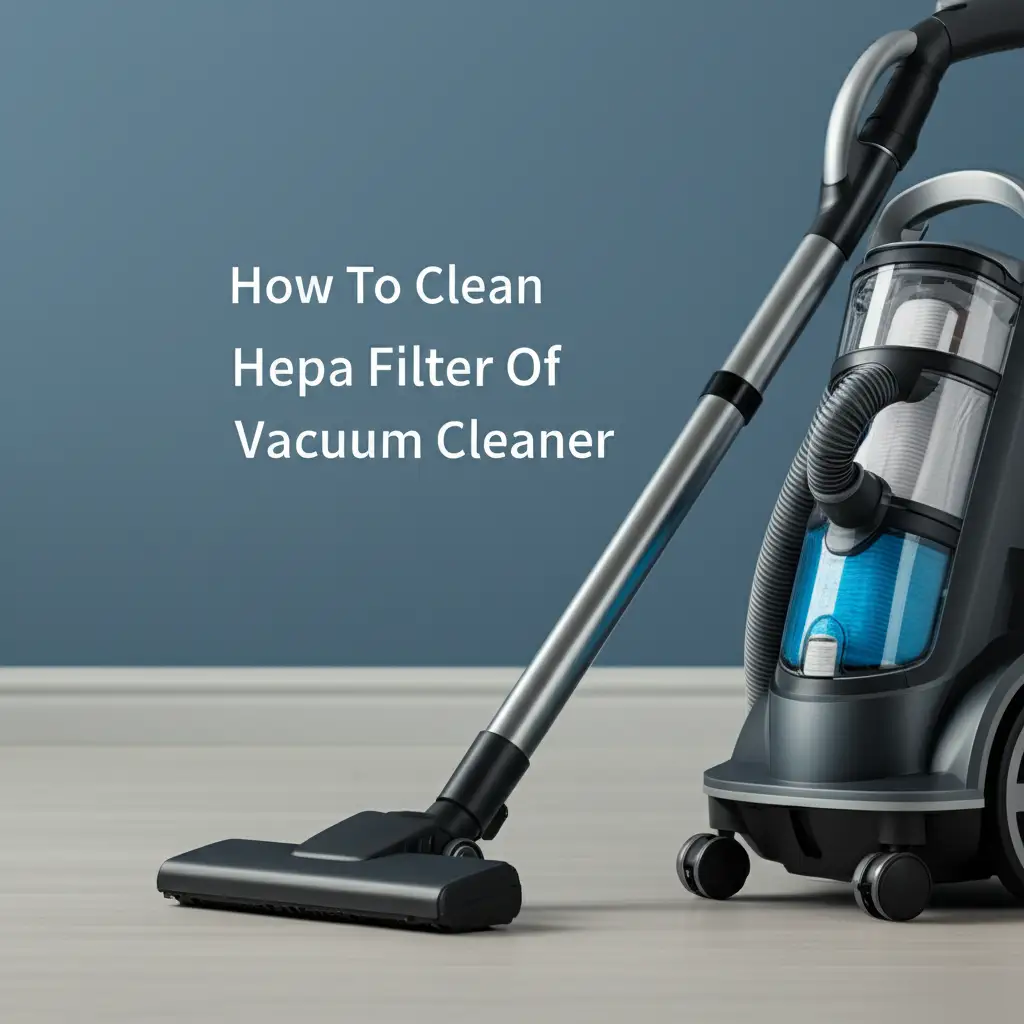
HEPA Filters (Post-Motor Filters):
- Location: HEPA filters are usually located in a separate compartment, often at the back or bottom of the vacuum. They capture the finest particles before air exits the vacuum.
- Cleaning Frequency: Most HEPA filters in Shark vacuums are not washable. They require less frequent cleaning, usually every 6-12 months. Some might be washable; always check your manual. For specific instructions on cleaning these, you can also look at guides like how to clean shark hepa filter.
- How to Clean (Non-Washable):
- Remove: Unplug the vacuum. Locate and remove the HEPA filter.
- Tap Clean: Hold the filter over a trash can and tap it gently to dislodge trapped dust. You can also use a soft brush or a dry cloth to wipe away surface dust.
- Do Not Wash: Unless your specific model’s manual states otherwise, do not wash a HEPA filter. Water can damage the delicate filter material, making it ineffective.
- Reinstall: Place the clean, dry HEPA filter back into its compartment.
- How to Clean (Washable HEPA): If your manual states your HEPA filter is washable, follow instructions similar to foam/felt filters. Rinse with lukewarm water until clear and let it air dry completely for at least 24-48 hours.
Maintaining these filters is key for your Shark vacuum’s performance. For specific details on filter maintenance for different models, especially cordless ones, refer to resources like how to clean shark vacuum filter cordless. Always ensure all filters are completely dry before reassembling. This prevents mold and protects the motor.
De-Tangling and Cleaning the Brush Roll
The brush roll is the workhorse of your vacuum. It spins rapidly, agitating carpet fibers to dislodge dirt and debris, or sweeping hard floors clean. Over time, hair, threads, and other fibers inevitably get wrapped around it. This buildup can significantly reduce its effectiveness. I have pulled out some incredible hairballs from my own vacuum.
A tangled brush roll cannot spin freely. This means it cannot agitate carpet effectively. It also puts strain on the motor. In some cases, it might stop spinning altogether. Cleaning the brush roll is essential for maintaining your Shark vacuum’s deep cleaning capabilities. This step often makes the most visible difference in your vacuum’s performance.
Step-by-Step Brush Roll Cleaning
- Unplug Your Vacuum: Safety is paramount. Always unplug your Shark vacuum before you begin working on the brush roll. This prevents accidental starts.
- Access the Brush Roll:
- Upright Models: For most upright Shark vacuums, you will need to recline the vacuum flat on the floor. The brush roll is usually visible on the underside of the floor nozzle. Some models have a removable plate secured by screws or latches.
- Lift-Away or Stick Models: These might have a removable floor head. You often press a button or slide a latch to detach the head. Then, you can access the brush roll.
- Rotator/Navigator Models: Many Shark Navigator models have an easy-access brush roll cover. Check your manual for specific release mechanisms. For example, how to clean brush roll on shark navigator gives specific guidance.
- Remove Tangled Debris: This is the main part of the job.
- Cut Hair: Use scissors or a seam ripper to carefully cut through any hair or strings wrapped around the brush roll. Cut along the length of the brush roll. Be careful not to cut the bristles or the belt.
- Pull Away: Once cut, gently pull the tangled debris off the brush roll. You might need to use your fingers or a small tool to loosen stubborn bits.
- Check Ends: Pay close attention to the ends of the brush roll. Hair often collects there and can get tangled in the bearings. Clean these areas thoroughly.
- Wipe Down the Brush Roll: Use a dry cloth to wipe down the bristles and the entire surface of the brush roll. Remove any dust, pet dander, or fine debris that might be clinging to it. Ensure the bristles are free of any residue.
- Check for Damage: While cleaning, inspect the brush roll for any signs of damage. Look for bent or missing bristles. Check if the belt that drives the brush roll is intact and not frayed. If bristles are severely worn or the belt is damaged, it might be time for a replacement part.
- Reassemble: Once clean and inspected, reassemble the brush roll and its cover. Ensure everything clicks back into place securely. If you removed the floor head, reattach it to the vacuum body.
Cleaning the brush roll can be a bit messy, but it significantly impacts your vacuum’s ability to clean deeply. It is a critical step in maintaining your Shark vacuum’s overall performance. I notice an immediate improvement in how well my vacuum picks up after doing this.
Clearing Hoses and Attachments
Even with clean filters and a clear brush roll, your Shark vacuum might still suffer from low suction. This often means there is a blockage hidden somewhere in the hose or attachments. Dust, pet hair, toys, or even socks can get stuck and create a clog. I once found a missing Lego piece in my vacuum hose!
A blocked hose prevents air from flowing freely to the dust cup. This chokes your vacuum, making it ineffective. Checking and clearing these pathways is a vital part of comprehensive Shark vacuum cleaning. It ensures a clear path for dirt to travel from your floors to the collection bin.
Step-by-Step Hose and Attachment Cleaning
- Unplug Your Vacuum: As always, start by unplugging the vacuum. This protects you from accidental injury.
- Remove the Hose: Most Shark vacuums have a removable hose. Look for release buttons or latches where the hose connects to the main body and the wand. Detach the hose completely from both ends. This allows for a full inspection.
- Inspect for Clogs:
- Visual Check: Hold the hose up to a light source. Look through it for any visible obstructions. You might see a clump of hair, a piece of paper, or a small object.
- Flex and Feel: Gently flex the hose along its entire length. If there is a clog, you might feel a firm lump or resistance in one spot.
- Push Through: If you find a clog, try to gently push it through using a broom handle, a straightened coat hanger, or a long, blunt object. Be careful not to puncture the hose. Push the clog towards the wider end if possible. Do not use anything sharp.
- If Stubborn: Sometimes, a clog is very stubborn. You can try using a shop vacuum on the hose end to suck it out, or gently run water through it if the hose is designed to be wet, and you can thoroughly dry it. Always confirm if your hose is water-safe before doing this.
- Clean Attachments:
- Crevice Tool: Use a thin wire or bottle brush to clear any debris from inside the crevice tool.
- Upholstery Tool/Pet Power Brush: For upholstery tools, wipe down any fabric or plastic surfaces with a damp cloth. If your model has a motorized pet power brush, check for hair tangles similar to the main brush roll. Use scissors to cut and remove them.
- Dusting Brush: Gently tap the dusting brush against a hard surface to dislodge dust. You can also rinse it under water if it’s plastic, then let it air dry completely.
- Check Air Paths within the Vacuum: While the hose and attachments are off, also check the air intake port on the vacuum body itself. Sometimes, debris gets stuck right at the opening where the hose connects. Use your fingers or a small tool to clear it.
- Reassemble: Once all components are clear and dry, reattach the hose and any cleaned attachments. Make sure all connections are secure. A loose connection can also lead to suction loss.
By systematically checking and clearing these pathways, you ensure your Shark vacuum has a clear line to pull dirt from your floors. This step is often the key to restoring full suction power and making your vacuum perform like new.
Deep Cleaning Specific Shark Models
While the core principles of Shark vacuum cleaning apply to all models, some variations exist. Different Shark vacuums have unique designs. This means slight differences in how you access their parts. Understanding these nuances helps you clean your specific model effectively. I own a Shark Rocket, and it needs slightly different care than my friend’s Shark Navigator.
Shark offers a wide range of vacuum types. These include uprights, Lift-Aways, Rotators, Rockets (stick vacuums), and robot vacuums. Each type has its own quirks for disassembly and cleaning. Knowing your model helps you avoid damaging it. Always refer to your user manual first.
Cleaning Considerations for Different Shark Models
Shark Upright Vacuums (e.g., Navigator, Rotator, Apex):
- Common Design: These are often the largest and most powerful. They feature a main upright body with a detachable canister (Lift-Away) or fixed body.
- Brush Roll Access: Many uprights have a brush roll access panel on the bottom. You might need a coin or flathead screwdriver to open latches or remove screws. This makes brush roll cleaning easier.
- Filter Locations: Pre-motor filters are usually found directly under the dust cup. Post-motor or HEPA filters are often at the back or bottom of the main unit.
- Hose System: Uprights typically have a main hose that can be detached from the wand and base. Check all connection points for clogs.
Shark Stick Vacuums (e.g., Rocket, Vertex):
- Lightweight Design: These are slimmer and lighter. They convert between an upright stick and a handheld.
- Dust Cup: Dust cups are usually smaller and located near the handle. They detach easily for emptying.
- Filter Access: Filters are often located right inside or next to the dust cup. They are usually foam and felt. Some stick models, especially cordless ones, might have additional filters.
- Brush Roll: Stick vacuums often have a smaller brush roll. They may or may not have an easy-access panel. Sometimes, the entire floor nozzle must be disassembled. If you have a Shark Rocket, you can find specific tips on how to clean shark rocket vacuum.
- Cordless Models: For cordless models, be extra careful with water. Only wash parts explicitly stated as washable. Ensure battery and motor components never get wet. For more on cordless filter cleaning, see how to clean shark vacuum filter cordless.
Shark Robot Vacuums (e.g., IQ Robot, ION Robot):
- Automated Cleaning: These vacuums navigate your home autonomously.
- Dust Bin: The dust bin is usually smaller and slides out from the side or back of the robot. It needs frequent emptying.
- Brush Roll/Side Brushes: Robot vacuums have a main brush roll (often called a multi-surface brush roll) and side spinning brushes. These need regular removal and cleaning for hair and debris.
- Filters: Filters are typically located in the dust bin. They are often thin mesh or pleated filters.
- Sensors: Robot vacuums have sensors that need wiping clean. This ensures they can navigate properly and avoid obstacles. For detailed steps on robot vacuum cleaning, check out how to clean shark robot vacuum.
Regardless of your model, always consult your specific user manual. It provides model-specific diagrams and instructions. Following these guidelines ensures you clean your Shark vacuum correctly and safely. It also helps preserve your warranty.
Routine Maintenance Tips and Troubleshooting
Cleaning your Shark vacuum is not a one-time event. It is an ongoing process. Establishing a regular cleaning schedule keeps your vacuum running efficiently. This prevents major issues from developing. I set reminders on my phone for vacuum maintenance.
Even with regular cleaning, sometimes problems can arise. Knowing basic troubleshooting steps can save you a trip to the repair shop. Most common issues are solved with simple maintenance. A well-cared-for Shark vacuum will serve you faithfully for years.
Establishing a Cleaning Schedule
- After Every Use (or two):
- Empty the dust cup. This prevents immediate airflow restriction and keeps the suction strong.
- Quickly check the brush roll for large hair tangles. Remove any obvious ones.
- Monthly (or more often with pets/heavy use):
- Wash the foam and felt pre-motor filters. Ensure they dry completely for at least 24 hours.
- Deep clean the brush roll, cutting and removing all tangled hair and debris.
- Check the hose and attachments for clogs.
- Every 3-6 Months:
- Clean the post-motor (HEPA) filter. Tap it clean. If washable (check manual), wash and dry completely.
- Wipe down the exterior of the vacuum with a damp cloth.
- Inspect cords for damage.
- Annually (or as needed):
- Consider replacing filters (foam/felt/HEPA). Even washable filters lose efficiency over time.
- Check the brush roll for worn bristles and consider replacement if severely worn.
- Inspect belts (if your model has one) for wear and tear.
Common Troubleshooting Scenarios
- Low or No Suction:
- Check Dust Cup: Is it full? Empty it.
- Check Filters: Are they dirty or wet? Clean and ensure they are dry, or replace them.
- Check Brush Roll: Is it tangled or stuck? Clean it.
- Check for Clogs: Inspect the hose, wand, and floor nozzle for blockages.
- My Experience: Almost every time my vacuum loses suction, it’s one of these simple fixes. Start with the easiest first!
- Brush Roll Not Spinning:
- Check for Tangles: Is hair or debris wrapped around it? Clean it thoroughly.
- Check Obstructions: Is something large stuck in the nozzle preventing movement?
- Check Reset Button: Some Shark models have a brush roll reset button on the floor nozzle if it jams.
- Belt Damage: If applicable, check if the drive belt is broken or stretched. You might need a replacement part.
- Vacuum Emits an Odor:
- Dirty Filters: Filters absorb odors. Clean or replace them.
- Dirty Dust Cup: Wash the dust cup if washable and ensure it’s completely dry.
- Debris in Brush Roll/Hose: Organic matter (like
- Shark vacuum cleaning
- vacuum maintenance
- clean vacuum filter
- brush roll cleaning
- Shark vacuum care

Todd Martin
Senior Writer
With over 15 years of experience in home renovation and design, I started HEG to share what I’ve learned with homeowners who want to create spaces that are both beautiful and functional. I’ve always believed in a hands-on approach, and over the years, I’ve picked up practical solutions that actually work. Through HEG, I aim to make home improvement more approachable, sharing real tips that help you create a home you truly love.