· Todd Martin · Outdoor Living · 21 min read
How To Clean Pavers Patio
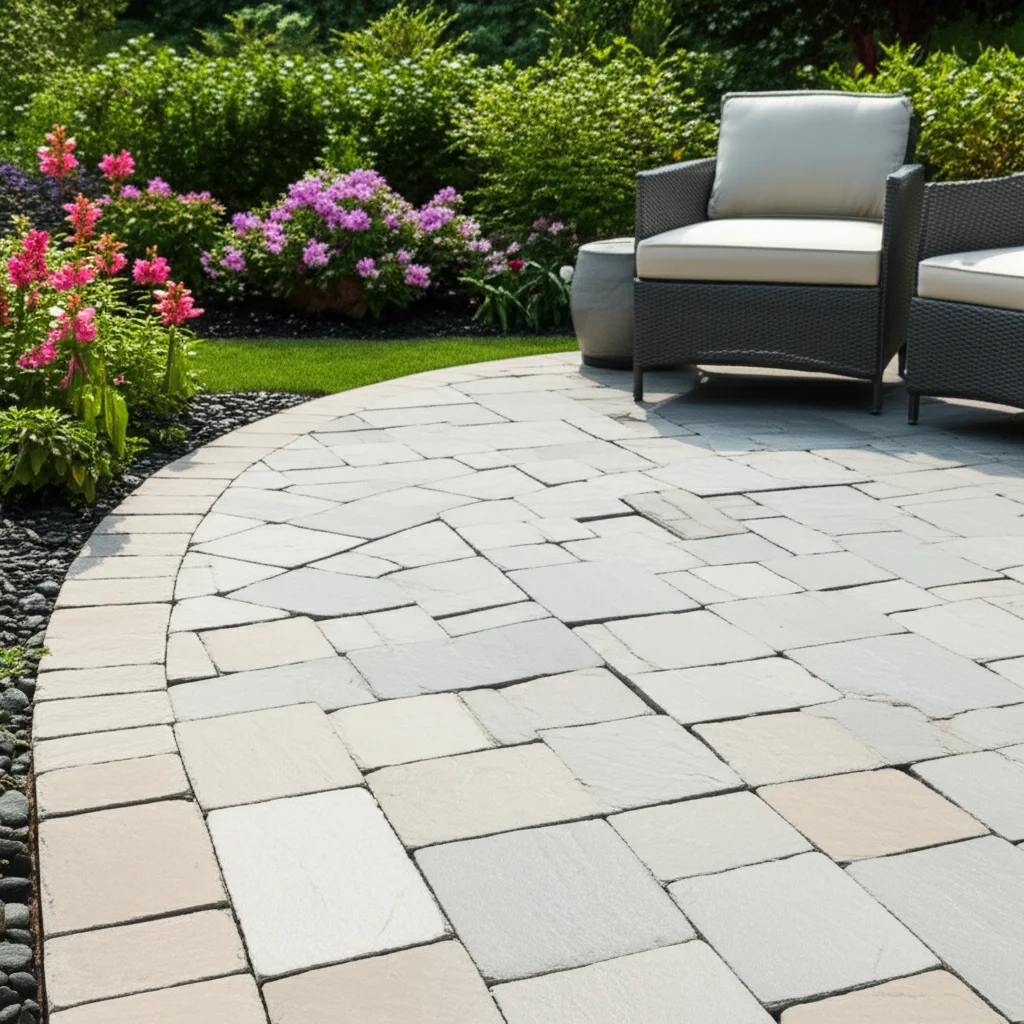
Restore Your Pavers Patio: A Complete Cleaning Guide
Your pavers patio is an outdoor haven. It offers a beautiful space for relaxation and entertaining. Over time, however, dirt, grime, and environmental elements can dull its appearance. Cleaning your pavers patio brings back its original charm. I will show you how to clean your pavers patio, ensuring it stays a welcoming extension of your home. This guide provides actionable steps and expert tips for a pristine outdoor area.
Takeaway:
- Regularly clean your pavers patio to prevent dirt buildup and maintain its appeal.
- Use appropriate tools and cleaning solutions for different types of stains and paver materials.
- Combine sweeping, scrubbing, and targeted stain removal for a thorough clean.
- Consider pressure washing for deep cleaning, but use it carefully to avoid damage.
- Implement protective measures like sealing to extend the life and cleanliness of your pavers.
Cleaning a pavers patio involves removing dirt, stains, and organic growth. Start by sweeping loose debris. Then, apply a suitable cleaner, scrub the surface, and rinse it thoroughly. Targeted methods address specific issues like moss, oil, or efflorescence, restoring the patio’s appearance.
Why Your Pavers Patio Needs Regular Cleaning
A clean pavers patio significantly enhances your home’s curb appeal. Over time, outdoor elements leave their mark. Leaves, dirt, and spills accumulate on the surface. These can lead to a faded, uninviting look. Regular cleaning prevents permanent damage and preserves your investment.
Neglecting your patio can cause several problems. Dirt and debris trap moisture. This encourages moss, algae, and mold growth. These growths make surfaces slippery and unsafe. They also embed into the paver’s porous structure, leading to deeper stains. Routine cleaning addresses these issues promptly. It keeps your outdoor space safe and visually appealing.
Common Contaminants on Pavers
Many things contribute to a dirty paver patio. I have seen them all. Environmental factors play a large role. Pollen, dust, and general outdoor grime settle on the surface. Organic matter also causes problems. This includes fallen leaves, twigs, and bird droppings.
Then there are spills from everyday use. Grease from barbecues, drinks, or pet accidents can leave stubborn marks. Automotive fluids, if your patio connects to a driveway, can also cause issues. Weeds and moss often sprout between the pavers, pushing them apart. Each of these contaminants requires a specific approach for effective removal.
Benefits of Regular Paver Cleaning
Regular cleaning offers multiple benefits for your pavers patio. First, it restores the patio’s aesthetic appeal. A bright, clean patio looks inviting and well-maintained. This can even increase your home’s value. Second, it extends the lifespan of your pavers. Removing abrasive dirt prevents wear and tear on the paver surface.
Third, cleaning improves safety. Moss and algae create slippery conditions, especially when wet. Removing them reduces the risk of falls. Finally, routine maintenance helps identify minor issues early. You can fix small cracks or joint sand loss before they become major problems. A clean patio means a safer, more beautiful outdoor living area for years to come. I always feel better relaxing on a clean patio.
Essential Tools and Materials for Paver Cleaning
Before you begin cleaning your pavers patio, gather the right tools and materials. Having everything ready saves time. It also ensures you can tackle any type of dirt or stain. I always prepare my workspace first. This step makes the entire process smoother and more efficient.
The tools you choose depend on the cleaning method. For light cleaning, basic items suffice. For tougher stains or larger areas, you might need specialized equipment. Investing in quality tools protects your pavers. It also makes the cleaning task less strenuous.
Basic Cleaning Supplies
For everyday maintenance and light cleaning, you need a few simple items. Start with a sturdy broom. A stiff-bristled push broom works best for sweeping away loose debris. You will also need a garden hose with a spray nozzle. This helps rinse off dirt and cleaning solutions. I find a good nozzle allows for better water control.
Buckets are essential for mixing cleaning solutions. A large scrub brush with strong bristles helps loosen ingrained dirt. For general cleaning, a mild dish soap or a dedicated paver cleaner works well. Remember to use protective gear like gloves and eye protection. Safety is always important when working with cleaning agents.
Specialized Equipment for Tough Jobs
Sometimes, basic supplies are not enough. Tough stains or extensive growth require more powerful tools. A pressure washer is highly effective for deep cleaning pavers. It removes stubborn dirt, mold, and mildew quickly. However, proper technique is vital to avoid damaging the pavers or washing away joint sand.
For targeted weed removal, a weeding tool or a torch can be useful. For efflorescence, a special acidic cleaner might be necessary. Some stubborn oil stains may require a degreaser. I recommend specific paver cleaning solutions for best results. These products are formulated to be effective yet safe for paver surfaces. Understanding your paver type helps you choose the correct products. For example, how to clean concrete pavers might involve different considerations than natural stone.
Step-by-Step Guide to Basic Paver Patio Cleaning
Basic cleaning of your pavers patio is a routine task. It keeps the surface looking fresh. I usually start with this simple method before considering harsher treatments. This approach is effective for light dirt and general grime. It also prepares the patio for any deeper cleaning or sealing you might plan.
Following these steps ensures a thorough and safe cleaning process. Consistent basic cleaning prevents major buildup. This reduces the need for aggressive methods later. It keeps your patio ready for use at any time.
Initial Preparation for Cleaning
Before applying any water or cleaner, prepare the area. First, remove all furniture, planters, and decorative items from the patio. This clears the space and prevents damage to your belongings. Next, use a stiff-bristled broom to sweep away loose dirt, leaves, and other debris. Make sure to get into the joints between the pavers. This initial sweep removes surface grime that can turn into muddy sludge when wet.
You can also use a leaf blower for quicker removal of loose debris. After sweeping, check for any large weeds growing between the pavers. Pull them out manually or use a weeding tool. This step prevents them from interfering with your cleaning. It ensures the cleaning solution can reach the paver surface directly.
Gentle Cleaning Methods for Pavers
Once prepared, you can start the gentle cleaning. Fill a bucket with warm water and a mild cleaning solution. You can use dish soap or a dedicated paver cleaner. Mix according to product instructions. Avoid harsh chemicals initially, as they can damage pavers. I often start with a simple mixture of water and soap.
Pour or spray the solution onto a small section of the pavers. Allow it to sit for a few minutes. This lets the solution penetrate and loosen the dirt. Do not let it dry on the surface. Use a stiff scrub brush to scrub the pavers. Work in small sections, applying consistent pressure. Pay attention to any visible stains. Rinse the area thoroughly with a garden hose. Make sure to remove all soap residue. Repeat this process for the entire patio. For a deeper clean on a variety of surfaces, you might consider how to clean your entire patio floor.
Tackling Stubborn Stains on Your Pavers
Stubborn stains are inevitable on an outdoor pavers patio. Oil, rust, moss, and efflorescence can mar its beauty. Each type of stain requires a specific approach for effective removal. Using the wrong method can cause more damage. I always identify the stain first. This ensures I use the most appropriate and safest cleaning technique.
Addressing these stains quickly prevents them from setting in. Fresh stains are always easier to remove than old ones. Be patient and systematic when dealing with them. Specialized cleaners or DIY solutions can effectively eliminate these unsightly marks.
Oil and Grease Stains on Pavers
Oil and grease stains are common, especially near grills or driveways. They can be tricky to remove from porous pavers. For fresh oil stains, blot as much as you can with paper towels or a cloth. Then, sprinkle an absorbent material over the stain. Kitty litter, cornstarch, or sand works well. Let it sit for several hours or overnight to absorb the oil.
Sweep up the absorbent material. For remaining stains, apply a degreaser specifically designed for pavers or concrete. You can also use a paste of dish soap and warm water. Scrub the area vigorously with a stiff brush. Rinse thoroughly with hot water. Repeat if necessary. For detailed instructions on removing these specific marks, learn how to clean oil off pavers.
Moss and Algae Removal from Pavers
Moss and algae thrive in damp, shaded areas. They create a green, slippery film on pavers. To remove them, first scrape off any thick moss with a stiff brush or scraper. Be careful not to damage the paver surface. Next, apply a solution of bleach and water (1 part bleach to 10 parts water) or a commercial moss and algae killer.
Let the solution sit for 15-20 minutes. It needs time to kill the organisms. Scrub the affected areas with a stiff brush. The moss and algae should loosen easily. Rinse the patio thoroughly with a garden hose. Ensure all residue is washed away. For more in-depth guidance on this specific problem, see how to clean moss off pavers.
Efflorescence and Hard Water Stains
Efflorescence is a white, powdery substance on pavers. It is salt deposits that rise to the surface as water evaporates. Hard water stains also leave mineral deposits. These stains can make pavers look dull. For light efflorescence, a stiff brush and water can sometimes remove it. For heavier deposits, use an acidic cleaner.
Vinegar is a mild acid that can work for efflorescence. Mix equal parts white vinegar and water. Apply it to the affected area. Let it sit for 10-15 minutes. Scrub with a stiff brush and rinse thoroughly. Commercial efflorescence removers are also available. Always test these products on a small, hidden area first. This prevents potential damage to your pavers.
Weeds and Debris Between Pavers
Weeds growing between pavers are a common nuisance. They can disrupt the paver pattern and look unsightly. Start by physically removing as many weeds as possible. A weeding tool or a flat-head screwdriver can help pry them out. For smaller weeds, a stiff brush might dislodge them.
For persistent weeds, consider a weed killer. Choose one safe for pavers. Apply it directly to the weeds. Alternatively, boiling water poured directly on the weeds can kill them. After removing weeds, refill the joints with polymeric sand. This sand hardens and helps prevent future weed growth.
Choosing the Right Cleaning Solution for Pavers
Selecting the right cleaning solution is crucial for effective paver maintenance. The best choice depends on the type of dirt and your paver material. Using an inappropriate cleaner can damage your pavers or leave residues. I always consider the stain first. Then I match it with the safest and most effective solution.
You have options ranging from simple household items to specialized commercial products. Each has its strengths and weaknesses. Understanding these helps you make an informed decision. This section explores various solutions, from DIY mixes to specific cleaners for different paver types.
Vinegar Solutions for Pavers
Vinegar is a popular eco-friendly cleaning agent. Its mild acidity makes it effective for many paver issues. I find it works well for general grime, light mold, and efflorescence. To use vinegar, mix equal parts white vinegar and water in a spray bottle or bucket. Apply the solution directly to the pavers.
Let it sit for about 15-20 minutes. Then, scrub the surface with a stiff brush. Rinse thoroughly with plenty of water. Vinegar is a good option for those seeking a less harsh chemical solution. However, avoid using it on certain natural stone pavers like limestone or marble, as the acid can etch the surface. For detailed guidance on using this common household item, review how to clean pavers with vinegar.
Bleach and Mildew Removers
Bleach is effective for killing mold, mildew, and algae on pavers. It brightens surfaces by removing organic stains. Mix one part household bleach with ten parts water. Apply the solution to the affected areas using a garden sprayer or watering can. Let it sit for 10-15 minutes.
Scrub the pavers with a stiff brush. Then, rinse the entire area thoroughly with a garden hose. Be careful not to let the bleach solution dry on the pavers. Also, protect nearby plants, as bleach can harm them. I always rinse the surrounding plants with water before and after applying bleach. Commercial mildew removers are also available and often come with specific instructions for outdoor surfaces.
Specialized Paver Cleaners
Many commercial cleaners are specifically formulated for pavers. These products target various issues like rust, oil, or general grime. They often contain enzymes or strong detergents. Always read the product label carefully. Follow the manufacturer’s instructions for mixing and application.
These cleaners can be highly effective for tough stains. They are designed to be safe for pavers when used correctly. Some may require specific dwell times or application methods. Always test a small, inconspicuous area first. This confirms compatibility with your specific paver material. I find these cleaners provide excellent results for persistent problems.
Cleaning Different Paver Types
Not all pavers are the same. Concrete pavers, brick pavers, travertine, and limestone each have unique properties. This affects the best cleaning approach. For instance, how to clean concrete pavers might involve stronger detergents. Concrete is durable and can handle more aggressive cleaning.
Brick pavers are also tough. Cleaning a how to clean brick patio often involves methods similar to concrete. However, natural stone pavers like how to clean travertine pavers or how to clean limestone pavers require gentler care. Acids (like vinegar) can etch these surfaces. Always use pH-neutral cleaners for natural stone. This protects their delicate finish. Researching your paver type ensures you use the correct and safest cleaning method.
Pressure Washing Pavers: When and How to Do It Safely
Pressure washing can transform a dirty pavers patio. It uses high-pressure water to blast away grime, moss, and embedded dirt. This method is incredibly efficient for deep cleaning. However, it requires careful execution. Improper use can damage your pavers or wash away joint sand. I use a pressure washer for a thorough clean. It makes a big difference.
Understanding when to use a pressure washer is important. It is not always the first choice. Knowing the right technique ensures a safe and effective clean. This section covers the benefits and risks. It also details the proper steps for pressure washing your pavers patio.
Is Pressure Washing Right for Your Pavers?
Pressure washing is ideal for heavily soiled pavers. It excels at removing stubborn stains, thick layers of grime, and widespread organic growth. If your patio has not been cleaned in years, a pressure washer can quickly restore its look. It saves significant time compared to manual scrubbing.
However, consider the type and condition of your pavers. Older, more brittle pavers might not withstand high pressure. Some soft natural stones are also vulnerable. If your paver joints are filled with regular sand, high pressure will blast it out. Polymeric sand is more resistant. Assess your patio’s specific needs before deciding to pressure wash.
Safe Pressure Washing Techniques
Using a pressure washer safely prevents damage. First, choose the correct nozzle. A wide-angle nozzle (25-degree or 40-degree) is generally best for pavers. Avoid narrow, high-impact nozzles (0-degree or rotating turbo nozzles) unless targeting very specific, tough stains. Keep the nozzle at least 12-18 inches from the paver surface. Closer distances increase the risk of etching or dislodging sand.
Hold the wand at an angle. Use consistent, overlapping strokes. Work in small sections to ensure even cleaning. Do not dwell in one spot, as this can create lines or pits. Always wear safety glasses and sturdy shoes. Never point the nozzle at people or pets. After cleaning, inspect the joints. You may need to re-sand if significant sand was removed. This method is effective for various surfaces, including how to clean patio pavers in general.
Alternatives to Pressure Washing
If you prefer not to use a pressure washer, or if your pavers are too delicate, alternatives exist. Manual scrubbing with a stiff brush and cleaning solutions is effective for most dirt. For larger areas, a power scrubber with a rotating brush head can provide more power than manual scrubbing. These tools are gentler than pressure washers. They still offer good cleaning action.
Chemical cleaners specifically designed for pavers can also lift tough stains without high pressure. Apply the cleaner, let it sit, and then rinse with a garden hose. These methods might take more time and effort. However, they are safer for delicate pavers or if you are concerned about washing away joint sand. For a guide on a specific alternative, explore how to clean concrete patio without pressure washer.
Maintaining Your Clean Pavers Patio for Lasting Beauty
Cleaning your pavers patio is only part of the story. Proper maintenance keeps it looking great for longer. It prevents quick re-accumulation of dirt and stains. Implementing preventative measures saves you time and effort in the long run. I always tell people that maintenance is key. It helps preserve the hard work you put into cleaning.
Regular upkeep also protects your investment. Pavers are a significant outdoor feature. Protecting them ensures they remain a beautiful and functional part of your home. This section outlines key maintenance steps, from preventing future stains to sealing your pavers.
Preventing Future Stains and Growth
Prevention is easier than cure when it comes to paver stains. Keep your patio clear of organic debris. Regularly sweep leaves, dirt, and branches. This prevents them from decomposing and staining the pavers. Trim overhanging trees and bushes to reduce shade and moisture. Less moisture means less moss and algae growth.
Consider placing mats under grills or potted plants. This catches spills and prevents rings. Address spills immediately. Blot liquid spills and scrape up solid ones before they dry. Applying a polymeric sand during installation or re-sanding helps inhibit weed growth. A proactive approach significantly reduces future cleaning efforts.
Re-sanding Paver Joints
The sand between pavers plays a crucial role. It locks the pavers into place. It also inhibits weed growth. Over time, joint sand can erode due to weather, traffic, or cleaning. When sand levels are low, pavers can shift. Weeds also find it easier to grow.
After a thorough cleaning, especially after pressure washing, inspect the joints. If the sand level is low, replenish it. Use polymeric sand for best results. This sand hardens when activated with water. It provides a durable, weed-resistant joint. Spread the sand over the dry pavers. Sweep it into the joints. Lightly mist the area with water to activate the polymeric sand. This process helps maintain the structural integrity and appearance of your patio.
Sealing Your Pavers
Sealing your pavers patio is a vital step for long-term protection. A good quality sealer creates a protective barrier on the paver surface. This barrier makes pavers less porous. It repels water, oil, and other liquids. This significantly reduces the chances of stains setting in. Sealing also enhances the paver’s color. It gives them a richer, more vibrant look.
Before sealing, ensure your pavers are completely clean and dry. Any trapped dirt or moisture will be sealed in. Apply the sealer according to the manufacturer’s instructions. Use a roller or sprayer for even coverage. One or two coats might be needed. Sealing typically lasts for 2-5 years. Regular reapplication ensures continuous protection. This makes future cleaning much easier. For more information on preparing your pavers for this step, learn how to clean pavers before sealing.
Common Paver Cleaning Mistakes to Avoid
Cleaning your pavers patio can seem straightforward. However, common mistakes can lead to damaged pavers or unsatisfactory results. Being aware of these pitfalls helps you avoid costly errors. I have learned from my own experiences. Knowing what not to do is as important as knowing what to do.
Avoiding these mistakes ensures your cleaning efforts are effective. It also prolongs the life and beauty of your pavers. Proper technique and product selection are key. Taking precautions saves you time, money, and potential frustration.
Using Incorrect Pressure Washer Settings
One of the most common mistakes is using too much pressure or the wrong nozzle on a pressure washer. A zero-degree nozzle or very high PSI can etch, pit, or even crack pavers. It can also blast away all the joint sand, leading to unstable pavers. Always start with a lower pressure setting. Use a wide-angle nozzle (25-degree or 40-degree). Keep the nozzle at least a foot away from the surface. Gradually increase pressure if needed. Test on an inconspicuous area first. This prevents irreversible damage.
Applying Harsh Chemicals Indiscriminately
Using strong, undiluted chemicals like bleach, muriatic acid, or abrasive cleaners without caution is another big mistake. These substances can discolor pavers. They can strip their sealant. They can also harm surrounding landscaping and be dangerous to handle. Always dilute chemicals as directed. Choose products specifically designed for pavers. Acidic cleaners should not be used on natural stone pavers like limestone or travertine. Always perform a spot test in a hidden area. This confirms the cleaner’s compatibility and effect.
Not Rinsing Thoroughly
Failing to rinse your pavers patio completely after cleaning is a mistake. Leftover cleaning solutions or dirty water can leave streaks or residues. These residues can attract more dirt. They can also cause discoloration over time. After scrubbing and applying a cleaner, rinse the entire patio thoroughly with plenty of fresh water. Ensure all suds and dissolved dirt are washed away. Rinse until the water runs clear. This step is crucial for a clean, streak-free finish.
Ignoring Weeds and Joint Sand
Neglecting weeds and the integrity of your joint sand undermines your cleaning efforts. Weeds growing through cracks can displace pavers and collect moisture, leading to more moss and algae. Leaving joint sand depleted after cleaning can cause pavers to shift. It also provides an open invitation for new weed growth. Always remove weeds entirely. Re-sand the joints with polymeric sand after a deep clean. This maintains the patio’s structure and prevents future weed issues.
Cleaning Pavers in Direct Sunlight or Hot Weather
Cleaning pavers in direct, hot sunlight is not ideal. The cleaning solutions can dry too quickly. This leaves streaks and makes them less effective. The heat can also cause the solutions to evaporate before they have time to work. This can lead to uneven cleaning. It also makes rinsing more difficult. I always try to clean my patio on a cloudy day. If not possible, work in small sections. Keep the area wet, and rinse immediately after scrubbing. Early mornings or late afternoons are better times on sunny days.
FAQ Section
How often should I clean my pavers patio?
I recommend a thorough cleaning for your pavers patio at least once a year. This removes accumulated dirt and prevents deep stains. For areas with heavy foot traffic, lots of trees, or high humidity, you might consider cleaning twice a year. Regular sweeping and spot cleaning between deep cleans help maintain its appearance daily.
Can I use bleach on pavers?
Yes, you can use bleach on many types of pavers. It is effective for removing mold, mildew, and algae. Mix one part household bleach with ten parts water. Apply it carefully. Always rinse thoroughly afterward. Avoid using bleach on natural stone pavers, as it can cause discoloration or damage.
What is efflorescence on pavers and how do I remove it?
Efflorescence is a white, powdery residue. It consists of natural salts that rise to the paver surface as moisture evaporates. For light efflorescence, a stiff brush and water work. For tougher cases, I use a diluted vinegar solution (equal parts vinegar and water) or a specialized efflorescence remover. Scrub and rinse well.
Is pressure washing bad for pavers?
Pressure washing is safe for most pavers when done correctly. Too much pressure or using the wrong nozzle can damage the paver surface or wash away joint sand. Use a wide-angle nozzle (25 or 40 degrees) and keep it at least 12 inches away. Always move the wand consistently.
How do I keep weeds from growing between my pavers?
To prevent weeds, ensure paver joints are filled properly. Polymeric sand is excellent for this. It hardens when wet and creates a barrier. Regularly sweep and inspect your patio. Address any new weeds promptly by pulling them or using a targeted weed killer.
How do I clean oil stains from my pavers?
For oil stains,


