· Todd Martin · Beauty Tools · 18 min read
How To Clean Nail Drill Bits
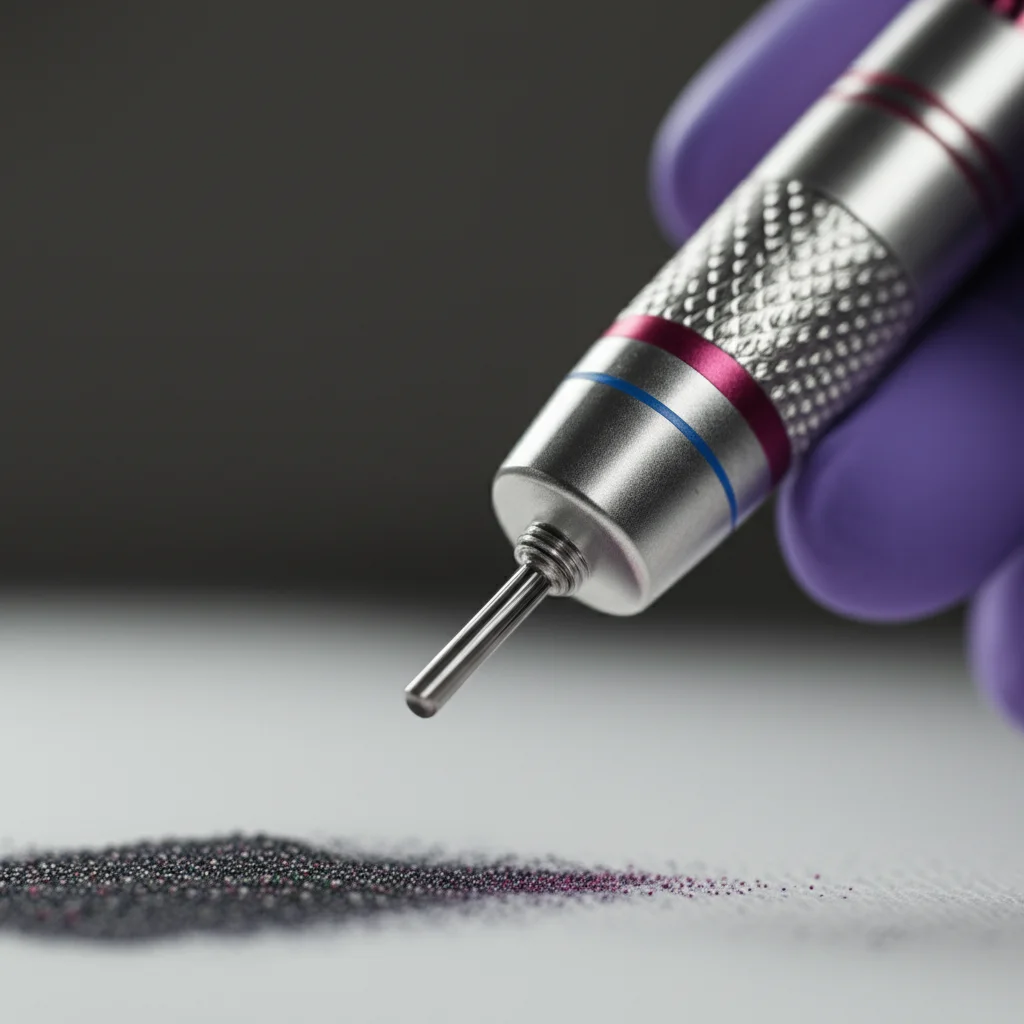
Cleaning Nail Drill Bits for Optimal Performance & Hygiene
Clean tools are a must for any nail enthusiast or professional. Dirty tools spread germs. This applies particularly to items like nail drill bits. You might wonder how to clean nail drill bits effectively. This task is simpler than you think. Proper cleaning ensures safety and makes your bits last longer.
This guide will show you exactly how to clean nail drill bits. We will cover necessary tools and a step-by-step process. We will also discuss different bit types and common mistakes. By the end, you will know how to keep your nail drill bits in top condition. This knowledge helps you maintain hygiene for yourself or your clients.
Takeaway:
- Clean nail drill bits after every use to prevent infections.
- Follow a three-step process: clean, disinfect, and sterilize.
- Use the correct cleaning agents for different bit materials.
- Store bits dry and properly to extend their lifespan.
Concise Answer:
To clean nail drill bits, first remove visible debris with a brush. Next, wash them with soap and water. Then, disinfect them using an EPA-registered solution. For professional settings, sterilize bits with a UV sterilizer or autoclave. Finally, dry and store your bits to ensure hygiene and performance.
Understanding Why Clean Nail Drill Bits Are Essential
Dirty tools can cause serious problems. Nail drill bits come into contact with skin and nails. This means they can pick up bacteria, fungi, and viruses. Using dirty bits can transfer these microbes, leading to infections. These infections can be painful and dangerous. Maintaining clean nail drill bits is a vital step in preventing such issues.
Beyond health risks, dirty bits perform poorly. Debris like nail dust and product residue builds up on the bit surface. This buildup makes the bit less effective at filing or shaping. A dirty bit can drag or snag, creating an uneven finish. It also makes the drill work harder, which can shorten the life of your nail drill machine. Regular cleaning helps your bits work as they should. It also protects your drill from strain.
Different types of contaminants stick to nail drill bits. These include dust from acrylic or gel, skin cells, and natural oils. Over time, these materials can harden. This makes bits even harder to clean. It also provides a breeding ground for germs. Think about how you clean other nail tools, like how to clean nail clippers or even how to clean a nail filer. The principle is similar: remove debris, then sanitize. Neglecting to clean bits compromises the health of your clients or yourself. It also impacts the quality of your nail work.
Ignoring this step means you risk health issues and poor results. A clean bit cuts efficiently. It reduces heat buildup during use. This makes the process safer and more comfortable. For these reasons, making bit cleaning a routine is not just good practice. It is necessary for safe and effective nail care.
Gathering Your Tools: What You Need to Clean Nail Drill Bits
Before you start cleaning your nail drill bits, gather all necessary items. Having everything ready saves time and ensures a thorough cleaning. You will need a few basic supplies. Some supplies are for everyday cleaning. Others are for deeper sanitation or sterilization. Prepare these items beforehand for a smooth process.
First, you need brushes. A small wire brush is excellent for tougher debris. Nylon brushes work well for general scrubbing. These help remove stubborn dust and product buildup from the bit’s grooves. Next, gather your cleaning solutions. Basic dish soap or a mild detergent works for the initial wash. For disinfection, an EPA-registered disinfectant is crucial. This type of disinfectant kills a broad range of germs. Make sure the disinfectant is approved for salon use if you are a professional. Always follow the product’s instructions for dilution and contact time.
For sterilization, especially in professional settings, you might need specific equipment. A UV sterilizer offers a good level of sanitization for many tools. An autoclave uses heat and pressure for true sterilization, killing all microbes. This is the gold standard for medical and salon tools. You also need personal protective equipment. Wear gloves to protect your hands from chemicals and germs. Safety glasses protect your eyes from splashes.
Finally, prepare items for rinsing and drying. A clean basin or sink is needed for washing. Lint-free cloths or paper towels are best for drying. An air-drying rack is also useful. Some people also use an ultrasonic cleaner. This device uses sound waves to loosen debris from the bits. It helps in the initial cleaning step. It is an investment but can make the cleaning process much easier.
Step-by-Step Guide: How to Clean Nail Drill Bits Effectively
Cleaning nail drill bits involves several distinct steps. Following these steps ensures your bits are not only clean but also sanitized. Each stage serves a specific purpose in removing debris and eliminating pathogens. I always follow this process to keep my tools safe and efficient.
Step 1: Remove Debris
The very first step is to remove all visible debris. After each use, nail dust, dead skin, and product residue cling to the bit. Use a small wire brush or a specialized drill bit cleaning brush. Gently scrub the bit under running water. This mechanical action loosens and removes most of the larger particles. An ultrasonic cleaner can also help here. Place the bits in the ultrasonic cleaner with water and a few drops of mild soap. The vibrations will agitate the debris, making it easier to rinse off. This initial cleaning is important. You cannot disinfect or sterilize a bit with dirt still on it. The debris acts as a barrier, protecting germs from the disinfectant.
Step 2: Wash with Soap and Water
After removing loose debris, it is time for a thorough wash. Use warm water and an antibacterial soap or mild detergent. Lather the soap and scrub each bit individually. Use your wire or nylon brush to get into all the grooves and crevices. Pay special attention to the tip and sides of the bit. Make sure to remove any sticky product residue, like gel or acrylic. Rinse the bits thoroughly under clean running water. Ensure no soap residue remains. Soap left on bits can interfere with the disinfection process. This step is about making the bits visually clean and ready for sanitization.
Step 3: Disinfect for Sanitization
Disinfection is crucial for killing most harmful microorganisms. After washing, submerge your clean bits in an EPA-registered disinfectant solution. Always follow the manufacturer’s instructions for the specific disinfectant you use. This includes dilution ratios and required contact time. Different disinfectants need different soaking times. This could range from 10 to 30 minutes. Do not shorten this time. Shortening the time means the solution will not kill all germs. After the required soak time, remove the bits from the solution. Discard the used solution immediately. This step makes the bits safe for use on different clients or for personal use. It is a critical barrier against infection.
Step 4: Sterilize (Optional but Recommended for Professionals)
Sterilization takes cleanliness a step further. It kills all forms of microbial life, including spores. This step is usually for professional settings, like salons or spas. It offers the highest level of infection control. An autoclave uses high-pressure steam to sterilize tools. This is the most effective method. Some nail technicians use UV sterilizers. UV sterilizers are good for sanitization, but they do not achieve true sterilization like an autoclave. If you use an autoclave, follow its specific operating instructions carefully. Always ensure tools are clean and dry before placing them in the sterilizer. This prevents corrosion and ensures proper sterilization.
Step 5: Rinse and Dry Thoroughly
The final step is to rinse the bits and dry them completely. After disinfection or sterilization, rinse the bits under clean, running water. This removes any leftover chemical residue from the disinfectant or sterilizer. Chemical residue can irritate skin or damage the bits over time. After rinsing, dry each bit thoroughly. Use a clean, lint-free cloth or paper towel. You can also let them air dry on a clean surface. Make sure they are completely dry before storing them. Storing wet bits can lead to rust or corrosion. It also creates an environment for mold or bacteria to grow. Proper drying preserves the integrity and sharpness of your bits. It also maintains their hygienic state until next use.
Cleaning Different Types of Nail Drill Bits
Nail drill bits come in many materials and shapes. Each material has unique properties. These properties affect how you should clean them. Understanding these differences helps you clean your bits safely and effectively. It also prevents damage to your valuable tools.
Carbide Bits
Carbide bits are popular for their strength and durability. They are often silver-colored and have sharp flutes. These bits are great for removing gel, acrylic, or calluses. Because they are tough, you can use a wire brush to clean them. A brass wire brush is ideal. It is strong enough to remove stubborn product buildup without scratching the bit. After brushing, follow the soap and water, then disinfectant steps. Carbide bits can withstand most strong disinfectants. Ensure complete drying to prevent rust. Their robust nature means they generally hold up well to rigorous cleaning.
Ceramic Bits
Ceramic bits are smoother and produce less heat than carbide bits. They are usually white or colorful. Nail technicians often use them for surface work and cuticle preparation. Ceramic bits are more brittle than carbide. You must handle them gently during cleaning. Do not use a wire brush on ceramic bits. It can scratch or damage their surface. Instead, use a soft nylon brush and mild soap. An ultrasonic cleaner is also excellent for ceramic bits. It cleans without direct scrubbing. Disinfect them with an EPA-registered solution as usual. Always dry them carefully to avoid water spots or mineral buildup.
Diamond Bits
Diamond bits are made from small diamond particles bonded to a metal base. They are used for cuticle work, nail shaping, and removing excess product. These bits are highly abrasive and durable. They can handle strong cleaning methods. You can use a wire brush for diamond bits. Their rough texture traps debris easily, so thorough scrubbing is important. Like other bits, wash them with soap and water. Then, disinfect them according to product instructions. Diamond bits are resistant to corrosion, but proper drying is still essential. Their hard surface makes them easy to clean. They rarely retain much residue if cleaned immediately after use.
Sanding Bands/Paper Bits
Sanding bands and paper bits are single-use items. They are made of abrasive paper or material on a disposable sleeve. They fit over a mandrel bit. These are commonly used for buffing, shaping, and removing shine from the nail plate. You cannot clean or reuse sanding bands or paper bits. They are designed for one-time use on a single client. Attempting to clean them is unsanitary and ineffective. The abrasive material breaks down with use. It also absorbs dust and debris. After each use, remove the sanding band from the mandrel and discard it. Always start with a new, fresh sanding band for each client or personal manicure. This ensures maximum hygiene and effective results. This is similar to how you would replace single-use items like cotton pads or nail wipes.
Common Mistakes to Avoid When Cleaning Nail Drill Bits
Cleaning nail drill bits seems straightforward. However, common mistakes can lessen their effectiveness or even damage them. Avoiding these pitfalls ensures your bits stay clean, safe, and last longer. I learned these lessons through practice.
One major mistake is not cleaning bits regularly. Some people only clean their bits when visible buildup appears. Bits should be cleaned after every single use. Even if you cannot see debris, microscopic particles and germs are present. Skipping regular cleaning allows buildup to harden. This makes bits harder to clean later. It also gives bacteria and fungi more time to grow. Make cleaning a habit, just like you would clean your acrylic nail brushes.
Another error is using improper cleaning solutions. Do not use household cleaners not meant for salon tools. Harsh chemicals like bleach can corrode metal bits. They can also leave harmful residues. Always use an EPA-registered disinfectant. These products are specifically formulated to kill pathogens on non-porous surfaces. They are safe for your bits and effective against germs. Always check the label to ensure it is suitable for your bit material.
Not rinsing properly is another common mistake. After using soap or disinfectant, bits must be rinsed thoroughly. Leftover soap can leave a sticky film. Disinfectant residue can irritate skin. It can also cause corrosion over time. Rinse under running water until no suds or slippery feel remains. This ensures the bits are truly clean and safe.
Storing wet bits is a quick way to ruin them. Moisture causes rust on metal bits, especially carbide. Rust dulls the bit and makes it unusable. It can also harbor bacteria. Always ensure bits are completely dry before putting them away. Air drying on a clean towel or using a lint-free cloth helps. A clean, dry storage container is essential.
Finally, neglecting to check for damage is a mistake. During cleaning, inspect each bit. Look for any signs of wear, cracks, or dullness. A damaged bit can cause injury to the nail or surrounding skin. It might also perform poorly. A dull bit will drag and pull, creating an uncomfortable experience. Replace damaged bits immediately. Do not try to continue using them. Proper inspection is part of maintenance, similar to checking other tools like gel nail brushes for fraying bristles.
Maintaining Your Nail Drill Bits: Beyond Basic Cleaning
Cleaning nail drill bits keeps them hygienic. But proper maintenance goes further. It involves caring for them in ways that extend their lifespan and ensure peak performance. Think of it as protecting your investment. I always consider these extra steps after cleaning.
Proper storage solutions are key. After bits are completely dry, store them in a clean, dry, and organized manner. A designated drill bit holder or a sealed container is ideal. These prevent bits from touching each other, which can cause dulling or damage. It also keeps them safe from dust and contaminants. Avoid tossing them into a drawer with other tools. This can chip or bend delicate bit tips. A proper storage case also makes it easy to find the bit you need. It also keeps them separate from dirty tools.
Regular inspection for wear is vital. Even with perfect cleaning, bits wear down over time. Before each use, quickly check the bit. Look for dull edges, bent shafts, or missing abrasive particles. Carbide bits might show dull flutes. Diamond bits might lose their grit. Ceramic bits can develop micro-cracks. A worn bit works inefficiently. It can also generate excess heat, which is uncomfortable for the client. Identifying wear early helps you replace bits before they cause issues.
Knowing when to replace bits saves trouble. There is no set timetable. It depends on how often you use them and what materials you work on. As a general rule, replace bits when they no longer perform as well. This means they might take longer to file, require more pressure, or feel less smooth. Do not wait until a bit breaks or causes problems. A proactive approach ensures you always have sharp, effective tools. This is a common practice for all professional tools, much like knowing when to get a new toothbrush or a new kitchen sponge.
The importance of quality bits should not be overlooked. While good cleaning helps, high-quality bits simply last longer. They are made from superior materials. They are designed for durability and consistent performance. Investing in better bits means you replace them less often. They also maintain their sharpness and effectiveness through many cleaning cycles. Cheaper bits might wear out quickly. This means you spend more on replacements in the long run. Quality bits also contribute to a better, safer experience. They reduce the risk of injury and provide a smoother finish.
Frequency and Best Practices for Nail Drill Bit Cleaning
How often you clean your nail drill bits depends on your use. For personal use, cleaning after each manicure is sufficient. For professional use, strict protocols are necessary. Consistency is the most important factor in maintaining hygiene and tool longevity. I always make cleaning a priority, no matter the situation.
For personal use, you should clean your nail drill bits after each use. You might be the only person using the bits, but bacteria from your own nails and skin can still accumulate. This prevents cross-contamination between your own nails. It also keeps your bits sharp and free of product buildup. A quick wash and disinfection are usually enough for personal tools. You can then store them dry until your next manicure. This simple routine protects your nail health.
In a professional setting, bits must be cleaned after each client. This is not just a recommendation. It is a strict hygiene standard. Many local health regulations require this. After working on one client, the bits are covered in their skin cells and nail dust. Without thorough cleaning and sterilization, these bits can transfer infections to the next client. This puts client health at risk. It also risks your reputation and business. You might clean other tools like nail stamping plates or glass nail files with similar frequency.
Establishing a cleaning routine makes it easier. Dedicate a specific time after each use or client for cleaning. Have all your cleaning supplies organized in one place. This prevents you from skipping steps due to inconvenience. For professionals, create a detailed log. Record when bits were cleaned and sterilized. This helps track maintenance. It also serves as proof of compliance with health regulations. A routine ensures no bit is missed.
Maintaining a clean workspace also impacts bit cleanliness. A clean work surface prevents newly cleaned bits from getting dirty again. Regularly wipe down your nail station. Use disinfectant on surfaces. Ensure proper ventilation to remove nail dust from the air. This reduces the amount of dust that settles on tools and equipment. A clean environment supports a clean practice. It shows professionalism. It also creates a safer space for both you and your clients. Proper disposal of used sanding bands and other single-use items is part of this.
FAQ Section
How often should I clean my nail drill bits?
For personal use, clean your nail drill bits after every manicure. In a professional setting, it is critical to clean, disinfect, and ideally sterilize bits after each client. This prevents the spread of bacteria, fungi, and viruses, ensuring client safety and maintaining tool performance.
Can I use rubbing alcohol to clean drill bits?
Rubbing alcohol (isopropyl alcohol) is a good antiseptic, but it is not a true disinfectant for tools. It may kill some germs, but it does not effectively eliminate all pathogens. Always use an EPA-registered disinfectant specifically formulated for non-porous salon tools.
What is the difference between sanitizing and sterilizing?
Sanitizing reduces the number of microorganisms to a safe level. Disinfecting kills most harmful bacteria and viruses but not necessarily all spores. Sterilizing kills all forms of microbial life, including bacterial spores. Sterilization provides the highest level of infection control.
How do I know when to replace a drill bit?
Replace a nail drill bit when it becomes dull, chipped, bent, or shows signs of wear. A worn bit takes longer to work, requires more pressure, and can generate excessive heat. Regular inspection helps you identify bits that need replacement before they affect performance or safety.
Can I clean sanding bands?
No, sanding bands and paper bits are single-use, disposable items. They are designed for one-time use on a single client. Attempting to clean or reuse them is unsanitary and ineffective. Discard sanding bands immediately after each use to maintain hygiene standards.
Are ultrasonic cleaners effective for nail drill bits?
Yes, ultrasonic cleaners are highly effective for the initial cleaning phase of nail drill bits. They use high-frequency sound waves to create bubbles that dislodge debris from intricate parts of the bits. This helps remove visible dirt and prepares the bits for disinfection or sterilization.
Conclusion
Cleaning nail drill bits is more than just a chore. It is a vital part of maintaining nail health and ensuring quality work. We have covered the essential steps needed to keep your bits in top condition. This includes proper removal of debris, thorough washing, and critical disinfection. For professionals, sterilization provides the ultimate safeguard against infections.
Remember, understanding the type of bit you are cleaning helps tailor your approach. Avoiding common mistakes like improper cleaning solutions or storing wet bits extends tool life. Beyond the basics, regular inspection and proper storage ensure your bits are always ready. Making “how to clean nail drill bits” a consistent routine protects you and your clients. It also ensures your nail work is always precise and professional. Implement these practices today. Your clean tools will thank you, and so will your clients. Start your effective nail drill bit cleaning regimen now.
- nail drill bits
- clean nail tools
- nail hygiene
- nail care
- e-file bits
- sterilize nail bits
- sanitize nail bits

Todd Martin
Senior Writer
With over 15 years of experience in home renovation and design, I started HEG to share what I’ve learned with homeowners who want to create spaces that are both beautiful and functional. I’ve always believed in a hands-on approach, and over the years, I’ve picked up practical solutions that actually work. Through HEG, I aim to make home improvement more approachable, sharing real tips that help you create a home you truly love.