· Todd Martin · Beauty & Personal Care · 20 min read
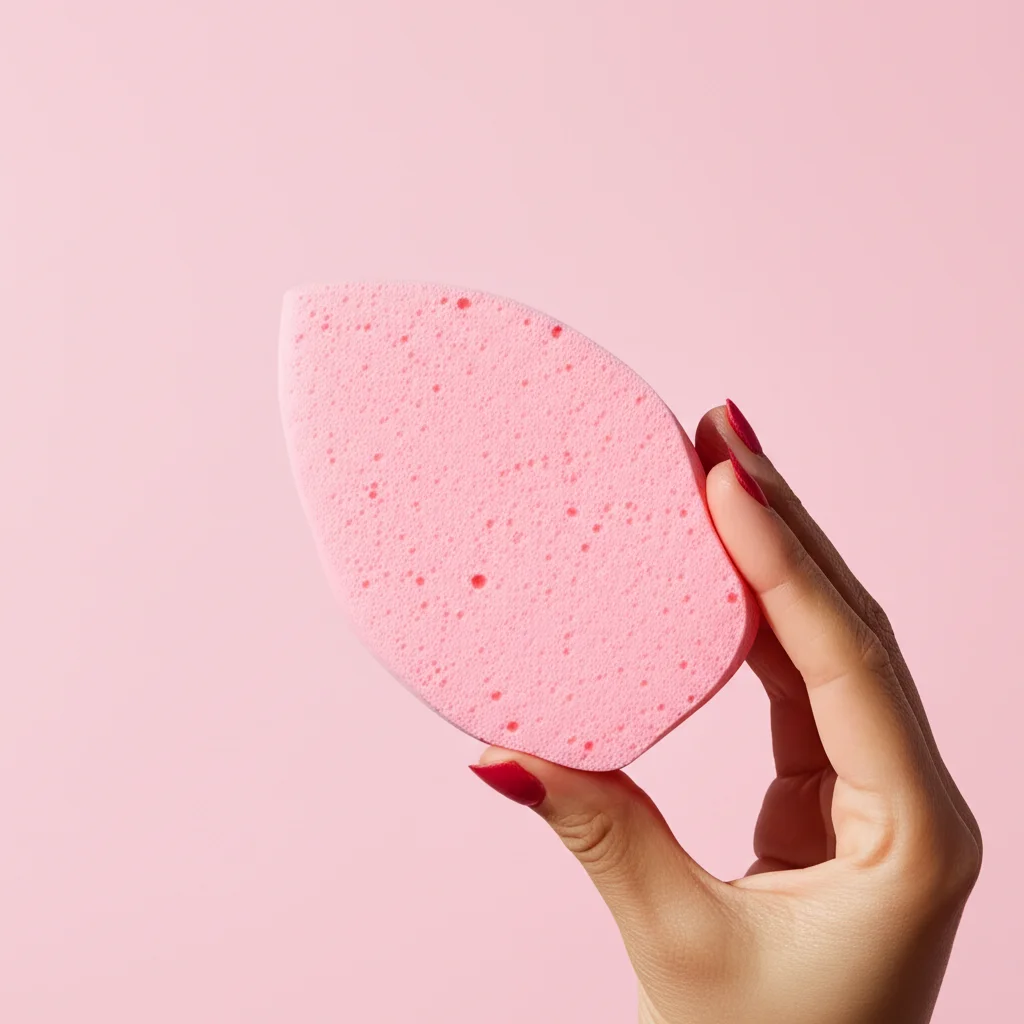
How To Clean My Beauty Blender
Keep Your Makeup Fresh: How To Clean Your Beauty Blender
A clean Beauty Blender is a key to flawless makeup. It also helps you maintain healthy skin. Dirty sponges hold bacteria, oil, and old makeup. These things can cause skin issues like breakouts. Cleaning your Beauty Blender regularly ensures a smooth, even makeup application every time. It also extends the life of your valuable tool. I often wonder if I am cleaning my Beauty Blender enough, and you might too. This guide will show you exactly how to clean your Beauty Blender. We cover simple daily routines and thorough deep cleaning methods. We will explore best practices for drying and storing your sponge too. Get ready to give your Beauty Blender the fresh start it needs.
Takeaway:
- Clean your Beauty Blender after each use for best results and hygiene.
- Use gentle cleansers like baby shampoo or specific sponge cleaners.
- Squeeze gently under running water to remove makeup build-up.
- Rinse thoroughly until water runs clear from the sponge.
- Allow your Beauty Blender to air dry completely in a well-ventilated area.
- Deep clean your sponge weekly to prevent bacteria growth and maintain its shape.
To clean your Beauty Blender, wet it, apply a gentle cleanser like soap or baby shampoo, and gently squeeze to work the product in. Rinse it under running water until the water runs clear and all soap is gone. Finally, squeeze out excess water and let it air dry completely.
Why Cleaning Your Beauty Blender Matters
Keeping your Beauty Blender clean is more than just a good habit. It is important for your skin health. Your Beauty Blender touches your face daily. It picks up makeup, skin oils, and dead skin cells. Over time, bacteria can grow on it. This can lead to breakouts and skin irritation. I have seen how dirty tools can ruin a good makeup day. A dirty sponge also makes your makeup look uneven. It cannot blend products smoothly. This means your foundation may look patchy.
Cleaning your Beauty Blender also saves you money. A well-cared-for sponge lasts longer. This means you do not need to replace it as often. Think of it as protecting your investment. I always tell my friends that a clean tool works better. It gives a streak-free finish. It ensures your makeup looks natural. This is why learning how to clean my Beauty Blender properly is a skill worth having. It keeps your skin clear and your makeup looking its best.
Essential Supplies for Beauty Blender Cleaning
You do not need many items to clean your Beauty Blender. The right tools make the job easy. I usually gather everything before I start. This saves time and keeps me organized. First, you need a gentle cleansing agent. Many people use mild soap or baby shampoo. These are gentle on the sponge material. They also prevent skin irritation. Some brands make special Beauty Blender cleansers. These cleaners work well. They are made for sponge materials.
Next, you need running water. A sink faucet is perfect for this. You want lukewarm water. This helps lift makeup without damaging the sponge. You also need a clean towel. This towel helps blot excess water after washing. Some people like to use a silicone mat. These mats have textures that help remove stubborn stains. They are optional but can be very helpful. Gathering these simple items prepares you for effective cleaning. It makes the cleaning process smooth.
Daily Cleaning Routine for Your Beauty Blender
Cleaning your Beauty Blender daily is a simple yet powerful step. It stops makeup from building up. It keeps your skin clear. I make this part of my evening routine. It takes only a few minutes. You will see a big difference in your skin.
Step-by-Step Daily Clean:
- Wet the Sponge: Hold your Beauty Blender under lukewarm running water. Let it soak up water. It will expand to twice its size. Squeeze it a few times to get it fully saturated.
- Apply Cleanser: Put a small amount of your chosen cleanser directly onto the wet sponge. I use about a dime-sized amount of mild soap. You can also use a solid cleanser. Rub the sponge onto the solid soap.
- Work the Lather: Gently squeeze and knead the sponge. Do this under the running water. You will see makeup and dirt come out. Focus on areas with heavy stains. Do not twist or pull the sponge too hard. This can damage it.
- Rinse Thoroughly: Continue squeezing and rinsing the sponge under running water. Do this until the water runs completely clear. No soap bubbles should remain. This step is important for removing all cleanser residue.
- Squeeze and Blot: Squeeze out as much excess water as you can. Then, wrap the sponge in a clean towel. Gently press it to remove more moisture. The sponge should feel damp, not dripping.
- Air Dry: Place your Beauty Blender in a well-ventilated area. Make sure air can flow around it. Do not store it in a closed container right away. It needs to dry completely. This prevents mold growth.
This daily routine keeps your Beauty Blender fresh. It makes your makeup application flawless. It also protects your skin from bacteria. For specific tips on cleaning similar tools, you might find information on how to clean a beauty blender powder puff helpful.
Deep Cleaning Your Beauty Blender Weekly
While daily cleaning is great, a weekly deep clean is essential. This helps remove stubborn stains and deeply embedded makeup. It also kills more bacteria. I find that a deep clean truly revives my Beauty Blender. It makes it feel new again. This method takes a bit more time. It is worth the effort for hygiene and performance.
Deep Cleaning Methods:
1. Bowl Method:
This is my go-to for a thorough clean. It lets the cleanser soak in.
- Prepare the Bowl: Fill a small bowl with lukewarm water. Add a generous amount of your gentle cleanser. About a tablespoon of liquid soap works well. You can also use a specialized Beauty Blender cleanser.
- Soak the Sponge: Place your dirty Beauty Blender into the soapy water. Make sure it is fully submerged. Let it soak for about 30 minutes to an hour. For very stubborn stains, you can let it soak longer. I sometimes leave it overnight.
- Work and Rinse: After soaking, take the sponge out. Gently squeeze and massage it under running lukewarm water. You will see a lot of old makeup come out. Continue rinsing until the water runs clear. Make sure all soap is gone.
- Final Squeeze and Dry: Squeeze out excess water. Blot with a clean towel. Then, let it air dry completely.
2. Microwave Method (Use with Caution):
Some people use the microwave for deep cleaning. This method can sanitize the sponge. However, you must use caution. Overheating can damage your Beauty Blender. I only use this method sometimes.
- Prepare for Microwave: Place your wet, soapy Beauty Blender in a microwave-safe bowl. Cover the sponge with water. Add a bit more cleanser to the water.
- Microwave Briefly: Microwave the bowl for 30 to 60 seconds. The water should be hot, but not boiling over. Watch it closely. Do not let it dry out or burn.
- Cool and Rinse: Carefully remove the hot bowl. The water will be very hot. Let the sponge and water cool down. Once cool enough to handle, squeeze and rinse the sponge under running water. Rinse until all soap and makeup are gone.
- Dry: Squeeze out water. Air dry completely.
I prefer the bowl method for most deep cleans. It is safer for the sponge. It still gets the job done. Keeping your Beauty Blender deeply cleaned helps keep your skin healthy. It also ensures your makeup looks flawless. You can also use these same principles if you need to clean other types of makeup sponges, as described in guides like how to clean blender sponge.
Drying and Storing Your Clean Beauty Blender
Proper drying and storage are just as important as cleaning. If you do not dry your Beauty Blender correctly, mold and mildew can grow. This defeats the purpose of cleaning it. Storing it badly can also affect its shape. I always take these steps seriously.
Drying Your Beauty Blender:
- Squeeze Out Excess Water: After rinsing, gently squeeze your Beauty Blender. Remove as much water as possible. Do not twist or wring it harshly. This can tear the sponge.
- Blot with a Clean Towel: Wrap the damp sponge in a clean, lint-free towel. Press gently to absorb more moisture. You want it to be damp, not soaked.
- Allow for Air Circulation: This is the most important step. Place your Beauty Blender in an open, well-ventilated area. Air must be able to flow around all sides of the sponge. Do not put it in a closed drawer or makeup bag. This traps moisture.
- Pro Tip: I sometimes place mine on a paper towel. Or, I use a special Beauty Blender drying stand. These stands elevate the sponge. This helps air reach all parts.
- Dry Completely: Let it dry for several hours. Depending on your climate, it might take 24 hours. Make sure it is bone dry before putting it away. Feel it all over. If it still feels cool or slightly damp, it needs more drying time.
Storing Your Beauty Blender:
- After Drying: Once your Beauty Blender is fully dry, you can store it. A breathable bag or a dedicated beauty sponge holder works well. I often use the plastic container it came in, but with the lid off.
- Avoid Air-Tight Containers: Never store a damp or even slightly damp Beauty Blender in an air-tight container. This is a perfect breeding ground for mold and bacteria.
- Keep Away from Humidity: Store your Beauty Blender in a dry place. The bathroom counter can be humid. Consider a bedroom drawer or vanity if your bathroom gets steamy.
- Protect from Dust: While it needs air, protect it from excessive dust. A loose mesh bag or an open stand can work. I keep mine on a small dish on my vanity. It gets enough air, but stays clean.
Following these drying and storage tips ensures your Beauty Blender stays fresh. It performs its best. It extends its lifespan significantly. Remember, a clean, dry sponge is a happy sponge.
Common Mistakes to Avoid When Cleaning
Cleaning your Beauty Blender seems simple, but common mistakes can harm it. Avoiding these errors keeps your sponge effective. It also helps it last longer. I learned some of these the hard way.
Mistakes to Watch Out For:
- Using Harsh Cleansers: Do not use strong soaps or dish detergents. These can break down the sponge material. They can leave residue that irritates your skin. Stick to mild soaps, baby shampoo, or specific sponge cleansers. Your skin will thank you.
- Twisting or Wringing Forcefully: The Beauty Blender is delicate when wet. Twisting or wringing it too hard can cause tears. It can also change its shape. Gently squeeze it instead. Think of it like a stress ball, not a rag.
- Not Rinsing Enough: Leaving soap residue in your sponge is a big no. It can make your makeup streaky. It can also irritate your skin. Rinse, rinse, rinse! Keep going until the water runs perfectly clear.
- Improper Drying: This is perhaps the biggest mistake. Putting a damp Beauty Blender in a closed bag or drawer leads to mold. Mold can make you sick. Always air dry completely. Give it plenty of time and space. Do not rush this step.
- Using Hot Water: While lukewarm water is fine, very hot water can damage the sponge. It can break down the material. It can also make it lose its bouncy texture. Stick to lukewarm water for cleaning.
- Over-Microwaving: If you use the microwave method, do not overdo it. Too much time can melt the sponge. It can also make it brittle. Always follow the short time limits. Let it cool fully before handling.
- Not Cleaning Regularly: Skipping cleans often builds up makeup. This makes deep cleaning harder. It also makes your sponge a breeding ground for germs. Aim for daily cleaning. Do a deep clean weekly. Regular cleaning makes the process easier. It also ensures your skin stays clear.
By avoiding these mistakes, you will prolong the life of your Beauty Blender. You will also keep your skin healthy and happy. A little care goes a long way. This is true for all your beauty tools, just like knowing how to clean your stove keeps your kitchen running smoothly.
When to Replace Your Beauty Blender
Even with the best care, Beauty Blenders do not last forever. They are tools that wear out over time. Knowing when to replace yours is important. Using an old, worn-out sponge can affect your makeup application. It can also be less hygienic. I usually look for a few signs.
Signs It is Time for a New Beauty Blender:
- Tears or Rips: If your Beauty Blender starts showing small tears or large rips, it is time. These tears make the sponge less effective. They can also harbor bacteria. The sponge might lose its smooth surface.
- Loss of Bounce or Firmness: A new Beauty Blender is soft and bouncy. It expands nicely when wet. If yours feels hard, flat, or loses its springiness even after cleaning, it is losing its effectiveness. It will not blend makeup well.
- Permanent Stains or Discoloration: Despite deep cleaning, some stains might remain. If your sponge has dark, stubborn spots that never come out, it might be permanent damage. These stains can mean makeup is deeply embedded. It is hard to clean them fully.
- Mold or Mildew: Any sign of black spots or a musty smell means mold. Mold is harmful to your skin. If you see or smell mold, throw the sponge away immediately. Do not try to clean it. This is a non-negotiable sign.
- Foul Odor: Even without visible mold, a persistent unpleasant smell is a red flag. This smell often indicates bacterial growth. If washing does not remove the smell, it is time for a new one.
- Rough Texture: The Beauty Blender should feel smooth. If it starts to feel rough or scratchy against your skin, its texture has changed. This can make makeup application uneven. It can also irritate your skin.
- General Lifespan: Most Beauty Blender brands suggest replacing them every 3-6 months. This is a general guideline. If you use it daily, you might replace it sooner. If you use it less often, it might last longer. Follow the signs, not just the calendar.
Replacing your Beauty Blender regularly ensures you always have a fresh tool. This helps you achieve the best makeup look. It also protects your skin health. Think of it as a small investment in your beauty routine. Just like knowing when to replace a kitchen sponge, knowing when to replace your beauty sponge is key.
Alternative Cleaning Solutions and Tips
While mild soap and specialized cleansers are great, you have other options. Different solutions can work for different needs. I like to explore various methods. This helps me find what works best.
Other Cleaning Solutions:
- Olive Oil and Dish Soap (for stubborn stains): This might seem odd, but oil can break down oil-based makeup.
- Method: Put a small amount of olive oil directly on the dry, stained areas of your Beauty Blender. Gently rub it in. Follow with a squirt of mild dish soap (like Dawn). Work it into a lather. The oil helps lift the makeup. The soap cleans it away. Rinse thoroughly under running water until all oil and soap are gone. This method is excellent for heavy foundation stains.
- Rubbing Alcohol (for sanitizing): Alcohol is a strong disinfectant. Use it sparingly.
- Method: After a regular wash, put a tiny bit of rubbing alcohol on a paper towel. Gently wipe the surface of the damp sponge. Do not soak the sponge in alcohol. Rinse it immediately and thoroughly with water. Alcohol can dry out the sponge if not rinsed quickly. Use this method only once in a while. It is good for extra sanitization.
- Makeup Remover: Liquid makeup removers can also pre-treat stains.
- Method: Apply your regular liquid makeup remover to a stained area. Let it sit for a minute. Then, proceed with your usual soap and water cleaning method. This acts as a pre-wash.
- Solid Cleansing Balms: Many brands make solid cleansers for makeup brushes and sponges.
- Method: Wet your Beauty Blender. Rub it directly onto the solid balm. The balm creates a rich lather. This effectively cleans the sponge. Rinse well. These balms are often gentle and effective.
General Tips:
- Clean Immediately: The longer makeup sits on your Beauty Blender, the harder it is to remove. Try to clean it right after each use.
- Warm Water is Key: Avoid hot water. It can damage the sponge. Lukewarm water is ideal for loosening makeup.
- Gentle Handling: Always squeeze, never twist or wring. The sponge is delicate when wet.
- Full Air Dry: This cannot be stressed enough. A damp sponge will grow mold.
- Designated Cleaning Area: Use a clean sink or bowl. This prevents cross-contamination.
Exploring these alternative solutions can help you tailor your cleaning process. It makes sure your Beauty Blender is always in top condition. These methods provide flexibility in caring for your essential beauty tool.
Maximizing the Lifespan of Your Beauty Blender
A Beauty Blender is an investment for many. You want it to last as long as possible. Good cleaning habits are the core. But other practices also help extend its life. I always try to treat mine with care.
Tips for Longevity:
- Handle with Care: Always be gentle. When applying makeup, dab or bounce the sponge. Do not drag or rub it. When washing, squeeze softly. Avoid harsh wringing motions. The sponge’s open cell structure is delicate. Rough handling breaks it down.
- Store Properly: As mentioned before, proper drying and storage are vital. Never store a damp Beauty Blender in an enclosed space. Allow it to fully air dry. Use a breathable holder. This prevents mold. Mold shortens the sponge’s life and makes it unusable.
- Use the Right Cleanser: Stick to mild, gentle cleansers. Harsh soaps, detergents, or strong chemicals can degrade the sponge material. They can make it lose its softness. They can also affect its ability to blend. Specialized Beauty Blender cleansers are formulated to be safe. Baby shampoo is another safe bet.
- Avoid Excessive Heat: While the microwave method can deep clean, use it sparingly. Excessive heat can damage the sponge. It can make it brittle. It can also reduce its elasticity. Lukewarm water for washing is always best.
- Rotate Sponges: If you have multiple Beauty Blenders, rotate them. This gives each sponge more time to dry completely between uses. It also reduces wear and tear on a single sponge. I have two, and I alternate them every few days. This makes them last longer.
- Clean Frequently: Daily light cleaning and weekly deep cleaning prevent makeup from embedding. Stubborn, old makeup is harder to remove. This often requires more aggressive cleaning, which can damage the sponge. Regular cleaning keeps it in good shape. It also means less intense scrubbing.
- Know When to Retire: Despite best efforts, sponges do wear out. Do not try to extend the life of a damaged or moldy sponge. This can harm your skin. Replacing it when signs of wear appear protects your investment and your health.
By following these simple steps, you can significantly extend the usable life of your Beauty Blender. This ensures you get the most out of your purchase. It also keeps your makeup application smooth and hygienic.
How Cleaning Affects Makeup Application
The state of your Beauty Blender directly impacts how your makeup looks. A clean sponge is not just about hygiene. It is about flawless makeup. I have seen the difference firsthand.
Impact of a Clean Sponge:
- Smooth, Even Coverage: A clean Beauty Blender has an open, porous surface. This allows it to absorb just enough product. It then bounces the product onto your skin evenly. It creates a smooth, streak-free finish. A dirty sponge has clogged pores. It cannot absorb or distribute product well. This results in patchy, uneven makeup.
- Better Blending: The soft, bouncy texture of a clean Beauty Blender is ideal for blending. It diffuses liquid and cream products seamlessly. This creates a natural, airbrushed look. A dirty, stiff sponge cannot blend effectively. It just pushes product around.
- Less Product Waste: A clean sponge absorbs only the excess. It allows most of your makeup to sit on the surface. This means more product goes onto your face, not into the sponge. A dirty sponge is saturated with old makeup. It will absorb more new product. This wastes your expensive foundation.
- Prevents Streaks and Lines: The smooth surface of a clean Beauty Blender prevents streaks. It applies makeup without leaving harsh lines. Dirty sponges can leave streaks due to product build-up.
- Enhanced Hygiene: This is critical. A clean sponge prevents bacteria transfer to your face. This reduces breakouts, redness, and irritation. A dirty sponge is a breeding ground for germs. These germs can cause skin problems. My skin looks clearer when my tools are clean.
- Comfortable Application: A soft, clean Beauty Blender feels good on your skin. A stiff, grimy one can feel rough. This makes your makeup routine less enjoyable.
In essence, a clean Beauty Blender is a key to professional-looking makeup. It ensures your foundation, concealer, and other cream products perform their best. It makes your skin look great and stay healthy. Always keep your Beauty Blender clean for the best beauty results.
FAQs About Cleaning Your Beauty Blender
Q1: How often should I clean my Beauty Blender?
A1: You should clean your Beauty Blender after every use. This daily cleaning removes surface makeup and prevents bacteria buildup. For a more thorough clean, aim for a deep cleaning session at least once a week. Regular cleaning helps maintain hygiene and prolongs the sponge’s life.
Q2: What is the best cleanser for a Beauty Blender?
A2: Mild soaps like baby shampoo or gentle bar soap are excellent choices. Many brands also offer specific Beauty Blender cleansers designed for their material. Avoid harsh detergents or strong chemicals as these can damage the sponge and irritate your skin.
Q3: Can I put my Beauty Blender in the washing machine?
A3: No, you should not put your Beauty Blender in a washing machine. The harsh tumbling action and strong detergents can damage the delicate sponge material. It can cause tears or alter its shape, making it less effective for makeup application. Always hand wash it gently.
Q4: How long does a Beauty Blender take to dry?
A4: A Beauty Blender usually takes 12 to 24 hours to dry completely. This depends on humidity and air circulation. Always ensure it is bone dry before storing it in an enclosed space. Placing it in a well-ventilated area helps speed up the drying process.
Q5: Can I use dish soap to clean my Beauty Blender?
A5: It is best to avoid regular dish soap for daily cleaning. While it can break down oil, it may be too harsh for the delicate Beauty Blender material over time. It can also leave residue. For very stubborn, oily stains, a small amount of mild dish soap can be used, but rinse very thoroughly afterwards.
Q6: How do I remove deep stains from my Beauty Blender?
A6: For deep stains, try the bowl method with lukewarm water and a generous amount of gentle cleanser. Let it soak for 30 minutes to an hour. You can also try a small amount of olive oil on the stain before applying soap, as oil helps break down makeup. Rinse extremely well.
Conclusion
Keeping your Beauty Blender clean is a simple step with big rewards. We have explored why it matters for your skin health and makeup application. We covered daily cleaning, weekly deep cleans, and proper drying. We also discussed common mistakes to avoid. Remember that a clean Beauty Blender delivers a flawless finish. It keeps your skin clear. It also extends the life of your favorite makeup tool. I hope you now feel confident in how to clean my Beauty Blender effectively. Make cleaning your Beauty Blender a regular part of your routine. Your skin and your makeup will thank you. Start today and enjoy a fresher, healthier beauty experience!
- beauty blender cleaning
- makeup sponge hygiene
- cosmetic tool care
- deep cleaning beauty blender
- foundation sponge care

Todd Martin
Senior Writer
With over 15 years of experience in home renovation and design, I started HEG to share what I’ve learned with homeowners who want to create spaces that are both beautiful and functional. I’ve always believed in a hands-on approach, and over the years, I’ve picked up practical solutions that actually work. Through HEG, I aim to make home improvement more approachable, sharing real tips that help you create a home you truly love.