· Todd Martin · Food Preparation · 15 min read
How To Clean Little Neck Clams
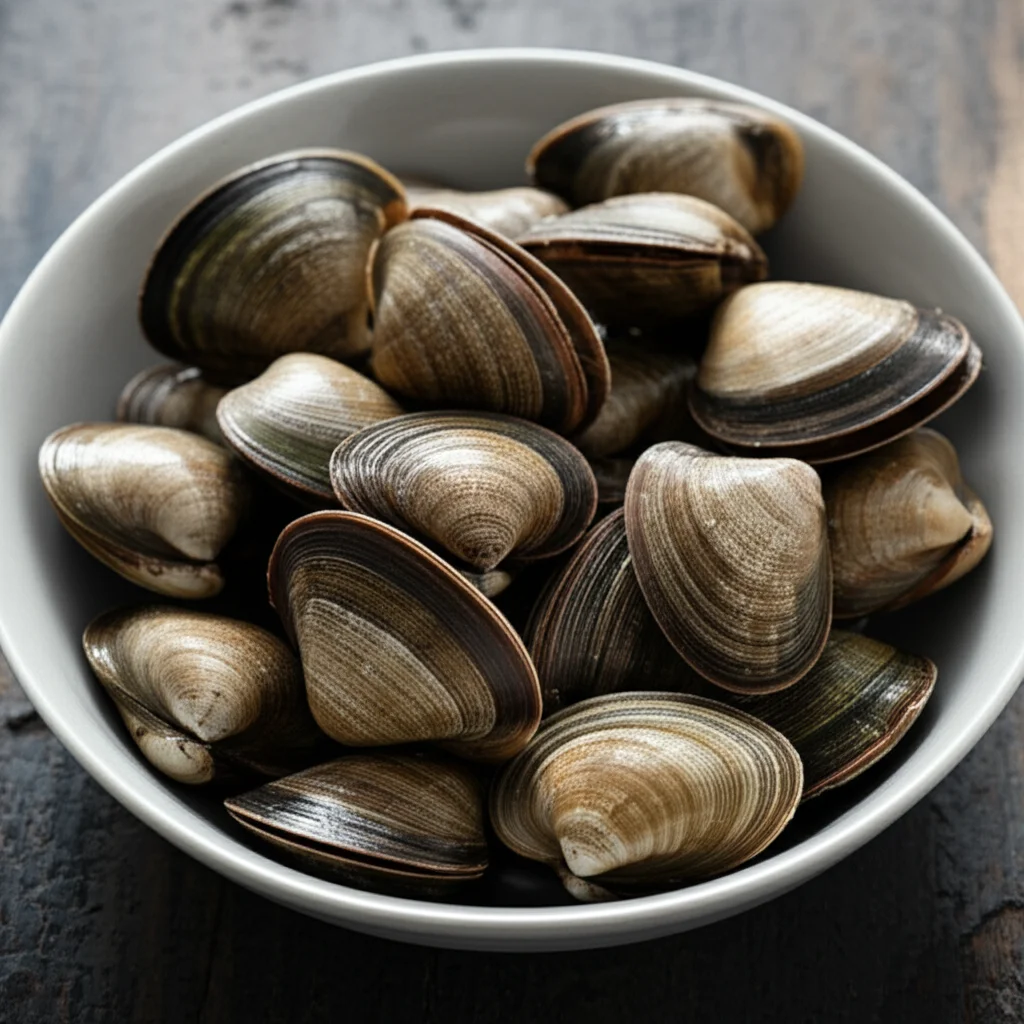
Master How To Clean Little Neck Clams Properly
Imagine a perfectly cooked clam dish, steaming hot, rich with flavor. Now imagine biting into sand. That unwelcome crunch quickly ruins the experience. Learning how to clean little neck clams correctly is crucial for truly enjoying these briny delights. Many people miss important steps, leaving their clams gritty. I want to show you the best methods to ensure your clams are spotless and ready for any recipe. This guide covers everything from initial inspection to final rinsing, preparing you for a delightful culinary adventure.
Takeaway:
- Always inspect clams for open or cracked shells before cleaning.
- The essential step involves a proper brining process to encourage clams to purge sand.
- Use cold water and a clean container for soaking.
- Rinse clams thoroughly after soaking to remove any remaining grit.
To clean little neck clams, first discard any open or broken shells. Then, soak healthy clams in a bowl of cold, salted water for at least 30 minutes, or up to 2 hours, allowing them to naturally expel sand and impurities. Finally, scrub their shells under cold running water before cooking.
Understanding Little Neck Clams: Why Cleaning Matters
Little neck clams are a popular choice for many seafood dishes, known for their tender meat and sweet, briny flavor. They are small, typically one to two inches across, making them versatile for pasta, steamed dishes, or raw consumption. However, these clams live in sandy or muddy environments, feeding by filtering water through their siphons. This natural feeding process means they often draw in sand, silt, and other impurities. If not cleaned properly, these gritty particles remain inside the clam, spoiling your meal. Proper cleaning ensures a clean, enjoyable eating experience. It also helps in identifying any spoiled or dead clams.
When you bring clams home, they are still alive. This living state is key to the cleaning process. The goal is to create an environment that encourages the clams to naturally filter out the grit they’ve collected. This self-cleaning mechanism is more effective than any scrubbing alone. Ignoring this step can lead to a dish full of unpleasant surprises. A dirty clam will release its grit into your sauce or broth, affecting the entire dish. This is why I always emphasize the importance of thorough cleaning.
Beyond just sand, clams can also contain small bits of seaweed or mud. These natural elements are not harmful but certainly not appetizing to eat. The cleaning process helps remove these as well. It prepares the clams for cooking, making them safer and more appealing. Remember, a perfectly prepared clam dish starts with perfectly cleaned clams. It’s a small effort that makes a huge difference in taste and texture.
Essential Tools and Ingredients for Clam Cleaning
Cleaning little neck clams does not require specialized tools, but having the right basic equipment makes the process much easier. You will need a few simple items that are likely already in your kitchen. First, a large bowl or bucket is essential. This container must be big enough to hold all your clams comfortably, with plenty of room for water. I prefer clear containers so I can see the sand settle at the bottom. A colander or strainer is also necessary for rinsing the clams effectively.
Next, you will need salt. Non-iodized salt, such as sea salt or kosher salt, is best. The type of salt matters because iodine can impart an off-flavor to the clams. You need to create a saltwater solution that mimics the clams’ natural habitat, which encourages them to purge sand. Plan to use about 1/3 cup of salt per gallon of cold water. Cold water is crucial. It keeps the clams alive and active, promoting better purging. Warm water can stress the clams and even kill them, making them unsafe to eat.
A stiff brush, like a vegetable brush, will be useful for scrubbing the shells. While soaking does most of the work inside, scrubbing removes any external dirt, barnacles, or debris. Finally, access to clean, running water is vital for the final rinse. You want to wash away all loosened grit and any remaining external impurities. Having these simple tools ready before you begin streamlines the entire clam cleaning process, ensuring you get the best results.
The Initial Rinse: Removing Surface Grime
The first step in how to clean little neck clams involves a quick initial rinse. This helps remove any obvious surface grime, mud, or loose debris from the clam shells. I always start by placing the clams in a colander in my sink. Then, I run cold tap water over them. I make sure to do this gently, as you do not want to damage the delicate shells. It is important to avoid using warm or hot water, as this can stress the clams or even cause them to open prematurely.
While rinsing, I take the opportunity to quickly inspect each clam. I look for any clams that are already open. If a clam shell is wide open and does not close when tapped firmly, it is likely dead. Dead clams should be discarded immediately. They can spoil quickly and contaminate your batch. I also check for any cracked or broken shells. Clams with compromised shells should also be thrown out, as their meat may be unsafe to eat. This initial inspection is a crucial step in ensuring food safety.
After rinsing, the clams will still have sand inside. This initial rinse is only for the outside. Do not expect this step to remove internal grit. Its purpose is purely to clean the exterior before you move on to the more important soaking phase. This quick wash prevents you from introducing external dirt into your clean soaking water. It sets the stage for the deep cleaning that follows. Think of it as preparing the clams for their “bath” where they will do most of the work themselves.
The Crucial Soaking Process: Purging Sand and Grit
The soaking process is the most critical step for how to clean little neck clams. This is where the clams naturally purge the sand and grit from their systems. You need to create an environment that encourages them to filter water and expel impurities. Start by preparing a large bowl or bucket with cold water. I use about a gallon of water for every couple of pounds of clams. The water should be cold, straight from the tap, or even chilled with a few ice cubes. Cold water keeps the clams alive and active, which is essential for purging.
Next, add non-iodized salt to the water. I typically use about 1/3 cup of salt per gallon of water, aiming for a salinity similar to their natural habitat. This salty environment prompts the clams to open their shells and begin filtering. Stir the water well to dissolve the salt completely. Now, carefully add your clams to the saltwater solution. Make sure they are submerged, but do not overcrowd the bowl. If you have many clams, it is better to clean them in batches. Overcrowding can stress the clams and reduce their purging effectiveness.
Let the clams soak for at least 30 minutes, but ideally 1 to 2 hours. Some people even soak them for up to 4 hours for very sandy clams. During this time, the clams will filter the clean saltwater, expelling sand and other impurities. You will notice sand settling at the bottom of the bowl. For extremely sandy clams, I sometimes change the water once or twice during the soaking period. After soaking, gently remove the clams from the water. Do not pour them out, as this will stir up the sand that has settled at the bottom, re-contaminating your clams. Lift them out by hand or with a slotted spoon. This ensures the sand stays in the bowl, not back on your clean clams. For general cleaning information, you might find useful tips on how to clean fruit with vinegar or how to clean greens with vinegar, as the principle of cleaning produce is similar in its aim to remove impurities, though the method differs.
H3: Enhancing the Purging Process (Optional Techniques)
While salt and cold water are usually enough, some people add a few extra elements to the soaking water to aid in the purging process. One common technique is to add a small amount of cornmeal or flour to the water. The idea is that clams will ingest these particles, and in doing so, expel more sand. I have seen this work for some, but I find it is not always necessary for little neck clams which are generally quite efficient at purging on their own. If you choose to use this method, add about 1/4 cup of cornmeal or flour per gallon of water.
Another option is to place a metal object, like a clean metal spoon or a few pennies (pre-1982 copper pennies are ideal), into the soaking water. Some believe the trace metals encourage the clams to filter more actively. This method is less scientifically proven but an old wives’ tale many swear by. I personally stick to just salt and cold water, as I find it effective and simplest. The most important factor remains the temperature of the water and the duration of the soak. Ensuring the water remains cold throughout the process is paramount. You can even add a few ice cubes if you are soaking them for a longer period in a warm kitchen. Remember, the goal is to keep the clams happy and active so they do their job. For general kitchen hygiene that might benefit from similar principles, learning how to clean a dishwasher with vinegar can help maintain a clean environment for food preparation.
Pre-Cooking Inspection: Ensuring Clams Are Ready
After the soaking and purging process, a final inspection is essential before cooking. This step ensures that every clam you cook is alive and healthy. It also serves as a last check for any lingering grit or damage. I always pick up each clam individually and give it a quick visual assessment. Look for any clams that have opened their shells again. If a clam is open, gently tap its shell. A healthy, live clam will close its shell tightly in response. If it remains open, or if the shell is gaping and does not close, it is dead and must be discarded.
Next, feel the weight of each clam. A live, healthy clam should feel somewhat heavy for its size. Clams that feel unusually light or empty may have died or lost their meat, and should also be discarded. I also quickly scrub the exterior of each clam one last time under cold running water using a stiff brush. This removes any stubborn dirt, barnacles, or debris that might still be clinging to the shell. Even though the soaking process aims to clean the inside, this final scrub ensures the outside is just as clean. This is particularly important if you are steaming the clams, as the cooking liquid will come into contact with the shells.
This pre-cooking inspection is your final quality control. It prevents any dead or gritty clams from making it into your dish, ensuring a delightful culinary experience. It takes only a few minutes, but it pays off significantly in terms of taste and food safety. I cannot stress enough how important this step is for a truly enjoyable clam meal. Remember, it is always better to discard a questionable clam than to risk ruining an entire batch or, worse, falling ill.
Safe Handling and Storage of Clean Clams
Proper handling and storage are crucial for maintaining the freshness and safety of your little neck clams, both before and after cleaning. Once you have cleaned your clams, you should cook them as soon as possible. Clams are living organisms, and their quality degrades over time, even after cleaning. If you cannot cook them immediately, proper storage is essential. Never store live clams in an airtight container or submerged in fresh water. They need to breathe and will die if deprived of oxygen or exposed to freshwater for too long.
To store cleaned clams for a short period, perhaps a few hours, place them in a single layer in a bowl. Cover the bowl with a damp cloth or paper towel. Then, place the bowl in the coldest part of your refrigerator, typically the back or bottom shelf. This method allows the clams to breathe while keeping them cool and moist. They can usually be stored this way for up to 24 hours after cleaning, but fresher is always better. For general cleanliness around your food preparation areas, consider learning how to clean with vinegar and baking soda, as these natural cleaners are safe for kitchen surfaces.
If you purchase clams and do not plan to clean and cook them on the same day, store them uncleaned in the refrigerator using the same method. Place them in a bowl with a damp cloth, never in standing water or an airtight bag. They can typically last for 2-3 days from purchase when stored correctly. Always clean them just before you are ready to cook. Discard any clams that have an off smell, are wide open and do not close, or have cracked shells. Safe handling ensures your delicious clams remain fresh and wholesome.
Troubleshooting Common Clam Cleaning Issues
Even with the best intentions, you might encounter some common issues when cleaning little neck clams. One frequent problem is persistent grit, even after soaking. If your clams are still gritty, it likely means they did not purge effectively. This can happen if the water was not cold enough, the salt concentration was off, or the soaking time was too short. I recommend repeating the soaking process with fresh, very cold saltwater. Extend the soaking time to at least 2-3 hours, or even up to 4 hours, changing the water once or twice if the clams were exceptionally dirty. Ensure the container is large enough to allow the clams to spread out.
Another issue is discovering dead clams. It is normal to find a few dead clams in a batch. These are the ones that are wide open and do not close when tapped, or have cracked shells. Discard them immediately. If you find a large number of dead clams, it could indicate poor quality from the supplier or improper storage before you got them. In such cases, it is best to return the batch to the store. Remember, live clams are essential for safe consumption.
Sometimes, clams might not open during cooking. If a clam remains tightly closed after cooking, it is generally best to discard it. It may have been dead before cooking, or its adductor muscle was too strong to release. Do not force it open. While frustrating, it is safer to err on the side of caution. Lastly, if you notice a strong, unpleasant odor from your clams at any stage, do not hesitate to throw them out. Fresh clams should smell like the ocean, clean and briny. A strong, fishy, or rotten smell indicates spoilage. Trust your nose and your judgment to ensure food safety.
FAQs About Cleaning Little Neck Clams
How long should I soak little neck clams?
You should soak little neck clams for at least 30 minutes. For best results and to ensure thorough purging of sand, I recommend soaking them for 1 to 2 hours. Extremely sandy clams may benefit from a soak of up to 4 hours, with a water change midway through.
Can I use salt or cornmeal to clean clams?
Yes, using salt is essential. Non-iodized salt (like sea salt or kosher salt) helps create a briny environment, encouraging clams to purge sand. Some people add cornmeal or flour to the water, believing it aids in purging, but I find cold saltwater alone is very effective.
What if some clams don’t open after cleaning?
If a clam’s shell is wide open and does not close when tapped firmly, it is dead and should be discarded before cooking. After cooking, if a clam remains tightly closed, it is also best to discard it. Do not attempt to force it open, as it may have been dead or otherwise unhealthy.
How do I know if a clam is bad?
A bad clam will have an unpleasant, strong “fishy” or rotten odor, not a clean ocean scent. Its shell might be gaping open and will not close when tapped. Cracked or broken shells also indicate a bad clam. Discard any clam that exhibits these signs.
Can I clean clams in advance?
You can clean clams a few hours in advance if necessary. After cleaning, store them in a bowl covered with a damp cloth in the coldest part of your refrigerator. Do not store them in airtight containers or submerged in fresh water. It is always best to cook them shortly after cleaning for optimal freshness.
What temperature water is best for cleaning clams?
Cold water is best for cleaning clams. Cold temperatures keep the clams alive and active, which is crucial for their natural purging process. Warm or hot water can stress the clams, cause them to die, and make them unsafe to eat.
Conclusion
Mastering how to clean little neck clams is a simple yet essential skill for anyone who enjoys seafood. By following these straightforward steps—from the initial inspection and rinse to the crucial saltwater soak and final scrub—you guarantee a delightful, grit-free culinary experience every time. Remember to always use cold, non-iodized salted water for soaking and give your clams ample time to purge their internal impurities. I promise you, the small effort invested in proper cleaning pays immense dividends in the taste and texture of your finished dish.
Proper handling and storage also play a vital role in ensuring your clams remain fresh and safe until they hit your pan or pot. Now that you know the secrets to perfectly clean little neck clams, you are ready to prepare amazing clam dishes with confidence. Go ahead, explore new recipes, and enjoy the pure, briny taste of these wonderful shellfish. Your taste buds will thank you for taking the time to clean little neck clams the right way! Happy cooking!
- little neck clams
- cleaning clams
- seafood preparation
- clam cleaning tips
- fresh clams

Todd Martin
Senior Writer
With over 15 years of experience in home renovation and design, I started HEG to share what I’ve learned with homeowners who want to create spaces that are both beautiful and functional. I’ve always believed in a hands-on approach, and over the years, I’ve picked up practical solutions that actually work. Through HEG, I aim to make home improvement more approachable, sharing real tips that help you create a home you truly love.