· Davia Murnell · Home Cleaning · 17 min read
How To Clean Light Switches
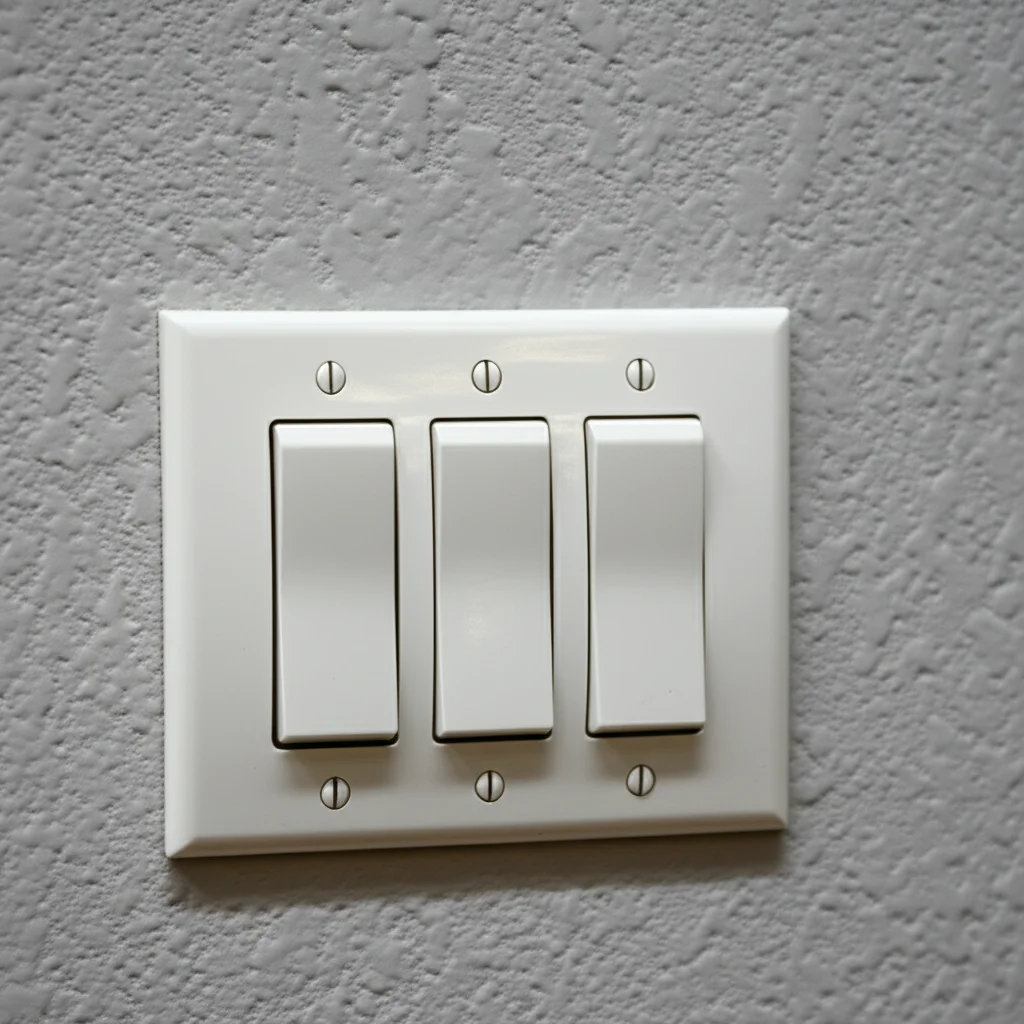
Keep Your Home Sparkling: How To Clean Light Switches Safely
Have you ever stopped to think about how many times your hands touch the light switches in your home each day? From turning lights on in the morning to switching them off at night, these little controls get a lot of use. Over time, light switches gather dirt, dust, and surprising amounts of germs. Cleaning them helps keep your home healthier and looking its best.
I often overlook these high-touch points during my regular cleaning routine. However, maintaining a clean home means paying attention to all surfaces, including those that are frequently handled. This article will guide you through the simple, effective steps on how to clean light switches safely. We will cover why it matters, what supplies you need, and the important safety precautions to take. Get ready to make these often-forgotten spots shine!
Takeaway:
- Always disconnect power at the circuit breaker before cleaning light switches.
- Use mild cleaners and a damp (not wet) cloth to avoid electrical damage.
- Regular quick wipes help prevent grime buildup and germ spread.
To clean light switches safely, first turn off the power at the circuit breaker. Then, use a slightly damp cloth with a mild cleaner or disinfectant wipe to gently wipe down the switch plate and toggle. For deeper cleaning, you may remove the plate after power is off and clean it separately with soap and water before reattaching.
Understanding the Need to Clean Light Switches: More Than Just Appearance
Light switches are some of the most frequently touched surfaces in any home or office. Think about it: every person entering a room likely interacts with these switches. This constant contact means they are hotbeds for dirt, grime, and an invisible army of microorganisms. We touch them after cooking, after gardening, or just with everyday hand oils. These actions transfer dust, grease, and germs onto the surface of the switch and its plate. Over time, this buildup creates a noticeable layer of dirt and can even harbor bacteria and viruses.
Dirty light switches are not just an aesthetic problem; they pose a health concern. Germs, including those that cause common colds or flu, can live on surfaces for hours or even days. When you touch a contaminated light switch, you can pick up these germs and then transfer them to your face, food, or other surfaces. Regularly cleaning and disinfecting light switches helps break this chain of transmission. It helps protect your family’s health and maintains a more hygienic living environment. It is a simple step with a significant impact on overall cleanliness.
The Grime and Germ Hotspot
Light switches are high-traffic areas. They collect fingerprints, skin oils, dust, and food residue. This creates a sticky surface where bacteria and viruses can thrive. I have noticed how quickly they can go from looking clean to showing smudges.
- Fingerprint and Oil Buildup: Every time someone touches the switch, natural oils and dirt from their hands transfer. This creates visible smudges and a sticky residue.
- Dust Accumulation: Like all flat surfaces, light switch plates gather dust. This dust mixes with oils and moisture to form a stubborn film.
- Germ Transmission: The most critical reason is germ spread. Cold and flu viruses, along with various bacteria, can survive on surfaces like light switches. Regular cleaning helps reduce the risk of illness spreading among household members.
Essential Tools and Supplies for Cleaning Light Switches
Gathering your tools before you start makes the cleaning process smooth and efficient. You do not need many items to effectively clean your light switches. Most of the supplies are common household cleaning products you likely already own. Having everything ready prevents interruptions and ensures you can complete the task safely and thoroughly. Think about both general cleaning and disinfecting.
Using the right materials also protects the light switch itself. Some harsh chemicals can damage the plastic or metal finish of the switch plate. Choosing mild, appropriate cleaners helps keep your switches looking good for longer. Always read the labels of your cleaning products to ensure they are safe for plastic or painted surfaces. This small preparation step ensures a successful and safe cleaning experience.
- Mild Cleaning Solution: A gentle all-purpose cleaner is ideal. You can also mix a small amount of dish soap with water.
- Disinfectant Wipes or Spray: For germ killing, disinfectant wipes are very convenient. If using a spray, mist it onto a cloth first, not directly onto the switch.
- Microfiber Cloths: These cloths are excellent for cleaning and wiping without leaving lint. They absorb well and clean effectively.
- Cotton Swabs or Toothpicks: These are useful for reaching small crevices around the switch toggle or plate edges.
- Small Flathead Screwdriver (Optional): You might need this if you plan to remove the switch plate for a deeper clean.
- Protective Gloves: Wearing gloves keeps your hands clean and protects them from cleaning solutions.
Prioritizing Safety: Disconnecting Power Before You Clean
Safety is the most important step when you clean light switches. Electricity is dangerous, and direct contact with live wires can cause serious injury or even death. Never attempt to clean a light switch or plate without first cutting off the power to that specific switch. This simple precaution removes any risk of electric shock. Ignoring this step is extremely hazardous.
I always make sure to double-check the power is off before I start. It provides peace of mind. Go to your home’s main electrical panel, also known as the circuit breaker box. This panel controls the electricity flow to different areas or circuits in your house. Locate the breaker that corresponds to the room or area where the light switch is located. Sometimes, breakers are labeled. If not, you may need to flip a few until you find the correct one. Once you turn it off, verify that the light switch does not work before proceeding. You can test it by trying to turn the light on. If the light does not come on, the power is successfully disconnected. This step is non-negotiable for your safety.
Step-by-Step Power Disconnection
Disconnecting power is a simple yet vital task. Do not skip this step. My priority is always personal safety.
- Locate Your Circuit Breaker Box: This is usually in a basement, garage, utility closet, or hallway. It has a metal door.
- Identify the Correct Breaker: Look for labels that indicate rooms (e.g., “Kitchen Lights,” “Living Room”). If unlabelled, you might need to turn off the main breaker or test breakers one by one. Turning off the main breaker cuts power to the entire house, which is the safest option for general cleaning but less convenient.
- Flip the Breaker to the “OFF” Position: Once you find the correct breaker, firmly flip it down.
- Test the Switch: Go back to the light switch you intend to clean. Try to turn the light on. If it does not work, the power is off.
- Inform Others: If other people are in the house, tell them you are working on the electricity. This prevents someone from accidentally flipping the breaker back on while you are cleaning.
Step-by-Step Guide: How To Clean Light Switches Thoroughly
Once you have ensured the power is off, you are ready to begin the actual cleaning process. This guide provides steps for both quick surface wipes and a more thorough deep clean. Start with surface cleaning for regular maintenance. If your light switches show significant grime or discoloration, then a deeper clean is appropriate. Remember to be gentle with all components. Excessive force or too much moisture can damage the switch or surrounding wall. My goal is always to restore cleanliness without causing any harm.
Surface Cleaning for Quick Touch-Ups
This method is perfect for weekly or bi-weekly maintenance. It helps keep germs at bay and prevents heavy buildup. It is quick and easy to do.
- Wipe Down with a Damp Cloth: Take a clean microfiber cloth. Dampen it slightly with your chosen mild cleaning solution or disinfectant spray. Make sure the cloth is only damp, not dripping wet. Excess water can seep into the switch mechanism and cause electrical problems.
- Clean the Switch Plate and Toggle: Gently wipe the entire surface of the light switch plate. Pay attention to the edges and the toggle or button itself. You can also use a disinfectant wipe for this step. Ensure the wipe is not overly saturated.
- Address Crevices: For dirt or grime in the small gaps around the toggle or between the plate and the wall, use a cotton swab. Dip the cotton swab in your cleaning solution (squeeze out excess) and carefully clean these areas. A toothpick can help dislodge stubborn bits of dirt before wiping.
- Dry Thoroughly: After cleaning, use a dry, clean microfiber cloth to wipe down the switch plate. Make sure the surface is completely dry before restoring power. Any lingering moisture can cause issues.
Deep Cleaning for Stubborn Grime
For switches that have years of buildup, a deeper clean might be needed. This involves removing the switch plate itself. This method is more involved but yields excellent results. I recommend doing this periodically for high-traffic switches.
- Remove the Switch Plate: With the power still off and confirmed, use a small flathead screwdriver to carefully unscrew the screws holding the light switch plate in place. Usually, there are two screws. Gently pull the plate away from the wall. Be careful not to tug on the wiring behind it. The internal mechanism of the switch remains attached to the wall.
- Clean the Plate Separately: Once removed, you can wash the plastic switch plate in warm, soapy water in a sink. For stubborn grease or stains, you might use a degreaser. For a natural approach, consider using a vinegar solution. For insights into cleaning various surfaces with vinegar, you might find tips on how to clean walls with vinegar or how to clean glass with vinegar. Use a soft brush or sponge to scrub the plate clean.
- Clean the Switch Body: While the plate is off, use a slightly damp cloth (dampened with rubbing alcohol or a very small amount of mild cleaner) to carefully wipe the surface of the switch mechanism that is still attached to the wall. Do not spray anything directly onto the electrical components. Rubbing alcohol evaporates quickly, making it a good choice for this part. It is also effective for general light bulb cleaning if they are glass.
- Dry and Reinstall: Ensure both the switch plate and the switch mechanism are completely dry before you put the plate back on. Air dry the plate, or wipe it thoroughly with a dry cloth. Align the plate and screw it back into place. Do not overtighten the screws.
- Restore Power: Once everything is dry and reassembled, go back to your circuit breaker box and flip the breaker back to the “ON” position. Test the light switch to ensure it works correctly.
Natural Cleaning Solutions: Vinegar and Beyond
For those who prefer to avoid harsh chemicals, several natural cleaning solutions work wonders on light switches. These options are effective, eco-friendly, and generally safe for household use. They are especially good for households with children or pets. I find these alternatives just as powerful for tackling everyday grime. They also leave a fresh, clean scent without the chemical smell.
Vinegar is a powerhouse in natural cleaning. Its acidic properties help break down grease, dirt, and even some types of mold. When diluted, it becomes a safe and effective general cleaner. Another simple yet powerful option is rubbing alcohol. It is an excellent disinfectant and evaporates quickly, which is ideal for cleaning near electrical components. Always remember to dilute vinegar and use rubbing alcohol sparingly on a cloth, never spray it directly. Exploring various natural cleaning methods can significantly reduce your home’s chemical footprint. For example, understanding how to effectively clean different materials can be useful, like how to clean plastic surfaces or even general grease stains which can accumulate on switches.
Vinegar Solution
Vinegar is a versatile cleaner, perfect for general household surfaces like light switches. I often use it for its natural disinfectant properties.
- Preparation: Mix equal parts white vinegar and water in a spray bottle.
- Application: Lightly dampen a clean microfiber cloth with this solution. Do not spray directly onto the light switch.
- Cleaning: Gently wipe down the light switch plate and toggle. The vinegar will help cut through grease and smudges.
- Drying: Finish by wiping with a dry cloth to remove any moisture and prevent streaks.
Rubbing Alcohol
Rubbing alcohol is a great disinfectant. It evaporates quickly, which makes it safe for electrical components when used correctly. I trust it to kill germs effectively.
- Preparation: Pour a small amount of rubbing alcohol (70% isopropyl alcohol) onto a clean cotton swab or the corner of a microfiber cloth.
- Application: Dab the alcohol directly onto the soiled areas or the entire switch plate.
- Cleaning: Rub gently to remove dirt and disinfect the surface. The alcohol will evaporate quickly, leaving no residue. This is similar to how you might approach cleaning sensitive electronics like keyboard switches.
Hydrogen Peroxide
Hydrogen peroxide is another effective disinfectant. It is a good alternative if you do not like the smell of vinegar or prefer a different option.
- Preparation: Use a 3% hydrogen peroxide solution. Pour a small amount onto a clean cloth or cotton swab.
- Application: Wipe the light switch surface. It will bubble slightly if it encounters organic matter.
- Drying: Allow it to air dry or wipe with a clean, dry cloth.
Maintaining Cleanliness: Regular Habits for Light Switches
Cleaning light switches should not be a once-a-year deep cleaning event. Incorporating them into your regular cleaning routine helps prevent heavy buildup of dirt and germs. Consistent, quick wipes are far easier than tackling years of grime. By adopting simple habits, you ensure your light switches remain hygienic and presentable all the time. I have found that a little effort often saves a lot of work later.
Make cleaning light switches part of your routine tasks. For instance, when you clean your kitchen counters, take an extra minute to wipe down the kitchen light switch. Similarly, when you clean the bathroom, include the bathroom light switch in your wipe-down. This small addition to existing routines makes the task seem less daunting and more manageable. It also promotes a healthier home environment overall, reducing the spread of common household germs. Consistency is key to keeping these high-touch surfaces clean.
- Weekly Quick Wipe: During your weekly tidy-up, use a disinfectant wipe or a cloth dampened with an all-purpose cleaner to quickly wipe down all light switches in high-traffic areas like the kitchen, bathrooms, and living room.
- Monthly Disinfection: Once a month, perform a slightly more thorough wipe-down using rubbing alcohol or a stronger disinfectant. This helps ensure germs are effectively eliminated. Remember to always turn off the power for a more thorough clean, even if just wiping.
- Deep Clean Annually: Plan for a deep clean once or twice a year, which includes removing the switch plates and washing them separately. This tackles any embedded dirt or discoloration that daily wipes might miss.
Troubleshooting Common Light Switch Cleaning Issues
Even with regular cleaning, you might encounter some common issues when trying to clean light switches. These can range from stubborn stains that just will not budge to discoloration that seems permanent. It is important to know how to approach these challenges without damaging your light switches or the surrounding wall. My experience has taught me that patience and the right technique can solve most problems.
Some problems, like yellowing plastic, are often due to age or sun exposure and may not be fully reversible through cleaning. However, many stubborn marks are simply embedded grime that needs a bit more attention than a quick wipe. Understanding the cause of the problem can help you determine the best cleaning approach. Always start with the least abrasive method and work your way up to stronger solutions if needed, remembering to prioritize electrical safety throughout.
Stubborn Stains and Grime
Sometimes a regular wipe is not enough. For tough spots, a bit more elbow grease and the right product are necessary. I have found certain stains need a targeted approach.
- Baking Soda Paste: For tough, greasy stains, mix a small amount of baking soda with water to form a paste. Apply the paste to the stain with a cotton swab or a soft cloth. Gently rub the area, then wipe clean with a damp cloth and dry thoroughly. Baking soda is a gentle abrasive that helps lift dirt.
- Magic Eraser: A melamine foam eraser (like a Magic Eraser) can be effective for scuff marks or general stubborn grime. Dampen it slightly and gently rub the affected area. Test a small, inconspicuous spot first, as these can sometimes remove paint or gloss from certain surfaces if used too aggressively.
Discoloration and Yellowing
Light switch plates, especially older white ones, can yellow over time due to UV exposure or oxidation. This is often a material issue rather than a dirt issue. It can be frustrating to deal with.
- Sunlight Exposure: Yellowing from sun exposure is often permanent. Cleaning will remove surface dirt but cannot reverse the chemical change in the plastic. In such cases, replacing the light switch plate is the best solution for a pristine look.
- Oxidation: Some plastics oxidize and change color over time. A thorough deep clean might lighten it slightly, but significant yellowing due to age or material quality may require replacement of the plate.
FAQ Section
How often should I clean light switches?
You should clean light switches weekly in high-traffic areas like kitchens and bathrooms. For other rooms, a monthly wipe-down is generally sufficient. A deep clean, including plate removal, is recommended once or twice a year to tackle embedded dirt and maintain hygiene.
What is the safest way to clean light switches?
The safest way is to first turn off the power at the circuit breaker. Then, use a slightly damp cloth with a mild cleaner or disinfectant wipe. Ensure the cloth is not dripping wet. Always dry the switch thoroughly before restoring power to prevent electrical hazards.
Can I use rubbing alcohol to clean light switches?
Yes, rubbing alcohol is an excellent choice for cleaning and disinfecting light switches. Apply it to a cloth or cotton swab, not directly to the switch. It evaporates quickly, which minimizes moisture risk. It effectively kills germs without leaving residue.
Is it okay to spray cleaner directly on light switches?
No, you should never spray cleaner directly onto light switches. Direct spraying can allow liquid to seep into the electrical components, leading to damage or creating a shock hazard. Always spray your cleaner onto a cloth first, then use the damp cloth to wipe the switch.
What if my light switch plate is discolored or yellowed?
If your light switch plate is discolored or yellowed, especially due to age or sun exposure, cleaning may only remove surface grime. The discoloration itself is often a permanent change in the plastic’s material. In such cases, replacing the plate is the most effective way to restore its original appearance.
Conclusion
Keeping your light switches clean is a simple yet impactful aspect of home maintenance. By regularly cleaning these frequently touched surfaces, you not only improve the appearance of your home but also contribute significantly to a healthier living environment. We have covered why these small fixtures matter so much for hygiene, the essential supplies you need, and, most importantly, the vital safety steps involved, especially disconnecting power.
Remember the key takeaways: always prioritize safety by turning off the power, use mild cleaners applied to a damp cloth, and commit to regular cleaning to prevent grime and germ buildup. Whether you opt for a quick surface wipe or a thorough deep clean, ensuring your light switches are clean will make a noticeable difference in your home’s overall cleanliness and health. Make cleaning light switches a regular part of your home care routine, and enjoy a cleaner, safer living space. Start today and see the immediate results!
- light switch cleaning
- electrical safety
- household cleaning
- germ removal
- surface disinfection

Davia Murnell
Room Cleaning Expert
Before joining HEG, I spent over a decade running my own window cleaning business, where I perfected streak-free techniques and learned the ins and outs of specialty glass care. Now, I bring that expertise to a broader mission—helping homeowners maintain sparkling windows and beautiful outdoor spaces. From skylights and sliding doors to patio glass and outdoor furniture, I believe every surface deserves attention and care. I share practical tips and proven methods that make even the toughest cleaning jobs feel manageable. Whether you're battling pollen on the porch or smudges on high windows, I’m here to help you see your home in a whole new light—literally.