· Todd Martin · Home Appliance Maintenance · 20 min read
How To Clean Ge Refrigerator Water Dispenser Nozzle
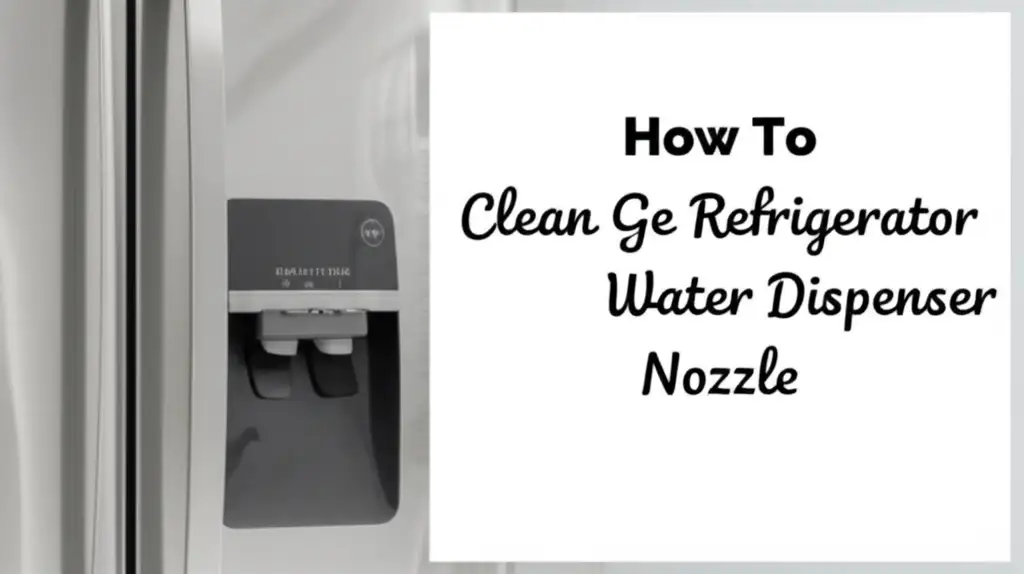
Keep Your GE Refrigerator Water Dispenser Nozzle Spotless
Do you trust the water from your GE refrigerator’s dispenser? Over time, the nozzle can accumulate grime, mineral deposits, and even mold. This can impact water quality and taste. Keeping your GE refrigerator water dispenser nozzle clean is crucial.
A dirty nozzle affects your health and the appliance’s performance. Regular cleaning ensures you always get fresh, pure water. This guide provides a comprehensive approach to cleaning your GE refrigerator water dispenser nozzle. We will cover necessary tools, cleaning agents, step-by-step instructions, and vital maintenance tips. You will learn how to tackle tough buildup and prevent future contamination. Let’s make sure your GE dispenser delivers clean water every time.
Takeaway
Maintaining a clean GE refrigerator water dispenser nozzle is simple yet essential.
- Regularly inspect and clean the nozzle using mild soap and water or vinegar solution.
- Address mineral buildup with a descaling agent or vinegar soak.
- Prevent mold growth by keeping the area dry and cleaning thoroughly.
- Follow a consistent cleaning schedule for optimal water quality.
What is the simplest way to clean a GE refrigerator water dispenser nozzle?
The simplest way to clean a GE refrigerator water dispenser nozzle involves using warm water and a mild dish soap solution. You can use a small brush or cotton swab to gently scrub visible buildup from the nozzle’s exterior and interior opening. For stubborn spots, a vinegar-soaked cloth or toothbrush works well.
Why Cleaning Your GE Dispenser Nozzle Is Essential
Cleaning your GE refrigerator water dispenser nozzle goes beyond aesthetics. This small component directly impacts the quality of your drinking water. Over time, the nozzle collects various substances. These include mineral deposits from hard water, food particles, and even mold or mildew spores. These accumulations create a breeding ground for bacteria.
Consuming water from a contaminated nozzle poses health risks. It can introduce unwanted germs into your body. Furthermore, buildup can restrict water flow, making your dispenser slow. Mineral deposits, especially, can cause blockages or reduce water pressure. A dirty nozzle also affects the taste and odor of your water. You might notice a strange metallic taste or a musty smell. Regular cleaning prevents these issues, ensuring your water remains fresh, clean, and safe for consumption.
Gathering Your Tools and Cleaning Agents
Before you begin cleaning your GE refrigerator water dispenser nozzle, gather all necessary items. Having everything ready saves time and makes the process smoother. You probably have most of these items at home already. Using the right tools ensures effective cleaning without damaging your appliance.
Here is a list of what you will need:
- Mild dish soap: Use a gentle, unscented soap.
- Warm water: Essential for mixing with soap and rinsing.
- Small brush: An old toothbrush or a bottle brush works great.
- Cotton swabs or Q-tips: Perfect for reaching tight spots inside the nozzle.
- Microfiber cloths or soft towels: For wiping and drying surfaces.
- White vinegar: A natural disinfectant and descaling agent.
- Baking soda (optional): Good for tougher stains or odors.
- Small bowl or cup: For mixing cleaning solutions.
- Protective gloves (optional): To protect your hands from cleaning agents.
Avoid using harsh chemicals or abrasive scrubbers. These can scratch or damage the dispenser’s finish. Stick to gentle, natural cleaners for the best results.
Step-by-Step Guide to Clean GE Refrigerator Water Dispenser Nozzle
Cleaning your GE refrigerator water dispenser nozzle is a straightforward process. Follow these steps carefully to ensure a thorough and effective clean. This method removes most common contaminants. It also ensures your water tastes its best.
Step 1: Disconnect Power and Prepare the Area
Safety first. Always unplug your GE refrigerator from the wall outlet before cleaning. This prevents accidental water dispensing or electric shock. If unplugging is difficult, trip the circuit breaker that controls the refrigerator. Next, prepare the area. Place a towel or paper towels beneath the dispenser. This catches any drips or spills during the cleaning process. Have your cleaning tools and solutions within reach.
Step 2: External Wipe-Down
Begin by cleaning the exterior of the dispenser area. Mix a few drops of mild dish soap with warm water in your small bowl. Dampen a clean microfiber cloth with this solution. Gently wipe down the entire dispenser area, including the paddle or button. This removes surface dirt and grime. Pay attention to any sticky residues. Rinse the cloth with plain water and wipe again to remove soap residue. Finally, dry the area thoroughly with a clean, dry cloth.
Step 3: Focus on the Nozzle Exterior
The nozzle exterior is often the first place to show buildup. Dip a small brush, like an old toothbrush, into your soap and water solution. Gently scrub the outside of the water dispenser nozzle. Work your way around the entire surface. If you see mineral deposits, try scrubbing more firmly. For stubborn stains, you can move to the next step which involves vinegar. Once scrubbed, wipe the area clean with a damp cloth and dry it.
Step 4: Deep Clean the Nozzle Interior
The inside of the nozzle needs special attention. This is where bacteria and mold can hide. Dip a cotton swab or Q-tip into the soapy water. Carefully insert it into the nozzle opening. Twist and gently scrub the interior walls of the nozzle. You might need several cotton swabs to get it truly clean. Repeat this process until the cotton swab comes out clean. For a more detailed guide on cleaning internal components, you might find tips on how to clean a water dispenser helpful.
Step 5: Tackle Tough Buildup with Vinegar
If mineral deposits or stubborn grime persist, white vinegar is your best friend. Vinegar is acidic and breaks down mineral buildup effectively. Dampen a corner of a clean cloth or a new cotton swab with undiluted white vinegar. Press and hold it against the heavily affected areas of the nozzle for a few minutes. For severe buildup inside the nozzle, you can try saturating a cotton swab with vinegar and leaving it inside the nozzle for 10-15 minutes. After soaking, use your small brush or cotton swab to scrub the softened deposits away. Vinegar also acts as a natural disinfectant, helping to eliminate bacteria and mold. If you are specifically concerned about mold, additional information on how to clean refrigerator water dispenser mold can provide deeper insights.
Step 6: Rinse and Sanitize
After scrubbing and soaking, it’s time to rinse. Take a clean cloth dampened with plain warm water. Wipe down all cleaned surfaces to remove any soap or vinegar residue. Ensure no cleaning solution remains on the nozzle or surrounding area. This step is crucial for taste and hygiene. For an extra layer of sanitization, you can lightly mist the nozzle area with a solution of one part white vinegar to one part water. Let it air dry or wipe it clean after a few minutes.
Step 7: Reassemble and Test
Once everything is dry, plug your GE refrigerator back into the power outlet. Allow a few minutes for the refrigerator to power up. Dispense about 2-3 cups of water into a pitcher or sink. This flushes out any remaining cleaning solution or loosened particles from the internal lines. Discard this water. Now, your GE refrigerator water dispenser nozzle is clean and ready for use. Enjoy fresh, clean water! For a broader understanding of dispenser cleanliness, refer to a general guide on how to clean water dispenser on fridge.
Preventing Future Buildup and Mold Growth
Preventing buildup and mold in your GE refrigerator water dispenser nozzle is easier than cleaning it after the fact. Regular maintenance is key. Adopting a few simple habits can keep your dispenser pristine. This ensures a consistent supply of clean, fresh water.
Here are proactive steps to prevent common issues:
- Regular Wiping: Make it a habit to wipe down the dispenser area daily or every few days. Use a clean, dry cloth to remove any water drips or spills. This prevents water spots and minimizes the chance of mold starting.
- Monthly Quick Clean: Dedicate a few minutes once a month for a quick cleaning session. Use a damp cloth with mild soap to wipe the nozzle exterior and a cotton swab for the interior. This prevents minor buildup from becoming a major problem.
- Address Spills Immediately: If water drips or splashes around the dispenser, wipe it up right away. Standing water provides an ideal environment for mold and mildew to thrive.
- Use Filtered Water: While GE refrigerators have built-in filters, using additional filtered water can reduce mineral content. This lessens the likelihood of hard water deposits forming on the nozzle. Consider replacing your GE refrigerator water filter regularly as per manufacturer guidelines. Incorrectly installed or old filters can sometimes contribute to problems.
- Air Dry After Use: After dispensing water, allow the nozzle to air dry for a moment. Avoid immediate wiping that might trap moisture. If you notice persistent issues, check for underlying problems such as how to keep GE refrigerator water dispenser from freezing, as freezing can cause water to sit longer and lead to issues.
- Ventilation: Ensure there is good air circulation around your refrigerator. This helps evaporate moisture faster.
- Annual Deep Clean: Once a year, perform a comprehensive deep clean of the entire water dispenser system. This includes the nozzle, drip tray, and surrounding areas. For advanced cleaning beyond just the nozzle, you might want to learn about how to clean a spray nozzle, as some principles apply.
By following these preventive measures, you can significantly reduce the need for intensive cleaning. You will also prolong the life and efficiency of your GE refrigerator water dispenser.
Addressing Common Nozzle Issues: Slow Flow and Leaks
Sometimes, cleaning the nozzle alone is not enough to resolve all issues. Your GE refrigerator water dispenser might experience slow water flow or even minor leaks. These problems can indicate issues beyond simple surface grime. Understanding the causes helps in effective troubleshooting.
Slow Water Flow: A restricted nozzle is a common culprit for slow water flow. However, other factors can also contribute.
- Mineral Buildup Inside Lines: Over time, mineral deposits can accumulate not just in the nozzle but also within the internal water lines leading to the dispenser. These deposits narrow the water pathway, reducing pressure. Regular flushing of the system can help.
- Clogged Water Filter: A dirty or old water filter is a frequent cause of slow water flow. The filter traps impurities, and if it becomes oversaturated, it restricts water flow significantly. Always replace your GE refrigerator water filter as recommended by the manufacturer, typically every 6 months. If you recently replaced the filter and the problem persists, check why your GE refrigerator water dispenser is not working after replacing filter.
- Low Household Water Pressure: Sometimes, the issue is not with the refrigerator itself but with your home’s overall water pressure. Test other faucets in your home to see if water pressure is consistently low.
- Frozen Water Line: In colder environments or if the refrigerator’s temperature settings are too low, the water line inside the freezer door can freeze. This completely blocks water flow. You may need to thaw the line. For more on this, check how to keep GE refrigerator water dispenser from freezing.
Leaks from the Nozzle: Minor drips from the nozzle after dispensing water are common. Persistent leaks indicate a problem.
- Sticky Dispenser Paddle: If the paddle or button does not fully retract, it can slightly open the valve, causing drips. Ensure the paddle moves freely and springs back into place.
- Worn Internal Seals: Inside the dispenser mechanism, small rubber seals prevent water from leaking when the dispenser is not in use. Over time, these seals can wear out, crack, or become brittle, leading to leaks. This usually requires a professional repair.
- Cracked Nozzle or Housing: Physical damage to the nozzle or its surrounding housing can create pathways for water to escape. Inspect for any visible cracks.
- Water Pressure Too High: If your household water pressure is excessively high, it can sometimes overwhelm the dispenser’s internal valve, causing minor leaks. A pressure regulator can resolve this.
Regular cleaning and proper filter maintenance can prevent many of these issues. However, if problems persist, it’s advisable to consult your refrigerator’s manual or contact GE customer support. Sometimes, the problem is deeper than just the nozzle. Other brand-specific issues like why your Kenmore refrigerator is leaking water from the water dispenser also point to broader system problems.
The Importance of Routine Maintenance for Longevity
Regular cleaning and maintenance of your GE refrigerator water dispenser nozzle extend beyond hygiene. It significantly contributes to the longevity and efficient operation of your entire refrigerator. Think of it as preventative care for your appliance. Ignoring the small nozzle can lead to bigger, more costly problems down the line.
Extended Appliance Lifespan: A well-maintained dispenser prevents strain on the refrigerator’s internal components. When the nozzle or water lines are clogged, the water pump has to work harder. This extra effort can wear out the pump prematurely. Keeping the system clean reduces this stress, allowing your refrigerator to last longer. It’s like keeping a car engine clean; it runs better and longer.
Optimal Performance: A clean nozzle ensures consistent water flow and pressure. You won’t experience frustratingly slow dispensing or erratic streams. This maintains the convenience and efficiency you expect from your GE appliance. For example, if you notice your water dispenser is slow, it might be due to issues beyond the nozzle that could be exacerbated by poor overall maintenance. Information on why your GE refrigerator water dispenser is so slow often highlights the importance of keeping the entire system clear.
Energy Efficiency: While seemingly minor, a dispenser struggling to push water due to blockages can indirectly affect energy consumption. The refrigerator’s cooling system and water pump might need to run longer or harder to achieve desired outcomes. A smoothly operating dispenser system helps maintain the refrigerator’s overall energy efficiency.
Preventing Costly Repairs: Addressing small issues like mineral buildup or early mold growth through regular cleaning prevents them from escalating. A neglected nozzle can lead to extensive mold contamination requiring professional deep cleaning or even part replacement. Blockages can stress the water line and lead to leaks, which can damage internal components or even your kitchen floor. Proactive maintenance is always cheaper than reactive repairs. It helps avoid situations like why your Bosch refrigerator is leaking water from the dispenser, which often stems from neglect.
Maintaining Water Purity: Beyond the physical wear and tear, regular cleaning guarantees pure drinking water. This is the primary function of your water dispenser. By keeping the nozzle clean, you protect your family’s health and ensure confidence in every glass of water.
In essence, investing a small amount of time in routine cleaning of your GE refrigerator water dispenser nozzle pays off greatly. It saves money, extends appliance life, and ensures you always have access to clean, fresh water. Make it a part of your regular home maintenance routine.
When to Seek Professional Help for Your Dispenser
While most cleaning and minor troubleshooting can be done yourself, there are times when professional help becomes necessary for your GE refrigerator water dispenser. Knowing when to call an expert can save you from further damage or personal injury. Do not attempt repairs that require specialized knowledge or tools.
Here are scenarios where professional assistance is advised:
- Persistent Leaks: If your dispenser continues to leak despite cleaning the nozzle and checking basic connections, it indicates an internal problem. This could be a cracked water line, a faulty water inlet valve, or a broken internal component. These issues often require dismantling parts of the refrigerator, which is best left to a trained technician. For comparison, understanding issues like why your Whirlpool refrigerator is leaking water from the ice dispenser shows complex problems often need professional attention.
- No Water Dispensing: If no water comes out at all, and you have already checked the water supply, water filter, and confirmed the dispenser is not frozen (referencing tips like how to keep GE refrigerator water dispenser from freezing), a more serious internal malfunction is likely. This might involve a defective water valve, a problem with the control board, or a completely clogged line that home remedies cannot clear. Sometimes, issues like why your Frigidaire refrigerator water dispenser is not working can stem from similar underlying failures that need expert diagnosis.
- Strange Noises: Unusual grinding, buzzing, or vibrating noises coming from the dispenser area can indicate a motor issue or a problem with the water pump. These components are complex and require professional repair.
- Electrical Issues: If you notice flickering lights, sparks, or the dispenser unit becomes unusually hot, immediately unplug the refrigerator and call a professional. Electrical problems are serious safety hazards.
- Visible Internal Damage: If you open up the dispenser area and see cracked pipes, frayed wires, or corroded parts, do not try to fix them yourself. These indicate significant wear or damage that requires professional repair or replacement.
- Odor Persists After Cleaning: If a foul odor persists even after a thorough cleaning, it could indicate deep-seated mold or bacterial growth within inaccessible parts of the water system, such as inside the reservoir or water lines. A professional can use specialized tools and cleaning agents to address this. This is related to but distinct from problems like why your LG refrigerator water dispenser is so slow, which also might need deeper inspection.
- Dispenser Not Responding: If the dispenser paddle or button does not activate water flow, and you have ruled out power issues, it could be a control board malfunction or a switch problem. These are technical repairs.
Always prioritize safety. If you are unsure about a repair or feel uncomfortable, contact a certified GE appliance technician. They have the expertise, tools, and replacement parts to diagnose and fix complex problems efficiently and safely.
Final Tips for a Pristine Water Dispenser Nozzle
Maintaining a pristine GE refrigerator water dispenser nozzle is an ongoing process. Beyond the deep cleaning and preventive measures, a few additional tips can help you achieve and sustain optimal cleanliness. These small actions contribute significantly to your water quality and appliance health.
Tip 1: Use a Water Filter Pitcher (Optional but Recommended): Even with your GE refrigerator’s internal filter, a filter pitcher can reduce the load on your dispenser’s system. It pre-filters water, reducing sediment and mineral content before it even reaches the refrigerator. This minimizes the buildup on your nozzle and internal lines, extending cleaning intervals. It adds an extra layer of filtration and protection.
Tip 2: Consider Bottled Water for Infrequent Use: If you travel frequently or use your water dispenser very rarely, consider dispensing bottled water for a period. Stagnant water in the lines and nozzle can encourage bacterial growth. Flushing the system with fresh water regularly is good. If this isn’t practical, using bottled water for your drinking needs ensures purity.
Tip 3: The Power of Steam Cleaning (Caution Advised): For very stubborn, calcified buildup that resists vinegar and scrubbing, a handheld steam cleaner can be effective. Direct the steam briefly at the nozzle. The heat and moisture can loosen deposits. Be extremely cautious. Do not over-saturate the area. Avoid direct contact with electrical components. Steam cleaning should be done carefully and sparingly. Always unplug the refrigerator first.
Tip 4: Natural Descaling Options Beyond Vinegar: While vinegar is excellent, citric acid powder mixed with water can be another powerful natural descaler. Dissolve a teaspoon of citric acid in a cup of warm water. Apply this solution to stubborn mineral deposits on the nozzle with a cloth or cotton swab. Let it sit for 10-15 minutes, then scrub and rinse. It is very effective at breaking down calcium and lime. This offers an alternative for those sensitive to the smell of vinegar.
Tip 5: Check for Drip Tray Cleanliness: The drip tray directly below the nozzle catches spills. This area is often overlooked but can harbor significant mold and bacteria. Regularly remove and clean the drip tray with soap and water. Ensure it is completely dry before returning it. A dirty drip tray can spread contamination back to the nozzle area. This is a crucial step in overall dispenser hygiene.
Tip 6: Gentle Rubbing Alcohol for Sterilization: For an extra layer of sterilization after cleaning, you can lightly wipe the exterior of the nozzle with a cotton swab dampened with rubbing alcohol (isopropyl alcohol). Allow it to air dry. This helps kill any remaining surface bacteria. Do not use it inside the nozzle or on plastic parts that could be damaged. Use sparingly and ensure it evaporates completely before dispensing water.
These extra tips complement your regular cleaning routine. They help maintain a consistently clean, functional, and healthy water dispenser nozzle on your GE refrigerator.
FAQ Section
How often should I clean my GE refrigerator water dispenser nozzle?
You should aim for a quick wipe-down weekly and a more thorough cleaning of the nozzle and surrounding area monthly. A deep cleaning, including addressing mineral buildup, is recommended every three to six months. This frequency helps prevent grime, mold, and mineral deposits from accumulating.
Can I use bleach to clean my GE water dispenser nozzle?
No, avoid using bleach or other harsh chemical cleaners on your GE refrigerator water dispenser nozzle. Bleach can damage plastic components, leave behind harmful residues, and is not safe for surfaces that come into contact with drinking water. Stick to mild dish soap, white vinegar, or specific appliance cleaners.
What causes black mold in a water dispenser nozzle?
Black mold in a water dispenser nozzle is typically caused by trapped moisture and food particles, combined with a dark, humid environment. Spores are naturally present in the air. When these find a suitable damp spot on the nozzle, they can grow and thrive. Regular cleaning and drying prevent this.
My water dispenser nozzle has hard water stains. How can I remove them?
Hard water stains, or mineral deposits, respond well to white vinegar. Soak a cloth or cotton swab in undiluted white vinegar and apply it to the stained areas. Let it sit for 10-15 minutes to allow the acid to break down the deposits, then scrub with a small brush and rinse thoroughly.
Does a dirty water dispenser nozzle affect water taste?
Yes, absolutely. A dirty water dispenser nozzle can significantly affect the taste and even the odor of your drinking water. Buildup of mold, bacteria, or mineral deposits can impart a stale, metallic, musty, or otherwise unpleasant flavor to the water dispensed. Regular cleaning ensures fresh-tasting water.
Can cleaning the nozzle fix slow water flow from my GE dispenser?
Cleaning the nozzle can help if the slow water flow is due to external mineral buildup restricting the water’s exit point. However, slow flow often results from a clogged water filter, a frozen water line, or internal line issues. If nozzle cleaning doesn’t fix it, check your water filter or consult your user manual.
Conclusion
Keeping your GE refrigerator water dispenser nozzle clean is a simple yet vital task. It protects your family’s health, maintains the appliance’s efficiency, and ensures you always have access to fresh, great-tasting water. We have covered the importance of regular cleaning, the tools you need, and a step-by-step process for a thorough clean. By following these guidelines, you can easily prevent common issues like mineral buildup and mold.
Remember, a clean nozzle contributes to the overall longevity of your GE refrigerator. Make cleaning your GE refrigerator water dispenser nozzle a regular part of your home maintenance routine. Consistent care avoids costly repairs and ensures peak performance. Start today to enjoy cleaner, purer water from your GE refrigerator. Your health and your appliance will thank you.
- GE refrigerator
- water dispenser cleaning
- appliance maintenance


