· Todd Martin · Home Maintenance · 21 min read
How To Clean Freezer
Discover How To Clean Your Freezer for a Sparkling Kitchen
Have you ever opened your freezer door and been greeted by an unpleasant odor or a wall of ice? A clean freezer is a happy freezer, and it directly impacts the freshness of your food and your appliance’s efficiency. Learning how to clean a freezer properly not only prevents foul smells and ice buildup but also saves you money on energy bills and keeps your food safe. This guide provides step-by-step instructions and practical tips to deep clean your freezer, making it a hygienic, organized space once again. We will cover everything from essential preparations to tackling tough grime and maintaining freshness long-term.
Takeaway
- Regular freezer cleaning prevents ice buildup and bad odors.
- Proper cleaning improves appliance efficiency and food safety.
- Always unplug the freezer before starting to clean.
- Use natural cleaning solutions like vinegar or baking soda.
- Organize food carefully to prevent future messes and make cleaning easier.
Cleaning your freezer thoroughly involves emptying contents, unplugging the unit to defrost, scrubbing all surfaces with a mild cleaning solution, rinsing, drying completely, and then reorganizing items efficiently. This process removes odors, improves hygiene, and helps the appliance run more effectively.
Why Regular Freezer Cleaning Matters for Your Home
Keeping your freezer clean is more than just about appearances; it is about performance and safety. A freezer filled with ice or old food debris works harder than it needs to. This extra effort uses more electricity, increasing your energy bills. Plus, a clean freezer helps keep your food tasting better and lasting longer.
Think about it: food particles can spill, and frost can build up. Over time, these issues create an environment where odors thrive. Your frozen vegetables might start smelling like last month’s leftover fish. This cross-contamination of smells is unpleasant and affects food quality. A regular cleaning schedule prevents these problems. It ensures your food stays in a clean, stable environment. Also, cleaning allows you to check for worn seals or other issues. These small checks help your appliance last longer.
Moreover, a well-maintained freezer offers maximum storage capacity. When ice builds up on the walls and shelves, it takes up valuable space. This means you can store less food. By removing excess ice, you free up room for more groceries. This is especially helpful for bulk buying or meal prepping. So, a clean freezer means more space for your frozen goods. It also keeps everything visible and easy to find. This saves you time and reduces food waste.
Gathering Your Essential Tools for Freezer Cleaning
Before you start, it is smart to gather all your supplies. Having everything ready saves time and makes the process smooth. You likely have most of these items around your home already. This list covers the basics for a successful freezer cleaning session. It ensures you are prepared for every step.
First, you will need protective gloves. Cleaning can get messy, and gloves protect your hands from cold water and cleaning solutions. Next, grab some clean cloths or sponges. Microfiber cloths work well for wiping down surfaces without leaving lint. You will also need a spray bottle for your cleaning solution. This allows for even application. For stubborn ice, a plastic scraper or spatula is useful. Never use metal tools, as they can damage the freezer lining.
For cleaning solutions, you have options. A mixture of warm water and mild dish soap works for general grime. For odor removal and sanitizing, white vinegar is excellent. You can mix equal parts white vinegar and water in your spray bottle. Baking soda is another fantastic natural cleaner and odor absorber. You might use it as a paste for tough spots or a powder to absorb smells after cleaning. Lastly, have a dry towel or two ready to thoroughly dry the interior. This prevents new ice from forming immediately after you plug it back in.
Here is a quick list of what you need:
- Protective gloves
- Clean cloths or sponges
- Spray bottle
- Plastic scraper or spatula
- Mild dish soap
- White vinegar
- Baking soda
- Dry towels
Having these tools ready makes the freezer cleaning process simple and efficient. You can focus on the task at hand without stopping to find supplies.
Step-by-Step Guide: Preparing Your Freezer for Cleaning
Preparation is key to a smooth freezer cleaning experience. This stage involves emptying your freezer and allowing it to defrost. Rushing this step can lead to a bigger mess or less effective cleaning. Take your time with these initial steps to ensure the best results.
Emptying Your Freezer Safely
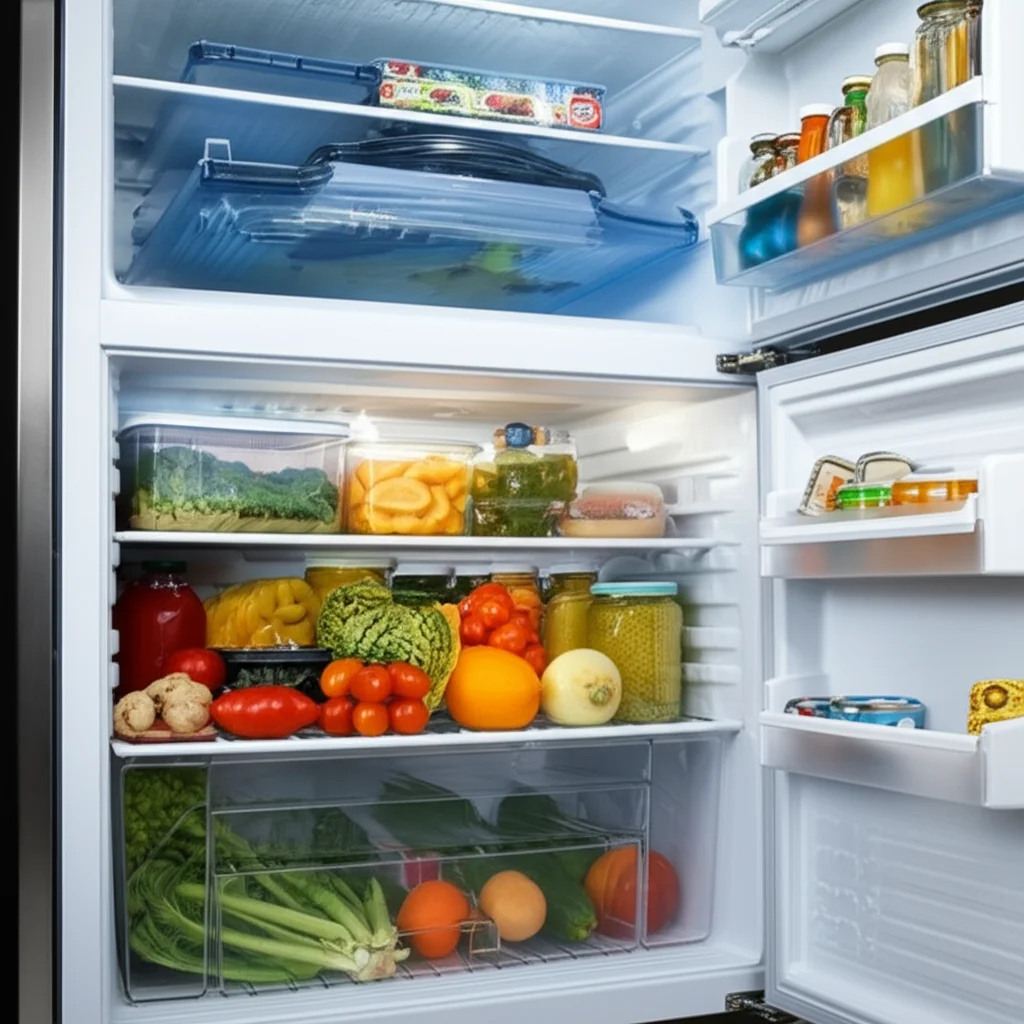
The first step is to completely empty your freezer. Start by pulling out all food items. This includes everything from frozen vegetables to ice cream. As you remove items, inspect them. Throw out anything that is past its prime, freezer-burned, or looks questionable. This is a good time to purge old items you no longer need. This helps you identify items that need to be used soon.
Next, you need a temporary spot for your frozen food. Use insulated coolers or even a large box lined with towels. Add ice packs or bags of ice to keep everything frozen solid. The goal is to keep your food at a safe temperature while you clean. If you have a second freezer, that is the ideal place for storage. Plan this cleaning for a day when you have fewer frozen goods. This makes the task easier and faster.
The Defrosting Process Explained
After emptying, unplug your freezer from the power outlet. This is crucial for safety and effective defrosting. Leaving it plugged in makes the cleaning process difficult and potentially dangerous. Once unplugged, open the freezer door. You can place towels on the floor around the freezer to catch melting ice. Some freezers have a drain plug; if yours does, open it to direct water into a shallow pan.
Defrosting can take several hours, especially for heavily frosted freezers. To speed up the process, you can place bowls of hot water inside the freezer. Close the door for 15-20 minutes, then check the ice. The steam helps loosen the ice. You can also use a hairdryer on a low, cool setting, keeping it at a safe distance from internal components. Remember, never use sharp objects or excessive force to chip away ice. This can damage your freezer’s internal surfaces. Patience is important here for a thorough defrost. For a deep freezer, this process might take even longer due to its larger size.
Effective Methods to Clean the Freezer Interior
Once your freezer is fully defrosted and empty, it is time to focus on the interior. This is where most of the grime and odors reside. Cleaning the inside thoroughly ensures a fresh start for your frozen foods. Pay attention to every corner and crevice.
Use a soft cloth or sponge to wipe down all interior surfaces. This includes the walls, ceiling, and floor of the freezer. For most general cleaning, a mixture of warm water and a few drops of mild dish soap works well. Dip your cloth in the solution, wring it out, and wipe vigorously. For persistent spots, you may need a bit more scrubbing. Make sure you get into all the grooves and seams where dirt can hide. Wipe down removable shelves and drawers separately in your sink. Rinse them thoroughly before setting them aside to dry.
Natural Cleaning Solutions for Your Freezer
For a natural and effective cleaning solution, white vinegar is a fantastic choice. Mix equal parts white vinegar and warm water in a spray bottle. Spray this solution directly onto the interior surfaces of your freezer. Let it sit for a few minutes to break down grime and odors. Vinegar is a natural disinfectant and deodorizer. It does not leave behind harsh chemical residues. This makes it safe for food storage areas.
Another excellent natural option is baking soda. You can create a paste by mixing baking soda with a small amount of water. Apply this paste to any stubborn stains or areas with lingering odors. Let it sit for 10-15 minutes, then scrub gently with a soft brush or cloth. Baking soda is mildly abrasive, helping to lift dirt without scratching surfaces. It also neutralizes odors effectively. After using either solution, always wipe down the surfaces with a clean, damp cloth to remove any residue. A thorough rinse helps remove all traces of cleaner.
Tackling Stubborn Stains and Spills
Sometimes, spills can dry and become difficult to remove. For these stubborn stains, the baking soda paste often does the trick. Apply a thicker layer of paste directly onto the stain. Let it sit for a longer period, perhaps 30 minutes, to really soften the grime. Then, use your plastic scraper to gently lift the softened stain. Follow up with a scrub using a cloth dipped in vinegar solution.
For very tough, dark stains, a bit of lemon juice can be added to the baking soda paste for extra bleaching power. Always test a small, inconspicuous area first. If you encounter mold or mildew, a strong vinegar solution is your best friend. Spray it directly, let it sit for several minutes, then scrub vigorously. Ensure proper ventilation when dealing with mold. After cleaning all interior parts, use a dry, clean towel to thoroughly dry everything. Any remaining moisture can freeze and cause immediate frost buildup once the freezer is back on.
Don’t Forget the Freezer Exterior and Coils
While the inside of your freezer is now spotless, the job is not complete without addressing the exterior and the often-overlooked coils. These parts play a crucial role in your freezer’s efficiency and overall lifespan. Neglecting them can lead to poor performance and higher energy consumption.
Start with the exterior surfaces. Wipe down the door, sides, and top with a damp cloth and a mild all-purpose cleaner. Pay special attention to the handles, which often accumulate dirt and fingerprints. If your freezer is stainless steel, use a specialized stainless steel cleaner for a streak-free shine. Remember to clean the rubber gasket around the door. Food crumbs and spills can get trapped here, affecting the seal. A good seal is vital for keeping cold air in and warm air out. Use a damp cloth and a little dish soap to carefully wipe the gasket clean.
Next, focus on the freezer coils. These are usually located at the back or underneath your freezer. Over time, dust and pet hair can collect on these coils. This buildup acts as an insulator, making the compressor work harder to cool the freezer. You will need to move your freezer away from the wall to access the back coils. For coils underneath, you might need to remove a kick plate. Use a coil brush or a vacuum cleaner with a brush attachment to gently remove dust and debris. Cleaning the coils significantly improves your freezer’s energy efficiency. It also extends its operational life. For more detailed guidance, consider checking out resources on how to clean freezer coils for a thorough job. Remember to unplug the unit before cleaning any electrical components. This step is essential for your safety.
Odor Removal and Freshness: Keeping Your Freezer Smelling Good
After a thorough cleaning, you want your freezer to smell as fresh as it looks. Lingering odors can still be a problem even after wiping down surfaces. The key is to absorb any remaining smells and prevent new ones from developing. This ensures your frozen food stays truly fresh.
The champion of odor absorption is baking soda. After your freezer is completely dry, place an open box or bowl of baking soda inside. Baking soda naturally neutralizes odors, rather than just masking them. Replace the baking soda every one to three months for continuous freshness. For stubborn odors, you might need a larger quantity or even a few bowls placed in different sections. Another natural option is activated charcoal. Activated charcoal is highly porous and excellent at trapping unwanted smells. You can find charcoal odor absorbers specifically designed for refrigerators and freezers. Just like baking soda, these need to be replaced periodically.
To prevent future odors, good food storage habits are essential. Always wrap foods tightly in freezer-safe bags or containers. This prevents food smells from mixing and also protects against freezer burn. Label and date everything so you use older items first. Regular rotation of food items helps keep your inventory fresh. Also, promptly clean up any spills, even small ones, before they have a chance to freeze and create problems. By combining thorough cleaning with ongoing odor absorption and smart storage, your freezer will always smell clean and inviting. This proactive approach helps maintain a fresh environment inside your appliance.
Organizing Your Freezer for Lasting Cleanliness
A clean freezer is wonderful, but an organized one stays clean longer. Smart organization prevents spills, makes food easier to find, and encourages regular inventory checks. This saves you time and reduces food waste. After cleaning, take a moment to rethink how you store your items.
Start by grouping similar items together. Designate specific zones for meats, vegetables, fruits, and prepared meals. For example, all frozen berries can go in one bin, while all chicken cuts go in another. Using clear storage bins or baskets helps immensely. You can pull out an entire bin to find what you need, rather than rummaging through loose items. This also helps contain any potential spills. Labeling these bins or shelves makes it even easier for everyone in the household to find and return items. This systematic approach ensures everything has its place.
Consider using vertical space effectively. For upright freezers, adjustable shelves are a boon. For chest freezers, stacking items neatly in baskets can maximize space. Avoid overfilling your freezer; leave some room for air circulation. Proper air flow helps the freezer run efficiently and maintains consistent temperatures. This consistent temperature keeps food frozen solid and prevents soft spots. Remember to practice the “first-in, first-out” rule with your food. Place new items at the back or bottom, and bring older items to the front or top. This helps ensure you use food before it expires or gets freezer burn. Maintaining an organized space is a vital part of how to keep a home clean and efficient. This simple practice keeps your freezer neat and functional for weeks and months to come.
Special Considerations for Different Freezer Types
Not all freezers are created equal when it comes to cleaning. While the core principles remain the same, each type has unique features that require slight adjustments to your cleaning approach. Understanding these differences helps you clean more effectively and efficiently.
Cleaning an Upright Freezer
Upright freezers resemble refrigerators, with shelves and drawers. This design makes them generally easier to clean than chest freezers. You can simply pull out shelves and drawers for cleaning in your sink. The vertical layout means gravity helps with defrosting; melting ice drips down. Place towels at the bottom to catch water. Since food is often stored on shelves, spills might drip down, so be thorough with wiping all levels. Pay special attention to the door shelves, as items there are more prone to shifting and spilling.
Cleaning a Chest Freezer
Chest freezers are known for their deep, wide design, which makes them excellent for bulk storage. However, their depth can make cleaning a bit more challenging. You might need to physically climb inside if you are short or if it is a very large model. Be careful if you do this. Many chest freezers come with removable baskets at the top. These are great for organizing and should be cleaned separately. When defrosting a chest freezer, be prepared for a significant amount of water. Ensure you have plenty of towels and perhaps a wet-dry vacuum ready to collect the meltwater. Their design also means cold air sinks, making them very efficient at holding temperature. This also means ice buildup can be more substantial on the bottom and sides.
Cleaning a Deep Freezer
A deep freezer is essentially a larger version of a chest freezer. The cleaning process is very similar but scaled up. Due to their immense storage capacity, defrosting can take a much longer time. You might need to plan this cleaning for a day when you are sure you can dedicate several hours. Consider doing it during cooler months to help keep your frozen food safe outside. The large volume means more ice buildup and potentially more water to manage during defrosting. As with regular chest freezers, use baskets and good organization to make food retrieval easier. This also helps during future cleanings by keeping smaller items from getting lost at the bottom.
Preventive Measures: Keeping Your Freezer Clean Longer
Once your freezer is sparkling clean, you want to keep it that way for as long as possible. Implementing a few simple preventive measures can drastically reduce the frequency of deep cleaning. These habits help maintain hygiene and efficiency.
First, establish a “no spills allowed” policy. If something spills, wipe it up immediately, even if it is frozen. A quick wipe-down prevents sticky messes from hardening and becoming a major chore later. Use freezer-safe containers and bags that seal tightly. This prevents leaks from food items and also helps to prevent freezer burn. Containers with snap-on lids are ideal for liquids and sauces. Always label your food items with the date and content. This helps you rotate your stock and use older items first. It also prevents mystery meals that sit in the back of the freezer for too long.
Regular, light maintenance is another key. Every few weeks, quickly check your freezer for any new ice buildup, especially around the door seal. If you see minor frost, you can often scrape it away with a plastic scraper before it becomes a big problem. Also, do a quick inventory check periodically. This helps you identify items that are near their expiry or need to be used soon. This proactive approach prevents food waste and keeps the freezer from becoming overcrowded. An overcrowded freezer works less efficiently. By adopting these habits, your freezer will remain cleaner, more organized, and more energy-efficient between deep cleanings. This also contributes to how to clean your fridge more efficiently, as the principles are similar.
Troubleshooting Common Freezer Cleaning Challenges
Even with the best planning, you might encounter a few common challenges when cleaning your freezer. Knowing how to address these issues can make the process smoother and more effective. Do not let these hurdles deter you from achieving a truly clean appliance.
Dealing with Excessive Ice Buildup
Excessive ice buildup is a common freezer problem. It happens when warm, humid air enters the freezer and condenses, then freezes. This often indicates a poor door seal or that the door is left open too long. To deal with the existing ice, first, try placing bowls of hot water inside the freezer, as mentioned earlier. The steam helps to loosen the ice sheets. You can also use a fan blowing directly into the freezer to speed up defrosting, but ensure it is not blowing hot air. Remember to use a plastic scraper, never metal, to gently pry off loosened ice. After defrosting, check your door gasket. If it is cracked or not sealing properly, it might need replacement. A simple paper test can check the seal: close the door on a piece of paper. If you can pull the paper out easily, the seal needs attention.
Eliminating Mold and Mildew
Mold and mildew can appear in freezers, especially if they have been turned off for a while or if there is persistent moisture. These fungi not only look unpleasant but also pose health risks. To eliminate mold, use a solution of one part white vinegar to one part water. Spray it directly onto the moldy areas. Let the solution sit for 10-15 minutes. Vinegar is a natural mold killer. Then, scrub vigorously with a stiff brush or an old toothbrush for tight spots. For tough mold, you might need to apply the vinegar solution multiple times. After scrubbing, wipe down the area with a clean, damp cloth to remove all traces of mold and cleaning solution. Ensure the freezer is completely dry before restocking. Good ventilation during and after cleaning is important when dealing with mold.
Safety First: Essential Tips When Cleaning Your Freezer
Safety should always be your top priority when cleaning any appliance, especially one connected to electricity and potentially dealing with water. Following these safety tips protects you and your appliance. Never cut corners when it comes to safety.
First and foremost, always unplug your freezer before you start any cleaning, especially when dealing with defrosting or cleaning coils. This eliminates the risk of electric shock. Do not just turn it off; pull the plug from the wall outlet. This ensures no power can reach the unit while you are working. Next, be mindful of slippery surfaces. As ice melts, water will collect on the floor around the freezer. Place old towels or absorbent mats on the floor to catch the water. Mop up any spills immediately to prevent slips and falls. This is particularly important if your freezer is in a high-traffic area.
When using cleaning solutions, even natural ones, ensure good ventilation. Open windows and doors in the area. This helps to dissipate any fumes and keeps the air fresh. If you are sensitive to cleaning agents, wear gloves and consider a mask. Never mix different cleaning products, especially those containing bleach and ammonia, as they can create dangerous fumes. When it comes to the freezer’s internal components, avoid using abrasive cleaners or sharp objects. These can scratch or puncture the freezer lining, leading to damage or refrigerant leaks. Use soft cloths and plastic scrapers. Finally, ensure the freezer is completely dry before plugging it back in. Any residual moisture can cause electrical shorts or immediate ice buildup. Following these simple safety guidelines ensures a safe and effective cleaning process for your freezer.
FAQ Section
How often should I clean my freezer?
You should deep clean your freezer at least once every six to twelve months. This helps prevent excessive ice buildup, eliminates odors, and maintains efficiency. For light maintenance, wipe up spills immediately and check for frost around the door seal monthly. Regular light cleaning reduces the need for frequent deep cleans.
What is the best natural cleaner for a freezer?
The best natural cleaner for a freezer is a mixture of equal parts white vinegar and warm water. This solution effectively sanitizes, removes grime, and neutralizes odors without harsh chemicals. For stubborn stains or strong odors, a paste made from baking soda and water works wonders.
How do I defrost my freezer quickly?
To quickly defrost your freezer, first, unplug it. Then, place bowls of hot water inside and close the door for 15-20 minutes. The steam helps melt the ice. You can also use a hairdryer on a cool, low setting, keeping it at a safe distance. Never use sharp objects to chip away ice.
Can I put food back in a slightly damp freezer?
No, you should always ensure your freezer is completely dry before putting food back in and plugging it in. Any remaining moisture will immediately freeze and form new ice buildup, undermining your cleaning efforts. Use clean, dry towels to wipe down all surfaces thoroughly.
What causes excessive ice buildup in a freezer?
Excessive ice buildup is usually caused by warm, moist air entering the freezer. This can happen if the door seal is faulty, the door is left open too long, or if hot foods are placed directly inside. Check your door gasket for cracks and ensure it seals tightly.
How can I prevent bad odors in my freezer?
To prevent bad odors, wrap all food items tightly in freezer-safe packaging to prevent odor transfer and spills. Place an open box of baking soda or activated charcoal inside the freezer to absorb any lingering smells. Also, regularly check and discard old or freezer-burned food.
Conclusion
Cleaning your freezer might seem like a daunting task, but it is a necessary part of home maintenance. By following these steps on how to clean freezer interiors and exteriors, you ensure a hygienic environment for your frozen foods. This regular upkeep not only improves food quality but also significantly boosts your appliance’s energy efficiency. A clean freezer means less waste, lower utility bills, and a more organized kitchen.
Remember the key takeaways: prepare thoroughly, use natural cleaning agents, and address both the inside and outside of your unit. Incorporating preventive measures and smart organization will keep your freezer clean and fresh for longer periods. Take the time to implement these practices. Your effort will pay off in freshness, efficiency, and peace of mind. Start today, and enjoy the benefits of a sparkling clean and well-maintained freezer!
- Freezer Cleaning
- Defrost Freezer
- Appliance Maintenance
- Food Storage Tips

Todd Martin
Senior Writer
With over 15 years of experience in home renovation and design, I started HEG to share what I’ve learned with homeowners who want to create spaces that are both beautiful and functional. I’ve always believed in a hands-on approach, and over the years, I’ve picked up practical solutions that actually work. Through HEG, I aim to make home improvement more approachable, sharing real tips that help you create a home you truly love.