· Todd Martin · Kitchen Maintenance · 25 min read
How To Clean Electric Stove Drip Pans
Sparkling Clean: How To Clean Electric Stove Drip Pans
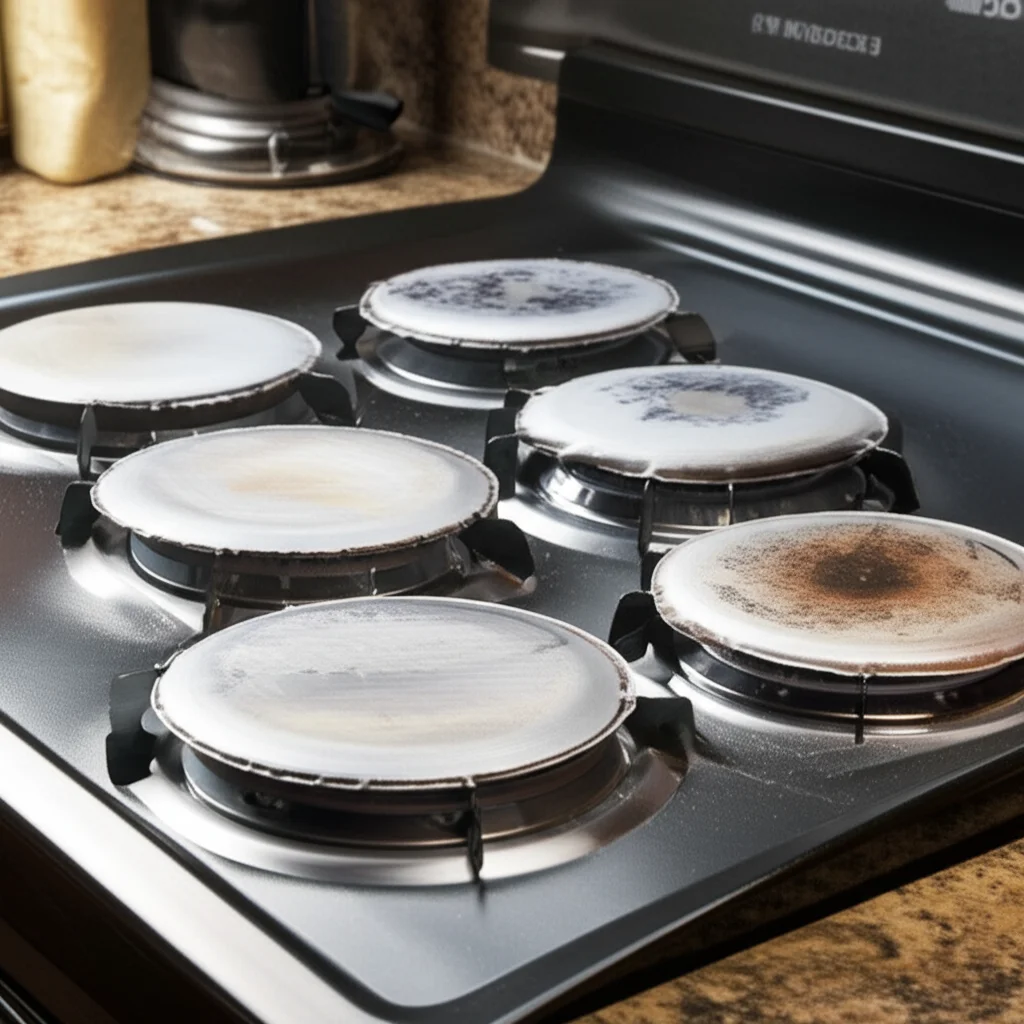
Have you ever looked at your electric stove drip pans and wished they could look new again? Those trusty metal bowls catch spills and crumbs, protecting your stove, but they often accumulate stubborn grease and burnt-on food. Cleaning these essential components can seem like a daunting task, especially when grime bakes on over time.
A clean stove not only looks better but also functions more efficiently. Dirty drip pans can affect cooking performance and even pose a fire hazard if grease builds up excessively. This article provides a comprehensive guide on how to clean electric stove drip pans effectively. We will explore various methods, from simple daily cleaning to tackling the toughest baked-on stains. Get ready to restore the shine to your kitchen centerpiece and enjoy a cleaner cooking environment.
Takeaway
- Regular Cleaning: Wipe drip pans after each use to prevent buildup.
- Soaking is Key: For tough stains, soak pans in hot, soapy water.
- Baking Soda Power: Use baking soda paste for scrubbing stubborn grease.
- Avoid Harsh Abrasives: Do not use steel wool or harsh chemicals that can scratch surfaces.
- Consider Liners: Use foil liners for easier cleanup and protection.
Electric stove drip pans benefit from regular cleaning using warm soapy water, baking soda paste for tough stains, or a commercial degreaser. For baked-on grease, overnight soaking or a combination of methods ensures a thorough clean, restoring their shine and efficiency.
The Importance of Cleaning Electric Stove Drip Pans
Keeping your electric stove drip pans clean is more than just about aesthetics. These pans, also known as burner bowls or reflector pans, play a crucial role in your stove’s overall performance and safety. They catch spills, crumbs, and grease, preventing them from dripping into the stove’s internal components. This protective function helps maintain the lifespan of your appliance.
Neglecting to clean these pans can lead to several problems. Accumulated food debris and grease can smoke and produce unpleasant odors when heated. This makes your kitchen smell bad during cooking. Over time, heavy buildup can even become a fire hazard, especially if grease ignites. Furthermore, clean drip pans reflect heat more efficiently back towards your cookware. This improves cooking performance and can even save energy. A sparkling clean stove also simply makes your kitchen a more inviting and hygienic space.
Enhancing Efficiency and Safety
Clean drip pans directly contribute to your stove’s efficiency. The reflective surface of the drip pan is designed to direct heat from the burner coil upwards towards your pots and pans. When this surface is covered in grime, its ability to reflect heat diminishes significantly. This means your stove works harder to achieve the desired cooking temperature. It also means food cooks unevenly or takes longer to heat up. Regular cleaning ensures maximum heat reflection, leading to more efficient cooking.
Safety is another critical reason to keep these pans spotless. Grease and food particles are highly flammable. As these substances accumulate and are repeatedly exposed to high heat, they can carbonize and become a fire risk. A small splatter during cooking could ignite built-up grease, potentially leading to a kitchen fire. Regularly removing these flammable residues drastically reduces this risk. This simple cleaning task provides peace of mind. Keeping your electric stove top clean extends beyond just the burners; it includes these vital drip pans for both safety and performance.
Maintaining Your Stove’s Appearance
Beyond functionality, clean drip pans significantly impact the overall appearance of your kitchen. An electric stove with grimy, stained drip pans can make even the cleanest kitchen look unkempt. Spills and burnt-on food detract from the aesthetic of your cooking space. Regular cleaning helps preserve the original look of your stove. It maintains the reflective finish of the drip pans, keeping them looking new for longer.
A well-maintained appliance contributes to a pleasant cooking environment. It makes cooking feel less like a chore and more enjoyable. People often notice a clean stove first in a kitchen. Prioritizing the cleanliness of your drip pans is a simple step. It shows care for your home and appliances. It also ensures a more pleasant cooking experience. If you are wondering how to clean stove drip pans on any stove, focusing on the electric models specifically enhances safety and performance.
Essential Tools and Solutions for Drip Pan Cleaning
Before you begin the cleaning process, gathering the right tools and solutions is crucial. Having everything on hand will make the task much more efficient and effective. You do not need fancy equipment to achieve sparkling clean drip pans. Most items are likely already in your kitchen or readily available at any grocery store. Preparing your cleaning arsenal ensures you are ready for any level of grime, from light spills to stubborn baked-on grease.
Safety should always be a priority when cleaning. Ensure you have proper ventilation, especially when using commercial cleaners. Wearing protective gloves is highly recommended. Gloves protect your hands from harsh chemicals and abrasive scrubbing. They also provide a better grip, which helps with the cleaning process. A well-prepared approach sets the stage for success.
Basic Cleaning Supplies
For everyday cleaning and light grime, a few simple items are all you need. These are standard household cleaning staples. They are gentle enough for regular use but effective against fresh spills. Warm water is the base for many cleaning solutions. Dish soap, preferably a degreasing formula, helps break down oily residues.
- Dish Soap: A good quality dish soap, especially one with degreasing properties, is excellent for cutting through fresh grease and food spills.
- Warm Water: Essential for soaking and rinsing. Hot water helps loosen grime more effectively than cold water.
- Soft Sponge or Microfiber Cloth: Ideal for wiping and light scrubbing without scratching the drip pan surface.
- Rubber Gloves: Protect your hands from cleaning solutions and stubborn grime.
- Old Towels or Paper Towels: Useful for wiping up excess water and drying the pans.
These items form the foundation of your drip pan cleaning routine. They are perfect for routine maintenance. They also serve as the first step in tackling more challenging stains. Many people wonder how to clean drip pans on stove effectively. Starting with these basics is always a good approach.
Natural Cleaning Powerhouses
For more stubborn stains and baked-on grease, natural cleaners like baking soda and vinegar are incredibly effective. They are non-toxic, eco-friendly, and surprisingly powerful. Baking soda acts as a mild abrasive, scrubbing away grime without scratching. Vinegar helps dissolve mineral deposits and cut through grease. When combined, they create a fizzy reaction that lifts stubborn dirt.
- Baking Soda: A versatile cleaner and deodorizer. Its gentle abrasive texture makes it perfect for scrubbing away baked-on food without damaging surfaces.
- White Vinegar: An excellent degreaser and deodorizer. It helps dissolve tough stains and can be used for rinsing to remove residues.
- Nylon Scrub Brush or Non-Scratch Scouring Pad: For tougher scrubbing jobs where a sponge isn’t enough. Ensure it is non-scratch to protect the pan’s finish.
- Spray Bottle: Handy for applying a vinegar solution evenly.
These natural solutions provide a powerful alternative to harsh chemicals. They are safe for most surfaces and leave no chemical residues. You can achieve fantastic results with just these two ingredients. For instance, how to clean baked on grease from pans often involves a baking soda and vinegar solution.
Commercial Cleaning Products (Optional)
In cases of extreme buildup or if you prefer a quicker solution, commercial degreasers are an option. Always choose products specifically designed for kitchen appliances. Read the instructions carefully before use. Some products are highly concentrated and require dilution. Always test a small, inconspicuous area first.
- Heavy-Duty Degreaser: For severely burnt-on grease that natural methods struggle with. Look for oven cleaner or dedicated stove-top degreasers.
- Plastic Scraper or Old Credit Card: Useful for gently scraping off thick, hardened layers of grime without damaging the pan. Avoid metal scrapers.
- Steel Wool (Use with caution): Only use very fine steel wool (000 or 0000 grade) on stainless steel or enamel drip pans, and with extreme caution. It can easily scratch finishes, so it is often best to avoid it on chrome or painted surfaces. For how to clean metal pans with baked-on grease, a degreaser and plastic scraper are generally safer.
Remember to ventilate your kitchen well when using commercial products. Always follow the manufacturer’s safety guidelines. While effective, these products are often harsher on both your hands and the environment. Weigh your options based on the severity of the mess and your personal preferences.
Step-by-Step Guide to Cleaning Electric Stove Drip Pans
Cleaning electric stove drip pans involves a systematic approach to effectively remove grease and grime. This process is designed to be thorough yet manageable, breaking down the task into simple steps. Proper technique helps preserve the pans’ finish and ensures optimal cleanliness. Always start by ensuring your stove is cool and unplugged for safety.
Before you begin, remove the drip pans and burner coils from the stove. Most electric stoves have removable drip pans that lift right out. Gently lift the burner coil first, then the pan underneath. Set the coils aside carefully, avoiding bending them. They do not need cleaning as frequently as the pans. Now you have the drip pans ready for cleaning.
Initial Scrape and Soak
The first step tackles the loosely attached debris and prepares the pans for deeper cleaning. Do not skip this step, as it makes subsequent cleaning much easier. Hardened food and grease can be difficult to scrub off directly. Soaking helps to loosen these stubborn layers, allowing for easier removal.
- Remove Loose Debris: Use an old plastic scraper, a stiff brush, or even a paper towel to scrape off any large, loose food particles or solidified grease. Dispose of these directly into the trash. Avoid pushing them down the drain.
- Prepare for Soaking: Fill a sink or a large basin with very hot water. Add a generous amount of dish soap, creating a good lather. The hotter the water, the better it will penetrate and loosen the grime.
- Soak the Drip Pans: Submerge the electric stove drip pans completely in the hot, soapy water. For best results, let them soak for at least 30 minutes. If the pans have severe baked-on grease, consider an overnight soak. This prolonged soaking time is key to breaking down stubborn grime. Soaking is a primary method when you are looking for how to clean burner pans effectively.
This initial soak is crucial for softening the baked-on layers. It allows the cleaning agents to work their magic more effectively. You will notice the water changing color as grime begins to lift off the pans.
Scrubbing Away the Grime
After soaking, the softened grime is ready for scrubbing. This is where your elbow grease comes in. Choose the right scrubbing tool to avoid damaging the drip pans while still being effective. A non-abrasive sponge or brush is usually sufficient for most messes.
- Drain and Inspect: Carefully drain the dirty water. Examine each drip pan to assess how much grime has loosened. Most of the surface residue should now be soft and pliable.
- Apply Cleaning Agent: For general cleaning, use a fresh squirt of dish soap directly onto a damp sponge. For tougher spots, create a paste with baking soda and a little water. Apply this paste directly onto the stained areas.
- Scrub Thoroughly: Using your sponge, non-scratch scouring pad, or nylon brush, scrub the drip pans in circular motions. Pay extra attention to areas with caked-on food or grease. The baking soda paste provides gentle abrasion to lift stubborn stains without scratching.
- Rinse and Repeat: Rinse the pans thoroughly under warm running water. Inspect them closely. If any grime remains, reapply your cleaning solution or baking soda paste and repeat the scrubbing process. Do not be afraid to dedicate time to this step. You want to remove as much grime as possible.
This step is often the most labor-intensive. However, it is essential for achieving a truly clean finish. The goal is to remove all visible residue, leaving the surface smooth and clean.
Addressing Stubborn Baked-On Stains
Sometimes, regular scrubbing is not enough for years of accumulated baked-on grease. For these persistent stains, more targeted methods are required. These techniques use stronger agents or longer contact times to break down the most resilient grime. Patience is often the best tool here.
- Baking Soda and Vinegar Power: After soaking and scrubbing, if stubborn spots remain, sprinkle a generous amount of baking soda directly onto the wet drip pan. Then, spray or pour white vinegar over the baking soda. It will fizz vigorously. Let this mixture sit for 15-30 minutes. The fizzing action helps lift the baked-on particles. Afterwards, scrub with a non-scratch pad and rinse well. This method is highly effective for how to clean baked on grease off pans without harsh chemicals.
- Commercial Degreaser (for severe cases): For extremely heavy buildup, a commercial oven cleaner or heavy-duty degreaser can be used. Always follow the product instructions carefully. Work in a well-ventilated area. Spray the cleaner on the pan, let it sit for the recommended time (usually 10-30 minutes), and then scrub thoroughly with a non-scratch pad. Rinse multiple times to remove all chemical residue. Be cautious, as some strong cleaners can damage certain finishes if left on too long.
- Boiling Method (for smaller pans): If your drip pans are small enough, you can try boiling them. Place the pans in a large pot, cover them with water, add a few tablespoons of baking soda and a squirt of dish soap. Boil for 15-30 minutes. The boiling water and cleaning agents will help loosen and soften the baked-on grime significantly. Allow to cool, then scrub and rinse.
No matter the method, remember to wear gloves throughout the process. Be persistent; some stains may require multiple treatments. The effort is worth it for perfectly clean drip pans.
Advanced Techniques and Solutions for Deep Cleaning
While basic soap, water, baking soda, and vinegar work wonders for most cleaning tasks, some electric stove drip pans present a greater challenge. Years of neglect or particularly stubborn, carbonized grease can feel impossible to remove. This section explores advanced techniques and solutions specifically designed for deep cleaning these difficult cases. These methods often involve stronger agents or longer processing times. Always exercise caution and proper ventilation when using more powerful cleaners.
The goal is to restore the drip pans to their original reflective shine. This helps them perform their heat-reflecting function optimally. It also significantly improves the overall appearance of your stove. Do not give up on heavily soiled pans; with the right approach, they can often be salvaged.
Harnessing Ammonia for Tough Stains
Ammonia is a powerful degreaser that can work wonders on heavily caked-on grease, but it requires careful handling. It is the chemical cleaner of last resort for many. The fumes are strong, so ventilation is absolutely critical. Never mix ammonia with bleach, as this creates dangerous toxic gases.
- Preparation: Place your electric stove drip pans in a large, heavy-duty plastic bag. A sturdy trash bag works well. Ensure the bag has no holes.
- Add Ammonia: Pour about ¼ to ½ cup of undiluted ammonia into the bag with the drip pans. Do not submerge the pans in liquid ammonia; the fumes are what do the work. The goal is to create a vapor-filled environment.
- Seal and Let Sit: Seal the bag tightly, expelling as much air as possible. Place the bag outdoors, in a garage, or in a well-ventilated utility room. Let the pans sit in the ammonia fumes for several hours, or preferably overnight (6-12 hours). The ammonia fumes will soften and loosen even the most stubborn, baked-on grease.
- Remove and Clean: The next day, wearing gloves, open the bag outdoors or in a very well-ventilated area. Carefully remove the drip pans. The grease should now be significantly softened. Scrub the pans with a non-scratch scouring pad or brush and hot, soapy water. The grime should come off much more easily.
- Rinse Thoroughly: Rinse the pans multiple times under running water to ensure all ammonia residue is gone. Dry completely before returning them to the stove. This method is highly effective for how to clean grease off pans when it’s truly baked on.
This ammonia method is a very effective solution for deeply ingrained dirt. Its fumes break down carbonized residues that other cleaners struggle with.
Utilizing Oven Cleaner (Last Resort)
While typically used for ovens, some oven cleaners can be highly effective on electric stove drip pans. This is often considered a last resort due to the aggressive nature of these chemicals. They contain strong lye (sodium hydroxide) which can dissolve organic material. Always use with extreme caution.
- Safety First: Wear heavy-duty rubber gloves and safety glasses. Ensure the area is exceptionally well-ventilated. Consider doing this outdoors if possible.
- Application: Place the drip pans on old newspapers or cardboard to protect your work surface. Spray the oven cleaner evenly over the entire surface of the drip pans. Do not spray near food or surfaces where food is prepared.
- Waiting Period: Allow the oven cleaner to work for the time specified on the product label. This can range from 20 minutes to several hours, depending on the product and the severity of the grime. For very old, stubborn grime, some products suggest leaving it overnight.
- Scrub and Rinse: Once the time is up, use a non-scratch scouring pad or a plastic scraper to remove the loosened grime. Be prepared for a thick, brown sludge. Rinse the pans meticulously under hot running water, scrubbing as you rinse, until all traces of the cleaner and grime are gone. You may need to rinse multiple times.
- Neutralize (Optional but Recommended): Some people follow up with a vinegar rinse to neutralize any remaining alkaline residue from the oven cleaner. Simply spray or wipe with white vinegar, then rinse again with water. Dry the pans completely.
Oven cleaner is potent. It can damage certain finishes, especially painted or chrome surfaces, if left on too long. Always test a small, inconspicuous area first if you are unsure. This method provides aggressive cleaning action for severe how to clean pots and pans issues, particularly baked-on grease.
The Role of Long Soaking and Agitation
Sometimes, the simplest approach, extended soaking, combined with physical agitation, can yield remarkable results without harsh chemicals. This method relies on time and the continuous softening of grime.
- Extended Soaking: Fill a large tub or sink with very hot water and a generous amount of dish soap. Submerge the drip pans for at least 8-12 hours, or even a full 24 hours. The prolonged exposure to hot, soapy water slowly breaks down the carbonized grease.
- Strategic Scrubber Use: After the extended soak, use a sturdy non-scratch brush or scouring pad. Instead of just scrubbing, try to scrape and push the loosened grime off the surface. The goal is to dislodge softened particles. For particularly difficult spots, a plastic scraper or an old credit card can help.
- Water Pressure: Use strong water pressure from your faucet to help blast away loosened debris during rinsing. A spray nozzle attachment can be very helpful here.
This method is less aggressive than chemical approaches. It requires more patience but is safer for both the user and the pan’s finish. It is an excellent choice for those who prefer to avoid strong fumes or chemicals. It also is an effective approach to learn how to clean the bottom of pans where grease typically builds up.
Restoring Shine and Preventing Future Buildup
Once you have put in the effort to clean your electric stove drip pans, the next logical step is to restore their shine and implement strategies to prevent rapid re-accumulation of grime. A clean, shiny drip pan not only looks better but also functions more efficiently by reflecting heat properly. Taking proactive steps can significantly reduce the frequency and intensity of deep cleaning sessions.
Maintaining the cleanliness of your drip pans is an ongoing process. It is much easier to prevent heavy buildup than to clean it once it is baked on. A little routine care goes a long way in preserving the appearance and functionality of your stove. Think of it as protecting your investment and simplifying your kitchen cleanup routine.
Polishing for a Flawless Finish
After deep cleaning, your drip pans might still look a bit dull, even if the grime is gone. A quick polish can bring back their original luster. This step enhances the aesthetic appeal of your stove. It also ensures maximum heat reflectivity.
- Drying is Key: Ensure the drip pans are completely dry before polishing. Any moisture can interfere with the polishing agent.
- Gentle Abrasives: For chrome or shiny metal drip pans, you can use a small amount of non-abrasive metal polish. Apply it with a soft cloth, rub gently in circular motions, and then buff to a shine with a clean, dry microfiber cloth.
- Natural Shine: For a more natural polish, a tiny dab of mineral oil or even olive oil on a paper towel can be buffed onto the cleaned pans. This creates a subtle sheen and can offer a very minor protective layer against fresh spills. Wipe off any excess immediately to avoid a sticky residue.
- Regular Wipes: After each use of your stove, once the pans are cool, a simple wipe with a damp cloth can help maintain their shine and prevent fresh spills from hardening.
Polishing makes a noticeable difference. It gives your stove a professional, well-cared-for look. This simple step completes the deep cleaning process beautifully. It reflects your attention to detail in kitchen maintenance.
Preventing Future Accumulation
The best way to deal with dirty drip pans is to prevent them from getting heavily soiled in the first place. Implementing simple habits can save you a lot of scrubbing time down the line. Proactive measures are always more efficient than reactive ones when it comes to cleaning.
- Wipe After Every Use: This is the golden rule. Once the stove and drip pans have cooled down, immediately wipe away any fresh spills, splatters, or crumbs with a damp cloth. Fresh messes are incredibly easy to clean. This prevents them from drying and baking onto the surface, which is when they become stubborn. This simple habit keeps your electric stove drip pans consistently cleaner.
- Use Drip Pan Liners: Disposable aluminum foil drip pan liners are a game-changer for easy cleanup. They are inexpensive and designed to fit perfectly into the existing drip pans. When a spill occurs, you simply remove the soiled liner and replace it with a new one. This protects your actual drip pans from ever getting dirty. It also makes cleanup incredibly fast. Ensure the liners fit snugly and do not interfere with the burner coils or elements.
- Cook Smart: Try to use pots and pans that are appropriate for the size of your burners. Overly small or large pans can lead to more spills. Avoid overfilling pots to prevent boil-overs. Using a splatter screen when frying can also significantly reduce grease splatter onto the drip pans.
- Regular Light Cleaning: Even if you use liners, occasional light cleaning of the actual drip pans is still a good idea. Every few weeks, remove the liners, wipe down the pans with warm soapy water, and then replace the liners. This prevents any minor buildup that might escape the liners. This proactive approach significantly reduces the need for aggressive deep cleaning. It saves time and effort in the long run.
By combining thorough cleaning with smart prevention strategies, you can maintain your electric stove drip pans in excellent condition with minimal effort. Your kitchen will look cleaner, and your stove will perform at its best.
Common Mistakes to Avoid When Cleaning Drip Pans
Cleaning electric stove drip pans can be straightforward, but certain practices can damage the pans or make the cleaning process more difficult. Knowing what to avoid is as important as knowing what to do. These common mistakes can lead to scratched surfaces, ineffective cleaning, or even safety hazards. Your goal is to clean the pans without compromising their integrity or your safety.
Taking a moment to understand these pitfalls can save you time, effort, and money in the long run. It ensures your drip pans remain functional and aesthetically pleasing for years to come. A little caution and knowledge go a long way in appliance care.
Using Harsh Abrasives or Tools
One of the most common and damaging mistakes is using overly abrasive materials or tools. Electric stove drip pans often have a chrome, enamel, or painted finish. These surfaces are susceptible to scratching. Scratches not only look bad but can also create rough spots where grime can stick more easily in the future.
- Avoid Steel Wool or Metal Scrapers: These are too harsh for most drip pan finishes. They will scratch and remove the reflective coating, reducing the pan’s efficiency and making it prone to rust.
- Skip Abrasive Powders (unless specifically designed): While baking soda is a gentle abrasive, other highly abrasive powders can be too aggressive. Always choose cleaners designed for delicate surfaces.
- Do Not Use Knives or Sharp Objects: Never use sharp kitchen utensils to scrape off baked-on food. This will undeniably damage the surface, leaving irreversible marks.
Instead, opt for non-scratch scouring pads, nylon brushes, plastic scrapers, or old credit cards. These tools provide enough friction to remove grime without harming the surface. Protecting the pan’s finish is crucial for its longevity and performance.
Neglecting Safety Precautions
Cleaning with chemicals, especially strong degreasers or oven cleaners, requires strict adherence to safety guidelines. Ignoring these can lead to skin irritation, respiratory issues, or even chemical burns. Your health is more important than sparkling drip pans.
- Always Wear Gloves: Protect your hands from harsh chemicals and continuous exposure to hot water and cleaning solutions.
- Ensure Proper Ventilation: When using strong cleaners or the ammonia method, always work in a well-ventilated area. Open windows, turn on extractor fans, or even consider cleaning outdoors. Inhaling fumes can be harmful.
- Never Mix Chemicals: Specifically, never mix ammonia with bleach. This combination creates highly toxic chloramine gas, which can be fatal. Always be aware of the chemicals you are using and avoid combining different types of cleaners.
- Unplug the Stove: Before removing drip pans or cleaning any part of your electric stove, always ensure it is unplugged. This eliminates any risk of electric shock. Safety should always be your top priority. Following these precautions makes the cleaning process safe and effective.
Skipping Routine Cleaning
Many people wait until their drip pans are heavily caked with baked-on grease before attempting to clean them. This makes the task much more difficult and time-consuming. Light, fresh spills are infinitely easier to remove than hardened, carbonized grime.
- Avoid Procrastination: Wipe up spills as soon as the stove cools down. Do not let food and grease sit and bake onto the pans over multiple cooking sessions.
- Lack of Regular Maintenance: Even if you use liners, regularly removing and wiping down the actual drip pans every few weeks prevents any minor buildup that might accumulate underneath or around the edges of the liners.
- Underestimating the Power of Soaking: Forcing yourself to scrub heavily without adequately soaking the pans first is a common mistake. Soaking softens the grime, making scrubbing significantly easier and less damaging. Always start with a good soak. For how to clean your stove thoroughly, regular maintenance of drip pans is critical.
By avoiding these common mistakes, you can clean your electric stove drip pans more effectively, efficiently, and safely. This ensures they remain in excellent condition and contribute positively to your kitchen’s hygiene and appearance. This also applies to how to clean your stove top more broadly.
FAQs About Cleaning Electric Stove Drip Pans
How often should I clean my electric stove drip pans?
Ideally, wipe down your electric stove drip pans after every use once they cool to prevent buildup. For a deeper clean, aim for once a week or at least every two weeks, depending on your cooking frequency. This regular maintenance prevents stubborn, baked-on grease from accumulating.
Can I put electric stove drip pans in the dishwasher?
Most electric stove drip pans are not dishwasher safe. The harsh detergents and high heat in a dishwasher can damage their chrome or enamel finish, causing discoloration, dullness, or rust. Handwashing with warm soapy water or targeted cleaning methods is always recommended to preserve their appearance and integrity.
What is the best way to remove baked-on grease from drip pans?
The best way to remove baked-on grease is to combine soaking with a gentle abrasive. Start by soaking the pans in very hot, soapy water, possibly overnight. Then, create a paste with baking soda and a little water, apply it to the grime, and let it sit before scrubbing with a non-scratch pad. For extreme cases, a controlled application of oven cleaner or ammonia fumes can be effective.
Are all electric stove drip pans interchangeable?
No, electric stove drip pans are not universally interchangeable. They come in various sizes and shapes to fit specific burner diameters and stove models. You need to measure your existing pans or check your stove’s manual to ensure you purchase the correct replacement size if you ever need new ones.
Can I use aluminum foil as a permanent drip pan liner?
You can use aluminum foil as a temporary, disposable liner for easier cleanup. However, it is not a permanent solution and should be replaced regularly. Ensure the foil fits snugly and does not cover the burner’s temperature sensor, which could affect cooking performance or create a fire hazard.
How do I prevent drip pans from getting dirty quickly?
Preventative measures are key. Wipe up spills immediately after cooking and once the stove cools down. Consider using disposable aluminum foil drip pan liners; they catch spills and can be easily replaced. Also, use appropriately sized cookware and avoid overfilling pots to minimize boil-overs and splatters.
- electric stove
- drip pans
- cleaning hacks
- grease removal
- stove maintenance

Todd Martin
Senior Writer
With over 15 years of experience in home renovation and design, I started HEG to share what I’ve learned with homeowners who want to create spaces that are both beautiful and functional. I’ve always believed in a hands-on approach, and over the years, I’ve picked up practical solutions that actually work. Through HEG, I aim to make home improvement more approachable, sharing real tips that help you create a home you truly love.