· Todd Martin · Personal Care · 20 min read
How To Clean Electric Razor

Clean Electric Razor: A Comprehensive Guide
Do you want your electric razor to last longer? Keeping it clean is key. A dirty razor can cause skin irritation. It also performs poorly over time. Learning how to clean electric razor parts correctly keeps your shaves smooth. This guide shows you simple steps. You will learn about daily, weekly, and deep cleaning methods. We cover the tools you need and important maintenance tips.
Takeaway
To ensure your electric razor performs well and stays hygienic:
- Perform a quick rinse after every shave.
- Conduct a thorough deep clean weekly, disassembling the head.
- Lubricate the blades regularly to reduce friction and wear.
- Replace cutting components as recommended by the manufacturer.
- Store your razor properly to keep it dry and protected.
Electric razors require regular cleaning to remove hair, skin cells, and oil buildup. This prevents bacterial growth, maintains sharp cutting performance, and extends the device’s overall lifespan. Both simple daily rinsing and a deeper weekly clean are crucial for hygiene and shaving efficiency.
Why Cleaning Your Electric Razor Matters
Cleaning your electric razor is not just about keeping it shiny. It is about hygiene and performance. A clean razor provides a better shave. It also protects your skin from issues. We will look at why cleaning is so important.
Hygiene and Skin Health
Think about what an electric razor collects. It gathers tiny hairs and dead skin cells. It also collects natural oils from your face. If these build up, bacteria can grow. Shaving with a dirty razor can transfer these germs to your skin. This can lead to rashes, irritation, or even infections. Keeping it clean ensures a fresh start every time you shave. This simple step protects your skin.
A dirty razor can also cause ingrown hairs. Clogged blades pull at hairs instead of cutting them cleanly. This damages the hair follicle. It increases the chance of hairs growing back into the skin. Regular cleaning removes these blockages. It allows the blades to glide smoothly. This gives you a closer and healthier shave. Your skin will feel better and look clearer.
Performance and Efficiency
An electric razor works by moving blades rapidly. Hair and debris can slow these blades down. This makes the motor work harder. A razor with clogged heads does not cut hair efficiently. It might pull or tug on your stubble. This can be very uncomfortable. It also means you need more passes to get a smooth shave.
Cleaning removes the obstacles that hinder performance. When the blades are clear, they move freely. This results in a faster, closer shave. You will notice the difference immediately. Your razor will glide effortlessly across your skin. It will cut hair effectively on the first pass. This saves you time and reduces skin irritation.
Extending Lifespan
Electric razors are an investment. You want them to last a long time. Dirt and hair buildup cause wear and tear on the internal parts. The motor strains when blades are clogged. This can shorten the motor’s life. Grime also dulls the cutting elements faster. Dull blades mean you need to replace parts more often. This adds to your costs.
Proper cleaning prevents premature wear. It keeps the motor running smoothly. It maintains the sharpness of the blades. Regular maintenance extends the life of your razor. It ensures you get the most value from your purchase. Treat your electric razor like any other important appliance you want to last, much like you would perform how to clean an electric kettle to ensure its longevity and performance. A well-cared-for razor will serve you for years.
Tools and Supplies You Need
Before you start cleaning your electric razor, gather your tools. Having everything ready makes the process easy. You probably have most of these items at home. Some are essential, while others are optional.
Essential Items
You do not need many special tools for basic cleaning. These are the items you will use most often. They help remove hair and grime effectively. Using the right tools protects your razor.
- Small cleaning brush: Most electric razors come with a tiny brush. This brush is perfect for sweeping away loose hairs. It reaches into small crevices. If you lost yours, a soft toothbrush works too. Make sure it is dry and clean.
- Running water (for wet/dry models): Many modern electric razors are waterproof. You can rinse them directly under the tap. This is the fastest way to clear hair. Always check your razor’s manual first. Ensure your model is safe for water exposure.
- Mild hand soap or dish soap: A small amount of soap helps break down oils. It cleans the cutting elements thoroughly. Use a gentle, non-abrasive soap. Avoid harsh detergents. These can damage the razor’s finish or internal parts.
- Lint-free cloth or towel: After cleaning, you need to dry your razor. A lint-free cloth prevents tiny fibers from sticking to parts. This ensures no new debris enters the mechanism. It also prevents water spots.
- Lubricating oil (razor oil): This is very important for blade health. After washing, blades can lose their protective oil. A special razor oil prevents friction. It keeps the blades moving smoothly. This extends their life. It also ensures a comfortable shave.
Optional Cleaning Solutions
Sometimes, you might want extra cleaning power. Or you might have stubborn buildup. These optional solutions can help. They are not for every cleaning session. Use them when needed for a deeper cleanse.
- Specialized razor cleaning spray/solution: Some brands offer their own cleaning solutions. These are designed for specific razor models. They often include lubricants. They can sanitize and clean at the same time. These are convenient but not always necessary.
- Rubbing alcohol (for sanitizing): Alcohol can kill bacteria and evaporate quickly. You can use it sparingly to sanitize blades. Do not soak plastic parts in alcohol. It can dry them out or cause damage. Always check your razor’s material first.
- Compressed air (for stubborn dry debris): If you have a dry-only razor, water is not an option. Compressed air can blast away stubborn hairs. It is useful for reaching areas the brush cannot. Hold the can upright to avoid liquid propellant.
- Warm water and vinegar solution: For general cleaning of removable parts, a dilute vinegar solution can work. Vinegar helps dissolve mineral buildup and acts as a mild disinfectant. This is a common household cleaning agent. You might use it for other items, like when you learn how to clean bathroom with vinegar. Just make sure to rinse parts thoroughly with plain water afterward.
Daily Quick Clean for Electric Razors
A quick clean after each shave is simple. It takes very little time. This daily routine prevents hair buildup. It keeps your razor ready for the next use. The method depends on your razor type.
For Wet/Dry Razors
Many modern electric razors are designed for wet or dry use. They are often waterproof. This makes daily cleaning very easy. You can rinse them under the tap. This is the most common and effective daily method.
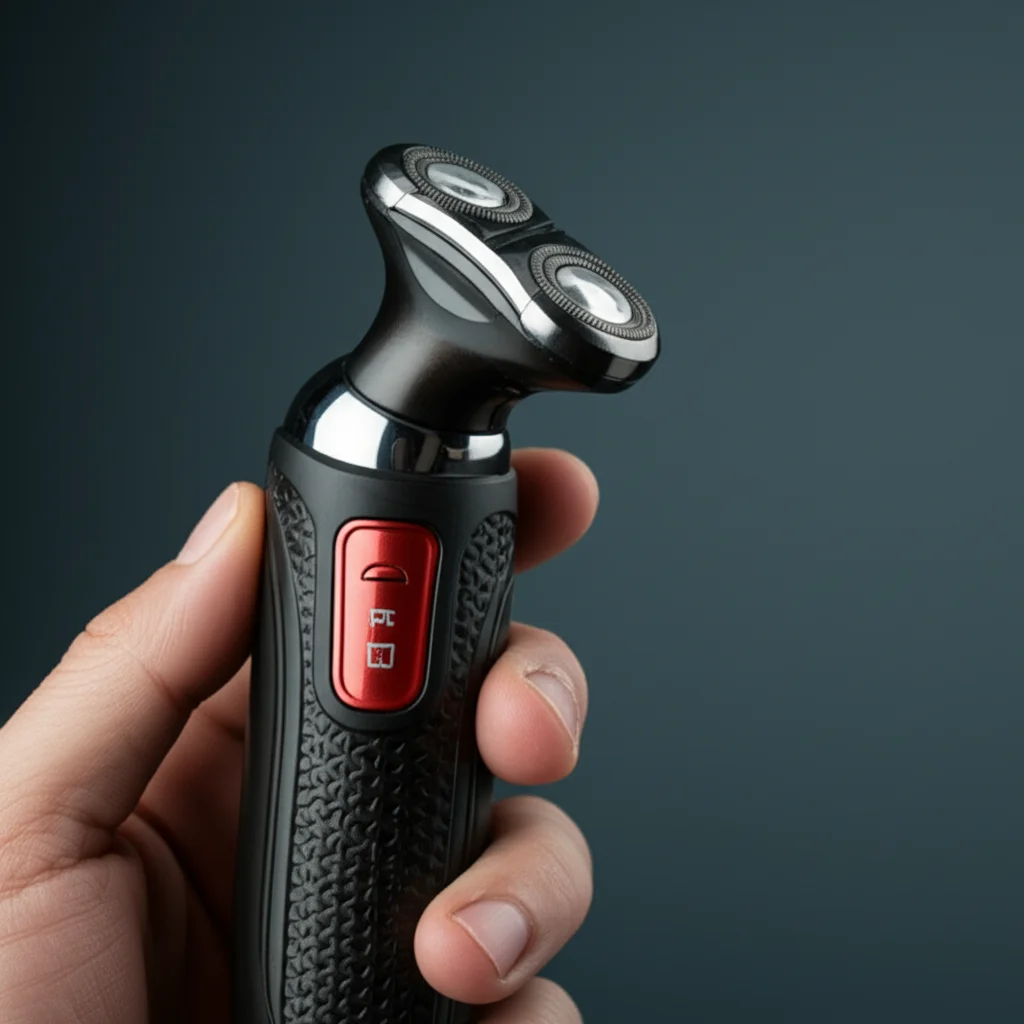
- Turn off and unplug the razor: Safety first. Always ensure your razor is off. Disconnect it from any power source. Never clean a plugged-in razor. This prevents accidental activation. It also protects you from electric shock.
- Remove the shaver head: Gently detach the head assembly. This usually involves pressing a release button. Some heads simply pop off. Refer to your razor’s manual if you are unsure. Removing the head exposes the cutting elements.
- Rinse the head and cutters under warm water: Place the detached head under running warm water. Let the water flow through the foil or rotary cutters. This washes away loose hairs and skin particles. You can also rinse the razor body if it is fully waterproof. Ensure the water pressure is gentle. Too much force can damage delicate parts.
- Shake off excess water: Give the head a few gentle shakes. This removes most of the water. Avoid harsh shaking. It could damage the components. You want to remove as much moisture as possible.
- Let parts air dry completely: Place the head and body on a clean towel. Let them air dry. This is very important. Putting a wet razor back together traps moisture. This can lead to mildew or corrosion. Ensure all parts are bone dry before reassembly. This might take a few hours.
For Dry-Only Razors
Some electric razors are not waterproof. You cannot rinse them under water. These models require a different daily cleaning approach. It usually involves brushing away debris.
- Turn off and unplug the razor: As with wet/dry models, safety is paramount. Make sure your razor is off. Disconnect it from any power outlet. This prevents any accidents during cleaning.
- Remove the shaver head: Carefully detach the head. This step is similar to wet/dry models. Accessing the cutting elements is crucial for cleaning. Consult your manual if you have difficulty.
- Brush away loose hairs: Use the small cleaning brush that came with your razor. Gently brush the inside of the shaver head. Sweep away all trapped hairs. Brush the cutting elements too. Ensure you remove all visible debris. Pay attention to corners and edges. These areas often collect more hair.
- Tap out remaining debris: Hold the shaver head over a waste bin. Gently tap it against the bin. This helps dislodge any stubborn hair particles. You might be surprised how much falls out. Repeat this a few times until no more debris comes out.
- Do not use water: This is the most critical point for dry-only razors. Water can damage the internal electronics. It can also cause rust on metal parts. Stick to dry brushing and tapping. Never submerge or rinse a dry-only model.
Weekly Deep Cleaning Methods
A weekly deep clean goes beyond daily rinsing. It involves disassembling more parts. This ensures thorough removal of buildup. It also includes lubrication. This keeps your razor in top condition.
Disassembling Your Razor
To deep clean, you need to take your razor apart. This allows you to reach hidden areas. Each razor model is slightly different. Always consult your razor’s instruction manual for specific disassembly steps.
- Turn off and unplug: Safety first is a constant rule. Ensure the razor is completely off. Unplug it from the wall. This prevents any accidental power-up.
- Remove the outer foil or rotary cap: This is the first main part to remove. For foil razors, it is the metal screen. For rotary razors, it is the cap covering the circular cutters. Gently unclip or twist it off.
- Remove the inner cutting blades/blocks: These are the actual cutting elements. For foil razors, these are usually a single blade block. For rotary razors, there are typically three individual cutters. They often lift straight out. Be careful not to drop them. Keep the individual rotary cutters with their corresponding screens. They wear together as a pair. Mixing them can reduce performance.
- Inspect for visible damage: While disassembled, check for any nicks or cracks. Look at the foils and blades. Damaged parts can irritate skin. They can also affect shaving quality. Note any parts that need replacement.
Rinsing and Brushing
Once disassembled, you can clean each part individually. This ensures no hair or grime remains. This step is crucial for both hygiene and performance.
- Rinse foil screens and rotary caps: If your razor is waterproof, rinse these parts under warm running water. Use a little mild hand soap. Gently rub the parts with your fingers. This removes oils and residue. Rinse thoroughly until no soap remains.
- Brush inner blades and cutter blocks: For inner blades, use your small cleaning brush. Carefully brush away all hair and debris. Focus on the cutting edges. For dry-only models, this is your primary cleaning method. For wet models, you can rinse these too, but a brush helps dislodge stubborn material.
- Clean the shaver body: Use a damp cloth to wipe the body of the razor. Remove any surface dirt or hair. For non-waterproof models, avoid getting water near the charging port. For waterproof models, you can rinse the body briefly.
- Rinse thoroughly (if applicable): After scrubbing with soap, rinse all parts under clean warm water. Make sure no soap residue is left. Soap can leave a film. This film can attract more dirt over time.
- Air dry completely: Lay all parts on a clean, dry towel. Allow them to air dry fully. This is perhaps the most critical step. Moisture encourages mold and rust. Ensure every component is dry before reassembly. This may take several hours. You can leave them overnight.
Using Cleaning Solutions
Sometimes, water and a brush are not enough. Cleaning solutions can offer a deeper clean. They can also sanitize parts. This is especially helpful if you shave daily.
- Manufacturer-specific solutions: Many electric razor brands sell their own cleaning solutions. These are often used with cleaning stations. Follow the product instructions carefully. They are designed for your specific razor.
- DIY cleaning bath: You can create a simple cleaning bath. Mix warm water with a few drops of mild dish soap. Submerge the removable cutting elements (foils, cutters) in the solution. Let them soak for 5-10 minutes. This helps loosen stubborn grime. After soaking, brush and rinse thoroughly. Always ensure your razor parts are safe for this type of soaking.
- Alcohol wipe (for sanitizing): After cleaning, you can gently wipe the cutting surfaces with rubbing alcohol. Alcohol evaporates quickly. It helps sanitize the blades. Do not use alcohol on plastic parts. It can cause them to become brittle. Always test on a small, hidden area first if unsure. Remember that general cleaning principles can apply to various parts of your home, for example, just as you might learn how to clean stainless steel appliances to keep them pristine, regular use of appropriate cleaners will keep your razor shining.
Lubricating Blades
Lubrication is often overlooked. But it is vital for razor performance. It reduces friction. This makes the blades run smoother. It also reduces wear and tear.
- Apply razor oil: After parts are completely dry, apply a drop or two of special razor oil. Place the oil on the cutter block and foil/rotary heads. A little goes a long way. Do not use too much. Excess oil can attract dust.
- Run the razor briefly: Reassemble the razor. Turn it on for about 10-20 seconds. This helps distribute the oil evenly. The oil gets into all the moving parts. You might hear a smoother sound. This indicates proper lubrication.
- Wipe off excess oil: Use a clean, lint-free cloth. Wipe away any oil that appears on the outside. Excess oil on the razor body can feel greasy. It can also collect dust. This simple step ensures maximum efficiency. Lubrication extends blade life. It maintains a comfortable shave.
Specific Cleaning for Rotary vs. Foil Razors
Electric razors come in two main types: rotary and foil. Each type has a slightly different design. This means their cleaning methods have minor variations. Understanding these differences helps you clean effectively.
Cleaning Rotary Razors
Rotary razors have three or more circular cutting heads. These heads typically flex. They are designed to follow facial contours. Cleaning them involves careful attention to each circular cutter.
- Open the head assembly: Most rotary razors have a hinged head. You press a button to flip it open. This exposes the individual circular cutters. Some older models might require twisting off a top ring.
- Remove the retaining frame: Often, a plastic frame holds the cutters in place. Gently lift or unclip this frame. This allows you to access each cutter and its guard.
- Separate cutters from guards (carefully): Each cutter sits within a matching guard. It is crucial to keep these pairs together. They wear down as a set. If you mix them up, your razor might not shave as well. Place them in a small tray or in order.
- Brush and rinse each part: Use the cleaning brush to sweep away hair from each cutter and guard. For waterproof models, rinse them under warm water. You can use a tiny drop of liquid soap to cut through oils. Rinse thoroughly. Ensure all soap is gone.
- Air dry completely: Lay all cutters, guards, and the retaining frame on a clean towel. Let them air dry fully. This is essential to prevent rust and mildew. Do not reassemble until everything is dry.
- Reassemble and lubricate: Once dry, place each cutter back into its matching guard. Insert them into the retaining frame. Snap the frame back into the razor head. Apply a drop of razor oil to each cutter. Run the razor for a few seconds to spread the oil. This step is critical for smooth operation.
Cleaning Foil Razors
Foil razors have a straight, perforated metal screen. Underneath this foil, oscillating blades move side to side. Cleaning foil razors focuses on both the foil screen and the blade block.
- Remove the foil head: The entire foil head assembly usually detaches from the razor body. This might be a button release or a simple pull-off. Be gentle. The foil screen is delicate.
- Remove the inner cutter block: Beneath the foil screen, you will find the inner cutter block. This is often one long piece with multiple blades. It usually lifts straight out. Handle it carefully.
- Clean the foil screen: For waterproof models, rinse the foil screen under warm running water. You can add a drop of mild soap. Gently tap the screen to dislodge hair. Avoid scrubbing the foil with a brush or cloth. The foil is very thin and can be damaged easily. If you have a dry-only foil razor, gently tap the foil to remove hair. You can use compressed air for stubborn spots.
- Clean the inner cutter block: Brush away hair from the inner cutter block. For waterproof models, you can rinse it. If you use soap, rinse thoroughly. Ensure all hair is gone from between the blades. These are the main cutting elements.
- Clean the razor body: Wipe the razor body with a damp cloth. Make sure to clean the area where the foil head connects. Hair can collect here. Just as a hair brush needs cleaning to remove trapped hair for effective use, your electric razor parts require thorough cleaning.
- Air dry all parts: Place the foil screen and cutter block on a clean towel. Let them air dry completely. Do not rush this step. Trapped moisture can damage the components.
- Reassemble and lubricate: Once dry, place the cutter block back into the razor body. Attach the foil screen securely. Apply a drop of razor oil to the foil and cutter. Run the razor briefly to distribute the oil. This keeps the blades moving smoothly against the foil.
Advanced Maintenance Tips
Beyond regular cleaning, some advanced practices help extend your electric razor’s life. These tips focus on preventing issues. They also ensure your razor always performs at its best. Taking these extra steps will save you money and frustration.
Blade Replacement Schedule
Razor blades do not last forever. They dull over time. Dull blades pull hair and irritate skin. This is true for both rotary cutters and foil shaver blocks. Replacing them regularly is key.
- Follow manufacturer recommendations: Most manufacturers provide a replacement schedule. For foil razors, the foil and cutter block often need replacing every 12-18 months. Rotary cutters typically last 18-24 months. Check your specific model’s manual. This guidance is usually the most accurate.
- Observe signs of wear: Even if not at the recommended interval, watch for signs. If your shaves are less close, uncomfortable, or take longer, it might be time. Visible damage to the foil or nicks on the cutters also means replacement. Do not wait for complete failure.
- Purchase genuine parts: Always buy official replacement parts. Generic versions might not fit perfectly. They might not perform as well. This can reduce your razor’s efficiency. It can also cause damage. Genuine parts ensure your razor operates as designed. Replacing parts is an investment in your comfort. It is also an investment in your razor’s longevity.
Storing Your Electric Razor
Proper storage protects your razor between uses. It keeps it clean and dry. It also prevents accidental damage. Where and how you store it matters.
- Keep it dry: Never store your razor in a damp environment. A humid bathroom counter can encourage mildew or rust. After cleaning and drying, store it in a dry place. A drawer or cabinet is often ideal.
- Use the protective cap: Most electric razors come with a plastic protective cap. Always use it. This cap shields the delicate cutting elements. It prevents dust and debris from settling on the blades. It also protects the blades from accidental impact. This is especially important if you travel with your razor.
- Store upright or in charging stand: If your razor has a charging stand, use it. This keeps the razor upright. It allows any remaining moisture to drain away. It also keeps it ready for use. If no stand, store it in a way that allows air circulation. This helps prevent moisture buildup. Proper storage is a simple but effective way to maintain your razor. Just like maintaining other electric household appliances, such as regularly checking the state of your electric stove top and ensuring it’s clean to avoid future problems, storing your razor correctly is a preventative measure.
Avoiding Common Cleaning Mistakes
Knowing what not to do is as important as knowing what to do. Some common mistakes can damage your razor. They can shorten its lifespan. Avoid these pitfalls to keep your razor healthy.
- Using abrasive cleaners: Never use harsh chemicals or abrasive scrubs. These can scratch or corrode the delicate parts. Bleach, ammonia-based cleaners, or scouring powders are too strong. Stick to mild soap or specialized razor cleaners.
- Washing non-waterproof razors: This is a major mistake. Submerging a dry-only razor in water will damage the motor and electronics. Always check your razor’s waterproof rating. If it is not rated for water, use only a brush and dry cloth.
- Drying with a towel (forcefully): While you can blot parts dry, avoid rubbing vigorously with a towel. Lint can get caught in the blades. Harsh rubbing can bend or damage delicate foils. Always allow for air drying. Air drying is the safest and most effective method.
- Neglecting lubrication: Skipping lubrication is a common error. Dry blades create more friction. This leads to faster wear and tear. It also causes a less comfortable shave. Lubricate after every deep clean. Or do it at least once a week.
- Mixing rotary cutter parts: For rotary razors, keeping the cutter and its corresponding guard together is vital. They wear as a pair. If you swap them, the new pair will not fit as precisely. This affects shaving performance. Keep them organized during disassembly. These small details make a big difference in the performance and longevity of your electric razor.
FAQ Section
How often should I clean my electric razor?
You should perform a quick clean after every shave. This involves rinsing (for wet/dry models) or brushing (for dry-only models). A deeper, more thorough clean is recommended once a week. This weekly cleaning includes disassembling parts, washing with soap, and lubricating the blades. Regular cleaning prevents hair buildup and maintains hygiene.
Can I use alcohol to clean my electric razor?
Yes, you can use rubbing alcohol for sanitizing the metal cutting elements. Apply it sparingly to a cloth and wipe the blades. Alcohol evaporates quickly and kills bacteria. However, avoid using alcohol on plastic parts or soaking the razor, as it can dry out or damage the materials over time. Always check your razor’s manual for specific guidelines.
What kind of oil should I use for lubrication?
Always use special razor lubricating oil. This oil is typically light mineral oil. It is designed to be safe for your razor’s components. Do not use motor oil, cooking oil, or any other household oils. These can gum up the mechanism or cause damage. A few drops of razor oil after a deep clean are sufficient.
How do I know when to replace the blades or foils?
Manufacturers recommend specific replacement intervals, usually every 12-24 months. You also know it is time if your shaves become less close, feel uncomfortable, or your razor starts pulling at your hair. Visible damage like dents in the foil or nicks on the cutters also indicate a need for replacement. Replacing parts ensures optimal performance and comfort.
Can I clean my electric razor with water if it’s not waterproof?
Absolutely not. If your electric razor is not specifically rated as “wet/dry” or “waterproof,” you must never rinse it under water or submerge it. Water can seep into the motor and electronics, causing irreversible damage and potentially
- electric shaver cleaning
- razor maintenance
- hygienic shaving

Todd Martin
Senior Writer
With over 15 years of experience in home renovation and design, I started HEG to share what I’ve learned with homeowners who want to create spaces that are both beautiful and functional. I’ve always believed in a hands-on approach, and over the years, I’ve picked up practical solutions that actually work. Through HEG, I aim to make home improvement more approachable, sharing real tips that help you create a home you truly love.