· Todd Martin · Kitchen Appliances, Home Cleaning, Appliance Care · 20 min read
How To Clean Dash Mini Waffle Maker
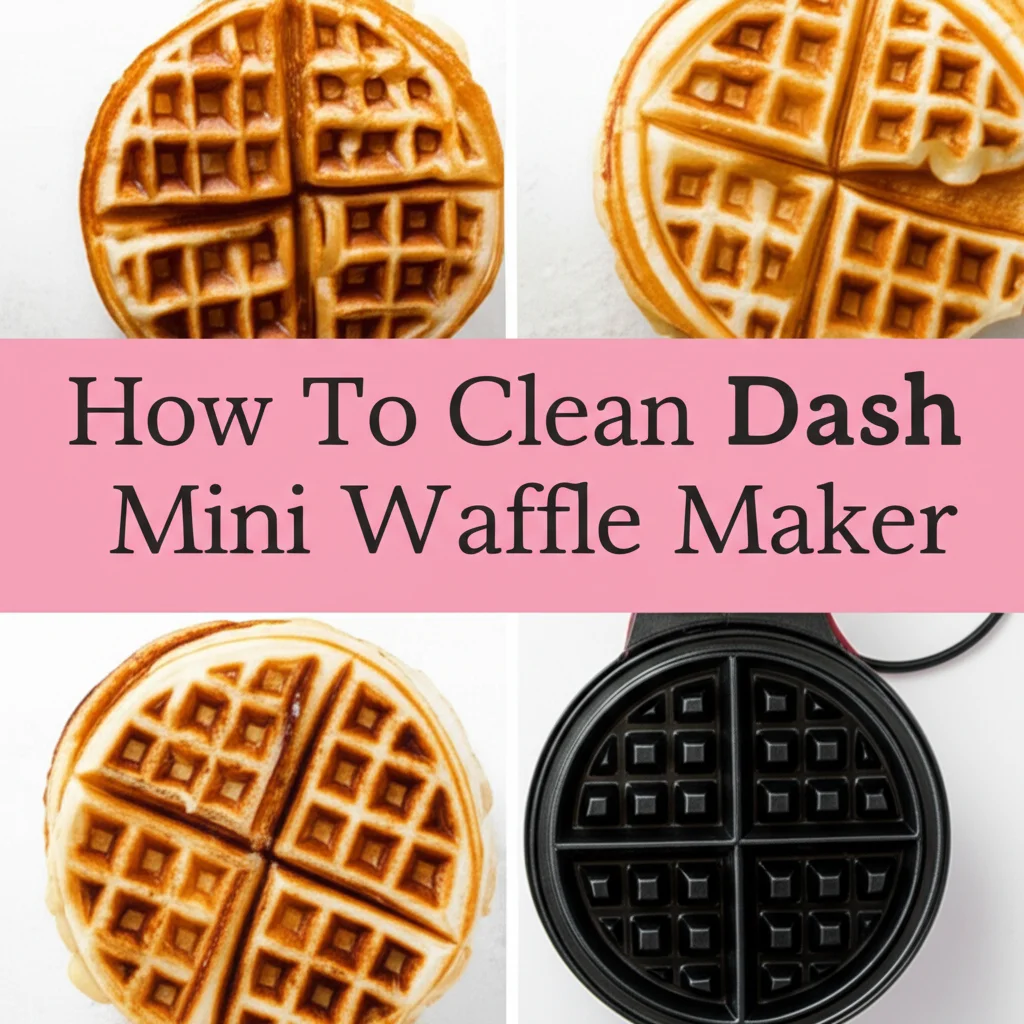
How To Clean Your Dash Mini Waffle Maker: A Comprehensive Guide
The smell of fresh waffles is delightful. Most of us love fluffy, golden waffles for breakfast. But after enjoying those treats, the thought of cleaning the waffle maker can feel like a chore. This is especially true for compact kitchen gadgets like the popular Dash Mini Waffle Maker. Its small size makes it convenient for quick meals, but also means nooks and crannies can collect batter.
Keeping your Dash Mini Waffle Maker clean is not just about hygiene. Proper cleaning extends the life of your appliance. It also ensures your waffles always cook evenly and release easily. A well-maintained non-stick surface is key to consistently perfect waffles. I will show you exactly how to clean Dash Mini Waffle Maker models. This guide covers everything from quick daily care to deep cleaning stubborn messes. We will also look at common mistakes to avoid and preventative tips.
Takeaway
Keeping your Dash Mini Waffle Maker clean ensures long-lasting performance and perfect waffles.
- Always unplug and cool down the appliance completely before cleaning.
- Use a damp cloth and mild dish soap for routine cleaning.
- Address stubborn batter with a baking soda paste or a wet paper towel steam method.
- Never use abrasive cleaners or metal tools on the non-stick surface.
- Prevent messes by not overfilling the waffle maker and using non-stick spray.
To clean a Dash Mini Waffle Maker, unplug it and let it cool completely. Use a damp cloth with mild dish soap to wipe down the non-stick plates and exterior. For stuck-on batter, apply a baking soda paste or use a wet paper towel to steam soften residues. Always avoid abrasive scrubbers and submerging the unit in water.
Understanding Your Dash Mini Waffle Maker’s Design
Your Dash Mini Waffle Maker is a compact and convenient kitchen appliance. It is designed for easy use and quick meals. Understanding its basic design helps you clean it properly. The main components are the non-stick cooking plates and the exterior casing.
The cooking plates have a special non-stick coating. This coating prevents batter from sticking. It allows waffles to lift out easily. This surface is delicate. You must use gentle cleaning methods to protect it. Avoid anything that could scratch or damage this coating. Metal utensils or abrasive scrubbers are not safe for this surface.
The compact size means the appliance is not submersible. Water can damage the electrical components inside. You clean it from the outside. Any food spills that seep into the edges can be tricky. Knowing this helps you be careful with liquid when cleaning. Always make sure the appliance is cool before you start cleaning it. Heat can make batter stick harder. It also poses a burn risk.
The Dash Mini Waffle Maker is simple. It has no removable plates. This means you clean the cooking surfaces directly on the unit. This design makes cleaning quick but demands specific techniques. I find that its simplicity means there are fewer parts to worry about. But you need to be precise when cleaning the cooking area. This section helps you understand why certain cleaning tools and methods are best. It protects your appliance and ensures it works well for a long time. You want to make sure your waffle maker stays in top condition.
Essential Tools and Supplies for Cleaning
Having the right tools makes cleaning your Dash Mini Waffle Maker simple. You do not need many items. The items you need are probably already in your kitchen. Choosing the correct supplies protects your appliance’s non-stick surface. It also ensures effective cleaning without damage. I always gather my supplies before I start. This makes the cleaning process smooth.
First, you need a soft, damp cloth. Microfiber cloths work very well. They are gentle on surfaces. They absorb moisture effectively. This cloth will be your main tool for wiping down both the cooking plates and the exterior. A few paper towels are also useful. They help absorb excess oil or liquid.
Next, you need mild dish soap. Just a few drops are enough. Harsh chemical cleaners can damage the non-stick coating. They can also leave residues that affect food taste. I always use a gentle, unscented soap. This prevents any chemical smells from lingering. It also protects the surface from degradation.
A soft-bristled brush is very helpful. An old toothbrush can work. A pastry brush or a dedicated kitchen brush with soft bristles is also good. This brush helps dislodge dried batter from crevices. It gets into the waffle maker’s grooves. It cleans without scratching the delicate non-stick surface. Do not use stiff wire brushes. Those will ruin the coating.
A rubber spatula or a silicone spatula is crucial for stuck-on bits. These tools are flexible and soft. They will not scratch the non-stick surface. You can gently scrape away hardened batter with them. I find this tool indispensable for removing stubborn pieces of cooked batter. It keeps the cooking plates smooth and intact. Using metal tools will damage the coating. This makes future waffles stick.
Finally, consider a small bowl for mixing cleaning solutions. For deeper cleaning, you might use baking soda or white vinegar. These natural cleaners are effective and safe for your appliance. I keep a dedicated sponge or cloth just for cleaning kitchen appliances. This prevents cross-contamination. It also ensures my cleaning cloths stay soft and clean.
Routine Cleaning: Keeping Your Mini Waffle Maker Pristine Daily
Regular cleaning of your Dash Mini Waffle Maker is essential. It prevents grime buildup. It also keeps your waffles tasting fresh. Routine cleaning is quick and easy. I usually do this after every use. This keeps my waffle maker looking new. It also makes sure it is ready for the next batch of waffles.
After Every Use: Basic Wipe-Down
First, always unplug your Dash Mini Waffle Maker. Let it cool down completely. This is very important for safety. Hot surfaces can cause burns. Also, cleaning a hot surface can bake on food residues even more. Once cool, take a damp cloth. Make sure it is only damp, not dripping wet. Add a tiny drop of mild dish soap to the cloth. Gently wipe down the non-stick cooking plates. Pay attention to the grooves where batter might collect.
Use a soft-bristled brush to get into the deeper indentations. This helps remove any crumbs or small bits of batter. After wiping the inside, wipe the exterior of the waffle maker. This includes the handle and sides. This removes any drips or fingerprints. I find that wiping it down immediately after it cools makes the job much easier. If you let spills dry, they become harder to remove. You can read more about general waffle maker cleaning tips here: How To Clean Waffle Maker.
Cooling Down Safely
Allowing your waffle maker to cool down properly is a key step. Do not try to clean it while it is still warm. This is a common mistake. I always leave mine open on the counter for at least 15-20 minutes. This allows heat to dissipate. A cool appliance is safe to handle. It also makes stuck-on batter easier to remove. The residual heat can actually bake on food particles. This makes them much more difficult to clean later.
You might notice some steam coming off if there are still wet batter drips. This is normal. Just let it cool. Once cool, you can proceed with the gentle wiping. This routine keeps your Dash Mini Waffle Maker in excellent condition. It also extends its lifespan. It is much easier to do a quick wipe now than a deep clean later.
Deep Cleaning Your Dash Mini Waffle Maker: Tackling Stubborn Messes
Sometimes, routine cleaning is not enough. You might encounter stubborn batter, grease, or burnt-on residues. These messes require a deeper clean. It is important to tackle them without damaging the non-stick coating. I have a few trusted methods for these tougher situations. These methods use common household items. They are safe for your Dash Mini Waffle Maker.
The Damp Cloth and Soap Method
For most dried-on batter, start with a damp cloth and mild dish soap. Unplug your waffle maker and let it cool completely. Dampen a soft cloth or sponge with warm water. Add a tiny amount of mild dish soap to the cloth. Gently scrub the non-stick plates. Work in small circular motions. The moisture and soap will help loosen the dried batter. Do not use too much water. You do not want water seeping into the electrical parts.
I find that letting the damp cloth sit on a particularly stubborn spot for a few minutes can help. It softens the batter. Then you can wipe it away. For more general advice on cleaning sticky surfaces, this article might be helpful: How To Clean Sticky Dash. After scrubbing, wipe down the plates with a clean, damp cloth. This removes any soap residue. Finally, dry the surface thoroughly with a clean paper towel. This prevents water spots and ensures the non-stick surface remains pristine.
Baking Soda Paste for Tough Spots
Baking soda is a natural abrasive. It is gentle enough for non-stick surfaces. It works wonders on tough, burnt-on batter. To make a paste, mix about two tablespoons of baking soda with one tablespoon of water. Adjust the water amount until you have a thick paste. It should resemble toothpaste.
Apply this paste directly to the stubborn spots on the cool non-stick plates. Let the paste sit for 10-15 minutes. This gives it time to break down the grime. After waiting, gently scrub the paste with a damp, soft cloth or a soft-bristled brush. You will see the batter loosen and come off. Rinse the cloth often to keep it clean. Wipe away all the paste and residue. Finish by wiping with a clean, damp cloth and then drying thoroughly. This method is effective for various types of residue, similar to how one might clean other cooking appliances like a waffle iron: How To Clean A Waffle Iron.
Vinegar Solution for Odors and Residue
Sometimes, your waffle maker might retain odors. Or it might have a slight greasy film. White vinegar is excellent for cutting grease and deodorizing. Mix equal parts white vinegar and water in a spray bottle. Alternatively, dampen a cloth with this solution.
Spray or wipe the cooled non-stick plates with the vinegar solution. Let it sit for 5 minutes. The vinegar helps break down grease and neutralize odors. After, wipe down the plates thoroughly with a clean, damp cloth. Make sure to remove all vinegar residue. The smell of vinegar dissipates quickly as it dries. You can also use this method to clean other kitchen tools like a sandwich maker: How To Clean Sandwich Maker. Always dry the surface completely before storing the appliance. This ensures no moisture is left behind.
Dealing with Overflow and Burnt-On Batter
Even with careful pouring, sometimes batter overflows. Or a piece of waffle gets stuck and burns. These situations can create particularly challenging messes. Do not worry. There are effective ways to handle them without damaging your Dash Mini Waffle Maker. I have dealt with these many times. Here are my go-to methods.
Scraping Safely
When batter overflows and hardens, it can stick to the edges or outside of the cooking plates. This dried batter is often difficult to remove. First, ensure your waffle maker is completely cool and unplugged. Never try to scrape hot batter. It will just smear. Use a rubber spatula or a silicone spatula. These tools are soft and flexible. They will not scratch the non-stick coating.
Gently slide the edge of the spatula under the hardened batter. Apply light pressure. Work slowly to lift the pieces. For batter that has seeped into the hinge or crevices, a wooden toothpick or cotton swab can be helpful. Dip the cotton swab in a little warm water or a baking soda solution. This softens the batter in tight spots. Be very careful not to force anything. Patience is key here. You want to loosen the batter, not chip away at the appliance itself.
The Wet Paper Towel Steam Method
This method is surprisingly effective for burnt-on batter. It uses steam to rehydrate and loosen the stuck food. First, make sure your waffle maker is unplugged and completely cool. Take two or three paper towels. Get them thoroughly wet. You want them very damp, but not dripping excessively. Fold them to fit over the burnt areas on the lower cooking plate.
Place the wet paper towels inside the waffle maker. Close the lid. Let it sit for about 10-15 minutes. The moisture from the paper towels creates a steaming effect. This softens the burnt batter. After waiting, open the lid. Carefully remove the paper towels. You will find the burnt batter is now soft. You can easily wipe it away with a soft, damp cloth or a silicone spatula. This technique avoids harsh scrubbing. It protects your non-stick surface. It works much like steaming off old wallpaper. The steam does the hard work for you. I use this method frequently for those really stubborn spots.
Common Cleaning Mistakes to Avoid
Cleaning your Dash Mini Waffle Maker seems simple. But some common mistakes can damage it. Avoiding these errors ensures your appliance lasts longer. It also keeps the non-stick coating intact. I have learned these lessons over time. It is important to be aware of what not to do.
Using Abrasive Cleaners or Tools
Never use steel wool, abrasive scrubbers, or scouring pads on your Dash Mini Waffle Maker. These materials are too harsh. They will scratch and damage the non-stick coating. Once the coating is scratched, food will start to stick. This makes cleaning harder in the future. It also ruins the cooking performance. I always stick to soft cloths, sponges, and silicone spatulas. These are gentle yet effective. Even rough paper towels can be too much if you scrub too hard.
Similarly, avoid harsh chemical cleaners. Oven cleaners, bleach, or strong degreasers can strip the non-stick surface. They can also leave harmful residues. These residues can transfer to your food. Always opt for mild dish soap. Baking soda and vinegar are also safe. These natural options clean well without causing damage.
Submerging the Appliance in Water
Your Dash Mini Waffle Maker is an electrical appliance. It is not designed to be submerged in water. Doing so can cause serious damage to the internal electrical components. It creates a shock hazard. It will also void your warranty. I always emphasize cleaning it from the outside. You should never run it under a faucet or put it in the dishwasher.
Even excessive water on the outside can seep into the housing. This can lead to rust or malfunction. When cleaning, use a damp cloth. Make sure it is wrung out well. You want just enough moisture to clean, not to soak. For more insights on general appliance cleaning, check out articles on how to clean specific kitchen devices to learn what to avoid: How To Clean Ice Maker or How To Clean Coffee Maker With Baking Soda.
Cleaning While Hot
This might seem obvious, but it is a common mistake. Cleaning a hot waffle maker is dangerous. You can burn yourself. Also, food residue tends to bake onto the non-stick surface when it is hot. This makes it harder to remove. I always allow my waffle maker to cool completely. This means waiting at least 15-20 minutes after unplugging it. A cool surface allows batter to stiffen. This makes it easier to scrape off. It also ensures your safety.
Preventative Measures for a Cleaner Waffle Maker
Cleaning is necessary. But preventing messes in the first place is even better. Taking a few simple steps can greatly reduce the amount of cleaning your Dash Mini Waffle Maker needs. I find that prevention saves me a lot of time and effort. These tips help keep your appliance cleaner, longer.
Proper Batter Portioning
One of the biggest causes of mess is overfilling the waffle maker. Too much batter will overflow. It spills onto the exterior and into crevices. This creates sticky, hard-to-reach messes. I always measure my batter. For most Dash Mini Waffle Makers, about ¼ to ⅓ cup of batter is sufficient. This amount allows the waffle to expand without overflowing.
Start with a smaller amount. You can always add a little more next time if the waffle is too thin. It is better to have a slightly smaller waffle than a big mess. This simple step makes a huge difference in keeping your appliance clean. It saves you from extra scrubbing. It also ensures perfectly shaped waffles.
Non-Stick Spray Application
Even though the Dash Mini Waffle Maker has a non-stick coating, a little cooking spray or oil can enhance its performance. It creates an extra barrier between the batter and the cooking surface. This makes waffles release even more easily. It also reduces the chances of batter sticking. This means less residue left behind.
Spray a thin, even layer of cooking spray before each waffle. If you prefer oil, lightly brush a small amount with a pastry brush. Do not use too much. Excess oil can build up and become sticky itself. A light application is all you need. I find this simple step truly helps in preventing sticky situations. It makes the cleaning process so much smoother.
Immediate Post-Use Care
Addressing small spills or crumbs immediately can prevent them from becoming big problems. Once you finish cooking, and the waffle maker is unplugged and cooling, do a quick preliminary clean. Use a paper towel to wipe up any fresh batter drips on the exterior. Use a rubber spatula to gently lift any tiny bits of cooked batter still on the plates.
This immediate attention stops food from hardening. It also stops it from baking onto the surface as the appliance cools. It is easier to wipe away a fresh spill than to scrape off a dried one. I always keep a roll of paper towels handy when I am making waffles. This way, I can quickly address any small messes as they happen. This proactive approach keeps your waffle maker in better condition between deep cleans.
Storage and Long-Term Care for Your Dash Mini Waffle Maker
Proper storage and long-term care are crucial for your Dash Mini Waffle Maker. They ensure its longevity. They also keep it ready for your next waffle craving. After cleaning, taking a few extra steps helps maintain its condition. I always make sure my appliance is stored correctly. This protects it from dust and damage.
Ensuring Complete Dryness Before Storage
Before storing your Dash Mini Waffle Maker, ensure it is completely dry. Any lingering moisture can lead to mold or rust. It can also damage electrical components over time. After cleaning, I often leave it open on the counter for an hour or two. This allows any residual moisture to evaporate fully.
You can also wipe it down thoroughly with a dry paper towel or a clean, dry cloth. Pay special attention to crevices and hinges. Moisture tends to hide in these areas. A fully dry appliance is safe for storage. It will be ready to go the next time you want to make waffles. This simple step prevents a lot of potential problems down the line.
Protecting the Non-Stick Plates
The non-stick coating is the heart of your waffle maker’s performance. You need to protect it during storage. Avoid storing anything directly on the cooking plates. Other kitchen gadgets, metal utensils, or heavy items can scratch the delicate surface. Even small scratches compromise the non-stick properties.
I usually place a piece of paper towel or a soft cloth between the upper and lower cooking plates. This provides an extra layer of protection. It prevents them from rubbing against each other. It also keeps dust off the cooking surface. This small habit helps maintain the non-stick coating. It ensures your waffles release perfectly every time.
Choosing the Right Storage Location
Store your Dash Mini Waffle Maker in a cool, dry place. A kitchen cabinet or pantry shelf is ideal. Avoid storing it near sources of heat or humidity. These can damage the electrical components or promote rust. Also, choose a spot where it will not get knocked around. Its compact size makes it easy to tuck away.
I often keep mine in an easily accessible cabinet. This encourages me to use it more often. Make sure it is stable and won’t tip over. Proper storage keeps your Dash Mini Waffle Maker in prime condition. It will be clean, functional, and ready for many more delicious breakfasts. Taking care of it now saves you effort and expense later.
FAQ Section
Can I put my Dash Mini Waffle Maker in the dishwasher?
No, you cannot put your Dash Mini Waffle Maker in the dishwasher. It is an electrical appliance. Submerging it in water or exposing it to dishwasher cycles will damage the electrical components. This can create a safety hazard. Always clean it by hand, using a damp cloth and mild soap on the non-stick surfaces and exterior.
How often should I clean my Dash Mini Waffle Maker?
You should perform a basic routine cleaning after every use. This involves wiping down the cooled non-stick plates and exterior. For deeper cleaning, if you notice stubborn batter buildup or a greasy film, do a deep clean as needed. This might be every few uses or once a month, depending on how often you use it and how messy your cooking is.
What if batter overflows into the crevices?
If batter overflows into crevices, let it cool and harden. Then, use a rubber or silicone spatula to gently scrape away the large pieces. For smaller, stubborn bits in tight spots, a damp cotton swab or a wooden toothpick can help. You can also try the wet paper towel steam method to soften the batter before removal.
Can I use steel wool on my waffle maker?
No, never use steel wool or abrasive scrubbers on your Dash Mini Waffle Maker. These materials will scratch and damage the non-stick coating. Once the non-stick surface is compromised, food will stick, and the appliance’s performance will decline. Always use soft cloths, sponges, or silicone tools for cleaning.
How do I remove the smell of burnt food?
To remove the smell of burnt food, ensure your waffle maker is clean of all residue. Then, wipe the non-stick plates with a solution of equal parts white vinegar and water. Let it sit for about 5 minutes, then wipe thoroughly with a clean, damp cloth. The vinegar helps neutralize odors. Ensure the appliance is completely dry before storing it.
Is it okay to use cooking spray?
Yes, it is okay and often recommended to use cooking spray or a light brush of oil on your Dash Mini Waffle Maker’s non-stick plates. This creates an extra barrier, helping waffles release even more easily and reducing the chance of batter sticking. Apply a thin, even layer before each use for best results and easier cleanup.
Conclusion
Keeping your Dash Mini Waffle Maker clean is simple. It ensures that every waffle you make is perfect. We have covered how to clean Dash Mini Waffle Maker appliances, from quick daily wipe-downs to tackling stubborn, burnt-on messes. You now know the right tools to use. You also understand the common mistakes to avoid. Using gentle methods protects the non-stick coating. This extends the life of your beloved appliance.
Remember to always unplug your waffle maker. Let it cool completely before you begin any cleaning. A damp cloth with mild dish soap is your best friend for routine care. For tougher grime, baking soda paste or the wet paper towel steam method works wonders. Prevention is also key. Proper batter portioning and light cooking spray use minimize future cleaning efforts. By following these steps, you will keep your Dash Mini Waffle Maker in excellent condition. This lets you enjoy delicious, non-stick waffles for years to come. Keep your kitchen tools clean and ready for your next culinary adventure!
- Dash Mini Waffle Maker
- Waffle Maker Cleaning
- Kitchen Cleaning Tips
- Non-Stick Cleaning
- Appliance Maintenance
- Mini Waffle Maker Care


