· Todd Martin · Home Cleaning · 20 min read
How To Clean Calcium Build Up In Toilet
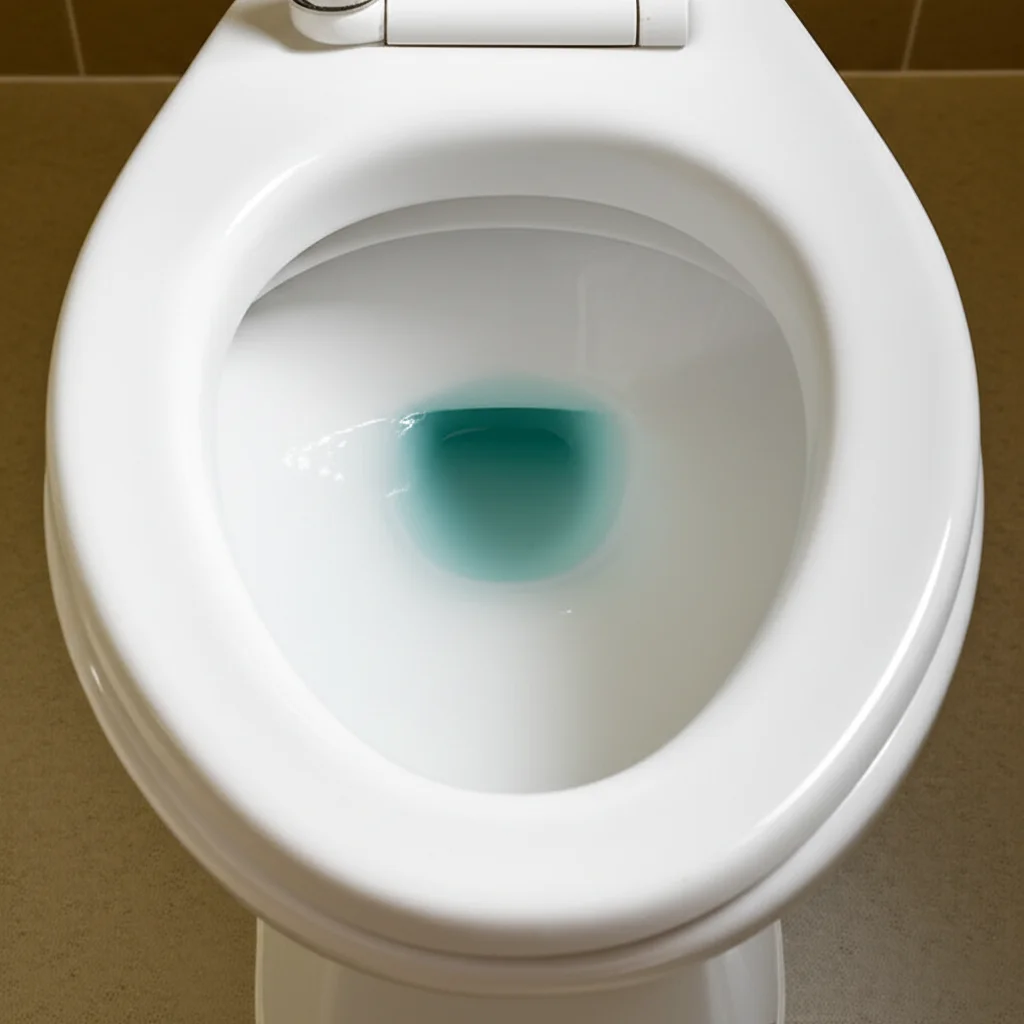
How To Clean Calcium Build Up In Toilet
Have you noticed those unsightly white, chalky deposits in your toilet bowl or tank? That is calcium buildup, a common problem for many homeowners, especially those living in areas with hard water. These mineral deposits not only look bad but can also affect your toilet’s performance over time. Cleaning calcium build up in your toilet may seem like a difficult task, but it is achievable with the right techniques and products.
I know how frustrating it feels to see your toilet looking less than pristine. It makes your bathroom appear dirty, even if you clean it regularly. This guide provides clear, effective methods to remove calcium buildup. We will explore various approaches, from natural solutions to powerful chemical cleaners. You will also learn about crucial safety steps and how to prevent future mineral accumulation. By the end, you will know exactly how to restore your toilet’s sparkling cleanliness.
Takeaway:
- Identify the source: Hard water causes most toilet calcium buildup.
- Choose your method: Use natural acids like vinegar or borax for light buildup. Employ commercial cleaners or a pumice stone for heavier stains.
- Prioritize safety: Always wear gloves and eye protection. Ensure good ventilation, especially with chemical cleaners.
- Prevent future issues: Regular cleaning and water softeners can stop calcium from returning.
To effectively clean calcium build up in your toilet, first identify the severity of the deposits. Then, choose an appropriate cleaning agent such as white vinegar or a specialized limescale remover. Apply the cleaner, allow it to penetrate the mineral layers, and then scrub thoroughly with a toilet brush or pumice stone to dislodge and remove the residue.
Understanding Calcium Buildup in Toilets
Calcium buildup, also known as limescale or hard water stains, is a common issue in bathrooms. It happens when water with high mineral content evaporates, leaving behind solid deposits. These minerals, primarily calcium and magnesium, bond to surfaces like your toilet bowl and tank. Over time, these layers can become thick and stubborn.
Hard water is the main culprit behind these unsightly stains. It contains dissolved minerals that are left behind when water dries. These white or yellowish deposits usually appear at the waterline or under the toilet rim. They can also accumulate in the toilet tank, affecting the flushing mechanism. This buildup reduces efficiency and can lead to expensive repairs if left untreated.
I often explain to friends that thinking of it like plaque on teeth helps understand it. Just as plaque sticks to teeth, minerals stick to ceramic surfaces. The more minerals in your water, the faster this buildup occurs. You might notice similar mineral deposits on faucets or showerheads throughout your home. Knowing what causes it is the first step in effective removal. These stains are not just cosmetic; they show a chemical reaction happening constantly in your toilet.
You can prevent calcium buildup by understanding its formation. When water evaporates, it leaves calcium carbonate behind. This is the same mineral found in rocks like limestone and marble. The toilet bowl, especially around the waterline, is a perfect breeding ground for these deposits. This constant wetting and drying cycle allows minerals to accumulate layer by layer.
These mineral deposits become harder and more resistant to cleaning over time. Early intervention is always best. A thin layer of calcium is much easier to remove than years of accumulated scale. Ignoring the problem will only make it worse, possibly leading to permanent staining or damage. It is important to address calcium buildup as soon as you spot it. This will save you time and effort in the long run.
Essential Tools and Safety for Calcium Removal
Before you begin tackling stubborn calcium buildup, gather the right tools and prioritize your safety. Having everything ready saves time and ensures you clean effectively. Safety measures protect you from harsh chemicals and strenuous scrubbing. Always remember that cleaning products, even natural ones, can cause irritation.
Here is a list of essential items you will need for this task:
- Rubber Gloves: These protect your hands from cleaning solutions and germs. I always wear thick, elbow-length gloves for extra protection.
- Eye Protection: Safety goggles shield your eyes from splashes, especially when using strong acids or scrubbing vigorously. A single splash can cause severe irritation.
- Toilet Brush: A sturdy toilet brush is crucial for scrubbing away loosened calcium. Choose one with stiff bristles for better cleaning power.
- Scrubbing Sponge or Pad: For areas above the waterline or inside the tank, a non-scratch sponge helps. Avoid abrasive pads on porcelain unless specifically designed for it.
- Spray Bottle: Useful for applying natural solutions like vinegar evenly. This allows the cleaner to sit on the affected area.
- Old Towels or Rags: Keep these handy to wipe up spills and dry surfaces. They also protect your bathroom floor from drips.
- Ventilation: Open windows or turn on the bathroom fan. Good airflow disperses fumes from cleaning products. This is especially important for chemical cleaners.
- Bucket: A bucket helps you remove water from the toilet bowl. It also provides a place to mix solutions.
Safety is paramount during calcium removal. Never mix different cleaning products, especially those containing bleach and acids. This combination can create dangerous chlorine gas. Always read product labels and follow their specific instructions. If using strong chemical cleaners, consider wearing a respirator in addition to eye protection. You must protect yourself when handling cleaning agents.
If you are sensitive to smells, or have respiratory issues, step outside for fresh air frequently. Proper ventilation cannot be overstressed when using any chemical cleaner. Even natural solutions like vinegar produce strong fumes. Keep children and pets away from the bathroom during cleaning. This ensures their safety from accidental contact with cleaners or wet surfaces.
Natural and Eco-Friendly Methods for Toilet Calcium
You can effectively tackle toilet calcium buildup using simple, eco-friendly ingredients. These methods are safer for your family and the environment. They often use items you already have in your pantry. I find these solutions work wonderfully for moderate mineral deposits.
1. White Vinegar Power: White vinegar is a natural acid that dissolves mineral deposits. It is my go-to for many cleaning tasks, including toilet calcium. First, turn off the water supply to the toilet and flush it to empty the bowl. This exposes the waterline stains. Pour 2-3 cups of undiluted white vinegar directly into the bowl. Make sure it covers all the stained areas. For tough stains around the rim, saturate paper towels with vinegar and tuck them under the rim. Allow the vinegar to sit for several hours, or even overnight, for best results. The longer it soaks, the more calcium it dissolves. After soaking, scrub the loosened deposits with your toilet brush. Flush several times to rinse. You might need to repeat this process for very heavy buildup. This method is effective and non-toxic.
2. Baking Soda and Vinegar Paste: For stubborn spots or areas above the waterline, a paste made from baking soda and vinegar works wonders. First, sprinkle a generous amount of baking soda directly onto the stained areas. Then, slowly pour white vinegar over the baking soda. It will fizz, creating a powerful scrubbing action. This reaction helps lift away dirt and minerals. Let the paste sit for at least 30 minutes. You can leave it longer for tougher stains. Scrub the area with a stiff brush or non-scratch sponge. This combination provides a gentle abrasive action along with the acid’s dissolving power. Rinse thoroughly with water.
3. Borax for Heavy Stains: Borax is another powerful natural mineral cleaner. It helps break down tough calcium deposits and deodorizes the toilet. First, empty the toilet bowl water as described for the vinegar method. Sprinkle about 1/2 cup of borax powder into the toilet bowl. Use a toilet brush to spread the powder around, focusing on the stained areas. Let it sit for a few hours, or ideally overnight. For a stronger effect, add 1/4 cup of white vinegar to the borax. The combination enhances the cleaning power. Scrub thoroughly after soaking and flush. This method is excellent for persistent calcium rings.
4. Lemon Juice for Light Buildup: For very light calcium buildup or general brightening, lemon juice offers a fresh, natural approach. The citric acid in lemon juice helps to gently dissolve minor mineral deposits. Squeeze several fresh lemons into the toilet bowl, focusing on the stained areas. Alternatively, you can use concentrated lemon juice from a bottle. Let it sit for at least an hour before scrubbing. While not as strong as vinegar or borax for heavy deposits, it leaves a pleasant scent. It is perfect for routine maintenance and adding shine.
These natural methods are a great starting point for tackling calcium. They are environmentally friendly and generally safe for septic systems. I use these first before considering stronger chemicals. For more general mineral deposit cleaning, learn how to clean mineral deposits from toilet. If your issue is primarily limescale, detailed steps on how to clean limescale from toilet bowl can offer even more specific advice.
Powerful Chemical Solutions for Tough Calcium
Sometimes, natural remedies are not enough for extreme calcium buildup. For very stubborn or old mineral deposits, powerful chemical solutions become necessary. These cleaners use stronger acids to dissolve the scale quickly. Always use these products with extreme caution and follow safety guidelines. I understand the need for stronger options when natural ones fall short.
1. Commercial Toilet Bowl Cleaners: Many commercial toilet bowl cleaners are specifically formulated to remove limescale and rust. Look for products labeled as “limescale remover” or “calcium remover.” These often contain hydrochloric acid or phosphoric acid. These acids are highly effective at dissolving mineral deposits. Follow the product instructions precisely. Typically, you apply the cleaner under the rim and around the bowl, let it sit for the recommended time, and then scrub vigorously. Always ensure good ventilation by opening windows and turning on the fan. Never mix these cleaners with other cleaning products, especially bleach, as this creates dangerous fumes. These cleaners are designed for tough jobs and can deliver impressive results. They adhere to the bowl surface, giving the acid time to work.
2. Muriatic Acid (Hydrochloric Acid): Muriatic acid is a highly corrosive substance and should only be used as a last resort. It is extremely powerful and can cause severe burns if it contacts skin or eyes. Always wear heavy-duty rubber gloves, eye protection, and old clothes. Ensure maximum ventilation; if possible, wear a respirator. First, remove as much water from the toilet bowl as possible. Carefully pour a small amount (about 1/2 cup) of muriatic acid into the bowl. Let it sit for no more than 15-30 minutes. The acid will bubble as it dissolves the calcium. Do not leave it longer than recommended. Scrub with a toilet brush made of acid-resistant material. Flush several times to thoroughly rinse the bowl. Never pour muriatic acid down a drain where it might mix with other chemicals. Dispose of any leftover acid according to local regulations. I cannot stress enough: use this acid with extreme caution. If you are uncertain about handling such strong chemicals, consider alternative methods or professional help. For deeper cleaning routines, understanding how to deep clean toilet can be helpful, even if it does not specifically address calcium.
When using any chemical cleaner, remember that their strength means they can also damage certain surfaces. Always test a small, inconspicuous area first if you are unsure. Porcelain toilets are generally resistant, but older or damaged surfaces might react differently. Store chemical cleaners safely away from children and pets. Proper storage prevents accidental exposure. These powerful solutions are effective for the most stubborn calcium, but safety always comes first. For general toilet cleaning advice, you can also refer to guides on how to clean toilet or how to clean your toilet for foundational steps.
The Pumice Stone Technique for Stubborn Stains
When chemical cleaners or natural acids struggle to remove deeply embedded calcium buildup, a pumice stone can be an incredibly effective tool. This method uses gentle abrasion to physically lift away the mineral deposits. It works particularly well on hard, calcified rings and stains that acids cannot fully dissolve. I have used this technique many times, and it often provides amazing results.
A pumice stone is a natural abrasive material. It is hard enough to remove mineral deposits but soft enough not to scratch porcelain if used correctly. The key to using a pumice stone safely is to always keep both the stone and the toilet surface wet. Never use a dry pumice stone on porcelain. Dry scrubbing will almost certainly scratch the surface. Ensure the toilet bowl has water, or wet the stone thoroughly before starting.
Here is how to use a pumice stone effectively:
- Wet the Stone and Surface: Before you begin, submerge the pumice stone in the toilet water or run it under a faucet until it is completely saturated. Ensure the area of the toilet bowl you are working on is also wet.
- Gentle Scrubbing: Lightly rub the wet pumice stone over the calcium buildup. Apply gentle pressure. You will notice a paste-like residue forming as the pumice stone wears down and the calcium comes off. This paste helps with the cleaning action.
- Check Progress: Periodically lift the stone and check your progress. The goal is to remove the calcium without applying excessive force. The stone will conform to the shape of the bowl as you work.
- Rinse and Repeat: As you scrub, the calcium will detach. You can flush the toilet to rinse away the loosened deposits and any pumice residue. Repeat the process on any remaining stained areas. Continue until the calcium is gone.
This method is particularly effective for waterline rings and stains that have become very thick. It is a physical removal method, rather than a chemical one. Always test the pumice stone in an inconspicuous area first, especially if you have an older toilet. While generally safe for modern porcelain, some surfaces may react differently. Do not use pumice on plastic components or painted surfaces of the toilet, as it can cause damage. The pumice stone is a powerful ally against the toughest calcium. For detailed instructions, refer to guides on how to clean toilet with pumice stone.
Deep Cleaning Your Toilet Bowl and Tank
Cleaning calcium buildup is not just about the visible bowl; it also involves deep cleaning the tank and under the rim. Mineral deposits can accumulate in these hidden areas, affecting your toilet’s efficiency and cleanliness. A thorough cleaning ensures every part of your toilet is free from scale. I always recommend addressing both the bowl and the tank for comprehensive results.
Cleaning the Toilet Bowl (Under the Rim and Waterline): The area under the toilet rim is a prime spot for calcium buildup and limescale. These deposits are hard to see and reach with a regular brush. First, wear your gloves and eye protection. To clean under the rim, you can squirt your chosen cleaner (vinegar, commercial limescale remover) directly up into the rim jets and channels. Let it soak for at least 30 minutes, or longer for heavy buildup. Use an old toothbrush or a specialized rim brush to scrub thoroughly. The small bristles can reach into tight spots. For the waterline, if you have not already, turn off the water supply to the toilet and flush it. This lowers the water level, exposing the waterline ring. Apply your cleaner directly to the exposed ring. Let it soak, then scrub vigorously with a toilet brush. For extremely tough rings, consider using a pumice stone as detailed in the previous section. Once clean, turn the water supply back on and flush several times to rinse away all residue. Cleaning under the rim is vital for hygiene and preventing mold growth. If you are specifically battling tough stains around the waterline, you can find more targeted advice on how to clean brown stains in toilet or how to clean ring in toilet bowl.
Cleaning the Toilet Tank: The toilet tank is often overlooked, but it can accumulate significant calcium and mineral deposits. These deposits can interfere with the fill valve, flapper, and other moving parts, leading to flushing problems. To clean the tank, first, turn off the water supply valve usually located behind the toilet. Flush the toilet to empty most of the water from the tank and bowl. If stubborn, use a sponge to soak up any remaining water in the tank. Once the tank is empty, you can inspect the inside. You will likely see white or brownish mineral buildup on the walls and components.
Pour 2-3 gallons of white vinegar into the empty tank. Make sure it covers the calcium deposits. Let the vinegar soak overnight for the best results. The acid will work to dissolve the minerals. In the morning, use a stiff brush (not the toilet bowl brush) to scrub the inside of the tank. Pay attention to the fill valve, flapper, and tank walls. Drain the vinegar by flushing the toilet several times. Turn the water supply back on and let the tank refill. Flush a few more times to ensure all vinegar and loosened debris are rinsed away. Cleaning the tank improves flushing efficiency and extends the life of internal components. Regularly cleaning the tank can prevent many toilet issues. For dedicated tank cleaning instructions, refer to how to clean toilet tank.
Preventing Future Calcium Buildup
Once you have invested time and effort in cleaning calcium buildup from your toilet, preventing its return is key. Proactive measures save you from strenuous cleaning in the future. I believe prevention is always better than cure, especially with hard water issues. A few simple habits can keep your toilet sparkling.
1. Regular Cleaning Schedule: The most effective way to prevent calcium buildup is through consistent, regular cleaning. Make it a habit to clean your toilet bowl at least once a week. Use a mild toilet cleaner or a mixture of vinegar and water for routine maintenance. A quick scrub around the bowl, especially at the waterline, can prevent mineral deposits from hardening. If you live in a hard water area, cleaning twice a week might be more beneficial. This prevents small deposits from becoming major problems. Regular cleaning also keeps your bathroom fresh and hygienic.
2. Use White Vinegar Regularly: White vinegar is not just for deep cleaning; it is also an excellent preventative agent. Once a week, pour about a cup of white vinegar into your toilet bowl before bed. Let it sit overnight. The mild acidity will help to break down any new mineral deposits before they can harden. In the morning, a quick scrub and flush will rinse everything away. This simple overnight soak can significantly reduce future buildup. You can also spray vinegar onto the toilet’s exterior and wipe it down. This keeps all surfaces free of mineral spots.
3. Consider a Water Softener: For homes with severe hard water, a whole-house water softener is the most comprehensive solution. A water softener removes calcium and magnesium ions from your water before it enters your plumbing system. This prevents buildup not only in your toilet but also in your faucets, showerheads, dishwasher, and pipes. While a significant investment, it protects all your appliances and fixtures from mineral damage. It can extend the lifespan of your plumbing and make cleaning easier throughout your home. If a whole-house system is not an option, consider a toilet tank drop-in water softener tablet (use with caution, see point 4).
4. Be Cautious with In-Tank Cleaners: Some people use automatic in-tank toilet bowl cleaners (like blue tablets) to prevent stains. These products can sometimes help, but they also have drawbacks. Many contain harsh chemicals that can damage the rubber and plastic components inside your toilet tank over time. This can lead to leaks and costly repairs. If you choose to use them, select reputable brands and monitor your tank’s internal parts for any signs of wear. I prefer to stick to natural methods or specific spot treatments for prevention. If you’re cleaning other areas like faucets or glass, consider methods for how to clean calcium build up faucets or how to clean calcium buildup on glass, as hard water impacts them too.
5. Keep the Toilet Dry (Where Possible): For areas like the toilet seat hinges or the exterior base, wiping them dry after each use can prevent water spots and mineral deposits. While impractical for the bowl interior, maintaining dry exterior surfaces reduces the opportunities for calcium to form. This simple habit contributes to overall bathroom cleanliness. A little effort each day saves a lot of cleaning later.
FAQ Section
Q1: What causes calcium buildup in toilets? Calcium buildup in toilets comes from hard water. Hard water contains high levels of dissolved minerals, primarily calcium and magnesium. When this water evaporates, it leaves mineral deposits behind. These deposits stick to the toilet bowl and tank surfaces, forming unsightly white or yellowish scale over time. The more minerals in your water, the faster and thicker the buildup becomes.
Q2: Is vinegar safe for cleaning toilet calcium? Yes, white vinegar is a very safe and effective natural cleaner for toilet calcium. It contains acetic acid, which dissolves mineral deposits without harming porcelain. You can pour it directly into the bowl or tank and let it soak for several hours. Vinegar is non-toxic, eco-friendly, and safe for septic systems. It also leaves no harsh chemical fumes.
Q3: How often should I clean calcium from my toilet? The frequency depends on your water hardness. In areas with moderately hard water, cleaning your toilet for calcium removal once a week with vinegar can prevent buildup. For very hard water, you might need to do a thorough calcium treatment every two to four weeks. Regular maintenance prevents small deposits from becoming stubborn, hard-to-remove stains.
Q4: Can I use bleach to remove calcium? No, bleach is not effective for removing calcium buildup. Bleach is a disinfectant and whitener, but it does not dissolve mineral deposits. In fact, mixing bleach with acidic cleaners (like vinegar or many commercial limescale removers) creates dangerous chlorine gas. Always avoid combining cleaning products, and use specific acid-based cleaners for calcium.
Q5: When should I call a professional for calcium buildup? You should call a professional if calcium buildup is extremely severe and resists all your cleaning efforts. This often indicates very hard water and possibly significant scale within your plumbing pipes. A professional plumber can assess the extent of the problem and recommend solutions like industrial-strength descalers or water softening systems. They can also clean hard-to-reach areas safely.
Q6: Does soda (like Coke) help with toilet calcium? Some people use soda, like Coca-Cola, to clean toilet stains. The phosphoric acid in soda can indeed help break down minor calcium deposits and rust. Pour a few cans into the toilet, let it sit overnight, then scrub and flush. While it can work for light stains, it is less effective than white vinegar or stronger dedicated limescale removers for heavy buildup.
Conclusion
Cleaning calcium build up in your toilet is a manageable task, even for the most stubborn stains. We have explored a range of effective methods, from natural, eco-friendly solutions like white vinegar and borax to powerful commercial cleaners for tougher challenges.
- toilet cleaning
- calcium buildup
- hard water stains
- limescale removal
- bathroom cleaning
- DIY cleaning
- toilet care

Todd Martin
Senior Writer
With over 15 years of experience in home renovation and design, I started HEG to share what I’ve learned with homeowners who want to create spaces that are both beautiful and functional. I’ve always believed in a hands-on approach, and over the years, I’ve picked up practical solutions that actually work. Through HEG, I aim to make home improvement more approachable, sharing real tips that help you create a home you truly love.