· Todd Martin · Home Maintenance · 18 min read
How To Clean Burners On Gas Grill
Unlock Peak Performance: How to Clean Gas Grill Burners
Grilling is a favorite pastime for many people. The sizzle of food on hot grates brings joy to outdoor gatherings. But a great grilling experience starts with a well-maintained grill. Specifically, clean burners are crucial. If your gas grill is not heating evenly or has weak flames, dirty burners are likely the cause. Learning how to clean burners on gas grill equipment properly ensures consistent heat. This improves cooking results and extends the life of your appliance.
I know the frustration of a grill that just won’t perform. Over time, grease, food debris, and even insects can block burner holes. This build-up prevents gas from flowing correctly. It creates cold spots and inconsistent cooking. Cleaning these essential components restores your grill’s efficiency. This guide will walk you through each step. We will cover preparation, cleaning methods, and reassembly. Get ready to enjoy perfectly grilled meals again.
Takeaway:
- Regular cleaning of gas grill burners prevents uneven heating and extends grill life.
- Always disconnect the gas supply and allow the grill to cool before cleaning.
- Use a wire brush or stiff brush to clear burner holes and surfaces.
- Check and clear venturi tubes for spider webs or blockages.
- Proper reassembly ensures safe and efficient operation.
To effectively clean gas grill burners, first ensure the gas supply is off and the grill is cool. Remove grates and heat tents. Then, carefully detach the burners. Use a wire brush or stiff brush to scrub away debris. Clear any blocked holes with a small wire or paperclip. Clean venturi tubes and manifold. Reassemble and test the grill for even flame.
Why Your Gas Grill Burners Need Regular Cleaning
You might wonder why cleaning your gas grill burners is so important. These components are the heart of your grill’s heating system. They distribute the gas and create the flame that cooks your food. Over time, several things can accumulate on them. Food drippings, grease, and carbon residue are common culprits. These substances can clog the small holes where gas exits.
A clogged burner cannot distribute heat evenly. This leads to hot spots and cold spots on your grilling surface. Imagine trying to cook steaks when one side burns and the other stays raw. This uneven cooking is frustrating and wastes food. Moreover, clogged burners force your grill to work harder. This can lead to increased gas consumption. It also causes faster wear and tear on components.
Beyond performance, cleaning addresses safety. Blocked gas flow can create dangerous flare-ups. It can also lead to gas leaks or inefficient combustion. Spiders and insects often build nests in the venturi tubes. These tubes carry gas from the valves to the burners. A nest can completely block gas flow. This causes a dangerous build-up of unburnt gas. Regular maintenance prevents these risks. It ensures your grill operates safely and efficiently. Keeping your grill clean is as important as learning how to clean grill grates with aluminum foil for optimal cooking results.
Essential Tools and Supplies for Burner Cleaning
Before you start the cleaning process, gather all your necessary tools and supplies. Having everything ready saves time and makes the job easier. You do not need specialized equipment. Most items are likely already in your garage or shed. Proper tools ensure you clean the burners effectively and safely.
Here is a list of what you will need:
- Wire Brush or Stiff Scrubber: This is essential for scrubbing away burnt-on food and rust. Choose one with strong bristles.
- Small Wire or Paperclip: A straightened paperclip or a thin wire can clear stubborn clogs in burner holes. A specialized burner cleaning tool also works well.
- Putty Knife or Scraper: Useful for scraping off heavy build-up from the inside of the grill box and the manifold.
- Bucket of Warm Soapy Water: A simple solution of dish soap and water helps loosen grease and grime.
- Gloves: Protect your hands from grime and cleaning solutions.
- Shop Vac or Compressed Air: Helps remove loose debris from the grill body and venturi tubes.
- Screwdriver (Phillips or Flathead): You may need this to remove screws holding the burners in place.
- Flashlight: Helpful for inspecting venturi tubes and hard-to-see areas.
- Rag or Old Towel: For wiping down surfaces and drying parts.
- Garden Hose: For rinsing parts if they are heavily soiled.
Using the right tools ensures a thorough clean. It also protects your grill parts from damage. Always make sure your tools are clean too. This prevents transferring old dirt back onto your grill.
Safety First: Pre-Cleaning Precautions
Safety is paramount when working with a gas grill. Before you even think about touching the burners, you must take proper precautions. Ignoring these steps can lead to serious injury or damage. I always stress this part of the process. It is not something to rush through.
First, turn off the gas supply. Locate the gas tank valve and turn it to the “off” position. If your grill connects directly to a natural gas line, turn off the main shut-off valve for the grill. This stops gas from flowing to the burners. It eliminates the risk of accidental gas leaks during cleaning.
Second, disconnect the gas tank. Unscrew the regulator from the gas tank. This ensures no residual gas is in the lines. For natural gas grills, simply ensuring the shut-off valve is off is usually sufficient. But disconnecting the tank offers an extra layer of security. This is similar to handling fuel systems when you need to know how to clean a gas tank on a lawn mower.
Third, allow the grill to cool completely. Never work on a hot grill. Even a warm grill can cause burns. Wait until all components are cool to the touch. This can take an hour or more after use. Patience is key here.
Fourth, remove the cooking grates and heat tents/flavorizer bars. These parts sit above the burners. They must be removed to access the burners directly. Set them aside on a protective surface. You can clean these separately later if needed. Cleaning rust from outdoor cooking surfaces is also important, much like when you need to know how to clean rust off of Blackstone grills.
By following these safety steps, you create a safe environment for cleaning. You protect yourself and your grill. Do not skip any of these crucial precautions.
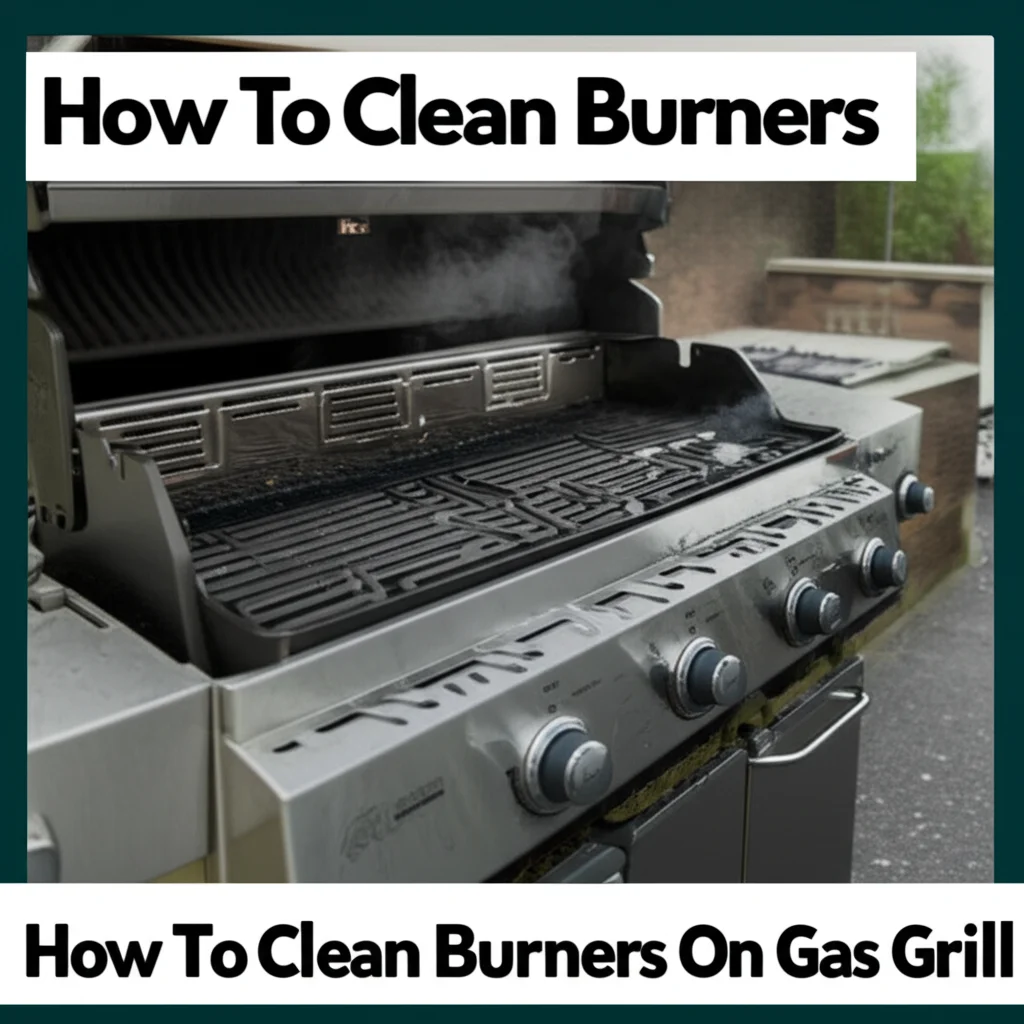
Step-by-Step Guide to Removing Grill Burners
Once you have completed all safety precautions, you can proceed with removing the burners. This step requires a gentle but firm hand. Grill burners can sometimes be fragile, especially if they are older or corroded. Take your time to avoid bending or breaking them. I find that understanding the specific design of my grill helps here.
Most gas grills have burners held in place by a single screw or clip at one end. The other end, called the venturi tube, slides over a gas orifice. This orifice is a small nozzle where the gas comes out from the manifold.
Here are the general steps for removal:
- Locate the Fasteners: Look at each burner. You will usually see a screw or a cotter pin at the back end. This screw secures the burner to the grill’s firebox.
- Unscrew or Unclip: Use the appropriate screwdriver (Phillips or flathead) to remove the securing screw. If it is a pin, pull it out with pliers. Sometimes, burners just sit in place with no fasteners.
- Lift and Slide: Once the fastener is removed, gently lift the burner slightly. Then, slide the venturi tube end off the gas orifice. The venturi tube is the wider, usually tapered tube at the end of the burner. It connects to the gas manifold.
- Inspect Each Burner: As you remove each burner, inspect it for visible damage. Look for cracks, excessive rust, or large holes. If a burner is severely damaged, it might be time for a replacement.
- Note Their Position: Pay attention to which burner came from which position. While many burners are interchangeable, some grills have different sized or shaped burners. Knowing their original location makes reassembly easier. You can even take a photo before you start.
Place the removed burners on a clean, flat surface. Now they are ready for a thorough cleaning. Remember to be gentle. Forcing them can cause irreparable damage.
Deep Cleaning Your Gas Grill Burners
Now that your burners are removed, it is time for the deep cleaning. This is where you tackle all that accumulated grime, rust, and insect nests. I approach this step with a clear goal: to restore each burner’s gas flow. Different types of build-up require specific attention.
Tackling Surface Debris and Rust
The first step is to remove any loose debris and rust from the exterior of the burner.
- Brush Thoroughly: Use a stiff wire brush to scrub the entire surface of each burner. Pay close attention to the small gas ports or holes. These are where the flames emerge. Brush along the length of the burner. This helps dislodge any stuck-on food or carbon.
- Scrape Heavy Build-up: For very heavy, caked-on grease or rust, a putty knife or scraper can help. Gently scrape without gouging the burner material. This will loosen the most stubborn layers.
- Rinse if Needed: If your burners are very dirty, you can rinse them with water. However, ensure they are completely dry before reinstallation. Water can cause rust if left to sit.
Clearing Clogged Gas Ports
This is the most critical part of cleaning. The small holes on the burner are essential for even flame distribution.
- Use a Small Wire: Take a straightened paperclip, a small drill bit (used manually, not with a drill), or a dedicated burner cleaning tool. Carefully poke it into each individual gas port. Push it through to clear any blockages. Do not enlarge the holes. Just clear them.
- Avoid Toothpicks: While a toothpick might seem convenient, it can break off inside the hole. This creates a new, harder-to-remove clog. Use metal tools.
- Tap and Brush Again: After poking all holes, lightly tap the burner against a hard surface. This helps dislodge any debris pushed inside. Then, brush the burner again to clear away loose particles.
Addressing Interior Blockages: Venturi Tubes
The venturi tubes are the long, often tapered parts of the burners that connect to the gas manifold. Spiders and other insects love to build nests inside these tubes. These nests can severely restrict gas flow. Clearing them is vital, similar to how one might clean a pilot light on a gas fireplace.
- Inspect with a Flashlight: Shine a flashlight into the venturi tube. Look for any spider webs, insect nests, or other obstructions.
- Use a Flexible Brush or Shop Vac: A specialized flexible brush designed for venturi tubes works best. Push it all the way through the tube to clear any blockages. Alternatively, use a shop vac to suck out debris. You can also blow compressed air through the tube, but ensure the debris has somewhere to go.
- Avoid Water Inside: Try to keep water out of the venturi tubes if possible. It can be hard to dry them completely, leading to rust inside.
By following these steps, you will restore your burners to optimal condition. This ensures proper gas flow and even heat for your next cookout.
Cleaning the Venturi Tubes and Manifold
While cleaning the burners themselves is crucial, paying attention to the venturi tubes and the gas manifold is equally important. These parts work together to deliver gas to the burners. Blockages here can prevent your grill from lighting or heating correctly. I have found that overlooking these components often leads to continued performance issues.
Deep Cleaning Venturi Tubes
We touched upon cleaning venturi tubes in the previous section. Let’s elaborate on their specific care. The venturi tube is the part of the burner that slips over the gas orifice. It’s designed to draw in air and mix it with gas before it reaches the burner holes. This air-gas mixture is necessary for a clean, efficient flame.
- Visual Inspection: Hold each venturi tube up to a light source. Look for any signs of obstruction. Spider webs are the most common culprits. Small insects, dirt, or even corrosion flakes can also get trapped inside.
- Mechanical Cleaning: Use a long, flexible brush specifically designed for cleaning venturi tubes. Push the brush all the way through the tube several times. This will dislodge any debris. If you do not have a specialized brush, a stiff wire or a long pipe cleaner can work for smaller tubes.
- Air Pressure: After brushing, use compressed air to blow out any remaining loose particles. Direct the nozzle into the tube and let the air clear it out. A shop vac can also be used to suck out debris. Ensure the air pressure is not so high it damages the burner.
Cleaning the Gas Manifold and Orifices
The gas manifold is the main pipe that runs along the front or back of the grill. It feeds gas to each burner’s orifice. The orifices are tiny brass or metal nozzles where gas exits the manifold and enters the venturi tubes.
- Inspect Orifices: Once the burners are removed, you can see the orifices. They are small, usually brass-colored fittings. Make sure they are clear. Sometimes, they can get clogged with carbon or debris.
- Clear Orifices (Carefully): If an orifice looks partially blocked, you can use a fine wire (like a guitar string or a very thin paperclip) to gently clear it. Be extremely careful not to enlarge the hole. The size of the orifice determines the gas flow. Enlarging it can lead to unsafe gas levels or improper flame. Do not use anything harder than brass on brass orifices.
- Clean Manifold Surface: Use a rag or a soft brush to wipe down the exterior of the manifold. Remove any grease or dirt. You can also use a mixture of dish soap and water for this. Ensure no water gets inside the manifold.
Keeping these components clean ensures proper gas flow. It promotes even flames and prevents dangerous gas build-up. This maintenance is key for a well-functioning grill.
Reassembling and Testing Your Gas Grill Burners
After all your hard work cleaning, it is time to put everything back together. Proper reassembly is crucial for the grill’s safe and efficient operation. Do not rush this final stage. I always double-check every connection.
Reassembly Steps
- Reattach Burners: Carefully slide each burner’s venturi tube back over its corresponding gas orifice. Ensure the venturi tube is securely seated. You should feel it slide firmly onto the nozzle.
- Secure Burners: Fasten the opposite end of each burner with its screw or clip. Make sure it is tight but do not overtighten. The burner should be stable and not wobble. If you noted the position of each burner during removal, place them back in their original spots.
- Replace Heat Tents/Flavorizer Bars: Once all burners are secured, place the heat tents or flavorizer bars back in their correct positions. These sit directly above the burners and protect them from dripping grease. They also help distribute heat.
- Replace Cooking Grates: Finally, set the cooking grates back into the grill. Ensure they are seated properly and lie flat.
Testing for Proper Function
Before you start grilling, you need to test the burners. This ensures everything is working correctly and safely.
- Reconnect Gas Supply: Carefully reconnect the gas tank regulator to the tank. Turn the gas tank valve to the “on” position. Listen for any hissing sounds. A hissing sound indicates a gas leak.
- Perform a Leak Test: If you smell gas or hear a hiss, perform a leak test. Mix some dish soap and water to create a soapy solution. Apply this solution to all gas connections (where the regulator connects to the tank, and where the gas lines connect to the manifold). If bubbles appear, you have a leak. Turn off the gas immediately and tighten connections or replace faulty parts. This step is as vital as cleaning a gas tank on a lawn mower to ensure there are no fuel leaks.
- Light the Burners: Open the grill lid. Turn on each burner, one by one, to its highest setting. Use the igniter to light them.
- Observe the Flames: A clean burner should produce a consistent, mostly blue flame. Some yellow tips are acceptable, but large, lazy yellow or orange flames indicate improper gas-to-air mixture or remaining clogs. If the flame is uneven, you might need to re-adjust the burner or re-clean it. The flame should be strong and steady.
If all burners light properly and show blue flames, your grill is ready for action! You have successfully completed the cleaning and reassembly.
Maintaining Burner Performance: Tips for Longevity
Cleaning your gas grill burners is not a one-time event. To keep your grill performing at its best, regular maintenance is key. Following a consistent routine will extend the life of your burners and ensure consistently great grilling results. I always remind myself that prevention is easier than deep cleaning.
Regular Post-Grill Burn-Off
A quick burn-off after each use can prevent heavy build-up.
- High Heat Burn: After cooking, turn the grill to high heat for about 10-15 minutes. Close the lid. This will burn off most food residue on the grates and some accumulated grease above the burners.
- Brush Grates: After the burn-off, use a grill brush to scrape the grates clean. While this does not directly clean the burners, it reduces the amount of drippings that reach them.
Periodic Quick Cleans
Every few uses, perform a quicker inspection of your burners.
- Visually Inspect: Lift the grates and heat tents. Quickly look at the burner flames. Are they even? Are they blue? If you see weak spots or yellow flames, it is a sign that a more thorough cleaning is needed soon.
- Brush Burners (Lightly): With the grill off and cool, you can lightly brush the top surface of the burners without removing them. This helps prevent minor clogs from becoming major issues.
Annual Deep Cleaning
Once a year, or more often if you grill frequently, perform a full deep clean. This includes removing the burners, cleaning the venturi tubes, and inspecting the manifold. This comprehensive clean addresses hidden issues and ensures long-term performance. It is like an annual tune-up for your grill.
Protect Your Grill
- Use a Grill Cover: A good quality grill cover protects your grill from weather elements. This includes rain, snow, and excessive sun. Exposure to elements can lead to rust and corrosion on metal parts, including burners.
- Store in a Dry Place: If possible, store your grill in a shed or garage during the off-season. This further protects it from harsh conditions.
- Clean Drip Tray: Regularly clean the drip tray and grease management system. Overflowing grease can drip onto burners and cause flare-ups or heavy build-up. Keeping various components of an outdoor kitchen clean helps prolong their life, similar to how cleaning grease off stainless steel keeps appliances looking new.
By incorporating these maintenance habits, your gas grill burners will deliver consistent performance. You will enjoy more time grilling and less time troubleshooting.
Frequently Asked Questions
How often should I clean my gas grill burners?
You should clean your gas grill burners thoroughly at least once a year. If you use your grill frequently (more than once a week), consider a deep clean every six months. Between deep cleans, perform a quick visual inspection every few uses to check flame consistency. Regular burn-offs after each use also help maintain burner performance.
What happens if I don’t clean my grill burners?
Neglecting burner cleaning leads to several issues. Flames become uneven or weak, causing hot and cold spots on your grill. This results in poorly cooked food. Clogged burners also increase gas consumption. They can create dangerous flare-ups and may shorten the lifespan of your grill components. Insect nests in venturi tubes can block gas flow completely.
Can I use water to clean gas grill burners?
Yes, you can use warm soapy water to clean the exterior of detached burners. However, ensure they are completely dry before reinstallation. Water left inside venturi tubes or on burner surfaces can cause rust. Avoid getting water inside the gas manifold or orifices. A wire brush is usually more effective for removing stubborn clogs.
How do I know if my grill burners are clogged?
Signs of clogged grill burners include uneven flames, yellow or orange flames (instead of mostly blue), weak flames, or burners that struggle to light. You might also notice cold spots on your cooking grates. If your grill is not heating up to temperature or one side is significantly cooler, it usually indicates a burner issue.
Should I replace grill burners or clean them?
First, try cleaning your burners thoroughly. Often, a good cleaning restores them to full function. However, if burners are heavily rusted, cracked, or have large holes (not original gas ports), replacement is necessary. Excessive corrosion or damage makes them unsafe and inefficient. Cleaning is a cost-effective first step, but know when to replace.
Conclusion
Cleaning your gas grill burners is a simple yet vital task. It directly impacts your grilling experience and the longevity of your appliance. I hope this guide helps you tackle this maintenance job with confidence. Remember, clean burners mean consistent heat. This consistency leads to perfectly cooked meals every time.
By regularly cleaning your gas grill burners, you ensure safety. You also extend the life of your grill. You prevent frustrating uneven cooking. Take the time to follow these steps. You will enjoy the benefits of a well-maintained grill for many seasons. So grab your tools, get cleaning, and look forward to delicious barbecue. Happy grilling!
- Gas Grill Cleaning
- Grill Maintenance
- Burner Cleaning
- Outdoor Cooking
- BBQ Care

Todd Martin
Senior Writer
With over 15 years of experience in home renovation and design, I started HEG to share what I’ve learned with homeowners who want to create spaces that are both beautiful and functional. I’ve always believed in a hands-on approach, and over the years, I’ve picked up practical solutions that actually work. Through HEG, I aim to make home improvement more approachable, sharing real tips that help you create a home you truly love.