· Todd Martin · Home Maintenance · 21 min read
How To Clean Air Conditioner Wall Unit
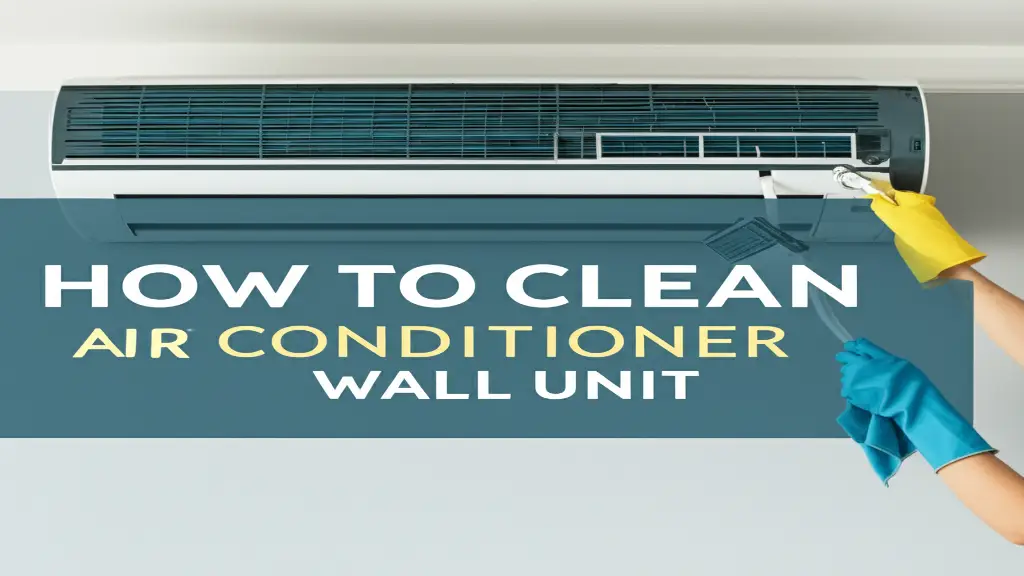
How to Clean Your Air Conditioner Wall Unit for Optimal Performance
Do you notice your air conditioner wall unit is not cooling as well as it used to? Perhaps you detect a musty smell when it runs. These are clear signs that it is time to clean your air conditioner wall unit. Regular cleaning is not just about keeping things neat; it significantly impacts your unit’s performance, the air quality in your home, and your energy bills.
I understand the importance of a well-maintained AC system, especially during hot weather. This guide will walk you through the essential steps to thoroughly clean your air conditioner wall unit. You will learn how to tackle everything from dusty filters to hidden mold, ensuring your unit runs efficiently and provides fresh, cool air. Let us get your wall unit back in top shape!
Takeaway
- Prioritize Safety: Always disconnect power before starting any cleaning.
- Clean Filters Regularly: Wash or replace air filters every 2-4 weeks.
- Address Coils: Carefully clean evaporator coils to ensure efficient cooling.
- Clear Drain Lines: Prevent mold and water leaks by flushing the drain line.
- Control Mold: Inspect and clean for mold growth, especially in damp areas.
To effectively clean an air conditioner wall unit, you must first disconnect its power, then clean or replace the air filters. Next, you should carefully clean the evaporator coils and blades. Finally, ensure the drain pan and line are clear of obstructions and mold for optimal performance and air quality.
Why Regular Cleaning of Your Wall AC Unit Matters
Keeping your air conditioner wall unit clean offers many benefits. It is more than just a chore; it is a critical part of home maintenance. A clean unit works better and lasts longer. Neglecting cleaning can lead to several problems.
First, a dirty AC unit consumes more energy. Dust and grime on filters and coils make the unit work harder. This increased effort translates directly to higher electricity bills. You pay more for less cooling. My experience shows that a clean unit can cut energy use significantly.
Second, indoor air quality suffers greatly. Your wall unit pulls air from your room, cools it, and puts it back. If the filters and coils are dirty, they can circulate dust, allergens, and even mold spores. This creates unhealthy air for you and your family. I always recommend cleaning to improve the air you breathe.
Third, a lack of cleaning shortens the lifespan of your unit. Overworked components wear out faster. Dirty coils can freeze, and clogged drain lines can cause water damage. Regular maintenance prevents these issues. This saves you money on costly repairs or early replacement.
Finally, a dirty unit often produces strange odors. Mold and mildew can grow in damp, dark areas inside the unit. These smells then spread throughout your home. Cleaning eliminates the source of these unpleasant odors. It leaves your home smelling fresh.
Safety First: Preparing to Clean Your Air Conditioner Wall Unit
Before you touch your air conditioner wall unit, safety is most important. You work with electricity and moving parts. Taking precautions prevents accidents and injuries. I always prioritize safety before starting any maintenance task.
First, turn off the power to the unit. Do not just use the remote control. Find the circuit breaker that controls your AC unit and flip it to the “off” position. This ensures no electricity flows to the unit. This step prevents electric shock. It also stops the fan from turning on accidentally.
Next, gather all your cleaning supplies. Having everything ready saves time and ensures a smooth process. You will need a few basic items. These include a soft brush, a vacuum cleaner with attachments, a spray bottle, and a mild cleaning solution. I find a mix of water and mild dish soap works well. You might also need a specialized AC coil cleaner.
Protect your surroundings. Place old towels or a drop cloth on the floor directly beneath the wall unit. Cleaning can be messy, especially when dealing with dust and water. This protects your flooring and furniture from drips and spills. I learned this lesson early on.
Wear appropriate protective gear. Gloves protect your hands from dirt and cleaning solutions. A face mask is also a good idea. It prevents you from inhaling dust, mold spores, or cleaning fumes. Safety glasses protect your eyes from splashes.
Finally, allow the unit to cool down if it has been running. This is important for both safety and effectiveness. Working on a warm unit can be less comfortable. It also allows time for any condensation to dissipate. Once these steps are complete, you are ready to start cleaning.
Cleaning the Air Filters: Your First Line of Defense
The air filter is the most important component to clean regularly in your air conditioner wall unit. It is the first line of defense against dust and debris entering the unit. A clean filter ensures good airflow and prevents bigger problems. I make sure to check my filters every few weeks.
Most wall units have removable filters. These filters are usually located behind the front panel of the unit. You can typically unclip or slide the front panel open to access them. Look for tabs or latches that release the cover. Handle the panel gently to avoid damage.
Once the front panel is open, you will see the air filters. They usually look like mesh screens. Carefully unclip or slide them out of their slots. Take note of how they fit into the unit. This makes reinstallation easier later.
Inspect the filters for dust and dirt buildup. If they are heavily coated, you will see a thick layer of gray fuzz. For washable filters, you can clean them with warm water and a mild detergent. Rinse them thoroughly until the water runs clear. I find that using a soft brush helps dislodge stubborn dirt.
If your filters are disposable, you must replace them with new ones. Do not try to wash disposable filters; they are not designed for it. Make sure you use the correct size and type of replacement filter specified by your unit’s manufacturer. Using the wrong filter can reduce efficiency.
After washing, let the filters air dry completely before putting them back. Moisture can encourage mold growth inside the unit. This step is critical for maintaining healthy air quality. Once dry, slide them back into place, ensuring a snug fit, and close the front panel. Regular filter cleaning significantly improves your unit’s performance and indoor air quality. For general window AC filter cleaning, you can refer to our guide on how to clean window AC unit filter.
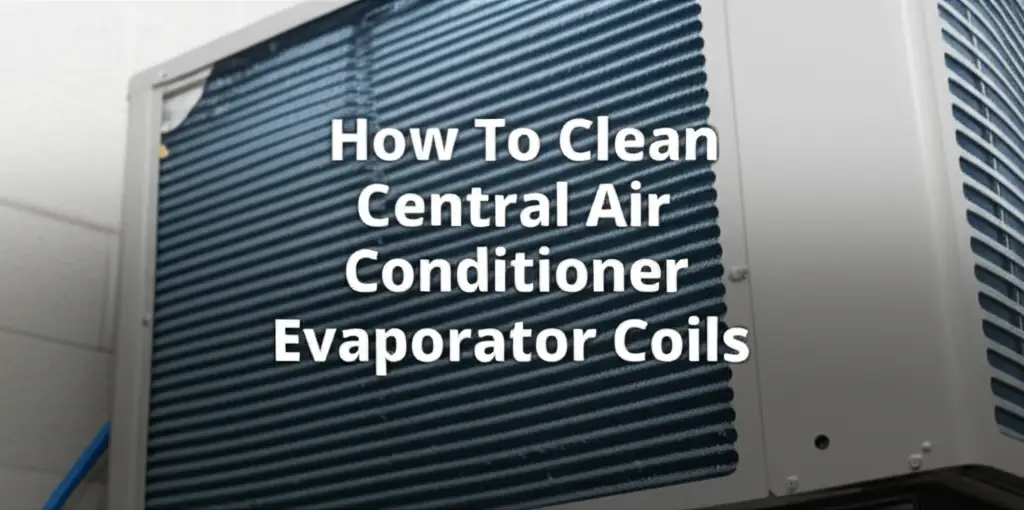
Deep Cleaning the Evaporator Coils and Fins
After cleaning the filters, the evaporator coils and fins are the next critical areas. These components are responsible for cooling the air. They get dirty over time, which reduces your unit’s efficiency. I find this part needs careful attention.
The evaporator coils are located behind the air filters. They look like rows of thin metal tubes. The fins are the delicate aluminum slats that run between these tubes. They are very fragile, so handle them with care. Bending them can block airflow.
First, use a soft brush or a vacuum cleaner with a brush attachment to gently remove loose dust and debris from the coils and fins. Work carefully, brushing downwards. Do not apply too much pressure. My preferred method is to vacuum first.
For deeper cleaning, you will need an evaporator coil cleaner. These cleaners come in spray cans and are designed to break down grime without damaging the coils. Follow the product instructions carefully. Often, you spray the cleaner onto the coils, and it will foam up and drip down into the drain pan. Some cleaners are “no-rinse,” meaning they evaporate without residue.
If you do not have a specialized coil cleaner, a solution of warm water and a little dish soap can work. Spray it lightly onto the coils, being careful not to get too much water on electronic components. Let it sit for a few minutes. Then, lightly mist with clean water if the cleaner requires rinsing. Be mindful of overspray.
Use a fin comb if any fins are bent. This tool can carefully straighten them. Straight fins allow for better airflow and heat exchange. This improves the unit’s cooling efficiency. This small detail makes a big difference in performance.
After cleaning, allow the coils and fins to air dry completely. This might take some time. Ensure they are dry before reassembling the unit. This prevents mold growth and electrical issues. You can also refer to our guide on how to clean coils on window AC unit for more coil cleaning insights.
Addressing the Drain Pan and Line: Preventing Clogs and Mold
The drain pan and drain line are often overlooked areas in an AC wall unit, but they are crucial for preventing water leaks and mold growth. As the evaporator coils cool the air, they remove moisture, which collects in the drain pan. This water then flows out through the drain line. I have seen many problems arise from clogged drain lines.
First, locate the drain pan. It sits directly beneath the evaporator coils. You might need to remove a few more panels or covers to access it. Use a flashlight to inspect the pan for standing water, slime, or mold growth. A healthy drain pan should be dry or have minimal moisture.
If there is standing water or visible slime, you need to clean the pan thoroughly. Use a cloth dampened with a mild cleaning solution, like a mixture of water and vinegar, to wipe down the pan. Vinegar is excellent for killing mold and mildew. Make sure to reach into all corners. You can also consider a guide on how to clean with vinegar and baking soda for general cleaning solutions.
Next, address the drain line. This is a small hose or pipe that leads from the drain pan to the outside or to a household drain. Clogs usually occur here due to algae, mold, or dirt buildup. If your unit is leaking water, a clogged drain line is a likely culprit.
To clear a clog, you can try flushing the line. Mix a solution of equal parts white vinegar and warm water. Slowly pour this solution into the drain pan. The solution will travel through the drain line, helping to dissolve any blockages. Let it sit for 15-30 minutes.
Alternatively, you can use a small, flexible brush, like a bottle brush, to manually clear the beginning of the drain line if accessible. For stubborn clogs, some people use a wet/dry vacuum to suction out the clog from the outdoor end of the drain line. Be very careful with this method to avoid damaging the line. Our article on how to clean an air conditioner drain line provides more detailed methods for this task.
After flushing, ensure the water flows freely. You might need to repeat the flushing process if the clog is severe. Regular cleaning of the drain pan and line prevents serious water damage and maintains healthy air.
Cleaning the Exterior Casing and Vents: A Finishing Touch
Once the internal components are clean, it is time to turn your attention to the exterior of your air conditioner wall unit. Cleaning the outer casing and vents not only makes the unit look better but also ensures optimal airflow. This step contributes to both aesthetics and function. I always make sure the exterior is spotless.
First, gently wipe down the entire outer casing of the wall unit. Use a soft, damp cloth. You can add a small amount of mild all-purpose cleaner to the cloth if there are stubborn marks or grease. Avoid spraying cleaner directly onto the unit, especially near control panels or electrical components. Spray the cloth instead.
Pay close attention to the air intake and output vents. These are the grilles where air enters and exits the unit. Dust and grime can accumulate on these surfaces. Use a soft brush or the brush attachment of your vacuum cleaner to remove loose dust from the vent slats.
For more thorough cleaning of the vents, you can use a cotton swab or a small, soft-bristled brush dipped in a mild cleaning solution. Carefully clean between the slats. This ensures that airflow is not restricted. Restricted airflow makes the unit work harder and reduces efficiency.
If your wall unit has a decorative front panel that was removed for internal cleaning, clean it separately. Wipe it down with a damp cloth. Make sure it is completely dry before reattaching it to the unit. Some panels might be washable in a sink with warm soapy water if the manufacturer allows it. Always check your unit’s manual first.
After cleaning, buff the casing with a dry, clean microfiber cloth. This removes any streaks and leaves the unit looking shiny. A clean exterior reflects a well-maintained interior. This final step enhances the unit’s appearance and helps maintain its efficiency.
Preventing Mold and Unpleasant Odors in Your Wall AC Unit
Mold and mildew can be a persistent problem in air conditioner wall units due to the dark, damp environment they provide. These fungi not only cause musty odors but also impact air quality. Preventing their growth is crucial for a healthy home. I proactively tackle mold in my AC units. For general guidance on mold in AC units, consider reading our article on how to clean mold from AC unit.
First, consistent cleaning of the drain pan and drain line is key. Mold thrives in standing water. If your drain pan consistently has water, it means the drain line is likely partially clogged or incorrectly sloped. Regularly flush the drain line with a vinegar solution. This helps kill mold spores and prevents new growth.
Second, ensure proper drainage. The unit should be slightly tilted towards the outside to allow water to flow freely from the drain pan. If your unit is not draining properly, you might need to adjust its installation. Proper slope is essential for moisture removal.
Third, use an anti-mold spray designed for AC coils. After deep cleaning the evaporator coils, you can apply an anti-fungal or anti-bacterial coil cleaner. These products leave a residue that inhibits mold growth. Always follow the product instructions carefully.
Fourth, consider running the fan mode for a short period after turning off the cooling. This helps dry out the internal components, especially the evaporator coil and drain pan. Running the fan for 15-20 minutes after cooling stops removes residual moisture. This greatly reduces the chances of mold developing.
Fifth, maintain good indoor humidity levels. High humidity in your home can contribute to moisture buildup in your AC unit. Using a dehumidifier in very humid climates can reduce the overall moisture load. This makes it harder for mold to establish itself.
Finally, do not ignore any musty smells. A persistent musty odor is a strong indicator of mold growth. If you smell it, perform a thorough inspection and cleaning as outlined in the previous sections. Addressing mold early prevents it from spreading and becoming a larger problem. For more targeted advice, look into how to clean mold from window air conditioner or how to clean window AC unit mold if applicable.
Essential Tools and Supplies for Wall Unit AC Cleaning
Having the right tools makes cleaning your air conditioner wall unit much easier and safer. You do not need many specialized items. Most are common household products. I keep these items ready for my cleaning routine.
Basic Cleaning Tools:
- Screwdrivers: You may need Phillips head or flathead screwdrivers to remove the front panel or other covers. Many wall units have easily removable clips, but some require tools.
- Soft Brush: A small, soft-bristled brush is perfect for gently removing dust from delicate fins and coils. An old, clean paintbrush works well too.
- Vacuum Cleaner with Attachments: A vacuum with a hose and brush attachment is essential. It efficiently removes loose dust from filters, coils, and vents. A crevice tool is great for tight spots.
- Spray Bottle: For applying cleaning solutions to coils and pans. Make sure it provides an even mist.
Cleaning Solutions:
- Mild Dish Soap: Mixed with warm water, this creates a simple, effective cleaner for filters, drain pans, and the exterior.
- White Vinegar: An excellent natural disinfectant and mold killer. Use it diluted with water for flushing drain lines and cleaning moldy surfaces.
- Evaporator Coil Cleaner: A specialized aerosol spray that cleans and deodorizes coils. Many are no-rinse, simplifying the process. Look for non-acidic types to protect your unit.
- Bleach (Optional, Diluted): For severe mold cases, a very diluted bleach solution (1 part bleach to 10 parts water) can be used on non-metal surfaces like drain pans. Use with extreme caution and good ventilation.
- Water: For rinsing filters and diluting cleaners.
Protective Gear:
- Gloves: Protect your hands from dirt, dust, and cleaning chemicals. Disposable or reusable rubber gloves are fine.
- Face Mask: Prevents you from inhaling dust, mold spores, or cleaning fumes. A standard dust mask is usually sufficient.
- Safety Glasses: Protect your eyes from splashes of cleaning solutions or dislodged debris.
Other Useful Items:
- Drop Cloths or Old Towels: Place these under the unit to catch drips and debris. This keeps your floor clean.
- Microfiber Cloths: Great for wiping surfaces clean and buffing for a streak-free finish. They are absorbent and lint-free.
- Fin Comb: If your evaporator fins are bent, this tool helps gently straighten them. This improves airflow and efficiency.
- Wet/Dry Vacuum: Useful for suctioning out stubborn clogs from the drain line. Exercise caution when using this method.
Having these items ready before you begin saves time and ensures a thorough and safe cleaning process.
How Often Should You Clean Your Wall AC Unit?
The frequency of cleaning your air conditioner wall unit depends on several factors. Regular maintenance is key to efficiency and longevity. I adjust my cleaning schedule based on my unit’s usage.
First, air filters should be cleaned or replaced most frequently. For average use, I recommend checking them every two to four weeks. If you use your AC unit constantly, have pets, or live in a dusty environment, check them even more often. Dirty filters quickly restrict airflow and reduce efficiency.
Second, the evaporator coils and drain pan/line require less frequent attention but are critical. I suggest deep cleaning these components at least once per cooling season. If you use your AC unit year-round, clean them every six months. This prevents significant dust buildup, mold growth, and clogs.
Third, consider your home environment.
- Pets: Animal dander and hair can quickly clog filters and coils. If you have furry friends, you will need to clean more often.
- Dusty Areas: Homes near construction sites, busy roads, or in areas with high pollen counts will accumulate more dust and debris. This necessitates more frequent cleaning.
- Humidity: High humidity levels can contribute to mold growth. If you live in a humid climate, pay extra attention to mold prevention and drain line cleaning.
Fourth, usage patterns play a role. If your wall unit is only used for a few weeks in the summer, an annual deep clean before the cooling season might suffice for the coils and drain. However, units that run almost daily will need more frequent attention.
Finally, signs of trouble indicate an immediate need for cleaning. If you notice reduced cooling performance, increased energy bills, strange noises, or a musty smell, it is time for a thorough cleaning regardless of your schedule. These are clear indicators of a dirty unit.
In summary, aim for monthly filter checks and cleanings, and at least a seasonal deep clean of the coils, pan, and drain line. This proactive approach ensures your air conditioner wall unit performs optimally.
Troubleshooting Common Issues After Cleaning
Even after a thorough cleaning of your air conditioner wall unit, you might encounter a few minor issues. Do not panic; most are easy to fix. I have come across these situations myself.
One common issue is water leaking from the unit. If this happens after cleaning, the most probable cause is a clogged drain line or an improperly seated drain pan. Recheck the drain line for any remaining blockages. Pour a small amount of water into the drain pan to see if it flows out freely. Ensure the drain line is not kinked or disconnected. Sometimes, air bubbles can get trapped, preventing flow. You can use an air compressor with caution to clear the line, as detailed in our guide on how to clean AC drain line with air compressor.
Another problem is reduced cooling performance. If the unit is not cooling as efficiently as expected, first recheck the air filter. Make sure it is completely dry and properly seated. Then, inspect the evaporator coils again. Even a small patch of dirt or a few bent fins can impact performance. Ensure the front panel is closed securely.
Musty odors returning indicate mold or mildew growth was not fully addressed. This often means there is still moisture or mold in the drain pan, on the coils, or within the fan housing. Re-clean these areas with a stronger mold-killing solution, like vinegar. Consider running the fan-only mode for longer periods after cooling to dry out the unit. Remember, preventing standing water is key to mold control. If mold is a persistent issue, consider checking our guide on how to clean mold around air vents.
Strange noises after cleaning can be alarming. A rattling sound might mean a loose panel or screw. Check all panels to ensure they are securely fastened. A buzzing noise could indicate an electrical issue; if so, immediately turn off the power and call a professional. A new squeaking noise could be the fan motor or bearings needing lubrication, but this is usually a job for a professional.
Finally, if the unit does not turn on at all, recheck the circuit breaker. Ensure it is in the “on” position. Also, confirm that the remote control batteries are working. If these simple checks do not resolve the issue, it might be a more complex electrical problem requiring professional assistance. Always prioritize your safety and call an expert if you are unsure.
FAQ Section
How often should I clean my wall unit’s air filter?
You should clean or replace your wall unit’s air filter every two to four weeks. If you have pets, allergies, or live in a dusty area, check it more frequently. Regular filter maintenance is crucial for efficiency and air quality.
Can I use household cleaners like bleach on my AC unit?
Use household cleaners with caution. A diluted white vinegar solution is safe and effective for cleaning drain pans and mild mold. Bleach should only be used in a very diluted form (1:10 with water) on non-metal parts for severe mold and with excellent ventilation. Avoid harsh chemicals on coils.
What causes a musty smell from my wall AC unit?
A musty smell usually indicates mold or mildew growth inside the unit. This often occurs on the evaporator coils, in the drain pan, or in the drain line due to moisture buildup. Regular cleaning, especially of the drain system, helps prevent these odors.
How do I know if my AC drain line is clogged?
Signs of a clogged drain line include water leaking from the indoor unit, standing water in the drain pan, or reduced cooling efficiency. If water cannot drain properly, it backs up. Flushing the line with a vinegar solution often clears minor clogs.
Is professional cleaning necessary for wall AC units?
While regular DIY cleaning is essential, a professional deep clean every 1-2 years can be beneficial. Professionals have specialized tools to clean components you might not easily reach, such as the blower fan and condenser coils (if applicable to your unit’s design), ensuring a more thorough service.
Can cleaning my AC unit improve its energy efficiency?
Yes, absolutely. A clean air conditioner wall unit does not have to work as hard to cool your space. This means it consumes less electricity, leading to lower energy bills. Dirty filters and coils significantly reduce efficiency.
Conclusion
Cleaning your air conditioner wall unit is a vital step in maintaining a comfortable, healthy home environment. It is not just about aesthetics; it is about extending your unit’s life, improving indoor air quality, and saving money on energy bills. We have covered the critical steps: from ensuring safety by disconnecting power to diligently cleaning filters, coils, drain pans, and the exterior.
By consistently performing these cleaning tasks, you prevent common issues like reduced cooling, mold growth, and unpleasant odors. Remember, clean filters are your first line of defense, and clear drain lines prevent costly water damage. Make cleaning your air conditioner wall unit a regular part of your home maintenance routine. Your unit will thank you with efficient, reliable cooling for years to come. Take action today to give your wall unit the care it deserves!
- wall AC cleaning
- mini-split maintenance
- AC efficiency
- indoor air quality

Todd Martin
Senior Writer
With over 15 years of experience in home renovation and design, I started HEG to share what I’ve learned with homeowners who want to create spaces that are both beautiful and functional. I’ve always believed in a hands-on approach, and over the years, I’ve picked up practical solutions that actually work. Through HEG, I aim to make home improvement more approachable, sharing real tips that help you create a home you truly love.