· Todd Martin · Home Furniture Guide · 21 min read
How To Attach A Headboard To A Platform Bed

Attaching a Headboard to Your Platform Bed
A headboard transforms your bedroom. It adds style and comfort. Many people wonder how to attach a headboard to a platform bed. This guide gives you clear steps and methods. You can achieve a polished look and a stable sleeping space. We will cover different attachment types, necessary tools, and simple instructions. You will learn how to make your bed stand out. This project is easier than you think.
Takeaway:
- Identify your headboard and platform bed types first.
- Choose the best attachment method for your specific furniture.
- Gather all necessary tools and hardware before starting.
- Follow safety guidelines during installation.
- Consider professional help for complex setups or if unsure.
Attaching a headboard to a platform bed often involves using universal brackets, direct bolt-on connections, or wall-mounting. The correct method depends on your headboard and bed frame design, ensuring a secure and stable fit for improved bedroom aesthetics and comfort.
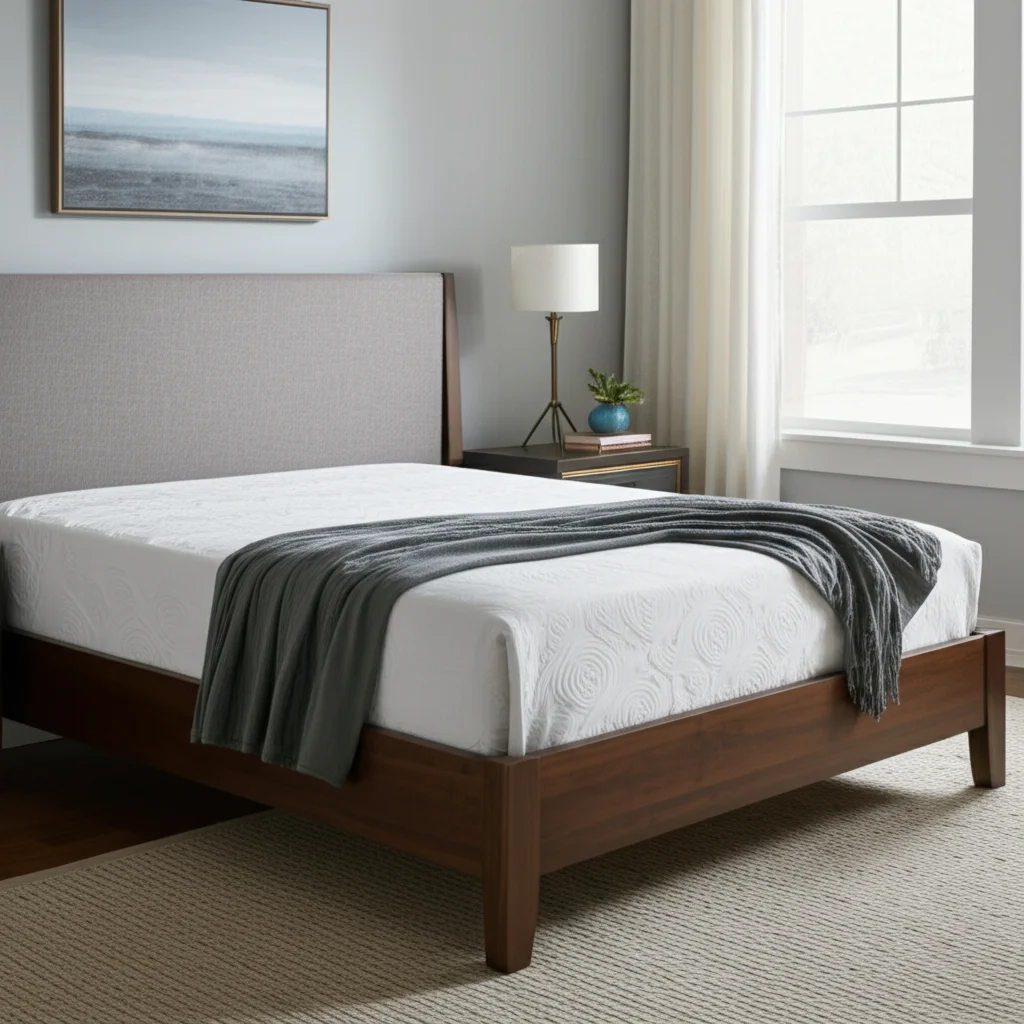
Understanding Platform Beds and Headboards
Platform beds offer solid support for your mattress. They do not require a box spring. This design makes them sleek and modern. Headboards are decorative panels at the head of a bed. They provide back support and define the room’s style. Knowing the types of each helps you choose the right attachment method. Different platform beds have different features. Some have pre-drilled holes for headboards. Others are simpler in design.
Headboards come in many styles. They can be wood, metal, upholstered, or even custom-made. The material impacts how you attach them. A heavy wooden headboard needs strong support. A lighter fabric headboard might use simpler hardware. Compatibility between your bed and headboard is key. If they are from the same manufacturer, attachment is usually easy. If not, you might need adapter plates.
It is important to check the design of both pieces. Look for attachment points on your platform bed frame. These are usually metal plates with holes near the top corners. Then, examine your headboard. Does it have legs or brackets? Are there pre-drilled holes? These details guide your project.
Essential Tools and Materials You Will Need
Before you start, gather your tools. Having everything ready saves time and effort. You might need specific tools depending on your chosen method. Always check your headboard or bed frame instructions first. Manufacturers often list required items. Do not skip this step. Proper tools make the job safer and easier.
Basic Tools for Headboard Attachment
- Adjustable Wrench or Socket Set: For tightening nuts and bolts.
- Screwdriver Set: Phillips and flathead, for various screws.
- Tape Measure: To ensure correct height and spacing.
- Level: To make sure the headboard is straight.
- Drill (with appropriate bits): If you need to create new holes.
- Pencil: For marking measurements.
- Safety Glasses: To protect your eyes.
- Gloves: For better grip and hand protection.
Common Materials and Hardware
- Headboard Attachment Brackets: These are often universal and sold separately.
- Bolts, Washers, and Nuts: Ensure they are the correct size and length.
- Wood Screws: If attaching to a wooden frame directly.
- Wall Anchors (if wall mounting): For secure attachment to drywall.
- Spacer Blocks: If there is a gap between the headboard and bed frame.
- Touch-up Paint or Wood Filler: For minor cosmetic repairs if needed.
Gathering these items beforehand helps you work efficiently. It prevents interruptions during the installation process. Remember, a successful project starts with proper preparation.
Method 1: Direct Bolt-On Attachment (Most Common)
The direct bolt-on method is the most common way to attach a headboard to a platform bed. Many platform beds and headboards come with pre-drilled holes. These holes align perfectly. This method creates a strong and stable connection. You will use bolts to secure the headboard legs to the bed frame. It is important to ensure the holes match. If they do not, you might need adapter plates.
Steps for Direct Bolt-On Attachment
- Align the Headboard: Position the headboard against the bed frame. Make sure the headboard legs are flush with the frame. Check that the bolt holes on the headboard align with those on the bed frame.
- Insert Bolts: Push the bolts through the aligned holes. Start from the headboard side or the bed frame side, depending on your setup.
- Add Washers and Nuts: On the opposite side of the bolt, place a washer. Then, thread a nut onto the bolt. Washers help distribute pressure and prevent damage.
- Hand-Tighten: Hand-tighten all nuts first. This allows for minor adjustments.
- Level and Adjust: Use a level to ensure the headboard is straight. Make any necessary adjustments.
- Fully Tighten: Once aligned, use an adjustable wrench or socket set to fully tighten all nuts. Do not overtighten, as this can strip threads or damage wood.
- Check Stability: Gently push and pull the headboard. It should feel secure and not wobble.
This method provides a clean and integrated look. It works best when your headboard and platform bed are designed to be compatible. If you are handy, you might also consider how to make a headboard for a queen-size bed to ensure it perfectly matches your bed frame.
Method 2: Using Headboard Brackets or Adapter Plates
Sometimes, your headboard and platform bed do not align. This happens if they are from different brands. Headboard brackets or adapter plates solve this problem. These items provide a bridge between the two pieces of furniture. They create new attachment points. Universal headboard brackets are widely available. They have multiple slots or holes. This allows for various alignment options.
Types of Brackets and Their Use
- Universal Bed Frame Brackets: These L-shaped or flat metal plates connect the headboard legs to the bed frame. They have multiple holes to accommodate different bolt patterns.
- Extension Brackets: If your headboard is too wide or too narrow for the bed frame, extension brackets can bridge the gap. They extend the reach of the headboard legs.
- Adapter Plates: Similar to brackets, these plates adjust the spacing between the headboard and the bed frame. They are useful when bolt patterns are close but not exact.
Steps for Attaching with Brackets
- Assess the Gap/Misalignment: Determine how much adjustment you need. Measure the distance between the headboard holes and the bed frame holes.
- Attach Brackets to Headboard: Bolt the adapter plates or universal brackets to the headboard legs first. Use the holes that align best.
- Align with Bed Frame: Position the headboard and brackets against the bed frame.
- Mark New Holes (if needed): If the bracket doesn’t align with existing bed frame holes, mark new spots for drilling. Use a pencil.
- Drill Pilot Holes: If marking new holes, carefully drill pilot holes into the bed frame. Use a drill bit slightly smaller than your bolts. This prevents wood splitting.
- Secure Brackets to Bed Frame: Bolt the brackets to the bed frame. Use washers and nuts.
- Tighten and Check: Hand-tighten all connections first. Level the headboard. Then, fully tighten all bolts. Check for stability.
Using brackets adds flexibility. It ensures a stable connection even with mismatched furniture. For more complex bed structures, like certain metal frames, you might also find insights in how to take apart a metal bed frame.
Method 3: Wall-Mounting a Headboard
Wall-mounting is a popular option. It is great when direct attachment to the bed frame is not possible. This method also works if you want a floating look. Wall-mounted headboards are very stable. They do not put any stress on the bed frame itself. This method is good for heavy or tall headboards. It also makes cleaning under the bed easier.
Advantages of Wall-Mounting
- Stability: A wall-mounted headboard is extremely secure. It does not wobble.
- Versatility: You can use almost any headboard style. It does not need to be compatible with a bed frame.
- Aesthetics: Creates a clean, minimalist look. The bed can be moved without affecting the headboard.
- Ease of Cleaning: Since the headboard is not attached to the bed, you have more room to how to clean under bed and around the bed.
Steps for Wall-Mounting
- Determine Height: Decide how high you want the headboard. This depends on your mattress and pillow height. Measure from the floor up. Mark the desired top edge.
- Locate Wall Studs: Use a stud finder to locate wall studs. Anchoring into studs provides the strongest support. Mark the stud locations with a pencil.
- Choose Mounting Hardware:
- French Cleats: Two interlocking wood or metal strips. One attaches to the wall, one to the headboard. They slide together.
- Z-Clips: Similar to French cleats but smaller.
- Heavy-Duty Picture Hangers: For lighter headboards.
- Molly Bolts or Toggle Bolts: If no studs are available, use these for drywall.
- Attach Hardware to Headboard: Screw one part of your chosen hardware (e.g., one side of the French cleat) to the back of the headboard. Ensure it is level.
- Attach Hardware to Wall: Line up the second part of the hardware on the wall. Use a level. Drill pilot holes into the studs. Secure the hardware to the wall.
- Hang the Headboard: Carefully lift the headboard. Engage the headboard hardware with the wall hardware.
- Check Security: Ensure the headboard is securely mounted and level.
Wall-mounting requires precision. It is best to have a helper. This method is especially useful for custom or oversized headboards. If you consider making your own headboard, such as how to make a headboard for a queen-size bed, wall-mounting offers great design flexibility.
Method 4: Freestanding Headboards and Stabilizing Them
Some headboards are designed to be freestanding. This means they are not physically attached to the bed or wall. They stand on their own legs. The weight of the mattress and bed frame holds them against the wall. This offers flexibility in design. You can easily move the headboard or bed. However, freestanding headboards can sometimes wobble or shift. It is important to stabilize them for safety and comfort.
When to Use a Freestanding Headboard
- Rental Properties: You cannot drill into walls or modify furniture.
- Changing Layouts: You like to rearrange your bedroom often.
- Unique Headboard Designs: The headboard is not compatible with standard attachment methods.
- Temporary Setups: For guest rooms or short-term living.
Stabilizing a Freestanding Headboard
Even a freestanding headboard needs stability. You do not want it to bang against the wall every time you move. Here are simple ways to make it more secure:
- Place the Bed Firmly Against It: Ensure your platform bed pushes directly against the headboard. This pressure holds it in place against the wall.
- Anti-Slip Pads: Place rubber or felt anti-slip pads under the headboard legs. These pads increase friction with the floor. They prevent sliding.
- Furniture Grippers: These are rubber cups or pads that go under furniture legs. They keep the headboard from moving on hard floors.
- Wall Bumpers: Stick clear silicone bumpers or felt pads to the back of the headboard where it touches the wall. This prevents scuffs and reduces noise.
- Temporary Wall Anchors (Non-Damaging):
- Command Strips: For lighter headboards, heavy-duty Command strips can provide a temporary, non-damaging bond to the wall. Ensure you use enough strips.
- Furniture Straps: Use furniture safety straps. These straps connect the headboard to wall studs. They prevent tipping but allow for easy unhooking. This is similar to methods used for securing tall furniture.
While offering flexibility, freestanding headboards require careful placement. Regularly check their stability. Make adjustments as needed. If you are building a custom bed, such as learning how to build a twin platform bed with storage underneath, consider how the headboard will integrate.
Attaching a Headboard to a Metal Platform Bed
Metal platform beds are popular for their durability and minimalist design. Attaching a headboard to a metal frame requires specific considerations. Many metal frames have pre-drilled holes on their leg posts. These holes are for headboard attachment. However, the holes may not always align perfectly with a chosen headboard. Knowing your metal bed frame type helps.
Common Metal Platform Bed Designs
- Integrated Headboard Brackets: Some metal frames come with built-in brackets. These are usually vertical plates with multiple slots. You can bolt a headboard directly to them.
- Simple Metal Frame: These frames might have just two or four holes on the leg posts. You need to match your headboard’s bolt pattern.
- Adjustable Frames: Some metal frames can expand or contract. This affects headboard alignment.
Steps for Metal Frame Attachment
- Identify Attachment Points: Look for pre-drilled holes or attachment plates on the vertical posts of your metal platform bed frame. These are usually at the head of the bed.
- Check Headboard Compatibility: Examine your headboard legs. Do they have holes? Do these holes align with the metal frame’s holes?
- Use Universal Brackets for Mismatches: If the holes do not align, you will need universal metal headboard brackets. These brackets typically have elongated slots. They offer flexibility for different hole patterns.
- Bolt Together:
- Place the headboard against the metal frame posts.
- If holes align, insert bolts through the headboard and frame holes. Secure with washers and nuts.
- If using brackets, attach the bracket to the headboard first. Then, attach the bracket to the metal bed frame.
- Ensure all connections are tight. Use a wrench.
- Consider Spacers: Sometimes, a small gap exists between the headboard and the metal frame. Use metal or wooden spacer blocks if needed. These fill the gap and prevent the headboard from flexing.
- Tighten All Fasteners: Go around and ensure all bolts and nuts are fully tightened. A loose connection can cause noise or instability.
Attaching a headboard to a metal platform bed is straightforward with the right hardware. Always double-check stability once the process is complete. If your bed frame has specific features, like an adjustable base, you might find similar concepts when learning how to attach a headboard to a Tempur-Pedic adjustable bed.
Attaching a Headboard to a Wooden Platform Bed
Wooden platform beds bring warmth and natural beauty to a room. Attaching a headboard to a wooden platform bed shares similarities with metal frames but has some unique aspects. Wooden frames typically have pre-drilled holes for headboard attachment. However, wood allows for more customization if holes do not align.
Understanding Wooden Platform Bed Designs
- Integrated Leg Posts: Many wooden platform beds have sturdy leg posts at the head. These posts often have pre-drilled holes.
- Solid Wood Frame: The main frame itself might be the attachment point.
- Custom Builds: If you built your own wooden platform bed, you have full control over attachment points.
Steps for Wooden Frame Attachment
- Locate Existing Holes: Most wooden platform beds have pre-drilled holes at the top of the bed frame, usually on the leg posts. Your headboard should have corresponding holes.
- Align and Bolt:
- Position the headboard against the wooden bed frame.
- Line up the holes on the headboard legs with those on the bed frame.
- Insert carriage bolts (with a rounded head) or hex bolts (with a hexagonal head) through the holes.
- On the other side, add a washer and a nut.
- Hand-tighten all connections.
- Using Adapter Plates/Brackets: If the holes do not align, use universal headboard brackets or adapter plates.
- Attach the bracket to the headboard first.
- Then, align the bracket with the wooden bed frame.
- If new holes are needed on the wooden frame, mark them carefully with a pencil.
- Drill Pilot Holes: Use a drill bit slightly smaller than your screws or bolts. This prevents splitting the wood.
- Secure the bracket to the wooden frame using wood screws or bolts with washers and nuts.
- Reinforcement for Heavy Headboards: For very heavy wooden headboards, consider adding extra support. You can add L-brackets underneath the headboard legs. Screw these into both the headboard and the bed frame. This increases stability.
- Check for Stability: Once all fasteners are tight, gently push and pull the headboard. It should be firm and secure. Do not overtighten, as this can damage the wood.
Working with wood provides some flexibility. If you are handy, you can always modify or reinforce attachment points. Remember, proper tools like a good drill make drilling pilot holes much easier. If you want to learn more about disassembling beds, guides like how to take apart a wooden bed frame with screws can give you insight into common construction.
Tips for a Secure and Stylish Headboard
Attaching a headboard is not just about functionality. It is also about aesthetics. A well-attached headboard improves the look of your entire bedroom. It also prevents annoying wobbles. Here are some extra tips to ensure your headboard is both secure and stylish.
Ensuring Stability
- Regular Checks: Periodically check all bolts and screws. They can loosen over time. Re-tighten them as needed. This prevents wobbling and noise.
- Correct Hardware: Always use the right size and type of hardware. Using too small screws or bolts can lead to instability.
- Spacer Blocks: If there is a gap between the headboard and the wall or bed frame, use spacer blocks. These can be wood, plastic, or even dense foam. They fill the void and add rigidity.
- Anti-Wobble Pads: Apply felt or rubber pads to contact points. This reduces friction and prevents the headboard from moving or scratching the wall.
- Don’t Overload: Avoid hanging heavy items on your headboard unless it is specifically designed for it. This can strain the attachment points.
Aesthetic Considerations
- Height and Proportion: Ensure your headboard is the right height for your bed and room. It should not look too small or too overpowering. A good rule of thumb is for the headboard to extend at least 2-3 feet above the top of your mattress.
- Material Match/Contrast: Consider how the headboard material complements or contrasts with your bed frame. A wooden headboard can warm up a metal frame. An upholstered headboard adds softness. If you have an upholstered headboard, consider how to clean upholstered headboard to maintain its look.
- Centered Placement: Always measure and center your headboard with your bed. An off-center headboard looks unbalanced.
- Wall Protection: If the headboard touches the wall, use clear wall protectors or felt pads. This prevents scuffs, dents, and paint damage.
- Lighting and Decor: Once the headboard is secure, think about adding lighting or decorative elements. Small lamps, string lights, or artwork can enhance the headboard’s visual appeal.
By following these tips, your headboard will not only be stable but also a beautiful focal point in your bedroom. Attention to detail makes a big difference in the final outcome.
Troubleshooting Common Headboard Attachment Issues
Even with careful planning, you might encounter issues. Don’t worry, most common problems have simple solutions. Knowing how to troubleshoot saves you time and frustration. It helps you get your headboard attached properly.
Problem 1: Headboard Wobbles or Is Not Stable
- Solution:
- Tighten All Bolts: This is the first step. Loose bolts are the most common cause of wobbling.
- Check for Missing Washers: Washers help distribute pressure and prevent bolts from digging into the wood or metal. Add washers if missing.
- Use Spacer Blocks: If there’s a gap between the headboard legs and the bed frame, insert wooden or hard rubber spacer blocks. This fills the gap and makes the connection firm.
- Add L-Brackets: For extra stability, especially with heavier headboards, add small L-brackets at the bottom of the headboard legs where they meet the bed frame. Secure them with screws.
- Wall Anchoring: If all else fails, consider wall-mounting the headboard for maximum stability, as described in Method 3.
Problem 2: Headboard Holes Don’t Align with Bed Frame Holes
- Solution:
- Use Universal Headboard Brackets/Adapter Plates: These are designed for this exact problem. They provide multiple attachment points to bridge the gap.
- Drill New Pilot Holes: If using brackets, and new holes are needed on the bed frame, carefully measure and drill pilot holes. Always use a drill bit smaller than your screw or bolt.
- Check Headboard Width: Sometimes the headboard is too wide or too narrow. Universal brackets can help, or you might need to reconsider the headboard’s compatibility.
Problem 3: Headboard Scratches or Marks the Wall
- Solution:
- Wall Bumpers/Felt Pads: Attach adhesive felt pads or clear silicone bumpers to the back of the headboard where it touches the wall. This protects the wall surface.
- Secure Attachment: A securely attached headboard is less likely to rub against the wall. Ensure all connections are tight.
Problem 4: Difficulty Tightening Bolts in Awkward Spaces
- Solution:
- Socket Wrench or Ratchet: These tools are more efficient than an adjustable wrench in tight spots.
- Open-Ended Wrench: Sometimes, an open-ended wrench works better for specific angles.
- Magnetic Bit Holder: If using a drill for screws, a magnetic bit holder helps prevent dropping screws in tight areas.
By systematically addressing these issues, you can resolve most attachment challenges. A stable headboard makes your sleeping space more enjoyable and safe.
Final Touches and Long-Term Maintenance
Once your headboard is securely attached, take a moment to admire your work! The right headboard enhances your bedroom’s aesthetic and comfort. But the job isn’t quite finished. A few final touches and regular maintenance will ensure your headboard remains a cherished part of your bedroom for years.
Final Touches
- Clean Up: Remove any pencil marks, dust, or debris from the installation process. If your headboard is upholstered, a quick vacuum or wipe down might be needed. For fabric headboards, learn how to clean fabric headboard for best results.
- Inspect All Connections: Do one final visual check of all bolts, screws, and brackets. Ensure everything is tight and secure.
- Arrange Bedding: Put your mattress, sheets, pillows, and comforter back on the bed. See how the headboard looks with all your bedding in place. Make any minor adjustments if the bed shifts or the headboard doesn’t seem perfectly centered.
- Add Decor: Now is the time to add decorative pillows, throws, or artwork above the headboard. These elements can further enhance the look.
Long-Term Maintenance
- Periodic Tightening: Bolts and screws can loosen over time with everyday use. Make it a habit to check and re-tighten all attachment points every few months. This prevents wobbling and noise.
- Cleanliness: Depending on the material, your headboard will need regular cleaning.
- Wood: Wipe with a damp cloth and mild wood cleaner.
- Metal: Dust with a soft cloth.
- Upholstered: Vacuum regularly. Spot clean spills immediately. Refer to guides like how to clean upholstered headboard for specific care.
- Check for Wear: Look for any signs of wear and tear on the headboard or the attachment points. Address small issues before they become major problems.
- Avoid Excessive Force: Do not lean too heavily on the headboard or allow children to hang from it. This can put undue stress on the attachment points and potentially cause damage.
By taking these steps, you ensure your headboard not only looks good but also remains a stable and durable part of your bedroom furniture. Enjoy your beautifully transformed sleeping space!
Frequently Asked Questions
Can any headboard attach to any platform bed?
No, not every headboard attaches directly to every platform bed. Compatibility depends on the pre-drilled holes and design. Many platform beds have standard attachment points. However, some headboards may require adapter plates or universal brackets. This ensures a proper and stable connection. It is important to check measurements and hole alignments before purchase.
What if my platform bed has no holes for a headboard?
If your platform bed has no holes, you have options. You can drill new pilot holes into the wooden frame, if suitable. Alternatively, you can use a wall-mounted headboard. Freestanding headboards are another choice. These do not attach to the bed at all. They rely on the bed’s weight and placement against the wall for stability.
Are universal headboard brackets difficult to install?
Universal headboard brackets are generally easy to install. They come with multiple slots or holes. This allows for various alignments. You attach one part to the headboard and the other to the bed frame. They usually require basic tools like a wrench and screwdriver. Instructions are typically included with the brackets.
How do I prevent my headboard from wobbling?
To prevent wobbling, first ensure all bolts and nuts are fully tightened. Use washers with all bolts. If gaps exist between the headboard and bed frame, insert spacer blocks. For extra stability, especially with heavy headboards, consider adding L-brackets. Wall-mounting is the most stable option if wobbling persists.
Can I attach an upholstered headboard to a platform bed?
Yes, you can attach an upholstered headboard to a platform bed. The attachment methods are the same as for other headboard types. You use direct bolt-on, universal brackets, or wall-mounting. The upholstery material does not change the structural attachment process. Just be careful not to damage the fabric during installation.
What is the ideal height for a headboard?
The ideal headboard height is mostly a matter of personal preference and aesthetics. Generally, a headboard should extend at least 24 to 36 inches (60-90 cm) above the top of your mattress. This height provides good visual impact and back support. Consider your room’s ceiling height and overall bedroom decor when choosing.
Conclusion
Attaching a headboard to a platform bed is a project anyone can complete. You now understand the different methods available. Whether you choose direct bolt-on, universal brackets, wall-mounting, or a freestanding setup, careful planning ensures success. Remember to gather the right tools and take your time. A secure headboard adds both comfort and a finished look to your bedroom. This simple update can truly elevate your space. Now, transform your bedroom into the stylish sanctuary you desire.
- Headboard Installation
- Platform Bed Setup
- Bedroom Decor
- Furniture Assembly
- DIY Headboard Attachment

Todd Martin
Senior Writer
With over 15 years of experience in home renovation and design, I started HEG to share what I’ve learned with homeowners who want to create spaces that are both beautiful and functional. I’ve always believed in a hands-on approach, and over the years, I’ve picked up practical solutions that actually work. Through HEG, I aim to make home improvement more approachable, sharing real tips that help you create a home you truly love.