· Katria Melrose · Kitchen Cleaning & Maintenance · 21 min read
Can Stove Burners Go In Dishwasher
Can Stove Burners Go In Dishwasher?
Dirty stove burners are a common kitchen challenge. Grease, food spills, and burnt-on residue can make your cooking area look less than inviting. Many people wonder if their trusty dishwasher can handle this tough cleaning task. The idea of simply loading these messy parts into the dishwasher is certainly appealing. It could save you so much time and effort. But is it a safe or effective solution for cleaning stove burners?
I often find myself looking for the easiest way to clean kitchen items. When it comes to stove burners, the answer is not a simple yes or no. The safety of washing stove burners in a dishwasher depends heavily on the type of burner and its material. Putting the wrong parts in can cause damage, reduce their efficiency, or even create safety hazards. This article will help you understand which stove components are dishwasher-friendly and which are not. I will also share the best methods for keeping your stove burners clean and functional without risking damage.
Takeaway
- Most stove burners (especially electric coils and gas burner heads) should NOT go in the dishwasher. This can cause severe damage, electrical hazards, and functional problems.
- Check your appliance manual. This is the most reliable source for specific cleaning instructions for your stove components.
- Gas stove grates and certain burner caps MAY be dishwasher safe. Always verify with your manufacturer’s guide.
- Manual cleaning is often the safest and most effective method. Use warm soapy water, baking soda, and vinegar for best results.
- Avoid harsh chemicals and abrasive scrubbers on delicate burner parts.
No, most stove burners should not go in the dishwasher. Electric coil burners, sealed burner heads on gas stoves, and certain burner caps can suffer damage, rust, or electrical issues from the high heat and harsh detergents. Always check your specific stove model’s manual for precise cleaning instructions to prevent damage.
Understanding Your Stove Burners: Types and Materials
Before you consider cleaning your stove burners, it is important to know what type of stove you have. Different types of stoves use different burner systems. Each system has unique parts and materials. Knowing this helps you understand the best cleaning methods for your specific stove. It also helps you avoid damage.
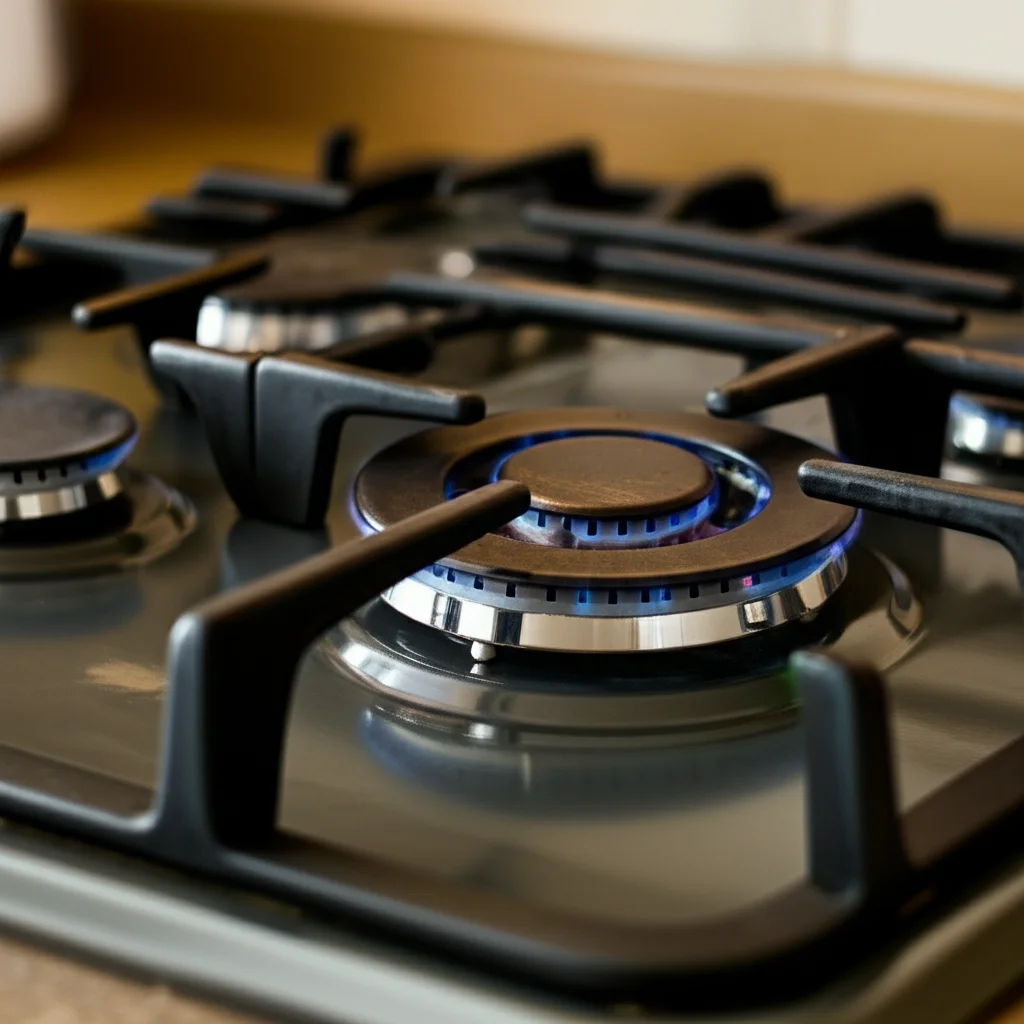
Gas Stove Burner Components
Gas stoves use open flames for cooking. Their burner systems have several removable parts. These parts are often made from cast iron, porcelain-enameled steel, or other heat-resistant metals. Understanding each component is important for proper cleaning.
- Grates: These are the metal supports that sit over the burners. They hold your pots and pans. Grates are often made of cast iron or porcelain-coated cast iron. They can be heavy and durable. Many newer gas stove grates are designed to withstand dishwasher cycles. However, solid cast iron grates often benefit more from hand washing to preserve their finish and prevent rust.
- Burner Caps: These are flat or slightly domed metal covers. They sit directly over the burner heads. Burner caps distribute the flame evenly. They are usually made from porcelain-enameled steel or cast iron. These caps are more delicate than grates. High heat and strong detergents in a dishwasher can discolor or damage their finish.
- Burner Heads: These are the actual components that produce the flame. They have small holes (ports) where the gas comes out. Burner heads are typically made of aluminum or brass. These materials are very sensitive to harsh detergents and high temperatures. Water can also clog the gas ports. It is generally not safe to put gas burner heads in a dishwasher.
When cleaning gas stove parts, identifying the material is key. For example, some cast iron grates might be fine in the dishwasher, but others require hand cleaning. I always recommend checking your stove’s manual first. For detailed guidance on cleaning these parts, you can read more about how to clean burners on gas stove or even how to clean stove burners gas.
Electric Stove Burner Types
Electric stoves operate differently from gas stoves. They use electricity to generate heat. Their burner components are very different from gas stove parts. They also have different cleaning needs.
- Coil Burners: These are the most traditional electric burners. They are metal coils that heat up when electricity passes through them. These coils contain electrical wiring. Submerging them in water or putting them in a dishwasher can cause electrical shorts or permanent damage. The coils can also rust easily. You should never put electric coil burners in a dishwasher. To clean these, I suggest gentle hand cleaning, focusing on wiping spills around them. Learn more about how to clean coil burners safely.
- Smooth-Top/Ceramic Glass Cooktops: These stoves have a flat, smooth surface. The heating elements are located underneath the glass. There are no removable burner parts to put in a dishwasher. Cleaning involves wiping down the glass surface. Special cleaners for ceramic cooktops are usually needed to prevent scratches.
- Induction Cooktops: Similar to smooth-top stoves, induction cooktops have a flat glass surface. They use electromagnetic fields to heat cookware directly. Like ceramic tops, there are no removable burner parts to wash. Cleaning is limited to the surface of the cooktop itself.
For all electric stove types, the primary concern is water and electrical components. You must keep electric burners dry and avoid harsh chemicals that could damage the finish. Always ensure the stove is completely cool before cleaning any part of it. Understanding these basic types helps you choose the right cleaning method. It helps you keep your stove working well for a long time. For general electric burner cleaning tips, you can explore how to clean electric burners.
The Risks of Washing Stove Burners in a Dishwasher
While the dishwasher offers convenience, it is important to understand the risks. Placing certain stove components inside can lead to significant problems. These problems range from cosmetic damage to functional failure and even safety hazards. I want to highlight why this shortcut can often cause more trouble than it is worth.
Material Damage and Discoloration
Dishwashers use high temperatures and strong detergents. These conditions are not suitable for all materials. Many stove burner parts are made of materials that react poorly to this environment.
- Cast Iron: While durable, cast iron can rust in the dishwasher. The high heat and moisture strip away any seasoning, which is a protective layer of oil. This makes the cast iron vulnerable to rust and corrosion. Once rust forms, it is difficult to remove and can damage the appearance and function of the part.
- Aluminum and Brass: These metals are common in gas burner heads. They can discolor or corrode in the dishwasher. Aluminum can turn dull and pitted, while brass might develop dark spots or lose its luster. The harsh chemicals in dishwasher detergents accelerate this process.
- Porcelain Enamel: Many burner caps and grates have a porcelain enamel coating. This coating can chip, crack, or fade in the dishwasher. High heat can cause the enamel to expand and contract unevenly, leading to cracks. Detergents can strip the glossy finish, leaving the surface dull and harder to clean in the future. I have seen this happen with other enameled items.
These types of damage are often permanent. They can make your stove parts look old and worn out. More importantly, they can affect how well the parts perform.
Electrical Hazards for Electric Burners
Electric coil burners contain heating elements and electrical connections. These components are designed to work dry. Introducing water or moisture can be extremely dangerous.
- Short Circuits: Water entering the coil’s internal wiring can cause a short circuit. This can trip your circuit breaker or, worse, lead to an electrical fire.
- Corrosion of Connections: Even if a short does not happen immediately, residual moisture can cause the electrical terminals to corrode over time. Corrosion prevents proper electrical flow. This makes the burner heat unevenly or stop working altogether.
- Permanent Malfunction: Once the internal wiring or connections are damaged by water, the burner often becomes unusable. Repairing or replacing electric coil burners can be costly. This is why I always emphasize keeping electric components completely dry. Never attempt to wash electric burners in a dishwasher or submerge them in water. You can find more safe cleaning methods for how to clean electric burners without putting them in danger.
Functional Impairment and Safety Concerns
Beyond material and electrical damage, dishwasher washing can impair the function of stove burners. This can also create safety concerns in your kitchen.
- Clogged Gas Ports: For gas burner heads, dishwasher washing can push food particles or detergent residue into the tiny gas ports. These ports are crucial for an even flame. Clogged ports lead to an uneven flame, reduced heating efficiency, or even no flame at all. An uneven flame can also be a safety hazard. It might cause incomplete combustion or gas leaks.
- Improper Seating: Damaged or warped burner caps and grates might not sit properly on the stove. This can cause instability for cookware. It can also interfere with the gas flow or heat distribution. A wobbly pot is a burn risk.
- Reduced Efficiency: A damaged burner system does not perform at its best. This means your food might cook unevenly or take longer to heat. It wastes energy and your time. I believe it is always better to clean stove components by hand if there is any doubt about dishwasher safety. This ensures they remain in optimal condition.
What Stove Components ARE Dishwasher Safe?
While most stove burners are not suitable for the dishwasher, some components can withstand the wash cycle. Knowing which parts are safe saves you time and effort. It also prevents costly damage. Always check your stove’s specific manual before putting any part in the dishwasher. My general advice comes from common practices, but manufacturers’ guidelines are the final word.
Gas Stove Grates
Many gas stove grates are robust enough for dishwasher cleaning. This is especially true for grates made from porcelain-coated steel. These grates are designed to be durable. They often have a protective enamel finish. This finish helps them withstand high temperatures and detergents.
- Check the Manual: Before placing grates in the dishwasher, consult your stove’s user manual. Some cast iron grates, particularly older ones or those with a specific seasoning, may not be dishwasher safe. The manual will confirm if your grates are suitable.
- Placement in Dishwasher: If your grates are dishwasher safe, place them on the bottom rack. Make sure they do not block the spray arms. Avoid overcrowding the dishwasher. This ensures they get thoroughly cleaned and prevents damage to other items.
- Pre-Scrape Large Debris: For heavily soiled grates, scrape off large food particles first. This prevents clogging your dishwasher’s filter. It also helps the grates get cleaner.
- Drying: After the cycle, ensure grates are completely dry before returning them to the stove. Air drying or wiping them down helps prevent water spots or rust, especially on cast iron.
I often put my porcelain-coated gas grates in the dishwasher. They come out sparkling clean. However, I always scrape off the big stuff first. For more details on cleaning these specific parts, you can check out how to clean gas stove grates in dishwasher.
Certain Burner Caps
Some stove burner caps, particularly those made from durable porcelain-enameled steel, might be dishwasher safe. This is less common than with grates, so extra caution is needed.
- Manufacturer Confirmation is Key: Do not assume all burner caps are dishwasher safe. Many are made from aluminum or have delicate finishes. These will get damaged in a dishwasher. Refer to your stove’s manual to confirm the material and cleaning instructions for the burner caps.
- Material Sensitivity: Caps made of aluminum, brass, or thin stamped metal are very likely to discolor or corrode. These should always be hand-washed.
- Placement and Detergent: If confirmed dishwasher safe, place caps securely in the utensil basket or on the top rack. Use a gentle dishwasher detergent. Avoid harsh chemicals.
I personally hand wash all my burner caps. I find it safer and it keeps them looking new. Even if the manual says “dishwasher safe,” I prefer to be cautious with smaller, more delicate parts.
Drip Pans
Drip pans sit under electric coil burners or sometimes under gas burners. Their purpose is to catch spills. These pans are usually made from porcelain-coated steel or aluminum.
- Porcelain Drip Pans: Many porcelain-enameled drip pans are dishwasher safe. They are designed to withstand heat and spills. These can usually be placed on the bottom rack.
- Aluminum Drip Pans: Aluminum drip pans are often disposable or designed for hand washing. They can discolor or warp in the dishwasher. It is best to hand wash aluminum pans to preserve their finish.
- Check for Compatibility: Again, the manual is your best friend. It will specify if your drip pans are dishwasher safe. If in doubt, hand wash.
To keep your kitchen running smoothly, understanding these details is very important. Always prioritize the manufacturer’s advice. This protects your appliance. For tips on cleaning these specific components, you might find guidance on how to clean stove drip pans.
Safe and Effective Manual Cleaning Methods for Gas Burners
Since most gas stove burners are not dishwasher safe, manual cleaning is the best approach. This method allows for careful cleaning without risking damage. I find that a combination of soaking and gentle scrubbing works wonders. It also ensures every part is thoroughly clean.
Soaking for Stubborn Grime
Soaking is the first step for heavily soiled gas burner components. It loosens burnt-on food and grease. This makes scrubbing much easier. I always start with a good soak.
- Disassemble and Prepare: First, ensure your stove is completely cool. Then, carefully remove the grates, burner caps, and burner heads. If the burner heads are very dirty, you can soak them, but be careful not to get water into the igniter.
- Warm Soapy Water Bath: Fill a sink or large basin with warm water. Add a generous amount of dish soap. Place the grates, burner caps, and burner heads into the soapy water. Make sure they are fully submerged.
- Add Degreaser or Baking Soda (Optional): For tougher stains, you can add a degreaser. I often use a cup of white vinegar or a few tablespoons of baking soda to the soaking water. These natural cleaners help break down grease. Let the parts soak for at least 30 minutes. For very stubborn grime, I let them soak overnight.
Soaking makes a huge difference. It turns a tough cleaning job into a manageable one. When I clean my own stove, I always prioritize this step. It saves me a lot of elbow grease later. If you want more tips on how to effectively clean burners on gas stove, soaking is a key part of the process.
Gentle Scrubbing Techniques
After soaking, the softened grime is much easier to remove. Gentle scrubbing is important to avoid scratching surfaces or damaging delicate parts.
- Soft Brush or Sponge: Use a non-abrasive sponge, soft-bristled brush, or old toothbrush. Avoid steel wool or harsh scrubbers. These can scratch porcelain enamel and other finishes. I always keep a dedicated cleaning brush for this purpose.
- Focus on Stubborn Spots: Gently scrub each component. Pay extra attention to any burnt-on spots or areas with heavy grease buildup. For the small gas ports on the burner heads, an old toothbrush or a straightened paper clip can help clear any blockages. Be very careful not to enlarge the holes.
- Rinse Thoroughly: After scrubbing, rinse all parts under clean running water. Make sure to remove all soap residue. This prevents streaks and ensures no soap clogs the gas ports.
- Dry Completely: This is a crucial step. Dry all components thoroughly before reassembling them. Use a clean cloth. For gas burner heads, ensure the gas ports are completely dry and clear. You can let them air dry for several hours or even overnight to be safe. Any moisture can affect performance or lead to corrosion.
I always take my time drying the parts. I remember one time rushing it, and the flame looked a little off until everything was truly dry. For a comprehensive guide on keeping your gas stove parts sparkling, check out how to clean gas burners.
Natural Cleaning Solutions
You do not need harsh chemicals for effective stove burner cleaning. Natural solutions are often just as good and safer for you and your home. I prefer using these because they are eco-friendly and readily available.
- Baking Soda Paste: Mix baking soda with a small amount of water to create a thick paste. Apply this paste directly to stubborn stains on grates or burner caps. Let it sit for 15-30 minutes before scrubbing. Baking soda is a gentle abrasive and odor absorber.
- Vinegar Spray: White vinegar is an excellent degreaser and disinfectant. Mix equal parts white vinegar and water in a spray bottle. Spray it onto greasy surfaces. Let it sit for a few minutes, then wipe clean. I often use vinegar after cleaning to give everything a streak-free shine.
- Lemon Juice: For a fresh scent and mild acidity, lemon juice can also be used. It helps cut through grease and leave surfaces smelling clean.
Combining these methods will help you achieve sparkling clean gas stove burners. Regular cleaning prevents heavy buildup. This makes future cleaning jobs much easier. For more general advice on cleaning your stove, including the top, consider these resources: how to clean your stove and how to clean the stove top.
Best Practices for Cleaning Electric Stove Burners
Cleaning electric stove burners requires a different approach than gas burners. Since you cannot remove electric coils or put them in the dishwasher, you need specific techniques. The key is to avoid water on electrical components and use appropriate cleaners for smooth surfaces. I always treat my electric stove with care to prevent damage.
Cleaning Coil Burners
Electric coil burners, also known as heating elements, are directly exposed. They can accumulate spills and grime. Never submerge these in water or put them in a dishwasher.
- Unplug and Cool Down: Always ensure the stove is unplugged or the circuit breaker is off. Allow the coils to cool completely before touching them. Safety is my first priority.
- Remove and Wipe: Carefully lift or unplug the coil burners from their receptacles. You can gently wipe the coils with a damp cloth and mild dish soap. Do not get the electrical connection wet.
- Address Burnt-On Residue: For burnt-on food, let the coils air dry completely. Then, use a soft nylon brush or an old toothbrush to gently scrub away the residue. Avoid using sharp objects or abrasive cleaners that can damage the coil’s surface.
- Clean Drip Pans: The drip pans underneath the coils catch spills. These can often be removed and washed by hand with warm, soapy water. Some porcelain-enameled drip pans may be dishwasher safe, but always check your manual. For more detailed tips on how to clean coil burners, specific advice can be very helpful.
It is crucial to ensure the coils and their receptacles are completely dry before plugging them back in. Any moisture can cause a short circuit. I always allow several hours for air drying.
Maintaining Smooth-Top Surfaces (Ceramic, Glass)
Smooth-top electric stoves are popular for their sleek look. Cleaning these surfaces requires special care to avoid scratches and streaks.
- Cool Surface is Essential: Never clean a hot glass or ceramic cooktop. The sudden change in temperature can crack the surface. Wait until the entire surface is cool to the touch.
- Specialized Cleaners: Use a cleaner specifically designed for ceramic or glass cooktops. These cleaners are formulated to remove grime without scratching the delicate surface. Apply a small amount and spread it with a clean cloth.
- Scraping Burnt-On Spills: For tough, burnt-on food, use a razor blade scraper designed for cooktops. Hold the scraper at a 45-degree angle. Gently push the residue off. Be very careful not to scratch the surface. I have found this tool to be a lifesaver for those stubborn spots.
- Buff to a Shine: After cleaning, use a clean, dry cloth or paper towel to buff the surface to a streak-free shine. This gives your cooktop a professional, clean look.
Regular wiping after each use prevents food from baking onto the surface. This makes deep cleaning much easier. If you are looking for more specific guidance, explore how to clean ceramic stove top for detailed instructions.
Addressing Burnt-On Spills
Burnt-on spills are common on any stove type. They require immediate attention to prevent them from becoming permanent stains. My method ensures thorough removal without damage.
- Act Quickly (Once Cool): The sooner you address a spill (after the surface cools), the easier it will be to remove.
- Baking Soda and Hot Water Method: For stubborn stains on both coil and smooth-top stoves, try this:
- Sprinkle baking soda generously over the spill.
- Cover the baking soda with a hot, damp towel.
- Let it sit for at least 15-30 minutes, or longer for very tough stains. The baking soda and steam help lift the grime.
- Gently scrub with a non-abrasive sponge.
- Specialized Cooktop Cleaners: For smooth-top stoves, if baking soda does not work, use a commercial cooktop cleaner designed for burnt-on messes. These often contain mild abrasives that safely lift stains.
For all electric stove cleaning, avoiding excessive water and abrasive materials is the golden rule. This protects your appliance. For general electric stove cleaning advice, you can also look into how to clean electric stove top.
Essential Stove Maintenance Beyond Burner Cleaning
Maintaining your stove goes beyond just cleaning the burners. A well-maintained stove looks better and performs more efficiently. Regular care for all parts of your cooking appliance can also extend its lifespan. I believe in a holistic approach to kitchen cleaning.
Cleaning the Stove Top Regularly
The stove top is the most visible part of your cooking area. It also catches most of the spills and splatters. Regular cleaning keeps it looking good and prevents grime buildup.
- Daily Wiping: After each use, wipe down the stove top with a damp cloth and mild dish soap. This removes fresh spills before they harden. I make this a quick routine after dinner.
- Weekly Deep Clean: Once a week, perform a more thorough clean. Remove burner grates and caps (if gas stove) or wipe around coils (if electric). Use an appropriate cleaner for your stove top material.
- Gas stove tops: Use warm soapy water or a degreaser. For stainless steel, wipe with the grain.
- Smooth-top stoves: Use a ceramic cooktop cleaner and scraper as needed.
- Preventing Grease Buildup: For greasy areas, a solution of warm water and white vinegar (equal parts) works well. Spray, let sit for a few minutes, then wipe. This helps break down stubborn grease. Many people wonder how to clean greasy stove. This method is very effective.
Consistent care prevents the need for intense scrubbing later. It also keeps your kitchen looking tidy.
Caring for Control Knobs and Dials
Control knobs are often overlooked, but they accumulate grease and food residue. Dirty knobs can feel sticky and look unhygienic.
- Remove Knobs (If Possible): Most stove control knobs pull straight off. Check your manual to confirm. Removing them allows for a more thorough cleaning.
- Wash with Soap and Water: Wash removable knobs in warm, soapy water. Use an old toothbrush to scrub around crevices and underneath the knob where grease can hide.
- Wipe Down Dial Area: While the knobs are off, wipe down the area underneath them. Grease and crumbs often collect here. Use a damp cloth and mild cleaner.
- Dry Thoroughly: Ensure knobs are completely dry before putting them back on. This prevents moisture from entering the control panel.
I make it a point to clean my stove knobs every few weeks. It makes a big difference in the overall cleanliness of my stove.
Maintaining the Oven Interior
While not directly part of the burner system, a clean oven contributes to a clean cooking environment. Spills inside the oven can smoke and affect cooking flavor.
- Regular Wipes: Wipe down fresh spills as soon as the oven cools. This prevents them from baking on and becoming harder to remove.
- Self-Cleaning Feature: If your oven has a self-cleaning cycle, use it according to the manufacturer’s instructions. Be aware that these cycles can produce strong odors. Ensure good ventilation.
- Manual Oven Cleaning: For ovens without a self-cleaning feature, or for spot cleaning, use an oven cleaner. Apply it according to the product directions, let it sit, then wipe clean. Alternatively, a baking soda paste can work for lighter grease buildup. Apply the paste, let it sit overnight, then spray with vinegar and wipe.
- Clean Oven Racks: Oven racks can get very greasy. Soak them in a bathtub with hot water and dish soap, or use specialized oven rack cleaners. For tips on cleaning specific parts like racks, you can explore [how to clean stove racks
- stove cleaning
- dishwasher safety
- kitchen tips
- burner cleaning
- appliance care
- gas stove
- electric stove

Katria Melrose
Cleaning Specialist
With over 12 years of experience in commercial cleaning and a certification in workplace ergonomics, I’ve developed a deep understanding of what makes a workspace truly productive. At HEG, I specialize in helping people transform their home offices into clean, efficient, and comfortable environments. Through smart cleaning routines and strategic organization solutions, I empower readers to create spaces that support focus, comfort, and success—one well-organized desk at a time.