· Kianna Connelly · Kitchen Essentials · 17 min read
Can I Use Roasting Pan Instead Of Dutch Oven
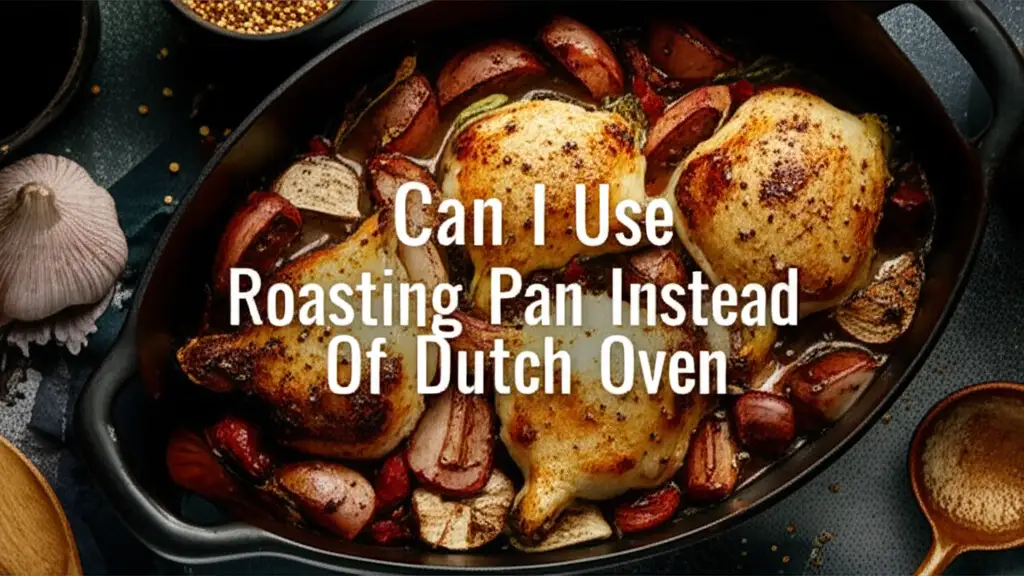
Roasting Pan vs. Dutch Oven: Can You Substitute?
Do you often find yourself in the kitchen, ready to cook, only to realize you lack a specific piece of equipment? Many home cooks face this challenge. You might have a recipe calling for a Dutch oven, but your only large pot is a roasting pan. This common scenario brings up an important question: Can I use a roasting pan instead of a Dutch oven? I have often wondered this myself. This article will explore the functionalities of both cookware items. We will look at their design and purpose. We will also discuss the key differences between them. Finally, I will provide practical advice on when a roasting pan can serve as a suitable substitute and when it might fall short. We will cover tips for successful cooking conversions.
Takeaway
- A roasting pan can substitute for a Dutch oven in certain situations.
- Consider the cooking method: dry heat roasting works best.
- Avoid long, slow braises or stovetop cooking in a roasting pan.
- Adjust liquid levels and oven temperature for best results.
- Understand material and lid differences for successful substitution.
Yes, you can use a roasting pan instead of a Dutch oven for some recipes. This works best for dishes that involve dry heat cooking, such as roasting meats or vegetables. However, a roasting pan is not ideal for slow braising or recipes requiring significant stovetop pre-cooking due to its design and material.
Understanding the Roasting Pan: Design and Purpose
A roasting pan is a fundamental piece of bakeware in many kitchens. Its design is distinct. Roasting pans are typically wide and shallow. They have low sides. This design promotes air circulation around the food. Good air circulation is crucial for achieving crispy skin and even browning. Most roasting pans come with a V-rack. This rack lifts the food. Lifting the food allows fats and juices to drip away. This prevents the food from sitting in liquid, which can make it soggy.
Materials for roasting pans vary. Common materials include stainless steel, aluminum, and sometimes enameled steel. Stainless steel pans are durable and non-reactive. Aluminum pans heat quickly and evenly. They are often lighter. Some roasting pans have non-stick coatings. These coatings make cleanup easier. Non-stick surfaces are generally less durable at very high temperatures. I always check my pan’s maximum temperature rating. Roasting pans are designed primarily for oven use. Their wide, open shape is not efficient for stovetop cooking. Using them on a burner can lead to uneven heating or warping.
The main purpose of a roasting pan is, as its name suggests, roasting. This cooking method uses dry heat. It browns the surface of food. It cooks the interior thoroughly. Roasting is perfect for large cuts of meat, like turkeys, chickens, or roasts. Vegetables also roast well in these pans. The low sides allow moisture to evaporate. This helps in creating a desirable crust. A roasting pan usually does not come with a tight-fitting lid. This open design is essential for effective roasting. It allows steam to escape, which prevents steaming and promotes browning.
Understanding the Dutch Oven: Design and Purpose
The Dutch oven is a versatile kitchen workhorse. It stands out with its heavy construction. These pots are typically deep and round. They have thick walls and a heavy, tight-fitting lid. The most common material for a Dutch oven is cast iron. Cast iron excels at retaining and distributing heat evenly. Many Dutch ovens are also enameled cast iron. The enamel coating makes them easier to clean. It also prevents rust. Some Dutch ovens are made from ceramic or stoneware. These materials also offer good heat retention.
A key feature of the Dutch oven is its lid. The lid fits snugly. This creates a self-basting environment. It traps moisture and steam inside the pot. This is ideal for cooking methods that require long, slow cooking. The heavy construction of a Dutch oven allows it to transition seamlessly from stovetop to oven. You can sear meat on the stove. Then, you can transfer the pot directly to the oven. This versatility makes it perfect for many dishes. I love using my Dutch oven for various recipes.
Dutch ovens are famous for their ability to conduct and retain heat. This thermal property makes them perfect for braising. Braising involves searing food. Then, you cook it slowly in liquid at a low temperature. They are also excellent for stews, soups, and chili. The even heat prevents hot spots. It ensures food cooks uniformly. Baking bread is another popular use. The heavy lid creates steam. This steam helps the bread crust develop beautifully. My family enjoys the bread I bake in it. Dutch ovens are designed for consistent, moist heat cooking. Their deep shape is also good for frying and boiling larger quantities of food. You can learn how to clean burnt residue from these valuable pots if you face issues after heavy use. how to clean burnt dutch oven
Key Differences Between Roasting Pans and Dutch Ovens
While both roasting pans and Dutch ovens are oven-safe, their designs lead to distinct uses. The primary difference lies in their shape and lid. Roasting pans are wide and shallow. They have low sides. This design promotes air circulation. It allows moisture to escape freely. This is perfect for dry-heat cooking. Dutch ovens are deep and typically round. They have tall sides. Their heavy lids create a sealed environment. This traps moisture inside.
Material also plays a big role. Roasting pans are often made from lighter metals. These include aluminum or thin stainless steel. They heat up quickly. They also cool down fast. This suits quick roasting tasks. Dutch ovens are usually cast iron. They are much heavier. Cast iron retains heat for a very long time. This is ideal for slow-cooked dishes. It ensures even cooking throughout. The heavy material also contributes to their durability. I find that my cast iron Dutch oven can handle almost anything.
Another significant difference is their versatility on the stovetop. A Dutch oven is designed for both stovetop and oven use. Its thick bottom and even heat distribution make it excellent for searing, sautéing, and simmering on the stove. A roasting pan is primarily an oven-only tool. Its wide, shallow base can warp on a stovetop burner. It also heats unevenly on a direct flame. Trying to sear meat in a roasting pan on the stove is often inefficient. It can even damage the pan.
Heat retention and moisture control are critical distinctions. A Dutch oven’s heavy construction and tight lid create a moist, even cooking environment. This is perfect for tenderizing tough cuts of meat over hours. Roasting pans, with their open design, are designed for moisture evaporation. This is what creates crispy exteriors. They are not built to hold steam or liquids for long periods. The cleaning process for a Dutch oven can also be specific due to its material. You can learn more about managing everyday use and ensuring its longevity. how to clean dutch oven stains
When a Roasting Pan Can Be a Substitute for a Dutch Oven
There are specific scenarios where a roasting pan can adequately stand in for a Dutch oven. The success of this substitution largely depends on the recipe and the cooking method. If your recipe involves dry heat cooking, a roasting pan is often a good choice. For example, roasting a chicken or a large cut of beef that does not require long braising. The roasting pan’s open design promotes excellent browning and crispy skin. This is exactly what you want for a roasted main course. I often use my roasting pan for Sunday roasts.
Consider recipes that primarily use the oven for cooking. If the Dutch oven is only used to hold food in the oven, a roasting pan might work. This includes dishes like baked casseroles or gratins. The key is that these dishes do not need the deep, even heat retention or the sealed, moist environment of a Dutch oven. For instance, if a recipe calls for a Dutch oven to bake a lasagna, a deep roasting pan can easily take its place. The pan provides the necessary container.
A roasting pan is suitable for short-duration baking tasks. If you are baking certain types of bread that benefit from a quick initial burst of steam, you might adapt a roasting pan. You would need to cover it tightly with foil. This creates a temporary steamy environment. However, this is less effective than a Dutch oven’s heavy lid. This approach is more of a workaround. It is not a perfect substitute for bread that needs prolonged steam.
Finally, for recipes where you want to achieve a crispier texture, a roasting pan can even be advantageous. If a Dutch oven recipe results in food that is too moist or steamed for your preference, switching to a roasting pan can change the outcome. This can apply to roasted vegetables or certain poultry dishes where crispiness is a priority. Remember, a deep baking pan can also stand in for certain casserole dishes, much like a roasting pan might substitute for a Dutch oven. You can learn more about those specific substitutions. can you use baking pan instead of casserole dish
Limitations and Challenges of Using a Roasting Pan as a Dutch Oven
While a roasting pan can serve as a substitute, it comes with significant limitations. The most critical challenge is moisture control. A Dutch oven’s heavy, tight-fitting lid traps steam effectively. This creates a moist, self-basting environment crucial for braising and slow cooking. A roasting pan, with its open design or loose-fitting foil cover, allows moisture to escape readily. This can lead to dry meat or a reduced amount of cooking liquid. This is why braised short ribs or coq au vin often suffer when cooked in a roasting pan.
Another major limitation is heat retention and distribution. Dutch ovens, especially cast iron ones, excel at retaining and distributing heat very evenly. This prevents hot spots and ensures thorough, consistent cooking over long periods. Roasting pans, made of lighter materials, heat and cool quickly. They may not distribute heat as uniformly. This can result in unevenly cooked food. Parts of the food might be overcooked while others remain undercooked.
Stovetop use is almost impossible for a roasting pan. Many Dutch oven recipes begin with searing ingredients on the stovetop. This builds flavor before moving the pot to the oven. A roasting pan is not designed for direct stovetop heat. Its wide, thin base can warp. Heat will distribute unevenly. This makes browning meat or sautéing vegetables on the stove difficult and inefficient. You would need to use a separate pan for searing, adding an extra step and more dishes to clean.
Finally, the capacity and depth differ greatly. Dutch ovens are deep, allowing for significant amounts of liquid and ingredients. Roasting pans are shallower. This limits the volume of liquid you can use for braising. It also makes it harder to submerge ingredients fully. This is vital for tenderizing tough cuts of meat. The lack of depth also means ingredients might not be as evenly covered by cooking liquid. My experience tells me that a proper braise simply needs the depth and sealed environment of a Dutch oven. Also, consider the specific requirements for cleaning cast iron, which is often the material of choice for Dutch ovens, after use to maintain its quality. how to clean a cast iron pan after use
Tips for Adapting Roasting Pan Use for Dutch Oven Recipes
If you must use a roasting pan in place of a Dutch oven, some adaptations can improve your results. First, you need to manage moisture. Since roasting pans allow more evaporation, you may need to add more liquid than the recipe calls for. Check the dish periodically. Add small amounts of warm liquid, like broth or water, if it looks too dry. This helps to keep the food moist.
Second, ensure your roasting pan is oven-safe and can handle the required temperatures. Most roasting pans are designed for oven use. However, some materials or coatings might have temperature limits. Always check the manufacturer’s recommendations. For example, knowing if your copper pan can go in the oven is crucial. can i put my copper pan in the oven. This is similar for other materials like All-Clad. can i put my all clad pan in the oven. You want to avoid damaging your cookware.
Third, use aluminum foil to create a makeshift lid. This helps to trap steam. Wrap the pan tightly with heavy-duty foil. This will mimic the sealed environment of a Dutch oven to some extent. The foil should be crimped securely around the edges. This prevents steam from escaping. Remove the foil for the last 30 minutes of cooking. This will allow for browning.
Fourth, adjust your cooking time and temperature. Because roasting pans heat faster and lose moisture, cooking times might be shorter. Start checking your food earlier than the recipe suggests. You might also need to lower the oven temperature slightly. This helps prevent the exterior from drying out before the interior cooks through. Monitor the dish closely. Make adjustments as needed.
Fifth, if the recipe involves stovetop searing, do this in a separate skillet. Brown your meat or vegetables in a heavy-bottomed pan on the stove first. Then, transfer them to the roasting pan. Add any liquids. Then, cover with foil and put it in the oven. This extra step ensures you get the flavor development from searing without damaging your roasting pan.
Best Practices for Cooking with Your Roasting Pan
Using a roasting pan effectively goes beyond simple substitutions. Mastering its use for its intended purpose can elevate your cooking. Always preheat your roasting pan. Placing a cold pan into a hot oven can sometimes cause uneven cooking. Preheating ensures the pan is at the correct temperature when the food goes in. This promotes better searing and browning from the start.
Using a roasting rack is essential for optimal roasting. A rack lifts the food. This allows air to circulate underneath. It also lets fats and juices drip away. This prevents the bottom of your roast from getting soggy. It ensures even browning all around. If you do not have a V-rack, you can create a makeshift one. Use sturdy vegetables like carrots, celery, and onions. Lay them across the bottom of the pan to form a bed.
Do not overcrowd the pan. Overcrowding reduces air circulation. It can cause food to steam instead of roast. This results in soft, pale food instead of crispy, browned exteriors. Give your ingredients space. If you are roasting a large quantity, use two roasting pans. Or roast in batches. This ensures each piece gets adequate exposure to the dry heat.
Deglazing the pan after roasting is a great way to make gravy or pan sauce. After you remove the roasted food, place the pan on the stovetop over medium heat (if it’s stovetop safe; otherwise, transfer drippings to another pan). Add liquid like broth, wine, or water. Scrape up all the browned bits from the bottom. These bits are full of flavor. This liquid forms the base of a delicious sauce. You can also clean your roasting pan using specific methods to remove baked-on stains. Knowing how to clean the bottom of your pan can also apply here. how to clean bottom of pan
Ensure proper ventilation when roasting, especially for high-temperature roasting. Smoke can be produced. A well-ventilated kitchen prevents smoke alarms from going off. It also keeps your kitchen air clean.
Maintaining Your Roasting Pan for Longevity
Proper care and maintenance will extend the life of your roasting pan. After each use, clean your roasting pan promptly. Do not let food residue dry and stick. This makes cleaning much harder. For most roasting pans, warm soapy water and a non-abrasive sponge are sufficient. Avoid steel wool or harsh scrubbers on non-stick surfaces. These can damage the coating.
For stubborn, baked-on food, you can soak the pan. Fill the pan with warm water and a little dish soap. Let it soak for several hours or overnight. This will loosen the stuck-on bits. Then, gently scrub them away. A plastic scraper or a wooden spoon can help dislodge stubborn residue without scratching the surface.
Always dry your roasting pan completely before storing it. Moisture can lead to rust, especially on stainless steel or aluminum pans. Towel dry it thoroughly. If possible, let it air dry for a bit before putting it away. Proper drying prevents water spots and corrosion.
Store your roasting pan properly. If stacking, place a paper towel or a soft cloth between pans. This prevents scratches. Storing it in a dry cabinet or pantry protects it from dust and humidity. Following these simple steps will keep your roasting pan in excellent condition for many years of roasting. My roasting pan has lasted for decades because I follow these rules.
FAQ Section
Can I bake bread in a roasting pan instead of a Dutch oven?
You can bake some types of bread in a roasting pan. For crusty artisan bread, a Dutch oven creates vital steam. A roasting pan usually does not seal well. You can try covering the roasting pan tightly with heavy-duty foil. This might create enough steam for the initial baking phase. However, the results may not be as good as with a proper Dutch oven.
Will a roasting pan cook food differently than a Dutch oven?
Yes, cooking in a roasting pan will be different. Roasting pans are wide and shallow. They allow moisture to escape. This promotes browning and crispiness. Dutch ovens are deep and sealed. They trap moisture. This makes food tender and moist. Expect drier results from a roasting pan, especially for long-cooked dishes.
What types of recipes are suitable for a roasting pan substitute?
Roasting pans work best for recipes that primarily use dry oven heat. Think roasted chicken, turkey, or large cuts of beef. They are also suitable for dishes that do not require liquid submersion. These include casseroles or oven-baked vegetables. Avoid using them for stews, braises, or soups.
Can I put a roasting pan on the stovetop?
Most roasting pans are not designed for stovetop use. Their thin, wide bases can warp or heat unevenly on direct flame. This can damage the pan. It also leads to poor cooking results. If a recipe requires stovetop searing, use a separate skillet first. Then, transfer the food to the roasting pan.
How do I prevent food from drying out in a roasting pan?
To prevent food from drying out, you can cover the roasting pan with foil. This helps to trap some moisture. You may also need to add more liquid during cooking. Check the food frequently. Basting can also help keep the surface moist. For certain dishes, lower the oven temperature slightly.
What is the ideal size roasting pan to substitute?
Choose a roasting pan that is large enough to hold all ingredients comfortably. It should not be overcrowded. The depth should be sufficient for the amount of food and any liquids needed. A pan that is too small will overcrowd. A pan that is too large might cause liquids to evaporate too quickly.
Conclusion
The question of “Can I use a roasting pan instead of a Dutch oven?” has a nuanced answer. Yes, you can, but with specific considerations and limitations. Roasting pans excel at dry-heat cooking. They promote browning and crispiness. Dutch ovens are superior for moist, slow cooking. They retain heat and moisture perfectly. Understanding these fundamental differences is key to successful substitutions.
When you adapt a Dutch oven recipe for a roasting pan, remember to adjust for moisture loss. Use foil to create a makeshift lid. Consider searing ingredients in a separate pan first. Always prioritize the longevity of your cookware. Choose the right tool for the job whenever possible. However, with thoughtful adjustments, your versatile roasting pan can often step in. This allows you to cook a wider range of dishes, even without a Dutch oven. Happy cooking!
- roasting pan
- Dutch oven
- cooking substitutes
- kitchen tools
- bakeware

Kianna Connelly
Cleaning Expert
With a background in hospitality management and a passion for professional organizing, I’ve dedicated my career to helping people create cleaner, calmer living spaces. At HEG, I design efficient, eco-friendly cleaning systems that not only save time but also deliver spotless, lasting results. I believe that a well-organized home brings peace of mind—and I’ve had the privilege of transforming thousands of homes with practical strategies that truly work. Whether it’s streamlining routines or tackling the toughest messes, I’m here to make clean living simple and sustainable.